Natural curls possess extraordinary texture, volume, and movement that deserve celebration through tailored cutting techniques. A modern shag haircut creates effortless separation, bouncy crown lift, and flattering face-framing layers across all curl patterns.
Traditional blunt cuts often leave curly textures looking heavy, triangular, and lifeless at the roots. In contrast, an intentional layered haircut removes excess interior bulk while encouraging individual curl spirals to clump naturally.
Cutting curly hair requires specialized knowledge of shrinkage rates, tension management, and structural elevation. When you cut curls dry in their natural state, you see the true silhouette develop in real time.
Whether you have loose 2C waves, bouncy 3B ringlets, or tight 4A coils, the shag adapts seamlessly. Learning professional sectioning methods, elevation angles, and carving techniques empowers you to craft a salon-grade shape at home.
Below, explore ten comprehensive steps designed to guide you through your transformative cut. Each breakdown includes structural blueprints, necessary tools, precise cutting methods, and essential curl styling ways.
1. Professional Tool Preparation and Workspace Setup
Setting up a dedicated cutting station with professional-grade tools ensures clean cuts and protects delicate curl cuticles. Dull household scissors crush hair fibers, causing immediate split ends and frizz along your curl canopy.
+-----------------------------------------------------------+
|             Essential Tool Kit & Workspace Guide          |
+-------------------+---------------------------------------+
| Core Cutting Tool | 5.5 to 6-inch Japanese Steel Shears   |
| Sectioning Gear   | Alligator Sectioning Clips, Duckbills |
| Detangling Tools  | Wide-Tooth Comb, Seamless Carbon Comb |
| Lighting & Mirror | 360-Degree Triple Mirror, Daylight LED|
+-------------------+---------------------------------------+

Structural Blueprint for a Flawless haircut Session
A successful cut begins long before scissors touch your strands. Having the right tools within arm’s reach ensures steady, confident hand movements.
Convex-edge Japanese stainless steel shears provide razor-sharp precision that slices cleanly through thick curls without pushing strands away. Investing in dedicated hairdressing shears preserves curl health and prevents split ends.
A triple-mirror setup or dual-mirror station lets you monitor your back perimeter and crown elevation angles simultaneously. Proper natural daylight or ring lighting eliminates shadows, ensuring balanced symmetry across both sides.
Essential Supplies and Workspace Checklist
- Professional 5.5-inch or 6.0-inch Japanese stainless steel shears.
- Six to eight heavy-duty alligator sectioning clips.
- Wide-tooth seamless detangling comb.
- Fine-tooth metal tail comb for clean partings.
- Spray bottle with fine water mist and leave-in conditioner.
- 360-degree adjustable triple-view mirror setup.
- Professional hairdressing cape or dark solid shirt.
- Sweep brush and floor mat for easy cleanup.
Step-by-Step Tool Calibration and Station Setup
- Sanitize all shear blades and combs thoroughly using isopropyl alcohol wipes.
- Adjust shear tension screws so blades close smoothly without catching or flopping loose.
- Position your cutting chair directly in front of your primary mirror under bright light.
- Set up a handheld or secondary wall mirror to inspect your back crown angles clearly.
- Lay all sectioning clips, combs, and shears on a clean, non-slip silicone towel.
- Wear a form-fitting dark top without a hood or bulky collar for clear neckline visibility.
- Fill your misting bottle with clean, filtered water and two drops of jojoba oil.
- Sweep and clear your floor perimeter so your feet remain firmly balanced while cutting.
Professional Ways to Maintain Tool Longevity and Safety
Never use your professional hair shears to cut paper, fabric, or plastic packaging tapes. Cutting household materials dulls shear edges instantly, leading to frayed curl cuticles during haircuts.
Store shears inside a padded leather case when not in active use to prevent blade damage. Wipe blades dry with a soft chamois cloth and apply mineral oil to the pivot weekly.
Keep your fingers relaxed to avoid repetitive strain during detailed point-cutting maneuvers.
2. Dry Curl Preparation and Natural Texture Assessment
Cutting curly hair dry in its natural resting state is the golden rule of modern curl architecture. Dry cutting respects natural shrinkage, curl elasticity variations, and unique wave patterns across different head zones.
+-----------------------------------------------------------+
|             Natural Texture Assessment Profile            |
+-------------------+---------------------------------------+
| Prep State        | 100% Dry, Styled with Minimal Product |
| Curl Pattern Test | Identify Loose Nape vs. Tight Crown   |
| Shrinkage Range   | Measure 20% to 50% Length Retraction  |
| Goal Silhouette   | Diamond / Oval Balanced Volume        |
+-------------------+---------------------------------------+
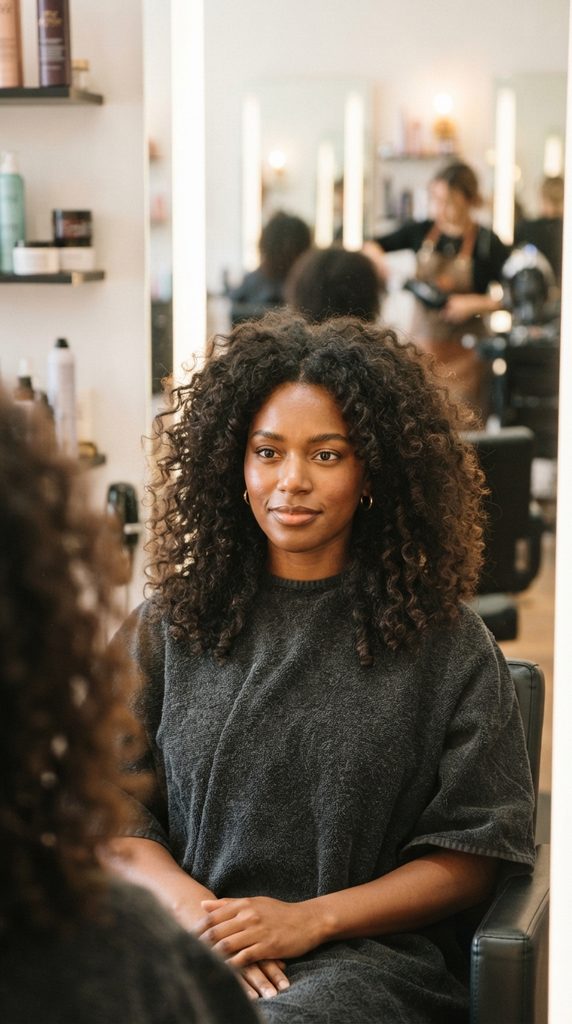
Structural Blueprint and Shrinkage Analysis
Wet hair stretches significantly, masking true curl bounce and hiding natural density shifts across your scalp. Cutting wet curls often leads to extreme, unintended shortening once your strands dry and shrink.
By assessing dry curls, you immediately see where weight accumulates and where natural volume collapses. Different zones of your head often feature varying curl diameters and shrinkage percentages.
The crown often shrinks more than the looser nape area beneath. Evaluating these differences beforehand guarantees a balanced, proportional shag silhouette that never looks uneven.
Essential Diagnostic Methods for Your haircut Canvas
- Wash hair twenty-four hours before cutting with a gentle clarifying cleanser.
- Style with a lightweight leave-in conditioner, avoiding heavy gels or sticky putties.
- Air-dry or diffuse curls completely to 100 percent dryness before assessing shape.
- Avoid pony-tails, braids, clips, or hats that distort your natural curl formation.
- Identify your dominant curl pattern zones across crown, temples, and nape areas.
- Measure shrinkage by gently pulling a dry curl straight and releasing it.
Step-by-Step Dry Curl Assessment Methods
- Stand before your mirror and shake your dry curls loose using your fingertips.
- Examine the natural fall of your hair without manipulating your parting line.
- Identify the widest points of your current silhouette, noting triangular bulk zones.
- Check the elasticity of curls at your crown by stretching and releasing spirals.
- Note areas where hair appears thinner, such as around the delicate front temples.
- Determine your target baseline length, keeping three inches of shrinkage allowance in mind.
- Decide on the height of your shortest crown layers to plan overall volume distribution.
- Take baseline reference photos from the front, profile, and back for comparison.
Professional Ways to Optimize Natural Texture Before Cutting
Clarify your scalp with an apple cider vinegar rinse to remove mineral buildup before cutting. Clean hair floats freely, revealing its true natural spring factor and organic grouping pattern.
Avoid brushing dry curls with fine-bristle brushes, which causes frizzy, undefined puffiness. Use your fingers to separate curl clumps into their natural, distinct spiral clusters.
Ensure your room maintains moderate humidity so curls do not swell excessively during cutting.
3. Diamond Sectioning and Structural Mapping
Precise structural sectioning creates the foundation for a balanced, flowing curly shag silhouette. Diamond sectioning isolates the crown, sides, and nape into manageable zones that control weight distribution.
+-----------------------------------------------------------+
|             Diamond Sectioning Architecture               |
+-------------------+---------------------------------------+
| Diamond Crown Zone| Top Apex to Occipital for Max Volume  |
| Lateral Temples   | Temple to Ear for Face-Framing Curtains|
| Interior Perimeter| Occipital to Nape for Length Baseline |
| Fringe Triangle   | Front Apex to Temples for Shag Bangs  |
+-------------------+---------------------------------------+
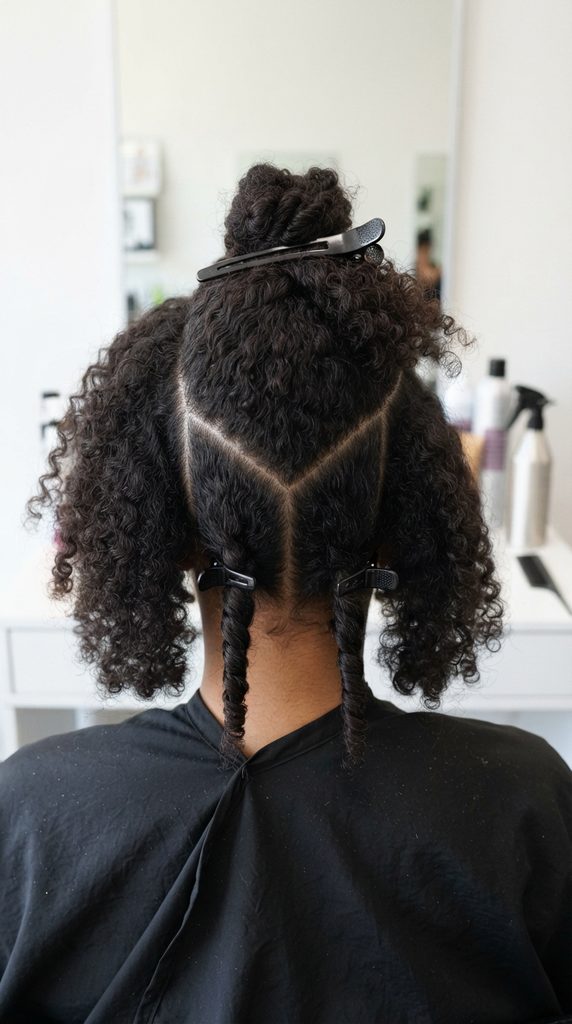
Structural Blueprint for a Proportional haircut
A shag relies on a shorter, rounded crown that transitions smoothly into wispy, textured perimeter lengths. The diamond sectioning method isolates the crown apex where maximum vertical lift is required.
By separating the top diamond from the perimeter, you prevent accidental over-shortening of your length baseline. The lateral side triangles isolate face-framing sections for custom curtain bang blending.
Clean sectioning lines allow you to work systematically around the head without losing your place. This architectural mapping ensures symmetrical balance between the left and right sides of your face.
Essential Supplies for Precision Mapping
- Metal tail comb for carving clean parting lines.
- Six heavy-duty hinged alligator clips for thick curl containment.
- Smooth duckbill clips for fine fringe isolation.
- Wide-tooth comb for gently directing unclipped zones.
- Handheld mirror for checking occipital parting lines.
Step-by-Step Structural Mapping Methods
- Establish your desired natural center or slightly off-center parting line.
- Carve a triangle section at the front hairline for your fringe, clipping it forward.
- Locate the highest point of your head, known as the apex or crown center.
- Draw a parting from the apex down to the left temple and right temple cleanly.
- Draw partings from both temples back to the upper occipital bone to form a diamond.
- Twist this top diamond section securely and fasten with a sturdy alligator clip.
- Divide the remaining lower hair into left and right lateral perimeter sections.
- Isolate the nape section from the ears down to the neck base with two horizontal clips.
Professional Ways to Manage Curl Clumps During Sectioning
Always work with the natural grain of your curls, avoiding forceful comb dragging through dry knots. Use the tail of your comb to separate curls at their natural parting seams.
Twist each isolated section loosely before clipping to maintain curl clump integrity and reduce frizz. Never pull clips out aggressively; unhinge them fully before sliding out of curl clusters.
Keep a visual mental map of your four core zones throughout the entire cutting process.
4. Establishing the Perimeter Baseline and Length
The baseline establishes the overall length, perimeter density, and structural bottom frame of your shag. Cutting the perimeter first anchors your shape, ensuring shorter interior layers drape over a strong foundation.
+-----------------------------------------------------------+
|             Perimeter Baseline Specifications             |
+-------------------+---------------------------------------+
| Nape Elevation    | Zero Degrees (Natural Fall Against Back)|
| Cutting Technique | Visual Point-Cutting / Curl-by-Curl   |
| Baseline Contour  | Soft Oval / Gentle U-Shape Silhouette |
| Target Density    | Wispy, Airy, Non-Blunt Edge Texture   |
+-------------------+---------------------------------------+
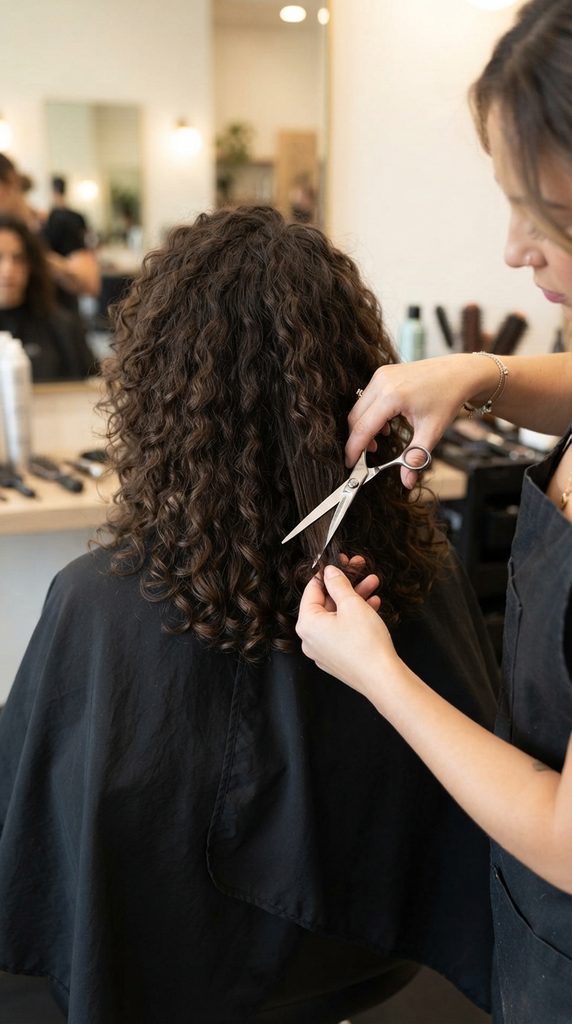
Structural Blueprint and Perimeter Design
Unlike blunt bob cuts that require heavy, horizontal lines, a shag thrives on a soft, airy perimeter. A gentle U-shaped baseline preserves length while removing bulky shelf-like weight at the bottom.
Cutting individual curl groupings at zero-degree elevation prevents unwanted stair-step graduation lines. Visual point-cutting softens the ends, allowing curls to move freely across your shoulders.
Evaluating natural neck posture while cutting the perimeter ensures your baseline remains symmetrical. Keeping your chin level prevents the back from becoming accidentally shorter than the sides.
Necessary Techniques for your baseline haircut
- Zero-degree natural fall cutting along the nape and back perimeter.
- Visual curl-by-curl carving on individual spiral tips.
- Soft 45-degree angle shear placement for point-cutting.
- Symmetrical comparison checks from left to right shoulders.
- Shoulder-clearing posture adjustments during length refinement.
Step-by-Step Perimeter Cutting Methods
- Release the bottom nape section, letting curls fall naturally against your back.
- Ensure your shoulders are relaxed, head is upright, and chin is parallel to the floor.
- Identify the longest natural curls that define your desired finished baseline length.
- Hold your shears at a 45-degree angle relative to the hair strand ends.
- Point-cut the tips of individual curl clumps, removing dead or split ends cleanly.
- Work across the nape from the center outward toward the left collarbone smoothly.
- Repeat the point-cutting sequence across to the right collarbone with matching length.
- Bring both front perimeter sides forward over your shoulders to verify length symmetry.
- Refine the perimeter contour into a soft, blended U-shape along the lower boundary.
- Shake your curls gently with your fingers to observe natural bounce and rebound height.
Professional Ways to Preserve Perimeter Health
Never cut straight horizontally across dry curls; horizontal cuts create blunt, heavy edges that resist clumping. Point-cutting preserves the tapered, natural taper of each individual curl tip.
Trim only a quarter-inch at a time, allowing curls to bounce up before removing more length. Curls often shrink higher than anticipated once heavy, weighed-down ends are removed.
Check perimeter balance in your mirror by comparing hair tips against your collarbones.
5. Carving Shag Fringe and Brow-Framing Curtains
The fringe and curtain layers define the signature rebellious character and vintage soul of the shag. Custom-carved bangs frame your eyes, accentuate cheekbones, and blend seamlessly into side layers.
+-----------------------------------------------------------+
|             Fringe & Curtain Layer Profile                |
+-------------------+---------------------------------------+
| Fringe Geometry   | Inverted V-Shape / Arched Brow Line   |
| Elevation Angle   | 45 Degrees Over-Directed Forward      |
| Focal Length      | Bridge of Nose (Shrinks to Brow Line) |
| Side Blending     | Cascading Downward to Cheekbone Crest |
+-------------------+---------------------------------------+
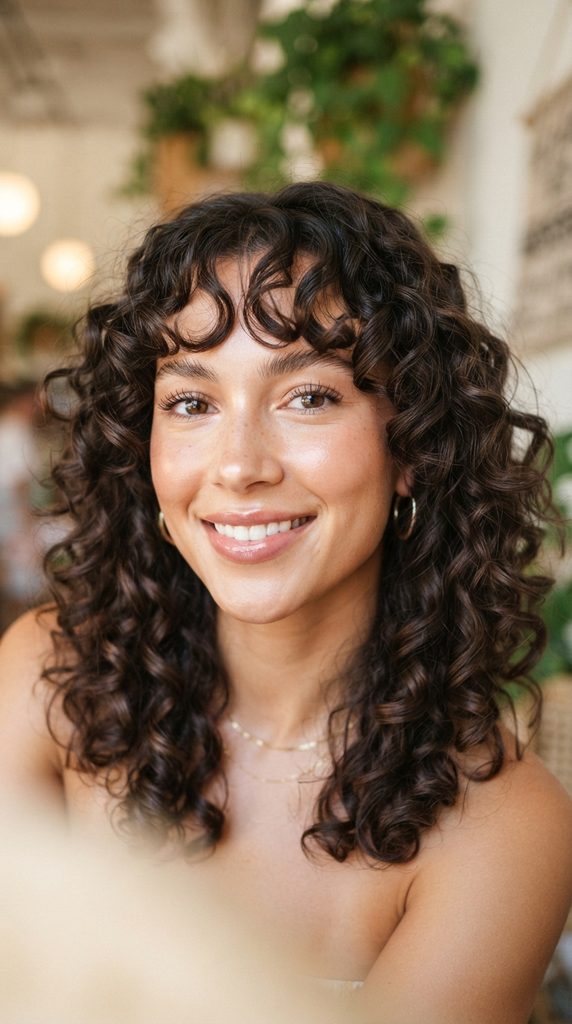
Structural Blueprint for Face-Framing Elegance
Curly bangs require careful length planning due to high shrinkage rates around the forehead. A gentle arched contour—shorter in the center and longer toward temples—opens up the face beautifully.
Over-directing the center fringe slightly forward while point-cutting creates soft, feathered ends. Longer curtain tendrils drape over the cheekbones, creating a flattering bridge into side layers.
Cutting the fringe curl-by-curl allows you to tailor each ringlet to your unique facial features. The resulting fringe feels light, bouncy, and versatile enough to part in multiple directions.
Tools and Focus Points for Fringe Design
- Fine duckbill clips for isolating delicate hairline tendrils.
- 5.5-inch precision cutting shears for detailed facial carving.
- Clean visual focus on natural brow line and cheekbone heights.
- Zero-tension finger holding to allow natural curl spring.
- Front-facing mirror with direct, shadow-free lighting.
Step-by-Step Fringe and Curtain Cutting Methods
- Release the isolated front triangle section, letting curls rest over your forehead.
- Separate a central one-inch cluster of curls directly above the nose bridge.
- Pinch this central cluster loosely with zero tension between your index and middle fingers.
- Position your shears at a 45-degree angle at the bridge of your nose.
- Point-cut the tips of the central curls, allowing them to bounce upward to brow level.
- Select the next curl cluster to the left, angling your cut slightly downward.
- Blend downward toward the cheekbone, increasing length progressively toward the temple.
- Repeat this angled, downward-sloping cut on the right side for symmetrical balance.
- Release side curtain tendrils and blend them into the outer edge of your cheekbone layers.
- Shake your head vigorously and inspect where the curls settle around your eyes.
- Refine individual rebellious ringlets that hang longer than your desired arched frame.
Professional Ways to Avoid Over-Shortening Fringe Curls
Always cut curly bangs at least one inch longer than your ultimate target resting length. Forehead curls experience significant bounce-back once the weight of long ends is removed.
Cut one individual curl spiral at a time rather than grabbing large, dense chunks. Carving individual curls ensures each ringlet forms a cohesive, bouncy spiral without split ends.
Style your fringe with a light mist of water to verify true bounce before making final trims.
6. Elevating the Crown Diamond for Maximum Volume
The diamond crown section creates the lush vertical volume and rounded silhouette characteristic of the iconic shag. High vertical elevation removes interior weight, allowing crown curls to lift with effortless bounce.
+-----------------------------------------------------------+
|             Crown Diamond Elevation Matrix                |
+-------------------+---------------------------------------+
| Section Zone      | Top Diamond Apex to Upper Occipital   |
| Elevation Angle   | 90 to 180 Degrees Straight Upward     |
| Over-Direction    | Directed Toward Center Apex Guideline |
| Cutting Motion    | Deep Point-Cutting for Soft Diffusion |
+-------------------+---------------------------------------+
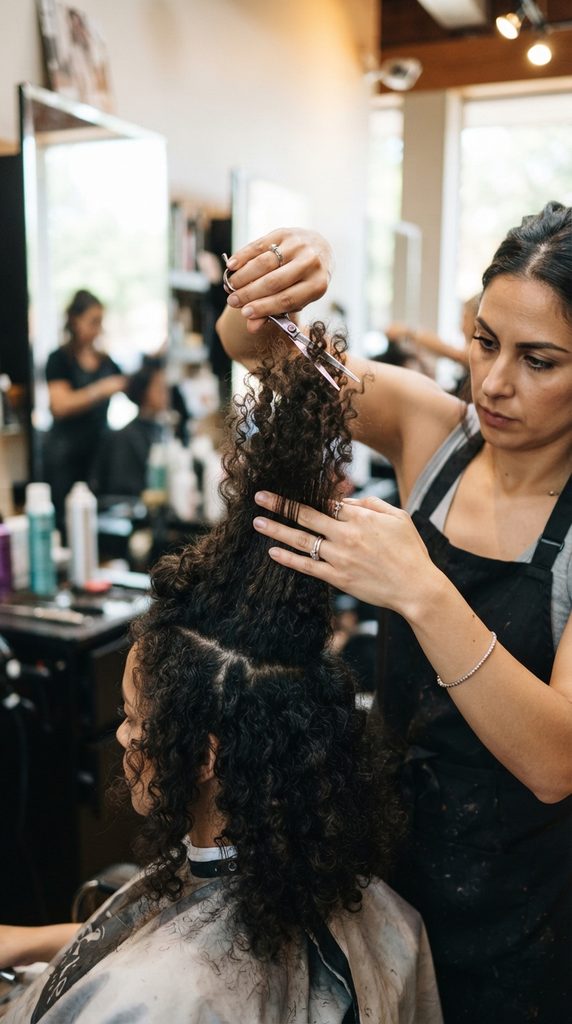
Structural Blueprint and Interior Weight Removal
Without short crown layers, long curly hair collapses flat against the scalp under its own weight. Elevating the crown diamond straight up to 180 degrees creates cascading interior layers.
This vertical over-direction preserves length at the bottom while creating short, voluminous top layers. The resulting graduation produces a balanced, rounded diamond silhouette that eliminates triangular bulk.
Deep point-cutting into the elevated ends diffuses the layer lines, preventing blunt shelf marks. When the crown falls naturally, the curls interlock seamlessly with the perimeter beneath.
Essential Principles for Volume Elevation
- 180-degree vertical elevation perpendicular to the floor ceiling.
- Central traveling guideline established at the highest crown apex.
- Deep point-cutting notches spaced evenly across elevated ends.
- Zero pulling tension to preserve natural curl spiral integrity.
- Symmetrical cross-checking across left and right diamond quadrants.
Step-by-Step Crown Layering Methods
- Unclip the top diamond section and gently shake the curls loose with fingers.
- Take a half-inch central traveling guideline section from the front apex to the back.
- Elevate this central guideline straight up toward the ceiling at 180 degrees.
- Hold the hair loosely between fingers, identifying your desired crown layer length.
- Point-cut into the ends at a steep 45-degree angle to create a soft, diffused edge.
- Take a horizontal subsection from the left side of the diamond and lift to match the guide.
- Point-cut the left subsection to match the height of your central traveling guide.
- Take a matching horizontal subsection from the right side and lift straight up.
- Point-cut the right subsection, ensuring equal length across both sides of the crown.
- Work progressively from the front of the diamond back to the upper occipital bone.
- Release the entire diamond section, letting curls fall naturally to inspect volume.
Professional Ways to Ensure Seamless Crown Blending
Cross-check your crown diamond by lifting horizontal subsections and inspecting the cutting line. The ends should form a gentle, symmetrical curve that peaks slightly at the center.
Avoid over-cutting the back corners of the diamond, which can create thin spots over the ears. Maintain consistent 180-degree vertical elevation without leaning hands forward or backward.
Shake out the crown with your fingertips to verify that layers nestle together smoothly.
7. Blending Lateral Layers and Face-Framing Transitions
Blending the lateral side sections connects your short curtain fringe with your longer perimeter baseline. Seamless diagonal transitions eliminate harsh weight lines and create the classic cascading shag frame.
+-----------------------------------------------------------+
|             Lateral Transition Architecture               |
+-------------------+---------------------------------------+
| Section Zone      | Temples Down to Jawline and Ear Tops  |
| Elevation Angle   | 45 Degrees Over-Directed Forward      |
| Parting Pattern   | Diagonal-Forward Slices (Mellon Slice)|
| Transition Path   | Cheekbone to Clavicle Cascade Line    |
+-------------------+---------------------------------------+

Structural Blueprint for Dynamic Movement
The lateral sides bridge the gap between front facial framing and back perimeter length. Without proper blending, a disconnect occurs, leaving a gap between bangs and back hair.
Using diagonal-forward partings over-directed toward the nose creates a smooth cascading diagonal line. This technique ensures that side layers get progressively longer as they travel downward toward the shoulders.
Point-cutting along this diagonal plane removes bulky corners around the ears and jawline. The resulting layers frame the neck gracefully, accentuating jaw definition and facial features.
Focus Points for your lateral haircut Balance
- Diagonal-forward sectioning parallel to the natural jawline angle.
- 45-degree forward over-direction toward the bridge of the nose.
- Smooth visual integration with existing curtain fringe endpoints.
- Preservation of perimeter density behind the earlobes.
- Symmetrical visual cross-checks using cheekbone landmark points.
Step-by-Step Lateral Blending Methods
- Unclip the left lateral section located between the temple, ear, and jawline.
- Carve a half-inch diagonal-forward slice parallel to your natural jawline angle.
- Over-direct this slice forward toward the corner of your eye at 45 degrees.
- Locate the shortest curtain fringe guide hair near your cheekbone.
- Point-cut from the fringe guide downward toward the baseline length smoothly.
- Take the next diagonal slice behind the first and over-direct to the same point.
- Point-cut along the established cascading guideline to blend the interior.
- Repeat steps 1 through 7 on the right lateral side with identical elevation.
- Bring both side sections forward together to verify that diagonal slopes match.
- Allow the sides to fall naturally and check the profile view in your mirror.
Professional Ways to Prevent Holes Around the Ears
Be cautious when cutting sections directly above the ears where hair density is naturally lower. Maintain minimal elevation over the ear to avoid accidentally carving away your bottom baseline.
Use your fingers as a gentle guide rather than clamping down with excessive tension. Gentle handling lets you see the curl bounce into place immediately after each cut.
Step back from the mirror frequently to evaluate the overall visual balance from all angles.
8. Weight Removal and Interior Curl Carving
Interior weight removal is the secret to unlocking bouncy movement, touchable softness, and definition. Sculpting individual curl clumps removes dense bulk from the mid-lengths without sacrificing length.
+-----------------------------------------------------------+
|             Interior Weight Removal Matrix                |
+-------------------+---------------------------------------+
| Target Zones      | Dense Occipital Mid-Lengths & Crown   |
| Technique         | Slide-Carving / Channeling / Pointing |
| Tool Orientation  | Shears Parallel to Natural Curl Grain |
| Reduction Volume  | 10% to 15% Interior Bulk Removal      |
+-------------------+---------------------------------------+
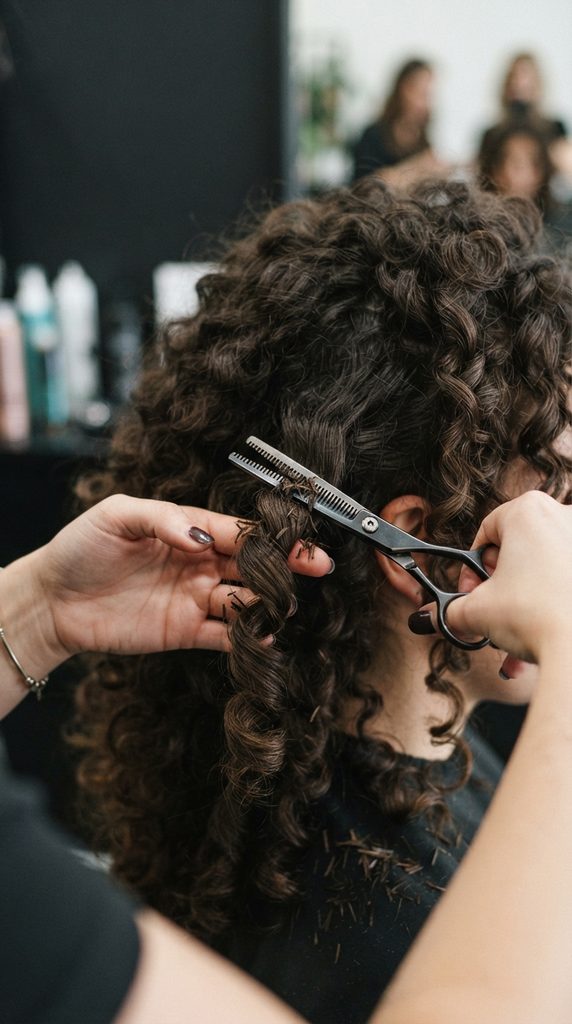
Structural Blueprint and Curl Canalization
Curly hair often forms dense, compressed clumps that trap weight in the middle of the hair shaft. This trapped density prevents curls from expanding into their full, springy potential.
Interior carving involves opening shear blades slightly and sliding down the outer perimeter of a curl. This creates micro-channels within dense clumps, allowing adjacent curls to move independently.
Targeting only the thickest, densest zones prevents thinning out your delicate ends. The result is an airy, touchable shag that bounces effortlessly with every head turn.
Methods and Precautions for Interior Thinning
- Never use traditional thinning shears or texturizing razors on dry curly hair.
- Work strictly on the outer third of individual, well-defined curl groupings.
- Align shear blades parallel to the natural direction of the curl spiral.
- Avoid cutting into the root zone to prevent short, spiky regrowth hairs.
- Assess weight distribution with your hands by gently squeezing curl density.
Step-by-Step Interior Carving Methods
- Release all clips and shake your hair completely loose with your fingers.
- Feel across your scalp to identify dense, heavy pockets of hair behind ears.
- Isolate a single thick curl clump between your index and middle fingers.
- Hold your shears with blades slightly open, aligned parallel to the strand.
- Gently slide the shears down the lower half of the curl clump to remove bulk.
- Snip tiny single-strand micro-notches along the thickest bend of the curl.
- Release the curl and watch how it separates into lighter, bouncier ribbons.
- Move across the dense mid-occipital area, carving select thick clusters.
- Step back and evaluate how the layers interact and nestle together.
- Avoid over-carving the top canopy layer to preserve a smooth surface finish.
Professional Ways to Avoid Frizz During Weight Removal
Avoid sliding closed shears down hair strands; always keep blades steady and use tiny nibbles. Rough friction damages the cuticle scales, leading to chronic frizz and dullness.
Carve only dry, fully formed curls where you can clearly see the natural clumping pattern. Carving brushed-out or frizzy hair leads to uneven, patchy holes in your silhouette.
Limit weight removal to no more than ten to fifteen percent of your overall hair mass.
9. Visual Detailing and Individual Curl Sculpting
Visual detailing is the artistic phase where you refine individual curls to perfect your finished silhouette. Inspecting your cut in motion allows you to tailor wayward spirals and balance asymmetry.
+-----------------------------------------------------------+
|             Visual Detailing & Refining Profile           |
+-------------------+---------------------------------------+
| Assessment Motion | Head Shaking, Finger Fluffing, Turning|
| Focus Details     | Stray Long Ringlets, Heavy Corners    |
| Cutting Method    | Freehand Micro-Trimming on Single Tips|
| Goal Finish       | Organic, Balanced, Lived-In Shag Shape|
+-------------------+---------------------------------------+

Structural Blueprint for Artistic Customization
Every head of curls possesses unique growth cowlicks, density shifts, and asymmetrical bounce heights. Visual freehand detailing addresses these organic quirks better than rigid geometry alone.
By gently shaking and fluffing your cut, you see how curls behave during everyday movement. Individual stray hairs that hang below the desired layer lines can be snipped away freehand.
This bespoke tailoring ensures that your shag looks intentional and balanced from every perspective. It creates a personalized, lived-in aesthetic that grows out gracefully over months.
Visual Quality Checkpoints for Your haircut
- Symmetrical balance between left and right cheekbone curtain frames.
- Smooth, graduated transition from short crown layers down to the baseline.
- Elimination of heavy, shelf-like horizontal weight lines in the back.
- Springy, buoyant bounce across all face-framing fringe tendrils.
- Clean, unobstructed neckline with wispy, textured perimeter ends.
Step-by-Step Visual Detailing Methods
- Stand before your mirror and shake your head gently from side to side.
- Fluff your roots lightly with your fingertips to establish full natural volume.
- Inspect your silhouette, looking for any single ringlets hanging lower than layers.
- Isolate wayward long strands and snip their tips freehand to match surrounding curls.
- Check your profile view using your handheld mirror to inspect the crown-to-nape slope.
- Soften any dense, bulky corners around the occipital bone with light point-cutting.
- Examine your fringe line, trimming any ringlet that pokes uncomfortably into your eyes.
- Part your hair slightly off-center to ensure the cut functions with versatile styling.
- Tuck one side behind your ear to verify that side layers still drape attractively.
- Take final reference photos from all angles to confirm balanced proportions.
Professional Ways to Fine-Tune the Silhouette
Use micro-trims of just two to three millimeters during the visual detailing phase. Tiny adjustments make a noticeable difference in how curls stack and interact together.
Step back three feet from your mirror to evaluate the overall silhouette rather than tiny details. Viewing your hair from a distance gives an accurate impression of balance and shape.
Trust your eye and your natural curl pattern rather than aiming for rigid geometric symmetry.
10. Post-Cut Wash, Style, and Definition Routine
The transformation becomes fully realized once your freshly cut curls are washed, hydrated, and styled. Proper product application and diffusing lock in your new shag shape with lasting definition.
+-----------------------------------------------------------+
|             Post-Cut Wash & Style Regimen                 |
+-------------------+---------------------------------------+
| Cleansing Step    | Sulfate-Free Hydrating Co-Wash        |
| Moisture Matrix   | Leave-In Conditioner + Curl Cream     |
| Hold & Cast       | Alcohol-Free Botanical Styling Gel    |
| Drying Method     | 80% Diffuse on Low Heat + 20% Air Dry |
+-------------------+---------------------------------------+
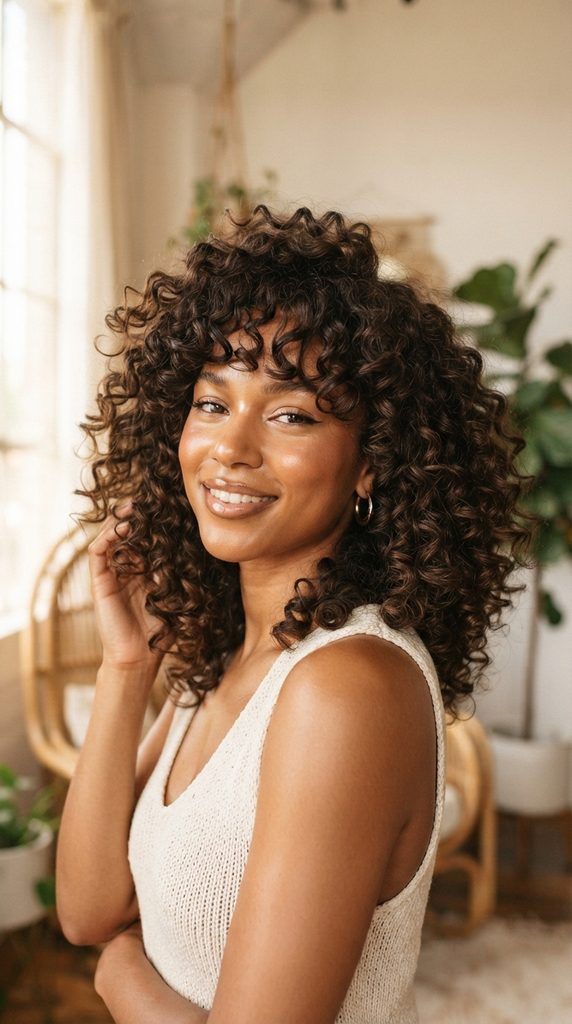
Structural Blueprint for Definition and Volume
Washing your hair immediately after cutting removes tiny snipped hair fragments from your canopy. Water also resets the curl memory, allowing newly lightened layers to spring into full bounce.
Applying moisturizing stylers to soaking-wet hair encourages individual curls to clump into smooth spirals. A botanical gel creates a protective cast that locks in hydration and banishes frizz.
Diffusing upside down lifts roots away from the scalp, amplifying your new crown layers. The resulting finish is a voluminous, defined curly shag bursting with personality.
Essential Styling Products and Tools
- Sulfate-free hydrating shampoo and rich moisture conditioner.
- Botanical leave-in conditioner with marshmallow root or flaxseed.
- Medium-hold defining curl gel or styling foam.
- Microfiber towel or cotton t-shirt for gentle water absorption.
- Professional ionic blow dryer with large-bowl diffuser attachment.
- Lightweight squalane or jojoba oil for breaking the gel cast.
Step-by-Step Wash, Style, and Diffuse Methods
- Cleanse scalp and hair thoroughly using a hydrating, sulfate-free cleanser.
- Apply a rich conditioner, squishing water into curls to promote deep hydration.
- Rinse with cool water to smooth the cuticle layer and lock in moisture.
- Glaze leave-in conditioner over soaking-wet hair using praying-hands motion.
- Distribute medium-hold curl gel evenly from roots to ends for cast formation.
- Scrunch curls upward toward the scalp with a microfiber towel to remove excess water.
- Attach a large-bowl diffuser to your dryer, setting heat and airflow to low.
- Tilt your head upside down and cup crown curls in the diffuser bowl gently.
- Hold the diffuser motionless against your scalp for thirty seconds per section.
- Dry hair to roughly eighty percent before switching to cool air to set the style.
- Allow remaining moisture to air-dry completely until a firm gel cast forms.
- Warm three drops of jojoba oil in palms and gently scrunch curls to break the cast.
Professional Ways to Maintain Shag Volume for Days
Sleep on a 100 percent mulberry silk pillowcase or wear a satin-lined bonnet nightly. Gathering curls into a loose high “pineapple” ponytail preserves crown layer height.
Refresh second- and third-day curls with a fine water mist and a drop of leave-in cream. Gently scrunch to reactivate styling gel without having to rewash completely.
Fluff roots gently with an afro pick in the morning to revive full shag volume.
Complete Curly Shag Cutting Reference Matrix
Mastering elevation angles, sectioning boundaries, and cutting tools ensures predictable, salon-grade results. Use this reference matrix to verify techniques for every zone of your cut.
+-----------------------------------------------------------+
|             Curly Shag Cutting Reference Matrix           |
+-------------------+---------------------------------------+
| Section Zone      | Elevation Angle    | Primary Technique|
| Perimeter Nape    | 0 Degrees (Fall)   | Point-Cutting    |
| Fringe / Bangs    | 45 Degrees Forward | Arch Carving     |
| Crown Diamond     | 180 Degrees Upward | Deep Notching    |
| Lateral Sides     | 45 Degrees Forward | Diagonal Cascade |
| Mid-Occipital     | 90 Degrees Outward | Slide Carving    |
+-------------------+---------------------------------------+
Understanding Elevation and Weight Dynamics
Elevation angle dictates whether hair retains weight, builds graduation, or releases volume completely. Zero-degree elevation keeps maximum weight at the bottom, creating a clean baseline.
Elevating hair to 90 degrees removes weight horizontally, creating soft, rounded graduation along the sides. Elevating to 180 degrees removes interior weight vertically, creating high crown volume.
Over-directing sections forward protects length in the back while creating cascading face-framing layers. Mastering these simple angle dynamics gives you complete control over your finished haircut silhouette.
Keep your body posture aligned with your cutting sections to maintain consistent elevation angles.
Diagnosing Common Cutting Mistakes and Quick Solutions
If your finished shag looks too heavy at the bottom, elevate the crown diamond higher. Increasing 180-degree vertical layering removes trapped weight and releases immediate crown bounce.
If your fringe turns out slightly shorter than intended, blend side curtain layers downward. Extending curtain tendrils down past cheekbones balances shorter center bangs seamlessly.
If layers appear blocky, point-cut vertically into the ends to soften sharp demarcation lines. Vertical point-cutting diffuses harsh edges, allowing individual curls to nestle together organically.
Patience and conservative micro-trims ensure you achieve your dream shag without stress.
Troubleshooting and Maintenance Guide for Curly Shags
A great cut continues to look fantastic over weeks and months with proper maintenance habits. Follow these essential tips to keep your shag healthy, balanced, and vibrant between trims.
+-----------------------------------------------------------+
|             Shag Maintenance & Upkeep Checklist           |
+-------------------+---------------------------------------+
| Dusting Frequency | Every 8 to 10 Weeks for Split Ends    |
| Bangs Refresh     | Every 4 to 6 Weeks for Brow Clearance |
| Moisture Balance  | Weekly Deep Conditioning Steam Mask   |
| Protein Therapy   | Monthly Reconstructive Bond Treatment |
+-------------------+---------------------------------------+
Establishing a Regular Dusting and Maintenance Schedule
Curly shags grow out gracefully due to their soft, layered architecture and diffused edges. However, regular maintenance dusting preserves shape and prevents split ends from traveling upward.
Perform a micro-dusting on individual curl tips every eight to ten weeks at home. Trimming just two millimeters removes split ends while preserving your hard-earned length.
Refresh your fringe every four to six weeks to maintain clear brow visibility and framing. Keep your dedicated hair shears sharp and stored properly for quick, precise touch-ups.
Consistent micro-trims keep your shag looking intentional, fresh, and effortlessly voluminous.
Preserving Curl Elasticity and Moisture Balance
Layered curls expose more surface area to environmental dry air, UV rays, and friction. Incorporate a rich, deep conditioning mask into your weekly wash routine to replenish moisture.
Alternate hydrating moisture masks with reconstructive protein treatments to maintain curl elasticity. Balanced protein levels keep curl spirals springy, defined, and resistant to mechanical breakage.
Always protect your hair with a UV-filtering leave-in spray when spending extended time outdoors. Sun protection prevents color oxidation and keeps your curl cuticles smooth and shiny.
Healthy, well-hydrated curls showcase the dimensional layers of your shag haircut with brilliant radiance.
Embracing the ultimate curly shag brings effortless volume, playful movement, and modern confidence to your natural texture. From carving custom curtain bangs to elevating crown layers, the transformation is empowering. Follow these beginner-friendly steps, trust your curl pattern, and enjoy your stunning new haircut.
Leave a Reply