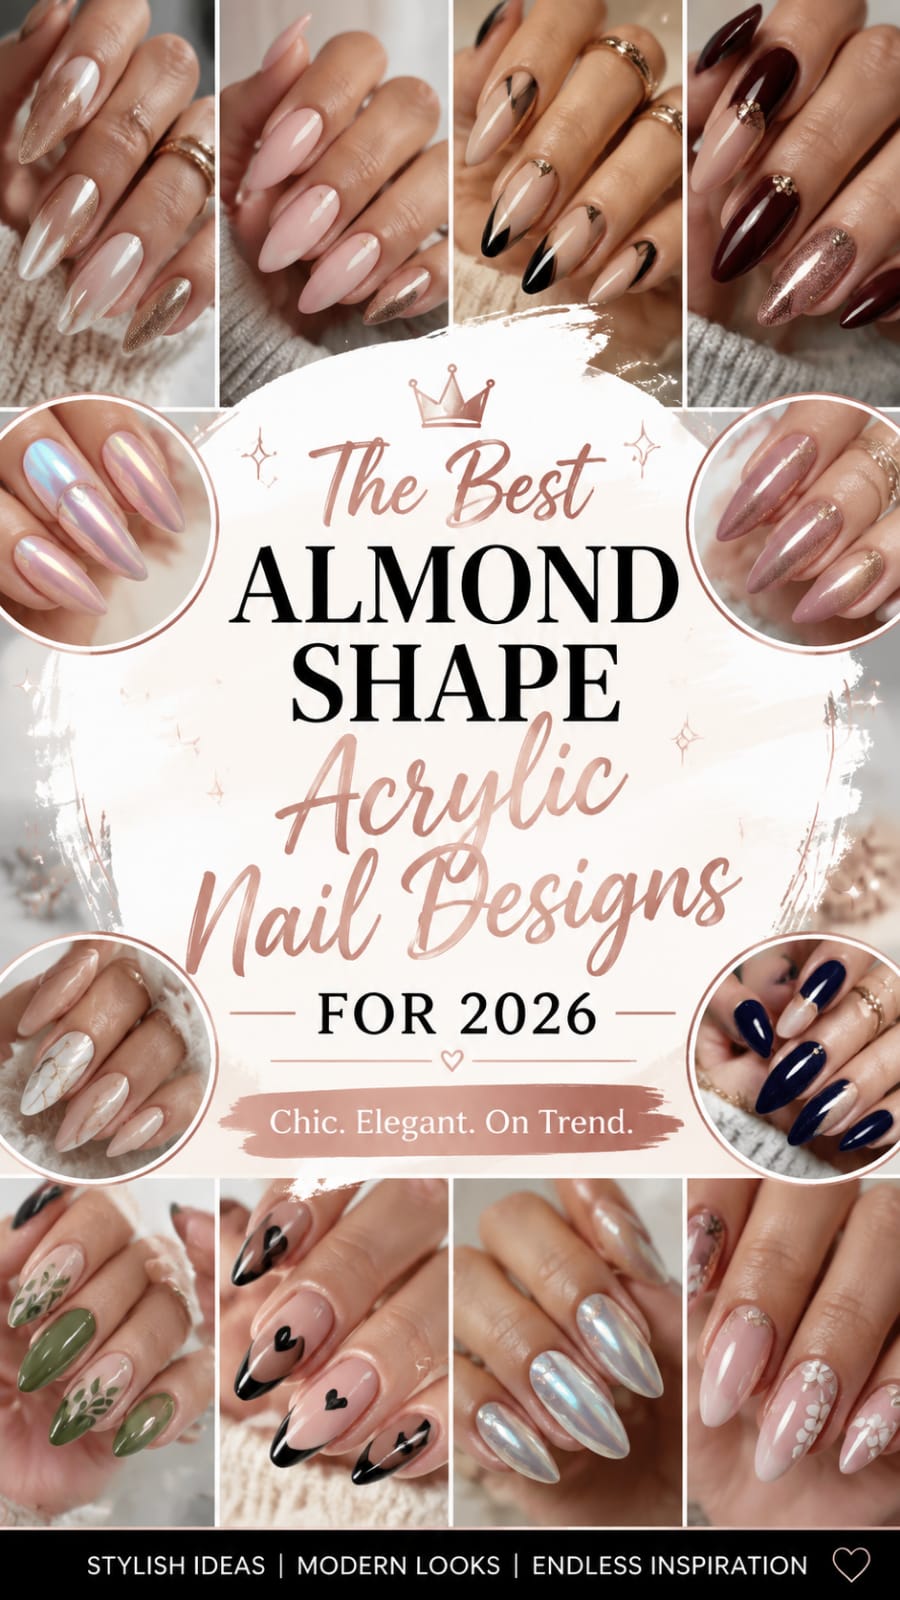
The iconic almond silhouette remains the undisputed crown jewel of modern nail shapes. Its gently tapered sides and softly rounded tip mimic the natural shape of an almond kernel, creating an unmatched elongating effect for every hand shape. In 2026, acrylic artistry takes this timeless canvas to extraordinary heights. Trendsetters across beauty channels are embracing ultra-glossy glass finishes, liquid chrome shifts, tactile 3D sculptures, and atmospheric gradients. Soft pastel washes share the spotlight with deep jewel tones, offering options for maximalists and minimalists alike.

Choosing this specific tapered cut completely transforms your overall aesthetic. Modern acrylic formulations provide incredible structural durability without feeling heavy or bulky on your natural plates. Advanced sculpting techniques ensure your set stays light, strong, and sleek throughout daily activity. Whether you love understated nude tones or eye-catching statement art, this shape delivers the perfect balance of strength, length, and pure sophistication.
This guide provides an extensive, highly detailed deep dive into the top ten trends dominating beauty boards this year. We break down each style with actionable step-by-step creation methods, versatile styling variations, and professional care routines. Discover how to sculpt, style, and preserve these breathtaking manicures for any occasion.
1. Pearl Chrome Elegance on Almond Nail Extensions
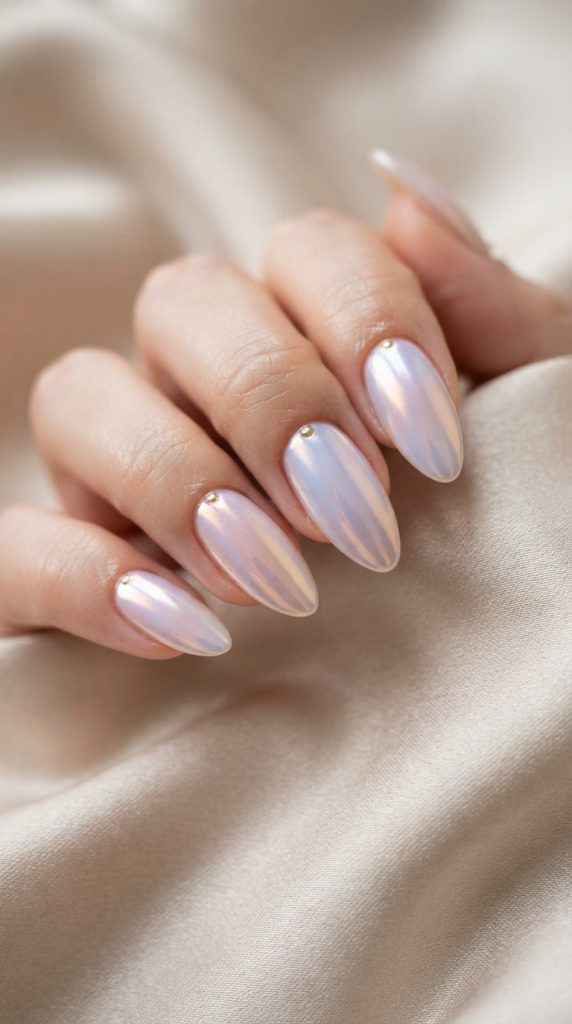
Pearl chrome finishes continue to dominate the high fashion beauty sphere this year. This ethereal aesthetic coats the hands in an iridescent sheen that catches light from every single angle. The smooth tapered curvature of the extension amplifies the pearlescent glow across the central arch, producing a clean look that feels sophisticated for executive settings yet glamorous for evening events.
The Foundation of Pearlescent Artistry
The almond contour relies heavily on a soft, natural arch that visually lengthens the fingers. When combined with iridescent pigments, the apex of the enhancement serves as a focal point for light refraction. Unlike flat glitter polish, micro-milled chrome powders melt into the topcoat, creating a smooth surface that looks like genuine mother-of-pearl or fresh saltwater pearls.
Core Step-by-Step Sculpting Method
Achieving a flawless pearlescent finish requires precise acrylic building and careful curing sequences to avoid a patchy powder distribution.
- Step 1: Prepare the natural plate thoroughly by removing shine, pushing back cuticles, and applying primer to prevent premature lifting along lateral edges.
- Step 2: Formulate a smooth acrylic base using a semi-sheer blush or soft milky pink powder, carefully building a supportive apex near the stress area.
- Step 3: Refine the shape with an electronic file, ensuring the side walls taper evenly toward a smooth center point.
- Step 4: Apply a thin, even coat of specialized non-wipe gel topcoat and cure under a high-wattage LED lamp for precisely thirty seconds.
- Step 5: Burnish a high-grade white-gold or pink-tinted pearl chrome powder into the surface using a soft silicone tool until completely reflective.
- Step 6: Dust away excess micro-pigment with a fluff brush, then seal the entire extension with a thick layer of hard builder gel and topcoat.
Versatile Methods for Everyday Styling
You can easily adapt this iridescent style to suit your specific lifestyle and personal aesthetic without losing its core appeal.
- Method 1: Pair a milky white acrylic base with warm champagne chrome powder to create a sun-kissed glow ideal for warm skin tones.
- Method 2: Combine a cool sheer lavender base with silver-blue pearl powder for an icy finish suited for formal winter wear.
- Method 3: Apply tiny pearl cabochons near the cuticle bed of your ring finger to add three-dimensional detail to the soft sheen.
Professional Consultation and Maintenance
When visiting your technician, request a medium-length taper to maximize the reflective surface area of the chrome. A well-sculpted apex is critical for preventing stress fractures along extended free edges.
To maintain your pearl chrome set, apply cold-pressed cuticle oils twice daily to keep the surrounding tissue soft and flexible. Avoid exposing your hands to abrasive cleaning agents without heavy-duty protective gloves, as chemicals can strip the top coat and dull the pearl shimmer underneath. Schedule maintenance refills every three weeks to address balance issues as your natural plate grows.
2. Classic Micro French Tips for Modern Acrylic Nail Trends
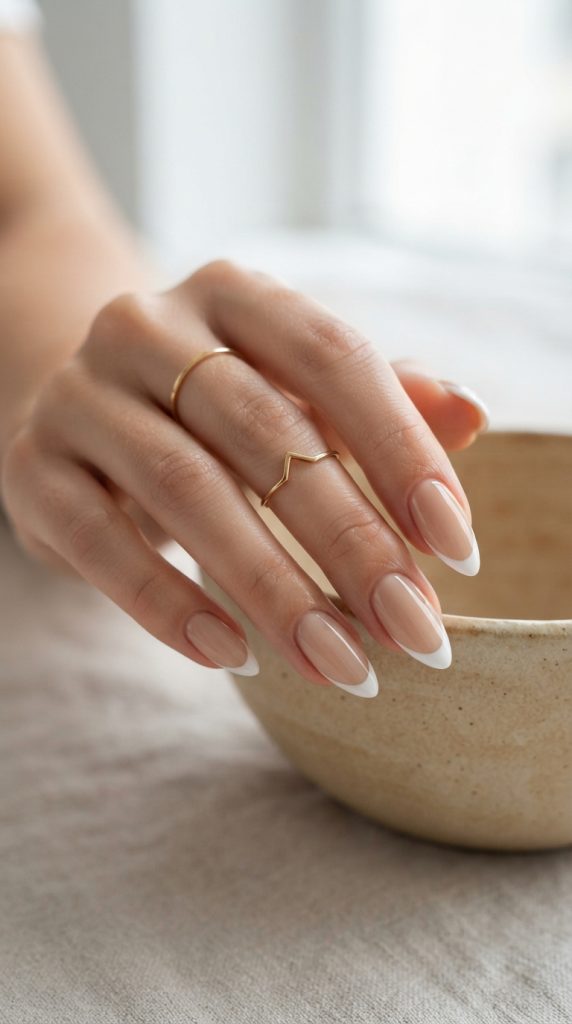
The iconic French manicure gets a ultra-modern update with micro-fine smile lines. Traditional thick white tips can often look heavy on longer extensions, cutting off the visual length of the finger. Micro French tips highlight the natural tapered free edge without shortening the appearance of your hands, making them a cornerstone of the popular clean beauty movement.
Structural Geometry of Micro Smiling Lines
The key to an incredible micro French look sits directly in the proportion of the tip relative to the bed color. By keeping the white line under two millimeters wide, you preserve the visual illusion of elongated finger proportions. The line must follow the exact curve of your outer edge to emphasize symmetry across all ten fingers.
Core Step-by-Step Sculpting Method
Creating razor-thin smile lines on curved surfaces requires steady hands, correct brush mechanics, and crisp gel paint formulations.
- Step 1: Sculpt the extension using a camouflage nude acrylic powder that matches your natural skin tone to mask regrowth lines.
- Step 2: Hand-file the side walls into a balanced, symmetrical almond curve, ensuring the edge remains smooth and free of burrs.
- Step 3: Wipe the refined acrylic clean with isopropyl alcohol to remove all residual dust particles that could disrupt line work.
- Step 4: Dip a extra-long detail liner brush into bright white artwork gel, removing excess product on a palette to keep line thickness minimal.
- Step 5: Trace a paper-thin smile line following the outer edge of the tip, curving slightly upward toward the lateral stress points.
- Step 6: Flash-cure the white line for fifteen seconds to prevent bleeding, then apply a protective glass-gloss topcoat over the full length.
Versatile Methods for Everyday Styling
Micro tips are not restricted to traditional stark white polish shades. Swapping the tip color completely changes the mood of the set.
- Method 1: Replace traditional white with high-shine metallic rose gold or chrome silver gel for a subtle touch of modern jewelry.
- Method 2: Paint micro tips using deep forest green, navy, or burgundy for a sophisticated pop of rich color.
- Method 3: Apply a soft velvet matte topcoat over the neutral base while keeping the thin micro tip hyper-glossy for subtle contrast.
Professional Consultation and Maintenance
Ask your technician for a crisp, thin free-edge filing technique that does not build bulk at the tip. Because micro tips reside on the extreme free edge, they are vulnerable to mechanical wear from daily tasks.
Reapply a layer of clear quick-dry topcoat at home after ten days to shield fine painted lines from edge friction. Keep cuticles hydrated with rich cream to maintain a healthy appearance against the neutral base color. File away micro-snags immediately using a high-grit glass buffer to keep edges crisp.
3. Velvet Cat-Eye Magic on Tapered Nail Extensions
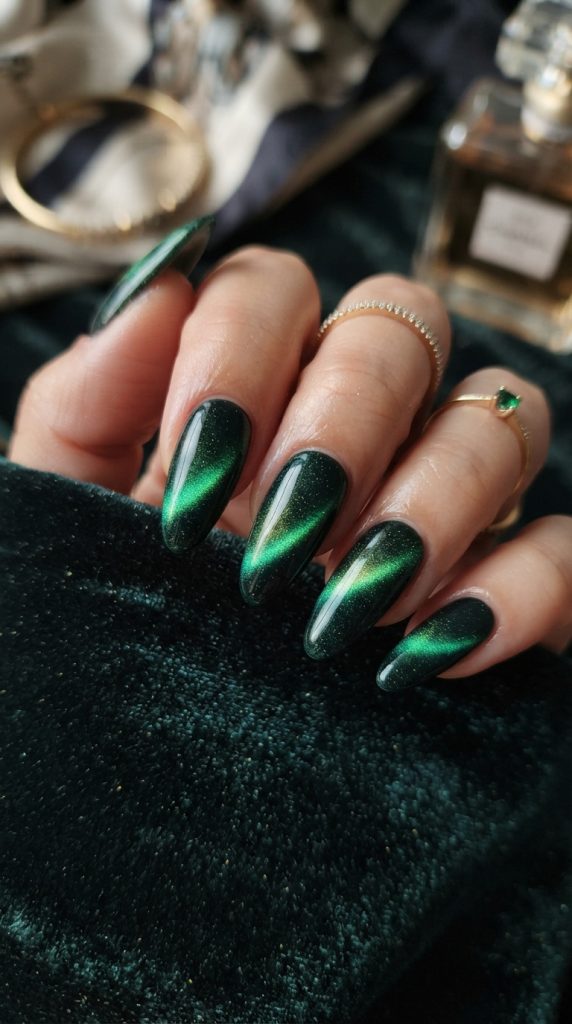
Velvet cat-eye polishes use dynamic magnetic iron particles to create mesmerizing three-dimensional depth. When applied over curved extensions, the magnetic effect moves responsively as you shift your hands under lighting. The plush, velvety sheen creates a luxurious texture that feels cozy, elegant, and futuristic all at once.
The Physics of Magnetic Velvet Finishes
Traditional cat-eye designs feature a single sharp line of concentrated shimmer across the center of the bed. Velvet cat-eye methods disperse the magnetic glitter evenly across the entire surface area, creating a soft, multi-dimensional luster resembling liquid silk or crushed velvet fabric. The tapered extension acts as a lens, enhancing optical depth.
Core Step-by-Step Sculpting Method
Mastering velvet depth requires strategic magnetic manipulation while the gel formula remains entirely fluid.
- Step 1: Sculpt a strong acrylic base and file the extensions into a crisp, uniform taper across all ten fingers.
- Step 2: Apply a thin coat of opaque black or rich chocolate brown gel polish to serve as an absorbing background shade.
- Step 3: Brush on an even layer of multi-magnetic cat-eye gel, making sure not to cure the gel immediately.
- Step 4: Position a rectangular magnet parallel to the left side edge for five seconds, then repeat on the right side edge to push particles upward.
- Step 5: Bring the magnet near the free edge tip to float shimmering particles into the central apex, creating an all-over velvet sheen.
- Step 6: Cure under LED light for sixty seconds instantly to freeze the shifted magnetic particles before they fall out of alignment.
Versatile Methods for Everyday Styling
Different magnetic arrangements alter the way light dances across your hands throughout the day.
- Method 1: Pull magnetic shimmer upward toward the tips to create a glowing celestial aura that accentuates length.
- Method 2: Combine two contrasting cat-eye gel colors—like emerald green and gold—to create a duo-chrome velvet effect.
- Method 3: Apply a matte topcoat over the cat-eye gel to transform the metallic shine into a soft cashmere fabric texture.
Professional Consultation and Maintenance
Request a dark tinted base color during your salon visit to maximize the visual pop of magnetic particles. Velvet finishes hold their deep shimmer exceptionally well beneath thick clear gel layers.
To preserve optical depth, buff out fine surface scratches using a 4000-grit buffer block when wear appears. Apply a fresh coat of high-gloss gel topcoat every two weeks to maintain crystal-clear transparency over the magnetic layer. Keep hand skin thoroughly moisturized with rich butter creams to match the soft luxury of the velvet finish.
4. Aura Gradient Glow for Aesthetic Acrylic Nail Art
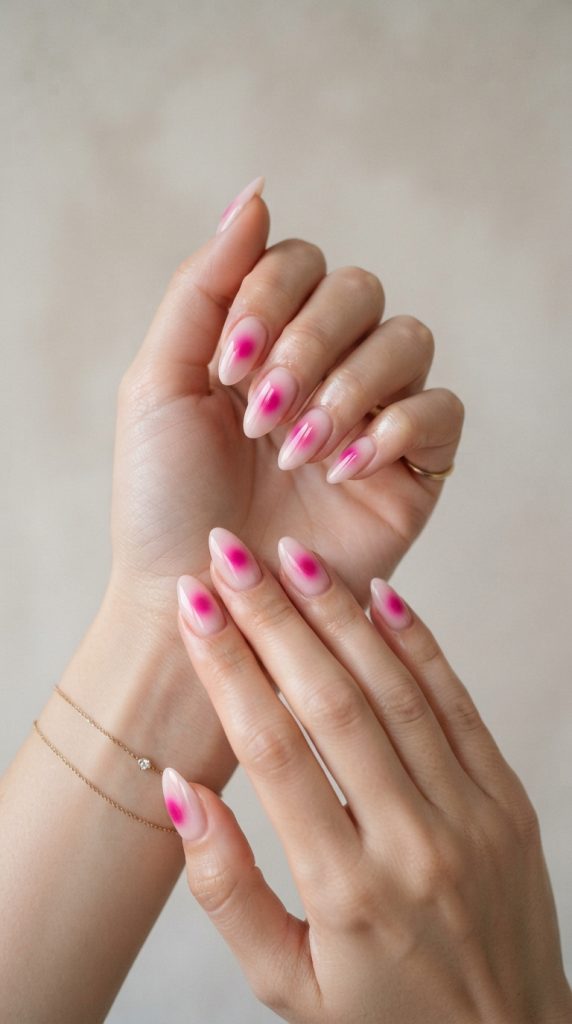
Aura designs feature a soft, airbrushed bloom of color radiating outward from the center of each finger. This glowing gradient effect flatters tapered extensions by emphasizing the central curve of the apex. It feels artistic, mysterious, and modern, blending two or more complementary shades into a seamless mist of color.
Visual Balance of Central Gradient Artwork
The aura pattern relies on strategic color placement. By concentrating the brightest color in the center and fading it outward toward the natural perimeter, your eye naturally draws along the finger. This effect creates a sleek appearance while offering room for expressive color combinations.
Core Step-by-Step Sculpting Method
Creating a smooth, seamless aura blend requires delicate layering, correct tool pressure, and precision airbrush technique.
- Step 1: Build a solid foundation using sheer neutral or soft pastel acrylic powder, ensuring the surface is filed smooth.
- Step 2: Matte the surface using a fine buffer block so that airbrushed pigments adhere evenly without running.
- Step 3: Load an airbrush tool with formulated liquid gel paint in your chosen vibrant contrast shade.
- Step 4: Spray a concentrated circle of color onto the center of the plate, easing pressure near the edges to create a soft bloom.
- Step 5: Allow the airbrushed layer to dry completely, or flash-cure if using specialized UV spray formulations.
- Step 6: Seal the soft gradient under a thick, self-leveling clear builder gel layer to protect the thin airbrush coat from scratches.
Versatile Methods for Everyday Styling
Aura designs offer infinite opportunities for personal expression through thoughtful color pairing.
- Method 1: Blend a bright magenta aura center over a pale baby pink background for a sweet, monochromatic romantic look.
- Method 2: Combine electric cobalt blue with a deep midnight purple base shade for a moody celestial vibe.
- Method 3: Overlay hand-painted chrome starbursts or delicate line art directly over the center of the aura bloom.
Professional Consultation and Maintenance
Ensure your nail technician uses proper airbrushing tools or ultra-soft blending sponges to avoid visible speckling or harsh lines. Because airbrushed pigments sit in delicate layers, adequate topcoat sealing is crucial.
Protect your aura set by avoiding direct skin contact with harsh household solvents or un-gloved cleaning products. Apply broad-spectrum sunscreen to your hands daily to prevent UV rays from fading vibrant central pigments. Address any edge lifting promptly at the salon to keep water from seeping beneath protective top coats.
5. Cherry Red Statement for Bold Almond Nail Styles
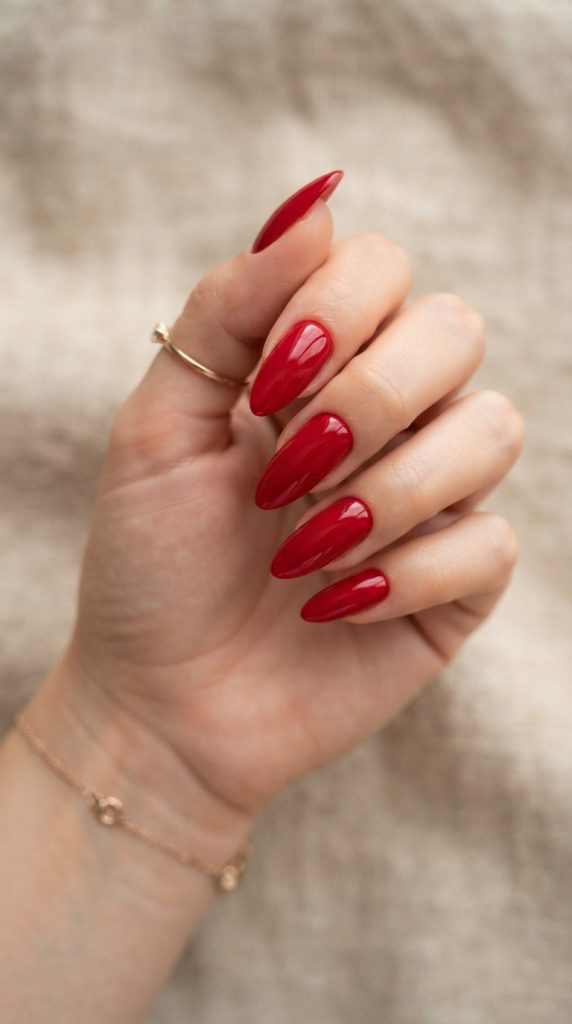
Cherry red makes a powerful impact as one of the standout power shades of the modern era. The sleek tapered shape softens bright red polish, keeping it sophisticated rather than harsh. This timeless color demands attention while keeping your hands looking crisp, confident, and classic.
The Power of Full Spectrum Red Pigment
Red polish highlights hand movement like no other color. The tapered edge of an almond set brings a refined balance to bold cherry tones, preventing the color from feeling too broad or heavy. Rich crimson shades suit every skin tone when undertones are matched correctly.
Core Step-by-Step Sculpting Method
Achieving saturated, streak-free red coverage requires disciplined application techniques and clean edge control.
- Step 1: Sculpt extensions using clear or natural acrylic powder, ensuring the side walls are filed with clean lines.
- Step 2: Cleanse the nail surface thoroughly with alcohol to eliminate oil residues that cause pooling or streaking.
- Step 3: Apply a thin layer of rich cherry red gel polish, anchoring the brush at the center before sweeping down to the tip.
- Step 4: Cap the free edge carefully on every coat to prevent red pigment from shrinking back from the extension tip.
- Step 5: Apply a second thin coat of red gel polish to achieve full color density, then cure under LED light for sixty seconds.
- Step 6: Top off with a plumping, non-yellowing clear topcoat to add a glass-like finish over the vibrant shade.
Versatile Methods for Everyday Styling
Cherry red adapts effortlessly to different aesthetic preferences, whether you prefer monochrome simplicity or intricate accents.
- Method 1: Choose full monochrome cherry red extensions across all fingers for timeless elegance.
- Method 2: Paint deep cherry red French tips over a milky nude base for a subtle nod to color.
- Method 3: Sculpt tiny 3D cherry fruit accents onto ring fingers for a playful touch of retro charm.
Professional Consultation and Maintenance
Ask your technician for a highly pigmented gel shade with blue undertones to make your skin tone pop. Bold red colors reveal even tiny chips or edge wear instantly, so precise topcoat encapsulation is vital.
Keep cuticles moisturized with nourishing oils daily to avoid dry skin that contrasts against bright red polish. Use protective gloves when using self-tanning products or hair dye to avoid staining clear topcoats. Schedule regular salon visits every two to three weeks to keep cuticle lines clean as your natural plates grow out.
6. Minimalist 3D Swirls for Textured Acrylic Nail Care
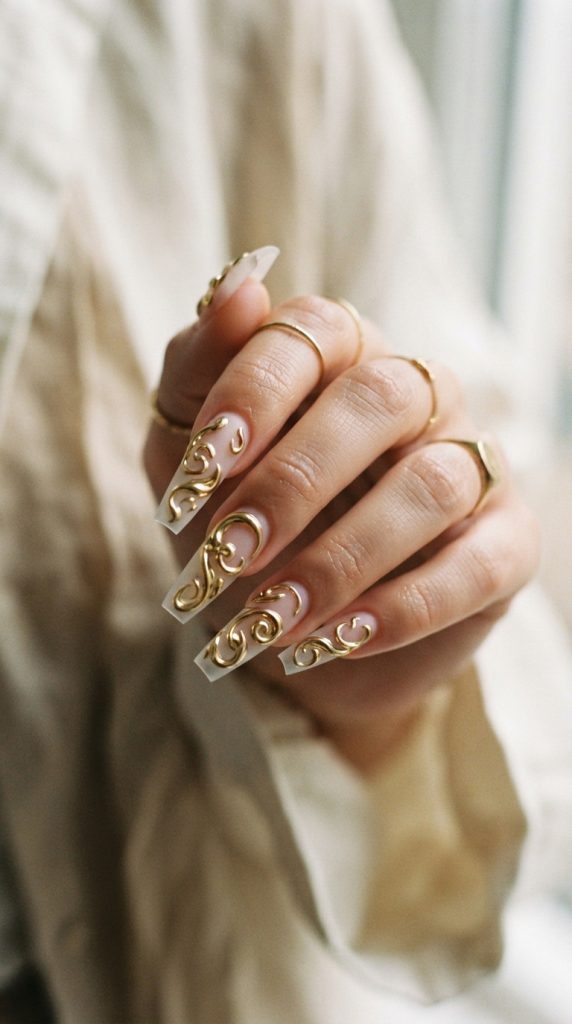
Textured 3D accent art brings an exciting tactile dimension to minimalist bases. Raised clear or chrome swirls curve around the extension, catching light in unique ways. This trend appeals to those who want artistic flair without overwhelming patterns.
The Aesthetics of Elevated Tactile Patterns
Three-dimensional gel work adds physical structure to flat color palettes. By using high-viscosity builder gels, technicians sculpt flowing organic curves that rise above the base coat. These raised lines capture ambient light along their edges, creating dynamic highlights as your hands move.
Core Step-by-Step Sculpting Method
Creating durable raised 3D lines requires hard gel formulations that hold their shape before curing.
- Step 1: Prepare and sculpt the acrylic foundation, filing the surface into a smooth, even taper.
- Step 2: Apply a clean nude or pale pastel gel polish base, followed by a non-wipe matte topcoat for visual contrast.
- Step 3: Load a fine detail brush with ultra-thick, non-leveling 3D gel paint.
- Step 4: Draw flowing, organic swirls across the surface, varying line pressure to create dynamic thick-to-thin transitions.
- Step 5: Flash-cure the raised gel lines with a handheld UV lamp immediately to prevent the structure from flattening.
- Step 6: Rub metallic chrome powder over the cured 3D lines, then seal the raised work carefully using a precision liner brush dipped in hard gel.
Versatile Methods for Everyday Styling
You can adjust the bold presence of 3D artwork by altering line thickness, color, and placement.
- Method 1: Paint clear, water-droplet style 3D swirls over a glossy neutral background for understated elegance.
- Method 2: Sculpt thick liquid-gold chrome swirls across two accent fingers for a piece of wearable art.
- Method 3: Combine pastel background colors with crisp white textured lines for a soft, modern aesthetic.
Professional Consultation and Maintenance
Ensure your technician smooths all sharp edges of 3D lines during the final curing phase so they do not snag on delicate clothing. Raised elements require care during daily routines to prevent chipping.
Clean around raised 3D lines using a soft nail brush during daily handwashing to remove soap residue. Avoid picking or pulling at raised gel lines, as this can breach protective topcoats and compromise the underlying acrylic structure.
7. Milky White Ombre for Soft Almond Nail Care
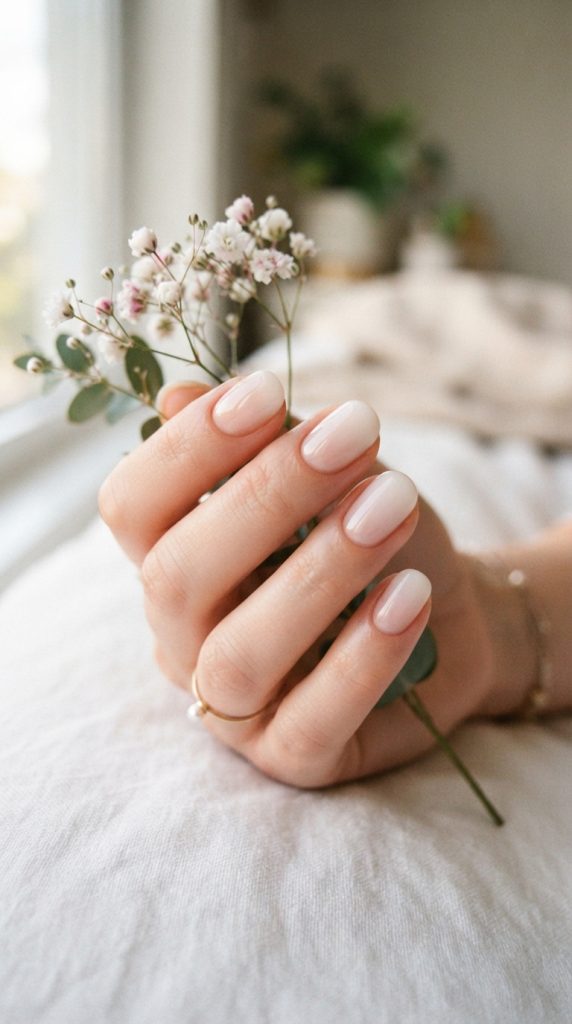
Milky white ombre offers a delicate, dreamy aesthetic that sits comfortably between nude and solid white. The color fades softly from a clear cuticle area into a creamy free edge. This soft gradient creates a subtle, elongated look that feels clean, fresh, and modern.
Gradients and Subtle Translucency
Milky white styles replace stark white color blocks with soft, semi-translucent shades. This subtle translucency allows natural skin tones to show near the cuticle, creating a smooth transition as your natural plate grows out. The almond shape enhances this effect by narrowing toward the white tip.
Core Step-by-Step Sculpting Method
Creating a smooth, seamless ombre gradient requires skilled brushwork during the acrylic application process.
- Step 1: Apply a clear form or tip to the prepped finger, establishing a clean extension length.
- Step 2: Place a medium bead of milky white acrylic near the free edge, fading it upward toward the stress zone with light brush strokes.
- Step 3: Place a bead of sheer cover pink acrylic near the cuticle area, blending it downward over the milky white transition point.
- Step 4: Check side profiles to ensure the apex remains properly placed over the blended color line.
- Step 5: Pinch the lateral walls gently while the acrylic sets to maintain a sleek shape.
- Step 6: File, buff, and seal the smooth gradient under a durable coat of high-gloss gel topcoat.
Versatile Methods for Everyday Styling
This soft canvas pairs exceptionally well with subtle accent details without losing its clean feel.
- Method 1: Scatter fine iridescent glitter over the ombre transition zone for a subtle touch of shimmer.
- Method 2: Place small gold foil flakes near the cuticle bed to add warmth to the milky white fade.
- Method 3: Coat the finished set with a translucent pearl topcoat for added luminous depth.
Professional Consultation and Maintenance
Ask your technician to use custom-blended semi-opaque powders to achieve a smooth, natural-looking fade. Milky white shades require careful upkeep to stay bright and clean over time.
Wash hands promptly after handling colorful foods or spices like turmeric to prevent surface staining. Apply a fresh layer of UV-blocking clear topcoat weekly at home to prevent yellowing caused by sunlight exposure. Keep your surrounding skin hydrated with cuticle oils to highlight the soft aesthetic of your set.
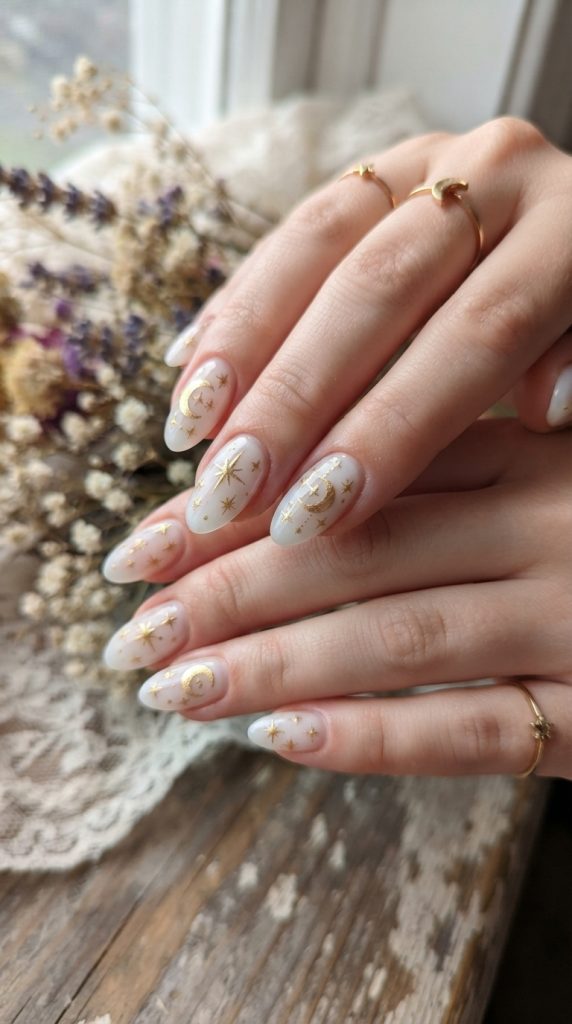
8. Celestial Gold Stars for Whimsical Nail Art Designs
Celestial themes bring magical charm to long extensions. Intricate gold starbursts, crescent moons, and constellation lines pop against neutral backdrops. The pointed tip of this shape naturally frames celestial elements like a wide night sky.
Compositional Framing on Curved Canvas
Celestial art benefits from strategic spacing across the length of the extension. Placing delicate line work along the central axis draws eyes toward the tip, accentuating finger length. Balancing star clusters with open space prevents intricate detail work from feeling busy.
Core Step-by-Step Sculpting Method
Painting precise celestial shapes requires fine brushes, steady control, and dense metallic gel paint.
- Step 1: Build a sleek acrylic base using sheer pink, milky white, or deep midnight blue shade options.
- Step 2: File and buff the extension until completely smooth, wiping away all fine dust particles.
- Step 3: Dip a micro-detail liner brush into high-pigment metallic gold painting gel.
- Step 4: Paint four-point starbursts by placing a central dot and flicking lines outward in cardinal directions.
- Step 5: Place tiny gold caviar beads or small reflective studs at the centers of major starbursts for added dimension.
- Step 6: Cure the detail work fully, then encapsulate everything under a smooth layer of clear builder gel and glossy topcoat.
Versatile Methods for Everyday Styling
Celestial designs can be scaled up or down to suit your personal style preferences.
- Method 1: Paint a single bold starburst on accent fingers for an understated look.
- Method 2: Scatter delicate gold foil stars across a soft milky pink background for a playful aesthetic.
- Method 3: Combine gold and silver celestial detailing over a dark navy base shade for a dramatic cosmic contrast.
Professional Consultation and Maintenance
Request encapsulated art if you prefer a completely smooth surface finish without raised studs. Encapsulation seals delicate foil and painted lines deep within clear gel, protecting them from everyday wear.
Avoid filing down the surface of your extensions at home, as this can break protective clear coats and scratch underneath detail work. If an external stud loses its seal, visit your technician for a quick gel touch-up. Apply daily cuticle oil to keep the surrounding tissue soft and clean.
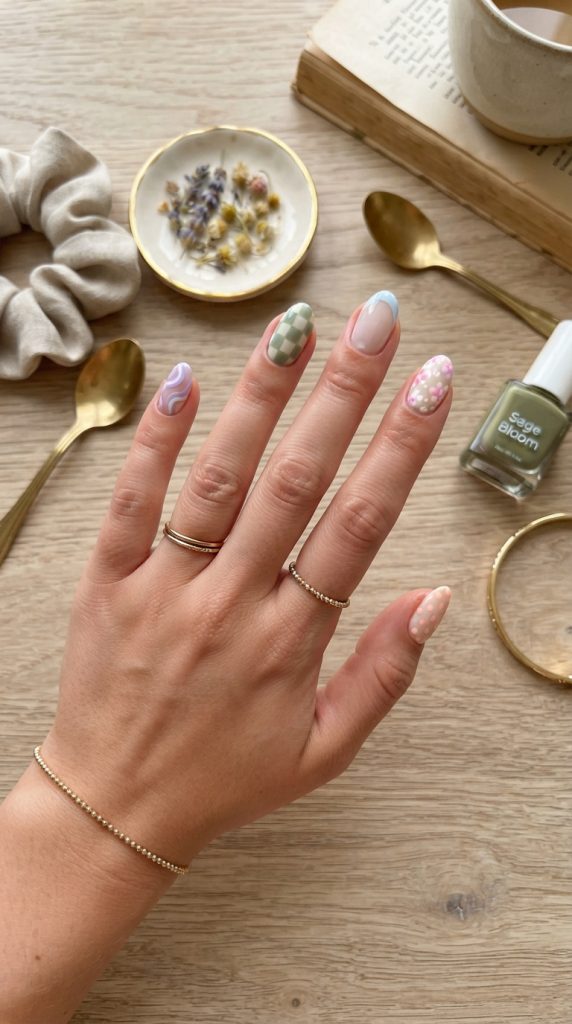
9. Pastel Mismatched Art for Playful Almond Nail Aesthetics
Mismatched pastel designs offer a fun, creative way to showcase multiple trends within a single set. Each finger features a unique pattern—such as swirls, checkerboards, or micro French tips. Soft pastel tones tie the entire look together into a cohesive, stylish result.
Harmonizing Diverse Patterns with Color Theory
The secret to a successful mismatched set lies in choosing a unified color palette. By picking three to four soft pastels with similar warmth or cool undertones, you can vary patterns across fingers while maintaining a clean, intentional look.
Core Step-by-Step Sculpting Method
Creating clean mismatched sets requires clear visual planning before applying any gel coats.
- Step 1: Sculpt extensions with a balanced taper and apply a uniform nude base shade across all ten fingers.
- Step 2: Select three to four coordinating pastel gel polishes, such as mint green, lavender, soft butter yellow, and baby blue.
- Step 3: Map out complementary patterns for each finger—assigning French tips to index fingers, swirls to middles, and accent dots to ring fingers.
- Step 4: Paint each pattern carefully using specialized detail tools, flash-curing between color applications to prevent bleeding.
- Step 5: Inspect overall hand symmetry to ensure art weight feels balanced across both hands.
- Step 6: Seal all ten fingers under a ultra-shiny clear gel topcoat to tie the distinct patterns into a finished set.
Versatile Methods for Everyday Styling
Combining different pattern styles keeps your manicure engaging and easy to adapt.
- Method 1: Alternate between solid pastel colors, delicate micro French tips, and abstract flowing lines across fingers.
- Method 2: Mix pastel aura center glows with tiny hand-painted floral accents on alternating fingers.
- Method 3: Combine pastel color-blocking with thin negative-space line work for a geometric aesthetic.
Professional Consultation and Maintenance
Work with your artist to choose pastel shades that complement your skin undertone. Multi-patterned sets benefit from consistent surface protection to keep detailed line work crisp over time.
Reapply a glossy clear topcoat every ten days to protect painted line work from dulling. Clean beneath free edges daily to keep visual lines sharp. Wear protective gloves when doing household chores to prevent chipping intricate details.
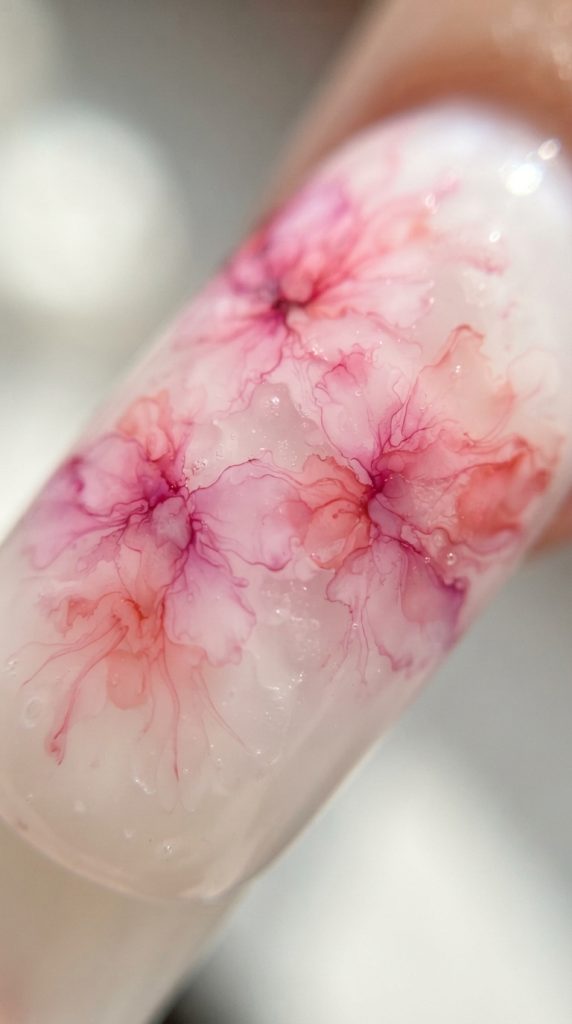
10. Smokey Floral Blooms for Romantic Nail Extensions
Smokey floral designs offer an ethereal, watercolor-like aesthetic. Blooming gel techniques allow pigments to bleed softly across the acrylic surface, creating delicate flower petals. The tapered tip mirrors the soft curve of natural petals for a romantic, artistic finish.
Watercolor Diffusion Mechanics
Blooming gels contain specialized solvents that keep gel polish fluid, allowing dropped pigments to spread outward in soft gradients. Controlling pigment diffusion requires precise timing to capture soft petal edges before colors blend entirely together.
Core Step-by-Step Sculpting Method
Creating beautiful watercolor blossoms relies on controlled blooming times and fast UV flash-curing.
- Step 1: Sculpt a thin, strong acrylic foundation, finishing with a milky white or pale pink base coat.
- Step 2: Apply a generous, even layer of clear blooming gel over the accent surface, leaving it uncured.
- Step 3: Dip a fine detail brush into concentrated gel polish and place dots where you want flower centers to begin.
- Step 4: Watch the pigment bleed outward into soft, translucent petal shapes over five to ten seconds.
- Step 5: Flash-cure immediately under a UV lamp the moment petals achieve your desired size and soft translucency.
- Step 6: Paint fine line details near central flower stamens, then seal everything under a crystal-clear topcoat layer.
Versatile Methods for Everyday Styling
Smokey blooms can be subtle or dramatic depending on your chosen color contrasts.
- Method 1: Create soft pink blooming petals over a milky white base for a light, romantic aesthetic.
- Method 2: Use deep plum or black blooming gel over a nude background for a moody floral look.
- Method 3: Add small leaf-gold foil accents to the centers of watercolor blossoms for a pop of warmth.
Professional Consultation and Maintenance
Confirm your technician uses professional-grade curing lamps, as thick blooming gel layers require high wattage to set fully. Properly cured blooming art remains durable beneath protective topcoats.
Keep surrounding skin thoroughly hydrated with natural oils to complement soft organic flower shapes. Schedule maintenance refills every three weeks to address weight redistribution as your extensions grow out.
2026 Trend Comparison Summary
| Design Style | Key Visual Feature | Skill Level Required | Ideal Occasion |
|---|---|---|---|
| Pearl Chrome | Iridescent mother-of-pearl sheen | Intermediate | Formal events, daily luxury |
| Micro French Tips | Ultra-thin crisp smile lines | High | Executive settings, minimal aesthetics |
| Velvet Cat-Eye | 3D dynamic magnetic depth | Advanced | Evening wear, autumn/winter styles |
| Aura Gradient | Soft central color bloom | Intermediate | Creative trends, casual chic |
| Cherry Red | Bold monochrome crimson | Beginner | Power dressing, night out |
| 3D Swirls | Sculpted tactile line work | Advanced | Fashion-forward statements |
| Milky Ombre | Soft white-to-nude gradient fade | Intermediate | Bridal events, subtle everyday wear |
| Celestial Stars | Gold starbursts & moons | High | Festivals, creative events |
| Mismatched Pastels | Multi-pattern pastel art | Advanced | Spring/summer, vacation wear |
| Smokey Blooms | Watercolor blooming petals | Advanced | Romantic gatherings, spring events |
Comprehensive Acrylic Prep and Care Routine
Keeping your acrylic set looking pristine requires daily maintenance and healthy routine habits. Following these core rules helps prevent lifting, breakage, and surface discoloration between salon visits.
Daily Care Best Practices
- Apply cold-pressed cuticle oil containing jojoba or vitamin E twice daily to keep natural plates and surrounding skin soft.
- Wear heavy-duty rubber gloves whenever washing dishes, handling household cleaners, or working in gardens.
- Avoid using your extensions as tools to pry open soda cans, lift box flaps, or peel sticky labels.
- Wash hands thoroughly after applying sunscreens, self-tanners, or hair dyes to prevent staining clear topcoats.
- Use a soft brush to clean beneath free edge tips during daily handwashing routines.
Salon Visit Timeline and Upkeep
Schedule refill appointments every two to three weeks without exception. As natural plates grow, the acrylic apex moves forward, shifting structural weight onto weak free edge areas and increasing breakage risk. Professional refills rebalance structural support while refreshing grown-out cuticle lines, keeping your manicures strong, comfortable, and beautifully on-trend throughout 2026.
Leave a Reply