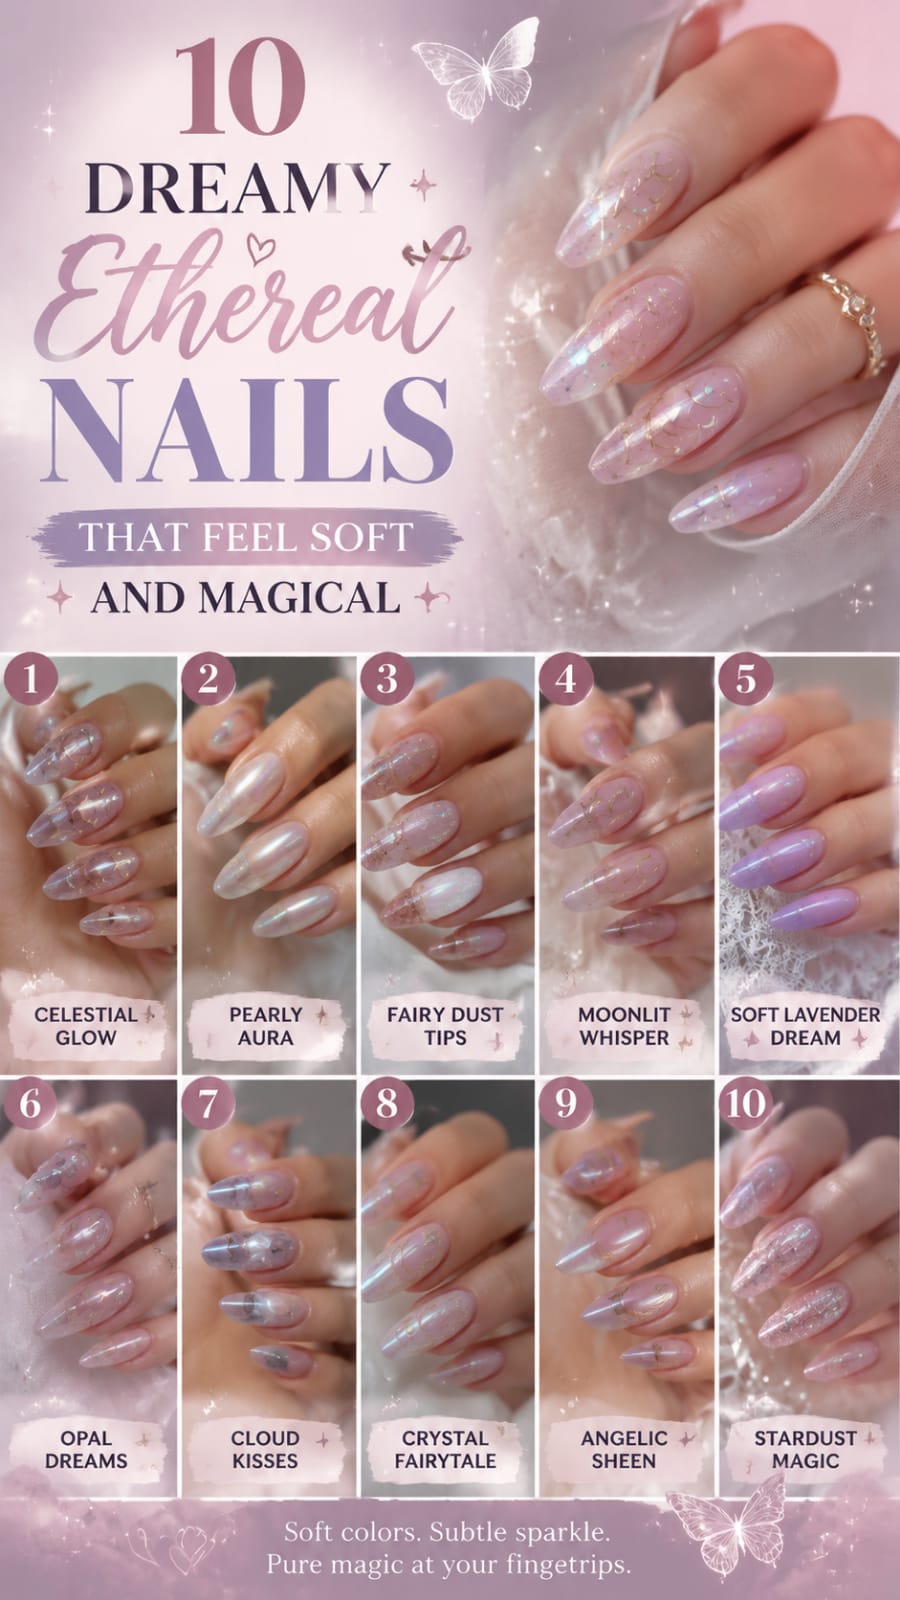
Imagine dipping your fingertips into a sunlit cloud or catching the subtle shimmer of a morning dewdrop. Ethereal style has taken over the beauty world with its soft aesthetic. It brings a magical mood right to your hands. Soft color of nails palettes, delicate chrome dust, and semi-sheer finishes transform simple manicures into wearable works of art.

Whether you love subtle everyday elegance or enchanting designs for special events, soft aesthetic manicures offer endless charm. They blend dreamy pastel tones with iridescent accents to create a effortless, floating look. These styles work beautifully on short natural shapes as well as sleek acrylic extensions.
Getting that airbrushed, glowing look on your hands is easier than you think. You can easily upgrade your routine by exploring sheer builder gels, pearl pigments, and celestial accents. Dive into these dreamy manicures to find your next magical look.
1. Cloud-Soft Opal Shimmer Nails
+-------------------------------------------------------+
|              OPAL SHIMMER LAYER MATRIX                |
+-------------------+-----------------------------------+
| Foundation        | Semi-sheer Milky White Gel Base   |
| Shimmer Layer     | Fine Fine-Grit Opal Dust          |
| Accent Element    | Hand-painted Wispy Cloud Strokes  |
| Top Seal          | High-Gloss Non-Wipe Gel Sealant   |
+-------------------+-----------------------------------+
Opal shimmer designs bring a glowing, dreamy atmosphere to your fingertips. This look uses translucent milky white bases mixed with micro-fine iridescent powders. The finish shifts color softly as light hits your hands from different angles. It feels like wearing tiny pieces of sea glass or smooth river pearls.
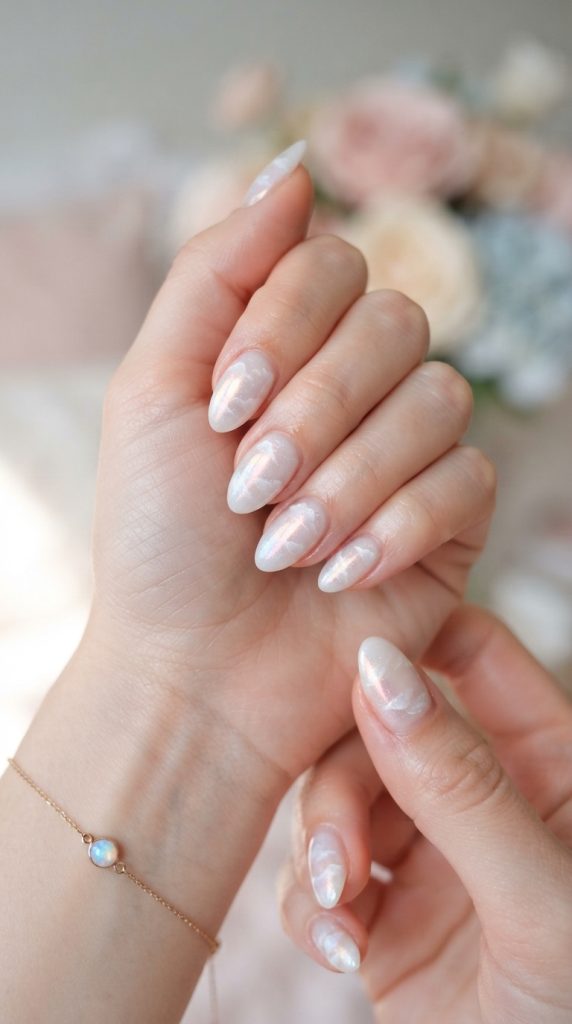
Methods to Achieve the Perfect Opal Glow
- Apply a thin base layer of translucent milky gel to build smooth depth.
- Buff fine opal powder onto the tacky layer using a soft sponge applicator.
- Layer an extra coat of semi-sheer pink polish to soften the metallic shine.
- Finish with a crystal glossy top coat to seal all shimmering particles cleanly.
Ways to Elevate Opal Art
- Mix pastel blue and light lavender tones beneath your sheer base coat.
- Add tiny hand-painted cloud motifs using thin white striping brushes.
- Inset delicate silver foil flakes into the wet gel layer for accent shine.
- Combine matte and glossy top coats across alternate fingers for dynamic texture.
Steps to Assemble This Soft Look
- Prep your natural nail surfaces by gently removing shine and applying primer.
- Paint your milky base coat evenly across all ten fingers.
- Cure your base under an LED lamp for sixty seconds completely.
- Apply iridescent opal powder smoothly using light sweeping motions.
- Seal the magical design with a top coat and cure again.
Practical Tips for Long-Lasting Wear
Keep your natural edges capped with gel polish to prevent early chipping. Apply daily cuticle oil to maintain a healthy, smooth skin boundary. Avoid using harsh household chemicals without protective gloves while wearing delicate finishes.
2. Iridescent Fairy Dust Sheer Nails
           *  .  *   .   *
         .  Fairy Dust  .
        *  Shimmer Glow  *
         .  *   .   *  .
  +-------------------------------+
  | Base: Soft Sheer Pink         |
  | Dust: Micro-Glitter Powder    |
  | Shimmer: Iridescent Chrome    |
  | Top Coat: Ultra-Glossy Gel    |
  +-------------------------------+
Fairy dust styles offer a playful take on classic sheer manicures. Tiny sparkles catch the light without looking heavy or crowded. Soft pink bases match natural skin tones, making your hands look longer and incredibly graceful.

Methods to Apply Micro Sparkles
- Dust ultra-fine iridescent glitter onto the wet tips of your fingers.
- Blend sparkles lightly toward the center to create a subtle ombre gradient.
- Use a fan brush to sweep away excess glitter particles before curing.
- Cap the sparkles under a generous layer of clear builder gel.
Ways to Enhance Fairy Sparkles
- Pair sheer rose bases with warm gold glitter for a soft sunlit effect.
- Add tiny starburst decals onto your ring finger for an extra accent.
- Keep the glitter light at the cuticle area for seamless regrowth.
- Layer clear holographic top coats over light pastel shades for quick art.
Steps for Flawless Application
- Trim and file your edges into a soft rounded or oval silhouette.
- Apply a sheer nude base shade to create a clean foundation.
- Sprinkle loose micro-glitter lightly onto the damp gel layer.
- Clean up any stray glitter from your side skin walls using rubbing alcohol.
- Secure everything under a high-shine clear gel coat for lasting wear.
Practical Tips for Everyday Care
Buff edges gently if glitter catches on delicate knit fabrics or clothing. Reapply a fresh clear coat after one week to refresh maximum shine. Hydrate your cuticles daily with jojoba oil to enhance natural shine.
3. Celestial Pearl Crescent Accent Nails
       [ Celestial Moon Base ]
                  |
  +---------------+---------------+
  |                               |
[Pearl Dust]              [Crescent Accents]
- Soft Chrome Powder      - Miniature Pearl Studs
- Velvet Polish Base      - Silver Star Decals
- Milky Overlay           - Micro-Bead Details
Celestial pearl designs combine historical elegance with modern starry art. Smooth pearl finishes create a classic backdrop, while delicate crescent moon accents bring a magical touch. It is a stunning look for dreamy occasions.

Methods to Master Pearl Finishes
- Rub white chrome powder over a cured non-wipe gel top coat carefully.
- Apply micro pearl studs along the base curve of your cuticle line.
- Use silver detailing gel to paint tiny crescent moons and stars.
- Blend soft grey accents behind pearl studs to create realistic shadows.
Ways to Customize Celestial Art
- Combine pearl finishes with dark navy accent fingers for night sky contrast.
- Place a single pearl stud at the center of each moon accent.
- Use magnetic velvet polish to add deep shifting dimension beneath chrome powder.
- Keep lines ultra-thin using specialized long-hair detailing brushes.
Steps to Build the Design
- Coat your surface with a soft cream base shade and cure thoroughly.
- Rub white pearl chrome powder across every surface until smooth and shiny.
- Dab a small drop of clear jewel glue near your cuticle edge.
- Place your crescent studs carefully into the glue using wax pencils.
- Encapsulate all raised studs with a thick gel top coat for protection.
Practical Tips for Pearl Hardware
Press hardware flat against the surface to avoid catching on long hair. Use strong gel glue instead of regular polish to lock heavy studs. Buff surrounding areas lightly before placing hardware to ensure strong adhesive bonds.
4. Ethereal Pastel Aura Flare Nails
+-------------------------------------------------------+
|                 AURA FLARE GRADIENT                   |
+-------------------+-----------------------------------+
| Outer Edge        | Clear Translucent Pink Base       |
| Core Center       | Soft Lilac Airbrushed Bloom       |
| Highlight Accent  | Crisp White Starburst Lines       |
| Outer Layer       | Glossy Sheer Overlay              |
+-------------------+-----------------------------------+
Aura flare art brings a soft, glowing color burst right to the center of your fingertips. The dreamy color gradient melts gently outward into clear edges. It creates an enchanting halo effect that feels modern and artistic.

Methods to Create Smooth Aura Blooms
- Spray soft lilac gel polish over a wet pink base using airbrushes.
- Blend colored gel blooms manually using round cosmetic sponges.
- Apply sheer builder gel over aura centers to smooth out color stepping.
- Highlight central bloom cores with pure white gel dots for added depth.
Ways to Mix Aura Colors
- Blend soft mint green centers into light pastel yellow outer borders.
- Paint sharp white star flare lines over dark aura centers for contrast.
- Add subtle pink chrome overlays to give color blooms an extra glow.
- Keep outer borders completely clear to create floating visual effects.
Steps to Craft the Gradient
- Apply your background shade and cure it completely under your lamp.
- Sponge your chosen aura color onto the center point of each finger.
- Diffuse the edges using light tapping motions until smooth and seamless.
- Paint delicate white star flares over the aura center using thin brushes.
- Seal the smooth surface under a non-wipe crystal clear top coat.
Practical Tips for Airbrush Styles
Clean airbrush stencils frequently to prevent dark color spatters on light bases. Use thin gel layers to prevent thick building along outer edge walls. Allow sponge layers to flash-cure briefly to keep colors bright and crisp.
5. Sheer Milk Glass Floral Drift Nails
              , . ,
           (   Flower  )
            ' - ' - '
  +---------------------------+
  | Base: Semi-Sheer White    |
  | Art: Pressed Flowers      |
  | Accent: Gold Leaf Flakes  |
  | Finish: Glassy Builder Gel|
  +---------------------------+
Milk glass floral styles capture the delicate beauty of dried blossoms floating in soft cream. The sheer finish creates a dreamy 3D depth. It feels like wearing real spring petals preserved in smooth glass.
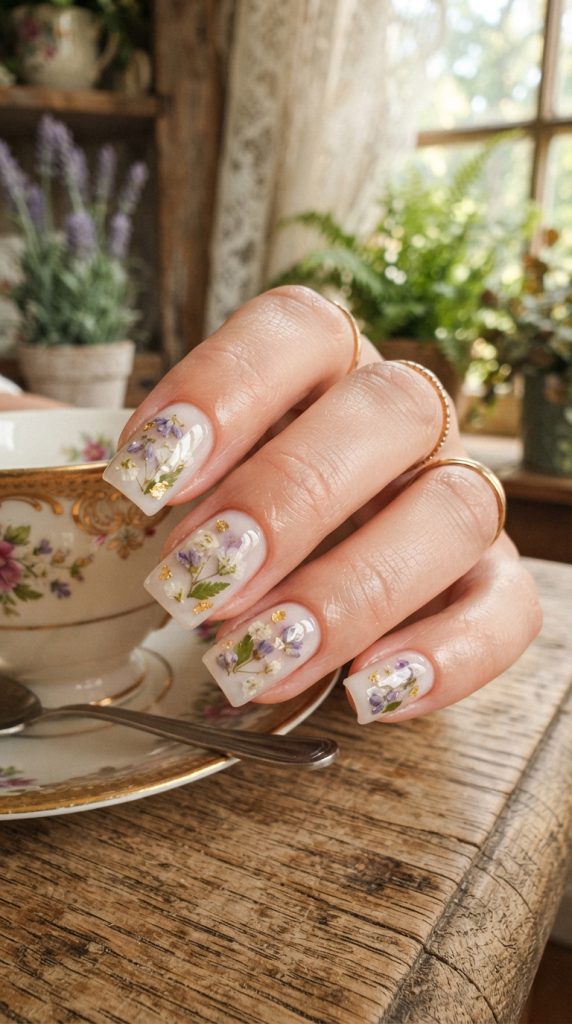
Methods to Encapsulate Dried Flowers
- Place real miniature dried flower petals onto wet clear gel layers.
- Press petals completely flat using silicone tool heads before curing completely.
- Layer semi-sheer milky gel directly over flowers to create smooth depth.
- Add tiny flakes of real gold leaf between floral clusters for shine.
Ways to Arrange Floral Accents
- Focus flower clusters exclusively along natural free-edge tips like french tips.
- Mix lavender petals with soft white baby breath blossoms for romantic looks.
- Use painted green leaf vines to connect separated floral groups smoothly.
- Keep thumb and index fingers plain to highlight detailed accent fingers.
Steps to Layer Floral Art
- Brush a coat of translucent milk-white gel across all surfaces.
- Lay down flattened dried flower petals using precise tweezers gently.
- Smooth down petal edges to ensure no sharp corners stick up.
- Float a generous layer of clear builder gel over the full art.
- Cure for ninety seconds and buff the surface smooth before final sealing.
Practical Tips for Real Flowers
Store dried flowers in dark boxes to prevent natural colors from fading early. Flatten thick flower stems gently between heavy books before placing them down. Ensure clear encapsulation layers cover flower edges completely to prevent snagging.
6. Velvet Iridescent Mermaid Scale Nails
       /\  /\  /\  /\
      /  \/  \/  \/  \
     ( Mermaid Scales  )
      \  /\  /\  /\  /
       \/  \/  \/  \/
  +-----------------------+
  | Base: Teal Magnetic   |
  | Texture: Velvet Shimmer|
  | Detail: 3D Gel Lines  |
  | Seal: Iridescent Top  |
  +-----------------------+
Velvet mermaid scale designs bring dynamic, shifting shimmer to alternative art lovers. Magnetic polish creates deep internal light movements. Soft 3D scale textures add a wonderful touch to hands.

Methods to Create Velvet Depth
- Move magnetic wands under uncured magnetic polish to pull shimmer upwards.
- Draw clear 3D scale lines over velvet bases using thick building gels.
- Dust soft mermaid chrome powder into raised line grooves for extra shine.
- Layer translucent teal polish over silver magnetic bases to customize shades.
Ways to Elevate Sea Textures
- Combine soft seafoam green velvet bases with lavender chrome scale highlights.
- Add tiny glass water drops over matte velvet surfaces for contrast.
- Place tiny flat seashell charms along accent edges near cuticle lines.
- Keep 3D texture lines minimal to retain overall soft aesthetic vibes.
Steps to Build Scale Shimmer
- Apply black or dark sheer base coats to boost magnetic intensity.
- Paint magnetic gel polish evenly over your chosen dark base coat.
- Hold your magnet close to edges for ten seconds to pull light.
- Cure immediately, then paint textured scale lines using clear gel.
- Dust light iridescent powder over 3D lines and seal with top coat.
Practical Tips for Magnetic Gel
Work on one finger at a time to prevent magnetic particles from settling down. Keep magnets away from electronic devices while working on delicate art setups. Use strong magnetic tools to achieve sharp light lines across all surfaces.
7. Soft Lavender Glass Butterfly Wing Nails
+-------------------------------------------------------+
|               BUTTERFLY WING STRUCTURE                |
+-------------------+-----------------------------------+
| Base Layer        | Glass Lavender Translucent Gel    |
| Line Work         | Crisp White Vein Line Details     |
| Shimmer Fill      | Fine Holographic Micro Powder     |
| Top Finish        | Smooth High-Gloss Armor Seal      |
+-------------------+-----------------------------------+
Lavender glass butterfly designs look like translucent, delicate insect wings. Translucent purple bases allow light to pass through your tips gracefully. Fine white vein patterns create a dreamy look for romantic style lovers.

Methods to Paint Butterfly Veins
- Use ultra-thin liner brushes to sketch delicate wing outlines in white.
- Shade inside wing segments using diluted sheer lavender gel mixtures.
- Dab holographic glitter into wing centers to create shifting light reflections.
- Outline wing tips with soft silver gel lines to accentuate gentle shapes.
Ways to Style Wing Art
- Paint half-wing patterns along side edges to create full butterflies when joined.
- Mix pastel blue and light violet translucent shades across wing segments.
- Add micro rhinestone drops along main wing borders for subtle sparkle.
- Finish wing surfaces with matte top coats to simulate soft butterfly dust.
Steps to Construct Wings
- Build sheer tips using clear extension forms and lavender glass gel.
- Paint main butterfly vein lines using smooth white gel polish carefully.
- Fill open wing panels with translucent colored gel using small brushes.
- Add micro glitter dust into wet color centers for inner sparkle.
- Apply a protective top coat over all detailed line work cleanly.
Practical Tips for Sheer Glass Extensions
Keep underlying natural free edges clean to preserve maximum glass clarity. Use clear builder gel forms during extension builds to avoid clouding tips. File glass edges smooth to prevent small splits along thin butterfly points.
8. Floating Metallic Rose Gold Ribbon Nails
      ~~~~~  ~~~~~  ~~~~~
    (  Floating Metallic  )
     (    Ribbon Waves   )
      ~~~~~  ~~~~~  ~~~~~
  +-------------------------+
  | Base: Sheer Nude Pink   |
  | Ribbon: 3D Chrome Gel   |
  | Color: Rose Gold Dust   |
  | Top Seal: Crystal Clear |
  +-------------------------+
Floating rose gold ribbon designs bring graceful metal accents to soft nude bases. Raised 3D waves wrap around your fingers like silk threads. This design beautifully balances modern metallic shine with delicate negative space.

Methods to Sculpt 3D Ribbons
- Extrude thick non-wipe sculpting gel onto surfaces using specialized detailers.
- Swirl gel lines diagonally across surfaces to simulate floating silk ribbons.
- Rub rose gold chrome powder directly onto cured 3D line ribbons.
- Keep background bases completely sheer and nude for floating visual balance.
Ways to Customize Metal Threads
- Combine rose gold metallic ribbons with tiny micro pearl accents alongside lines.
- Cross double ribbon lines over each other to create ribbon loop bow ties.
- Matte your nude background coat before painting shiny chrome 3D ribbons.
- Use pale champagne gold chrome powders for a softer overall warmth.
Steps to Apply Metallic Lines
- Paint your base using two thin coats of nude pink gel polish.
- Apply a completely matte top coat over the base and cure fully.
- Pipe raised 3D ribbon lines smoothly across surfaces using sculpting gel.
- Cure the raised gel lines for thirty seconds under your LED lamp.
- Rub rose gold chrome powder onto ribbons, sweeping excess dust away cleanly.
Practical Tips for Chrome Line Longevity
Seal 3D chrome lines twice using thin liner brushes to prevent powder peeling. Avoid touching uncured chrome surfaces with bare fingers to maintain maximum shine. Use dedicated non-wipe sculpting gels designed specifically to grip chrome powders.
9. Soft Mint Cloud-Dappled Quartz Nails
+-------------------------------------------------------+
|               QUARTZ VEINING MATRIX                   |
+-------------------+-----------------------------------+
| Foundation        | Semi-Sheer Pastel Mint Base       |
| Vein Layer        | Soft White Alcohol Ink Lines      |
| Shimmer Inlay     | Crushed Silver Foil Highlights    |
| Surface Polish    | Smooth Mirror Gel Overlay         |
+-------------------+-----------------------------------+
Mint quartz designs bring cool, soothing stone textures straight to your hands. Soft pastel mint washes blend effortlessly with translucent white quartz veins. It creates an organic, refreshing look that feels natural and magical.
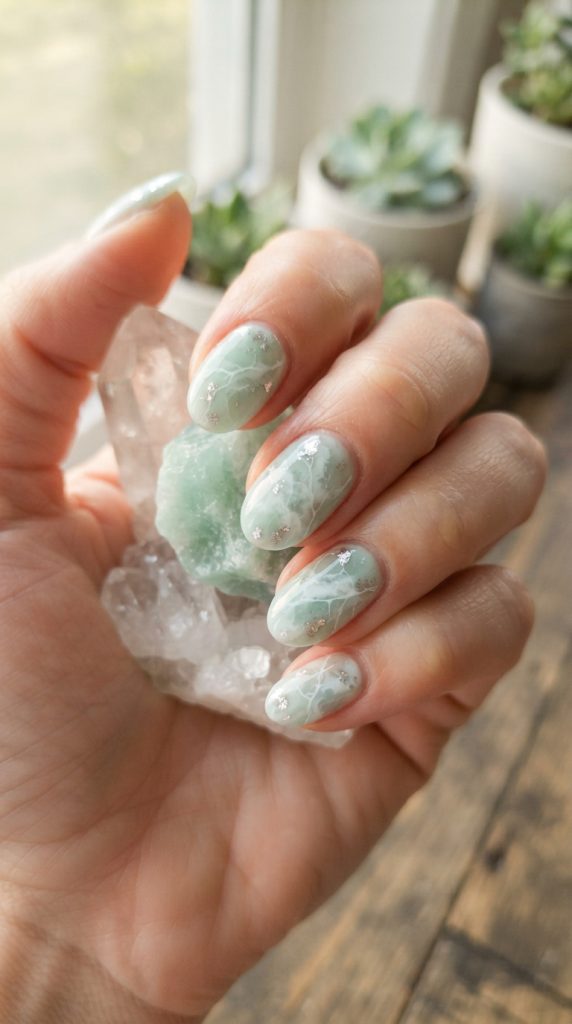
Methods to Marble Quartz Textures
- Dab small drops of white alcohol ink over wet pastel mint base coats.
- Disperse ink edges using fine brushes dampened with pure isopropyl alcohol.
- Draw delicate fracture lines across marble veins using crisp white paint.
- Layer semi-sheer mint gel over marble lines to sink patterns down deep.
Ways to Elevate Stone Styles
- Add small flecks of crushed silver foil into deep quartz fractures.
- Mix soft sage green and icy blue washes within single marble patterns.
- Keep stone patterns asymmetrical across fingers to mirror real quartz crystals.
- Use matte top coats over quartz art to create raw mineral finishes.
Steps to Craft Mineral Art
- Paint your surface with a soft, semi-sheer pastel mint background shade.
- Apply drops of white marble ink onto surfaces using delicate brushes.
- Fan out ink edges with alcohol until soft cloudy formations appear.
- Draw sharp white vein lines through cloudy areas using thin detailers.
- Seal everything beneath a thick layer of clear builder gel for smoothness.
Practical Tips for Alcohol Ink Art
Allow alcohol inks to air dry completely before applying gel top coats. Work in well-ventilated spaces when using alcohol ink solutions for art. Clean detailing brushes with fresh alcohol between color transitions for clear lines.
10. Shimmering Champagne Dewdrop Nails
        o   .   o   .
      ( Fresh Dewdrops  )
        .   o   .   o
  +-----------------------+
  | Base: Champagne Nude  |
  | Shimmer: Fine Chrome  |
  | Droplets: 3D Hard Gel |
  | Seal: Non-Wipe Polish |
  +-----------------------+
Champagne dewdrop styles capture the serene beauty of fresh rain resting on soft nude bases. Fine champagne shimmer provides a warm glow. Clear 3D water droplets add a fun, realistic touch.
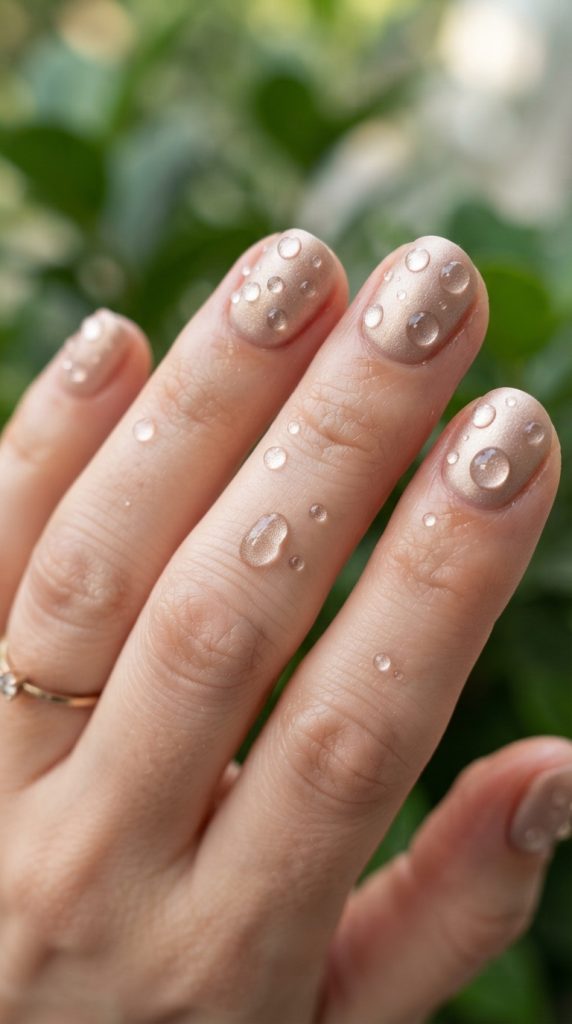
Methods to Create 3D Dewdrops
- Place round droplets of crystal-clear hard gel onto cured top coats.
- Flash-cure individual droplets immediately to lock high, rounded water beads.
- Vary droplet sizes across fingers to imitate natural morning rain distribution.
- Apply champagne chrome powder under dewdrops to magnify internal light reflections.
Ways to Enhance Rain Drops
- Combine clear dewdrops with matte nude background coats for striking contrast.
- Add tiny green leaf hand-paintings beneath clear dewdrops for spring vibes.
- Place single dewdrops over silver star decals for magical celestial art.
- Keep dewdrops concentrated near free tips like fresh morning mist droplets.
Steps to Finish the Look
- Apply two coats of champagne shimmer gel polish as your main background.
- Cure your base coat and seal it with a velvet-matte top coat completely.
- Wipe off any lingering tacky residue using fresh alcohol surface wipes.
- Dot clear hard gel onto your surface using rounded dotting tools.
- Cure under LED lamps for full two minutes to set water beads solid.
Practical Tips for 3D Droplets
Use high-viscosity hard gels that do not run before curing your droplets. Avoid wiping cured dewdrops directly with acetone to prevent surface clouding. Keep droplet dots slightly back from free edges to prevent catching during wear.
Alternative Nail Style Matrix
| Style Archetype | Primary Fabric / Pattern | Core Hardware Accent | Signature Footwear | Silhouette Key |
| Gothic Slip | Sheer lace, satin | Silver chain belts, chokers | Platform combat boots | Fluid with structural outer layering |
| Grunge Floral | Dark jewel-tone florals | Heavy belt buckles, safety pins | Lug-sole boots, platform Oxfords | Oversized, relaxed slouchiness |
| Punk Plaid | Bold tartan (Red/Blue/Purple) | Grommets, safety pins, chain links | Steel-toe boots, creepers | Sharp A-line with cinched waist |
| Victorian Gothic | High-neck lace, brocade | Cameo brooches, brass frames | Lace-up spool-heel boots | Structured high collar, corseted waist |
| Cyberpunk | Technical stretch, clear vinyl | Utility straps, carabiners | Chunky neon-laced sneakers | Form-fitting bodycon with utility accents |
| Pastel Goth | Pastel cotton (Lavender/Mint) | Dark plastic hardware, heart buckles | Platform Mary Janes, creepers | Playful pinafore overall over dark base |
| E-Girl | Striped mesh, black satin | Grommet belts, padlock chains | Mid-calf platform boots | Mini camisole over fitted mesh |
| Dark Fairycore | Earthy linen, raw lace | Leather cordage, bronze fittings | Suede lace-up ankle boots | Asymmetrical handkerchief hemline |
| Witchy Bohemian | Heavy velvet, sheer chiffon | Crescent moon chains, brass buckles | Pointed-toe suede ankle boots | Dramatic flowing bell sleeves, maxi length |
| Dark Academia | Tailored cotton, wool blends | Matte black leather harnesses | Chunky leather brogues, loafers | Collared shirt dress with structured tailoring |
Leave a Reply