
Introduction: The Timeless Allure of Short Volume
The bob haircut remains one of the most versatile and modern hair trends today. When combined with a professional blowout technique, this short cut achieves incredible movement and body. A great hair transformation can elevate your entire personal aesthetic effortlessly. It frames your face, highlights your cheekbones, and adds instant polished elegance. Many people believe achieving salon-quality results at home is impossible for short styles. However, mastering the right tools, products, and sectioning methods changes everything completely. A classic blowout gives your short strands fullness that lasts for days without flattening out. Whether your hair is naturally fine, thick, straight, or wavy, this style adapts beautifully.
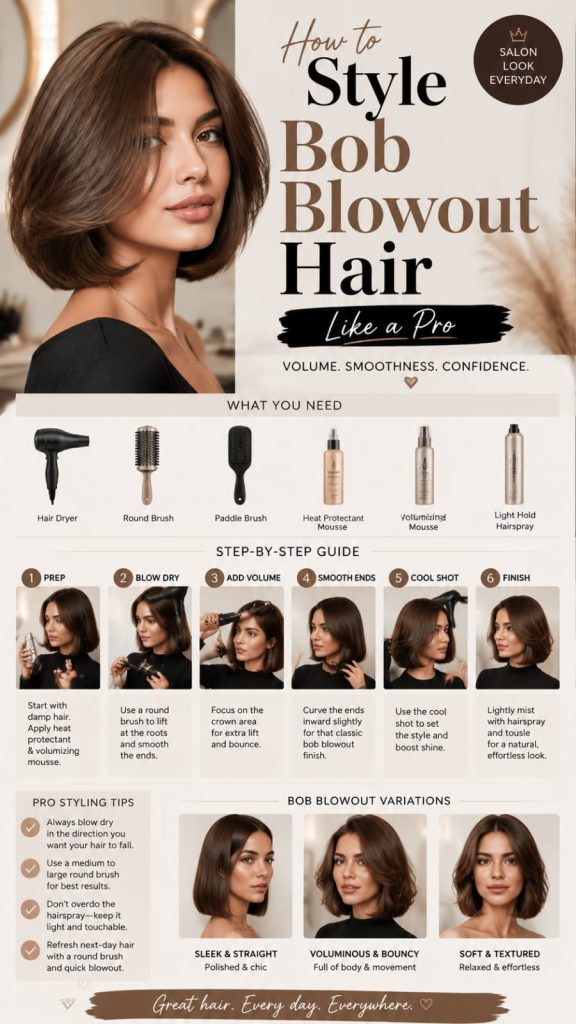
In this ultimate step-by-step guide, we will explore ten detailed styling secrets. You will discover precise heat settings, brush angles, product layering, and maintenance tips. Get ready to transform your daily routine into a seamless, rewarding styling experience. Short hair cuts require a different approach than long tresses because every section contributes directly to the visible silhouette. When hair is short, gravity behaves differently, allowing you to build structural root height that stays elevated all day long. Investing time into mastering your blow-dry technique allows you to skip flat irons that strip natural moisture away.
Furthermore, short styles dry much faster, making the learning curve rewarding and manageable for daily routines. Once you understand how airflow direction, brush tension, and cooling cycles work together, styling becomes intuitive. You will no longer struggle with flat crowns, unruly cowlicks, or awkward outward bends. Instead, you will enjoy a bouncy, polished look that looks fresh from the salon morning after morning.
1. Preparing Your Damp Hair Canvas
Essential pre-styling foundation steps for a smooth blowout finish
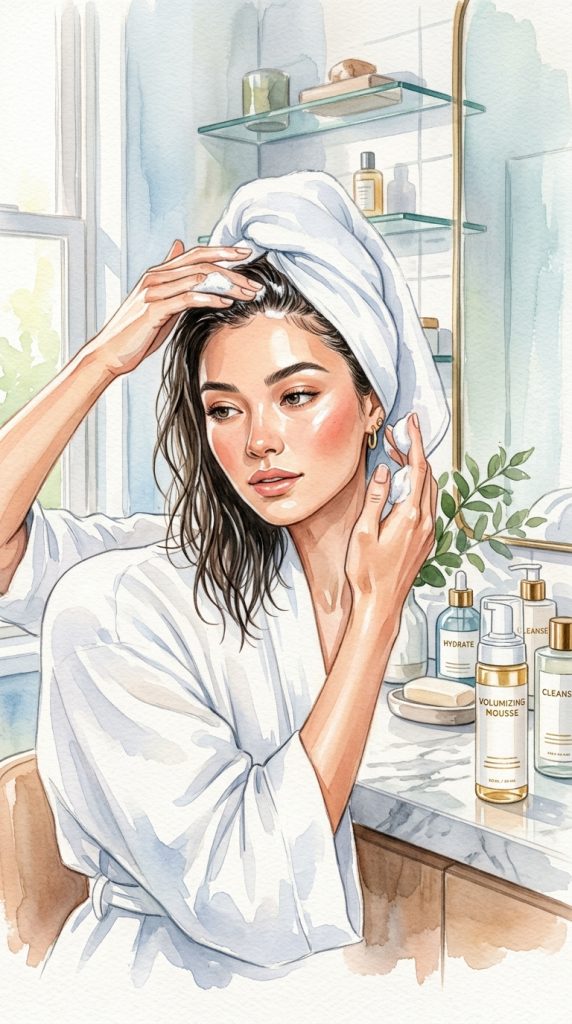
A flawless finish always begins in the shower long before heat tools touch your hair. Start by washing your strands with a lightweight volumizing shampoo and hydrating conditioner. Avoid applying heavy conditioning treatments near your roots to prevent unwanted flattening later. Gently towel-dry your hair using a soft microfiber towel instead of rough terrycloth. Microfiber reduces friction, preventing frizz and keeping your cuticles lying smooth and flat. Before introducing any heat, apply a high-quality thermal heat protectant evenly throughout your hair.
Heat protection builds an invisible shield, preserving internal moisture and preventing heat damage. Layering a lightweight styling mousse through damp roots provides necessary lift and flexible hold. This initial prep phase ensures your hair remains healthy, shiny, and pliable during styling. The canvas you prepare determines how easily your brush glides through sections later. If hair is too wet when you begin round-brushing, you risk stretching delicate strands and causing heat stress. Conversely, if strands are too dry, setting a smooth curved shape becomes nearly impossible without re-dampening.
In addition, choosing products formulated specifically for short haircuts prevents product buildup that weighs down roots. Volumizing mousses contain flexible polymers that expand as heat is applied, creating air pockets between individual strands. This produces the illusion of double the hair density without leaving a crunchy or sticky residue behind. Taking five extra minutes during pre-styling steps saves you fifteen minutes of corrective styling later.
Step-by-Step Prep Method for Maximum Volume
Method 1: Microfiber Moisture Removal
Gently press your microfiber towel against your scalp and length to absorb excess water. Never rub strands vigorously, as this roughs up the natural cuticle layer unnecessarily. Ensure your hair is about seventy percent dry before applying styling products. This optimal moisture level allows products to distribute evenly without becoming diluted by excess water droplets.
Method 2: Strategic Product Layering
Dispense a golf-ball-sized amount of volumizing mousse into your palm evenly. Distribute the mousse evenly from roots to mid-lengths using a wide-tooth comb carefully. Finish by misting a light heat protectant spray across every section of hair. Layering liquids before foams ensures heat protection reaches the innermost core of every strand.
Method 3: Pre-Drying and Root Lifting
Flip your head upside down while rough-drying with your dryer set to medium heat. Use your fingers to gently massage roots upward away from your scalp surface. Return upright once roots feel warm, dry, and noticeably lifted from the base. This directional pre-drying establishes baseline volume before round brushes introduce sleek shape.
Maintenance Ways to Protect Hair During Pre-Styling
Always select product formulas that suit your specific hair density and texture needs. Fine hair thrives with lightweight aerosol foams, while thick textures require rich cream-mousse hybrids. Clean your styling brushes regularly to prevent old product buildup from transferring back onto clean strands.
Use warm water rather than scalding hot water during your initial shampoo routine. Hot water strips essential scalp lipids, leaving cuticles raised and vulnerable to thermal stress. Applying a final cool rinse in the shower helps seal cuticles before towel-drying even begins.
2. Choosing the Right Round Brush Size
How small round brushes create the perfect bouncy blowout shape
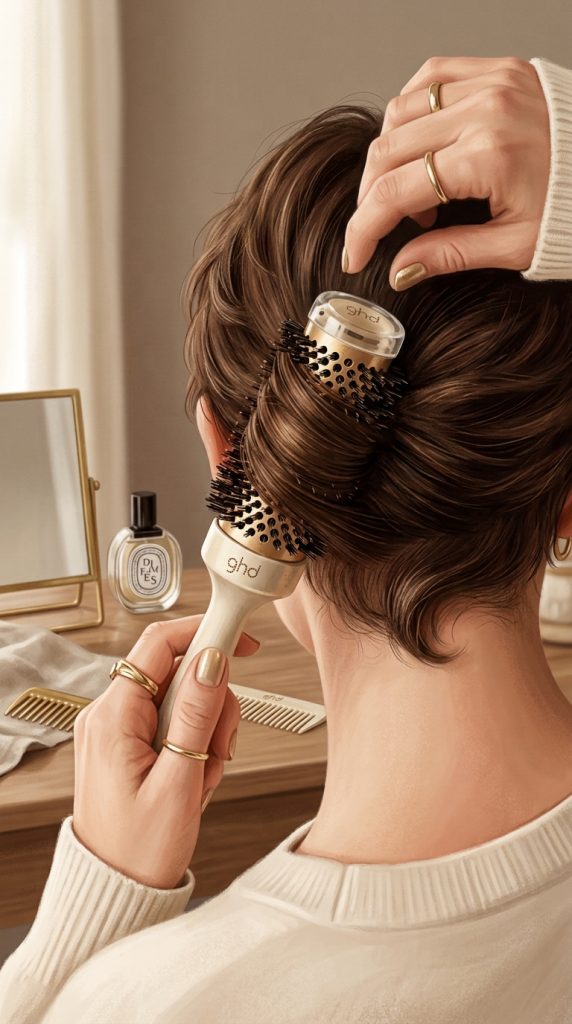
Selecting the correct brush barrel diameter is critical when working with short bob lengths. Large barrel brushes often fail to catch short layers near the nape of your neck. A smaller round ceramic or boar bristle brush gives you total control over every strand. Ceramic barrels heat up quickly, helping set curls and smooth out coarse texture effectively. Boar bristle brushes distribute natural scalp oils, resulting in unbelievable natural shine and smoothness. For classic short bob cuts, choose a barrel size between one and one-and-a-half inches wide.
This size allows you to wrap short hair completely around the barrel with ease. It provides enough tension to smooth roots while creating soft, touchable bend at ends. Investing in a quality brush transforms a tedious styling routine into an effortless process. The construction of your brush directly influences thermal distribution and tension consistency. Metal and ceramic cores act like heated rollers, shaping hair simultaneously from the inside out.
Meanwhile, boar bristles grip fine hairs tightly, pulling strands taut against the heated barrel for maximum smoothing power. If your brush barrel is too large, short hair simply slips off without bending, leaving you with a straight, shape-less result. Having two brush sizes on hand—a smaller one for the short nape and a slightly larger one for crown layers—gives you ultimate styling flexibility across every section of your head.
Steps to Select and Hold Your Styling Brush
Step 1: Measuring Your Ideal Barrel Size
Hold your short hair layers against different brush barrels to test wrapping capability. Ensure your hair wraps around the barrel at least one full turn comfortably. Select smaller barrels for short nape sections and slightly larger barrels for crown layers. This ensures every layer receives adequate tension regardless of its length.
Step 2: Mastering Grip and Hand Placement
Hold the brush handle firmly near the base for better wrist control and movement. Position your thumb near the top of the handle to rotate the brush smoothly. Practice rotating your wrist in both inward and outward directions while holding your dryer. A flexible grip prevents hand fatigue and allows fluid movement along curved head shapes.
Step 3: Creating Consistent Tension
Place the brush underneath a hair section right at the root line firmly. Pull upward and outward gently to create steady tension as heat is applied. Maintain this consistent tension all the way down to your hair ends smoothly. Steady tension aligns internal keratin bonds, smoothing frizz and instilling long-lasting shape memory.
Practical Care Methods for Styling Brushes
Remove trapped hair strands from brush bristles after every single styling session carefully. Trapped hair blocks airflow and reduces the brush’s ability to grip new sections cleanly. Wash your brush barrels monthly using mild shampoo and warm water to clear product buildup.
Store your styling brushes in a clean, dry drawer to protect delicate bristles from bending. Inspect bristle tips regularly to ensure rough edges do not scratch delicate scalp skin or snap fragile hair shafts during high-tension pulling.
3. Sectioning Your Bob for Precision
Sectioning secrets for a structured, long-lasting blowout look
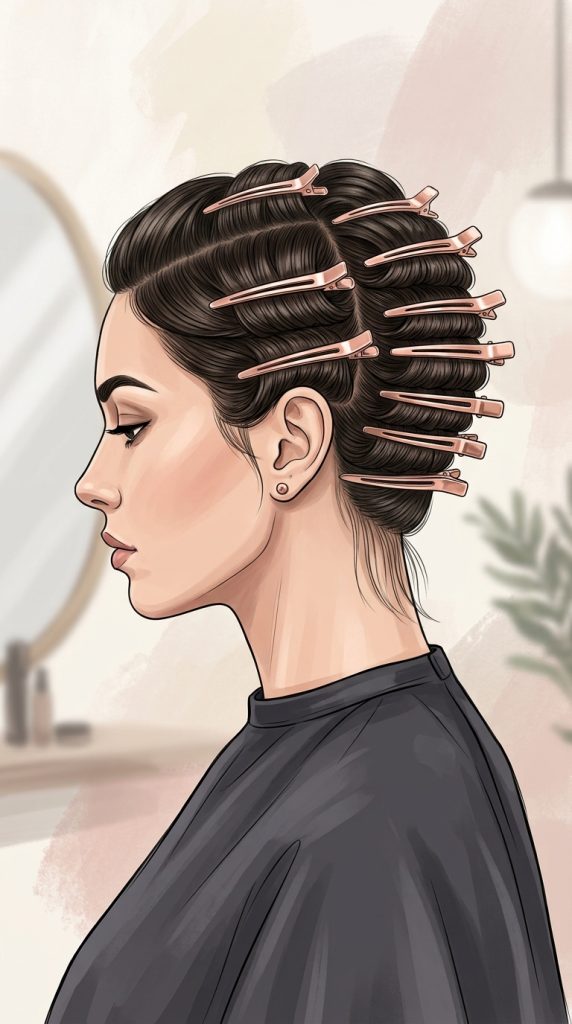
Working on unsectioned short hair leads to uneven drying, tangles, and frustrating heat damage. Dividing your bob into small, manageable sections ensures every strand receives equal attention. Precision sectioning gives your overall shape structure, balance, and consistent volume from all angles. Use professional duckbill clips that grip short strands firmly without leaving deep indentations. Divide your hair into three main horizontal tiers: nape, middle section, and top crown.
Start styling at the lowest nape section where hair is coarsest and shortest. Keeping unstyled sections pinned away prevents damp hair from touching finished, dry sections. This systematic approach saves time and yields clean, polished results every single time. Sectioning also allows you to control the direction of volume across different parts of your head. For instance, the nape requires smoothing down toward the neck, whereas the crown demands vertical lift straight toward the ceiling.
By isolating these areas, you apply heat strategically rather than blowing air wildly across the entire head. Working in sub-sections no wider than your brush barrel guarantees that heat penetrates evenly from root to tip. You will notice immediate improvements in smoothness, shine, and structural symmetry across your finished bob shape.
Guide to Precision Sectioning for Short Styles
Way 1: The Three-Tier Horizontal Grid
Use a rat-tail comb to carve a clean horizontal part across your lower nape. Clip the top two-thirds of your hair securely out of your working path. Create a second horizontal part right above your ears for your middle working tier. This systematic division prevents wet top layers from dampening already-styled bottom sections.
Way 2: Pinning the Crown Section
Gather the top crown area in a neat horseshoe-shaped section around your temple lines. Twist this top section lightly and secure it flat against your head top. Leave side panels loose so you can style them toward your face smoothly. The horseshoe section isolates the exact area responsible for over-all crown height.
Way 3: Isolating Face-Framing Layers
Separate front side layers from behind your ears to create dedicated framing sections. Clip these front pieces forward temporarily while you finish working on back panels. Style these front sections last so you can direct movement precisely around cheeks. Dedicated front sectioning ensures your face-framing angles fall symmetrically.
Ways to Keep Sections Clean and Organized
Use creaseless clips to secure delicate front layers without creating awkward bends or ridges. Keep your rat-tail comb handy during the entire styling process for clean parting line adjustments.
Work in small sub-sections no wider than the width of your round brush barrel. Re-clip sections that fall loose to maintain complete control over your styling space and prevent accidental re-drying of finished areas.
4. Master the Tension and Airflow Direction
Airflow secrets that unlock smooth blowout shine and root height
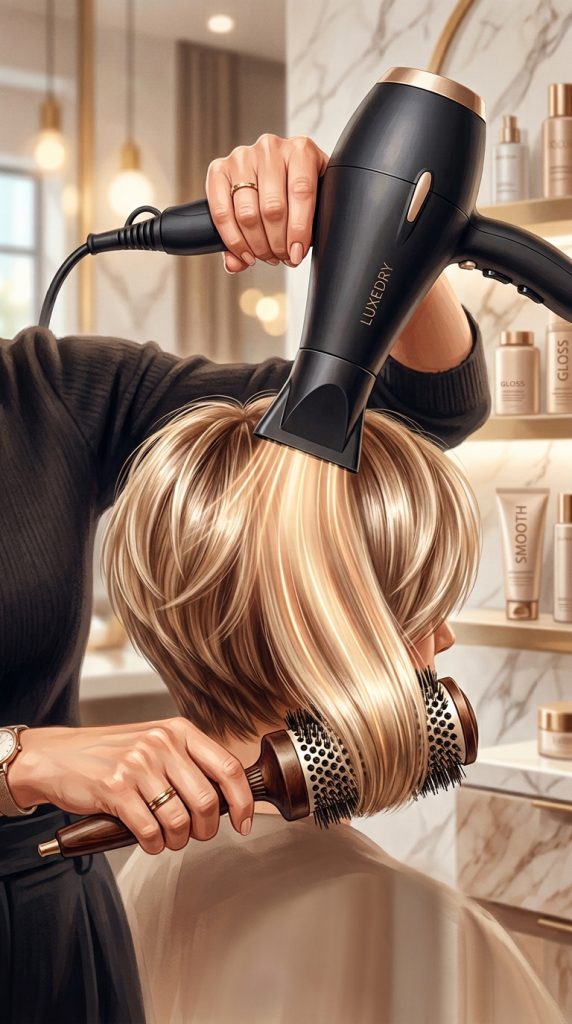
Heat alone will not smooth short hair cuticles or create lasting root elevation effectively. Combining strategic directional airflow with consistent brush tension creates that coveted salon-quality polish. Always point your hair dryer nozzle downward along the hair shaft toward your ends. Flowing air down the shaft flattens outer cuticles, sealing in moisture and boosting reflective shine. Pointing nozzles upward roughs up cuticles, causing instant frizz, flyaways, and dull surface texture.
Concentrator nozzles are non-negotiable accessories because they direct heat airflow into precise target paths. Pulling strands firmly upward away from your scalp creates structural volume at root bases. This technique locks in vertical lift that resists gravity throughout your busy day. The relationship between nozzle angle and brush motion defines the ultimate surface texture of your blowout.
When you maintain a steady two-inch distance between nozzle and hair, you harness maximum thermal energy without scorching delicate fibers. The concentrator nozzle compresses air, increasing its velocity so it flattens unruly flyaways instantly. When styling short bobs, directing airflow straight up at the roots for five seconds before smoothing down the length establishes an architectural foundation that supports the entire style.
Steps to Master Airflow and Tension Control
Step 1: Attaching the Concentrator Nozzle
Snap your concentrator nozzle onto your hair dryer barrel securely before turning heat on. Align the narrow nozzle opening so it sits parallel to your round brush surface. Maintain a two-inch distance between nozzle tip and hair strands to prevent singing. This alignment focuses heat directly along the working plane of your brush bristles.
Step 2: Lifting Roots with Directional Heat
Lift a hair section straight up using your round brush placed beneath roots. Direct warm airflow right at root undersides for three to five seconds continuously. Allow roots to cool briefly in elevated positions to lock in vertical structure. This upward pulling motion breaks natural growth direction patterns to create lasting height.
Step 3: Gliding Down to Ends with Downward Angle
Slowly roll your brush down toward ends while following closely with your dryer. Keep the airflow moving continuously down the top surface of your smoothed section. Rotate your brush gently at ends to curl edges under or outward gracefully. Smooth, continuous gliding prevents heat spots and ensures uniform shine across every strand.
Safety Methods to Prevent Heat Damage
Never press your dryer nozzle directly against hair strands or bristle surfaces tightly. Contact burning strips moisture rapidly and can melt synthetic brush bristles onto hair. Keep your dryer moving constantly to distribute heat evenly across every single hair strand.
Use medium heat settings for fine hair and reserve high heat for thick or coarse textures. Apply cooling airflow shots whenever sections feel hot to protect delicate hair cuticles from thermal fatigue.
5. Curling Ends Inward for Classic Volume
Traditional curved ends bring timeless elegance to your blowout style
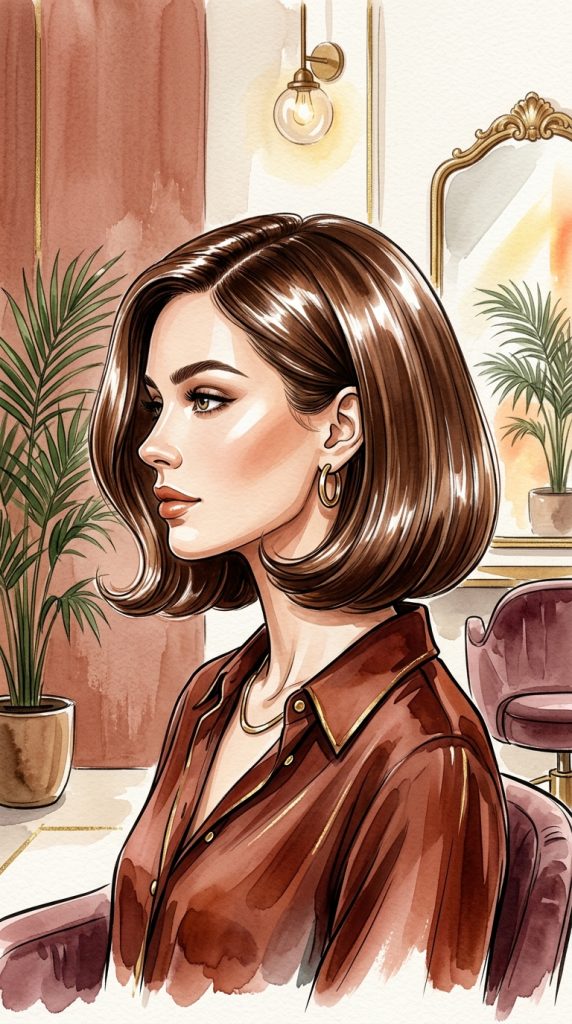
The classic bob shape features smooth, rounded ends that turn inward gracefully toward your neck. This timeless silhouette highlights your jawline while providing a clean, retro-chic aesthetic. Achieving this inward sweep requires proper brush placement near the very bottom of sections. As you approach the ends, roll your round brush inward toward your face completely. Apply steady warm airflow while continuously rotating the brush barrel with your wrist movements.
Allowing hair to cool wrapped around the barrel sets the curved shape permanently into place. This subtle inward bend prevents short layers from sticking out at awkward side angles. It creates a cohesive, rounded shape that looks incredibly full, soft, and sophisticated. The inward turn relies on resetting the hydrogen bonds at the absolute tips of your hair. Because the ends are often the oldest and driest part of the hair shaft, they require gentle polish rather than harsh over-drying.
Rotating your brush continuously as heat is applied wraps the tips smoothly around the barrel without creating harsh kinks. As you release the brush, roll it out gently following the curve of the curl rather than pulling straight down. This preserves the soft, cup-like shape that cradles your jawline and completes the classic silhouette.
Step-by-Step Method for Inward Curved Ends
Method 1: The Continuous Wrist Roll
Glide your round brush down your hair section until reaching the final three inches. Rotate your wrist inward toward your neck, wrapping ends around the brush barrel completely. Hold warm airflow on wrapped ends for five seconds to set internal structure. This continuous rotation ensures heat wraps fully around the curved tip.
Method 2: The Double-Pass Polishing Technique
Pass your dryer down the length once to smooth main surfaces thoroughly. On your second pass, focus entirely on rolling ends tightly around your barrel. Twirl the brush continuously as you release hair to create a smooth turn. Double passes ensure both the upper length and tip receive tailored heat attention.
Method 3: Underhand Nape Manipulation
Reach behind your neck and place your brush underneath short nape layers carefully. Roll nape ends upward and inward toward your scalp base firmly under heat. This keeps short back hair lying flat against your neck while turning softly. Proper nape styling prevents short back layers from flaring outward awkwardly.
Preservation Ways for Rounded Ends
Avoid touching newly curled ends while they are still warm to prevent straightening the curve. Mist ends lightly with a flexible-hold hairspray immediately after releasing from your brush.
Keep ends hydrated daily with a drop of lightweight hair oil or serum smoothed over tips. Avoid wearing heavy jackets with high, rigid collars that press repeatedly against curved nape ends during daily commutes.
6. Flipping Ends Outward for Modern Texture
How playful flipped ends add modern energy to your blowout look
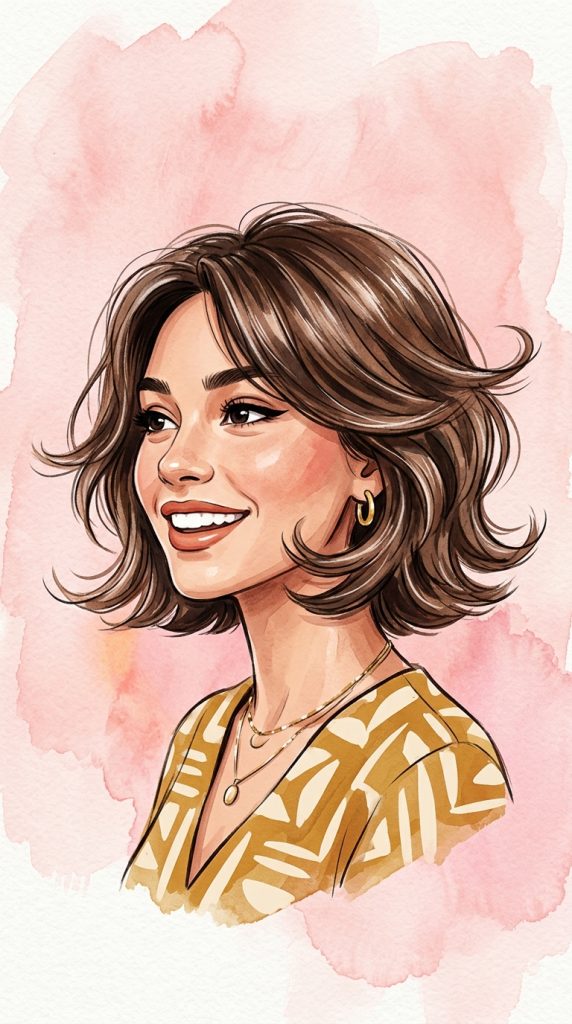
If you prefer an edgy, contemporary aesthetic, flipping your ends outward creates instant personality. Flipped ends offer a fun, retro-sixties twist that feels fresh, airy, and movement-focused. This styling variation works exceptionally well on blunt bobs and textured layer cuts alike. Instead of placing your brush underneath sections, place it on top of your hair. Roll your round brush outward away from your face while applying focused warm heat.
The outward flick widens your jawline visual, making it flattering for long face shapes. It breaks up rigid lines, giving your short haircut a playful, wind-swept energy. Combining smooth roots with flipped tips creates dynamic contrast that catches the eye. The outward flick redirects how light hits the ends of your hair, emphasizing crisp layers and textured razored tips.
By placing the brush on the upper surface of your section, you reverse the traditional curve, forcing the bottom two inches to flare upward. This technique requires strong tension near the bottom to prevent the flip from drooping into an undefined wave. When executed correctly, outward flipped ends add playful bounce that moves naturally as you walk, bringing energetic modern flair to short silhouettes.
Steps to Achieve Playful Flipped Outward Tips
Step 1: Top-Surface Brush Placement
Take a smoothed hair section and place your round brush on its top surface. Glide the brush down toward ends while holding your dryer above the section. Stop two inches above ends to prepare for your outward flick movement. Over-hand placement reverses the curvature direction completely.
Step 2: Outward Wrist Rotation
Rotate your wrist outward away from your neck, curving hair ends upward and outward. Direct warm airflow straight into the inner curve of your outward-turned ends. Hold heat on the flipped shape for five seconds to etch the turn into the hair shaft. Strong upward wrist rotation creates a defined, bouncy flare.
Step 3: Setting the Flick with Cool Air
Press your dryer’s cool shot button while keeping ends wrapped outward tightly. Hold cool airflow over flipped ends for five to ten seconds completely. Unravel the brush gently downward to reveal a crisp, bouncy flipped tip shape. Cold air sets the spring-like memory of the outward turn permanently.
Methods to Keep Flipped Tips Defined
Apply a pea-sized amount of styling wax or texturizing pomade to your fingertips for clean definition. Pinch individual flipped ends lightly to separate strands and emphasize playful outer flicks.
Avoid using heavy creams that weigh down tips and cause flips to droop over time. Re-flip stray sections during the day using your fingers and light hairspray mists to maintain crisp outer flick angles.
7. The Cool Shot Button Secret
Why temperature switching locks in your voluminous blowout shape
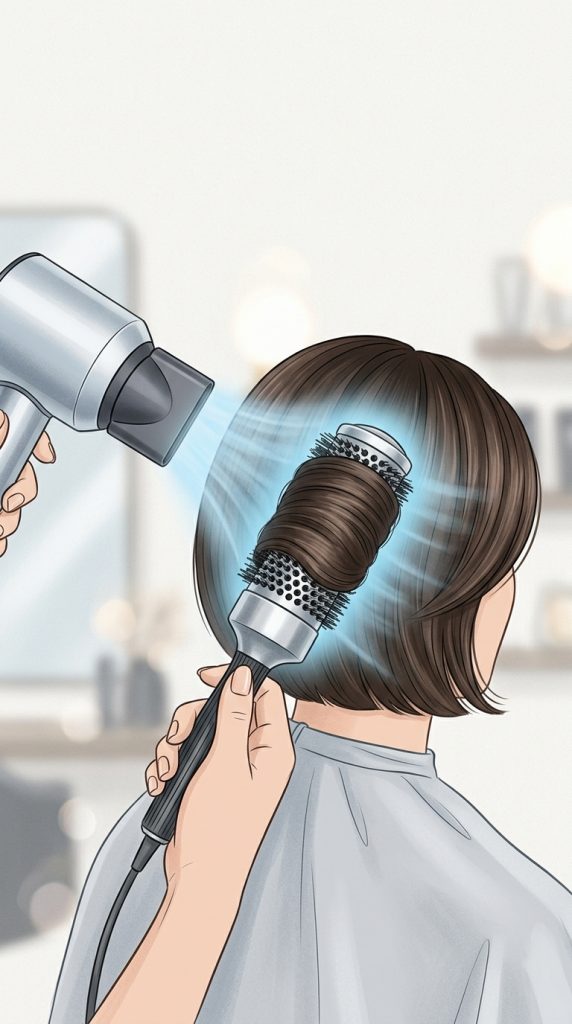
The cool shot button on your hair dryer is your ultimate secret weapon for style longevity. Heat softens natural hydrogen bonds within hair strands, allowing you to reshape them easily. However, cold air rapidly hardens those bonds back up, locking your new shape into place. Skipping the cooling step causes short hair to lose shape and flatten within hours. Once a section is completely dry and warm, hit it with cold air immediately.
Keep hair wrapped around your round brush barrel while applying cold airflow thoroughly. This simple temperature transition creates incredible bounce, elastic memory, and long-lasting hold. It also seals cuticles tightly, maximizing shine while repelling environmental humidity effectively. Think of heat as the tool that molds the clay, and cold air as the kiln that freezes it solid.
If you remove the brush while hair is still warm, gravity pulls the warm, pliable strands down instantly, stretching out the curve you just worked hard to create. Taking ten extra seconds per section to blast cool air ensures that when you drop the strand from the brush, the bounce remains fixed. This single habit bridges the gap between home styling that lasts four hours and salon work that lasts three days.
Guide to Using Cool Air for Shape Retention
Way 1: The Barrel-Wrapped Lock Method
Finish smoothing a section with warm heat until hair feels completely dry throughout. Keep hair wrapped firmly around your brush barrel without moving your wrist position. Engage your cool shot button and blow cold air over wrapped hair completely. This locks the curve while strands are in their ideal structural form.
Way 2: Pin Curl Setting Technique
Roll a freshly heated hair section around your fingers to form a neat ringlet. Secure the rolled ringlet against your scalp using a smooth metal single-prong clip. Blast pinned curls with cold air, leaving them pinned while styling remaining sections. Pinning allows hair to cool completely while freeing your hands to style other areas.
Way 3: Crown Volume Cooling Pass
Lift your top crown section straight upward over your head using your brush. Apply warm heat at root undersides, followed immediately by a ten-second cool blast. Release the crown section backward gently to reveal elevated, gravity-defying root height. Cool air at the base creates a rigid structural foundation that supports top layers.
Ways to Prevent Cooling Errors
Ensure hair is one hundred percent dry before hitting it with cold airflow passes. Cold air applied to damp hair locks in unwanted frizz rather than sleek smoothness.
Hold cold airflow on each section for at least ten full seconds without rushing. Avoid pulling brush barrels out forcefully while applying cold air, as friction can disrupt the setting process.
8. Creating Face-Framing Curtain Layers
Framing your features with sweeping curtain curves and blowout volume
Face-framing layers define your haircut and draw attention directly to your eyes and cheekbones. Styling front curtain sections away from your face creates an open, flattering visual effect. This technique softens strong jawlines and adds effortless, breezy movement to short bobs. To create sweeping curtain layers, roll front strands backward away from your cheekbones. Place your round brush behind front sections and direct warm airflow forward then back.
As you release the brush, twirl it backward in a diagonal motion smoothly. This movement creates a soft, wing-like wave that cascades delicately around your face sides. It integrates your front layers seamlessly into the rest of your styled short haircut. Curtain layers act as the focal point of your entire haircut because they directly border your features.
Directing airflow and brush rotation backward opens up your face, preventing short layers from falling forward into your eyes throughout the day. By pulling the brush diagonally toward the back of your crown as you dry, you build a sweeping trajectory that looks organic and soft. When paired with root lift at the part line, curtain layers give short bobs an ultra-glamorous, red-carpet appeal.

Steps to Style Face-Framing Front Sections
Step 1: Carving the Center or Side Part
Establish your preferred part line cleanly using a rat-tail comb before styling. Isolate a two-inch wide panel on either side of your part line forward. Clip back remaining side sections so you can focus entirely on front strands. Clean parting lines ensure curtain waves branch symmetrically from the center or side.
Step 2: Diagonal Backward Roll Technique
Place your round brush vertically behind one front section near root bases. Direct warm airflow at roots while rolling the brush backward away from your face. Pull the brush diagonally toward the back of your head as heat applies. Diagonal pulling directs the wave trajectory seamlessly toward your side layers.
Step 3: Cooling and Cascading Release
Apply cold air to the backward-wrapped front layer for five to ten seconds. Twirl your brush out of strands gently, allowing the curtain wave to fall naturally. Finger-comb strands backward lightly to open up your cheekbone area beautifully. Twirling the brush out preserves the spiral-like wing shape of the front curtain.
Maintenance Methods for Curtain Layers
Keep front layers free of heavy facial creams or oils that transfer onto hair strands easily. Pin curtain layers back loosely with silk clips while applying daily makeup routines.
Spray a light mist of dry texture spray through front roots for added grip and separation. Avoid tucking freshly styled front layers behind ears while they are still warm to prevent denting the wave.
9. Extending Style Longevity for Days
How to preserve your flawless shape overnight and through busy mornings
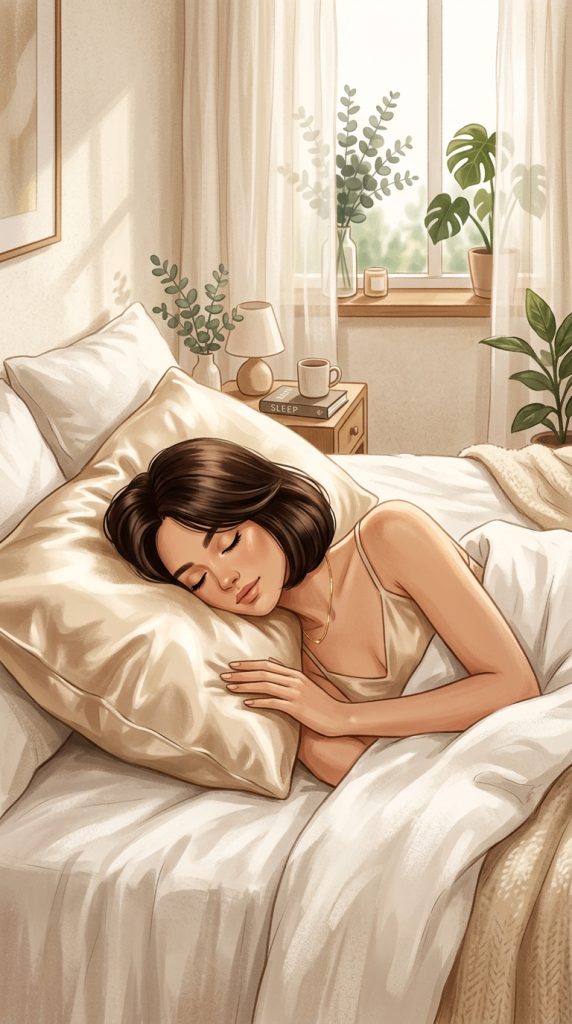
A professional-looking style takes time, so making it last for several days is ideal. Short hair flattened during sleep can look creased, messy, and uneven by morning. Protecting your volume overnight requires smart sleep habits and low-friction hair accessories. Swap traditional cotton pillowcases for high-grade silk or satin pillowcase options immediately. Silk reduces friction dramatically, preventing morning bedhead, tangles, and frizz production overnight.
Using dry shampoo strategically on night one absorbs natural scalp oils while you sleep. In the morning, revive flattened sections with quick brush passes and dry texture mists. This proactive care routine keeps your short bob looking fresh for up to three days. Maintaining short hair overnight requires a different strategy than long hair, which can be tied into a high topknot.
Because short layers cannot reach a top ponytail, loose wrapping or silk bonnets are essential to keep layers lying flat without crushing root lift. When you apply dry shampoo before going to sleep, the powder sits on the scalp, neutralizing oils as they are secreted throughout the night. By morning, your roots remain light, airy, and full of volume, requiring minimal heat touch-ups.
Overnight Protection and Morning Refresh Steps
Method 1: The Silk Bonnet or Pillowcase Strategy
Sleep on a smooth silk pillowcase to eliminate friction against short hair strands. Alternatively, wrap your head loosely in a silk scarf to keep layers lying flat. Avoid tight elastic headbands that leave deep indents across your styled crown layers. Low friction preserves the smooth cuticle alignment created during your blowout.
Method 2: Proactive Nighttime Dry Shampooing
Spray translucent dry shampoo directly into root sections before going to bed. Do not rub product in; allow it to sit on roots overnight naturally. Your natural tossing and turning blends the powder while absorbing overnight oil production. This proactive absorption prevents oil from saturating roots and flattening your volume overnight.
Method 3: Morning Volume Revival Routine
Flip your head upside down in the morning and shake roots gently with fingers. Target flat crown areas with a quick pass of your round brush and warm dryer. Finish with a light mist of texturizing spray to restore airy root lift. Spot-drying flat sections takes under two minutes and revives overall fullness.
Ways to Avoid Style Ruin Factors
Avoid taking long, hot showers without wearing a high-quality, terrycloth-lined waterproof shower cap. Steam from hot showers reintroduces ambient humidity, causing smooth strands to frizz up rapidly.
Keep hands out of your hair during the day to prevent natural skin oils from transferring to roots. Avoid applying heavy liquid oils near scalp areas when refreshing mid-lengths and ends.
10. Troubleshooting Common Styling Mistakes
Quick solutions for frizz, flat roots, and stubborn cowlicks during styling
Even experienced home stylists encounter common issues like flat roots, surface frizz, or stubborn cowlicks. Understanding how to correct styling mistakes quickly saves time and prevents unnecessary frustration. Frizz usually occurs when hair is dried without enough tension or heat protection. To fix surface frizz, apply a drop of lightweight hair serum onto palms and smooth downward gently. Flat roots happen when products are too heavy or roots are dried without upward lift.
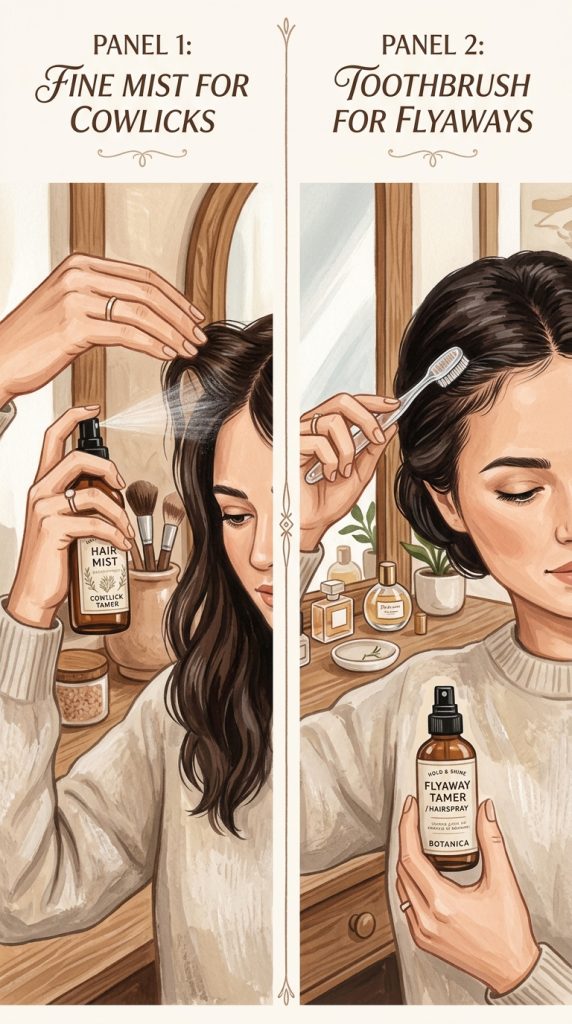
Revive flat areas by lifting roots upward and applying a warm air shot directly beneath. Stubborn cowlicks require immediate wet re-drying using firm brush control right at hair bases. With these quick fixes, you can rescue any styling session and achieve success. Cowlicks are caused by hair follicles growing in localized circular patterns that resist standard styling directions.
Trying to tame a dry cowlick with heat usually fails and damages the strand. By re-dampening the specific area with a water spray bottle, you reset the hydrogen bonds entirely. Brushing the cowlick left, then right, then straight down under tension forces the growth pattern to neutralize, laying flat against your scalp seamlessly before you style the rest of your section.
Step-by-Step Fixes for Styling Dilemmas
Step 1: Eradicating Frizz and Flyaways
Rub a pea-sized amount of lightweight smoothing cream between your palms completely. Gently glide palms over the top surface of frizzy sections without pressing down firmly. Use a clean toothbrush misted with hairspray to tame stubborn hairline flyaways carefully. Micro-application tames surface stray hairs without flattening underlying root volume.
Step 2: Rescuing Flat Crown Roots
Isolate flat crown sections and mist roots lightly with texturizing spray or water. Insert a velcro roller at root bases, pulling hair straight up firmly. Apply warm heat for ten seconds, let cool, and remove roller for instant height. Velcro rollers offer quick structural lift for flat areas without re-washing your entire head.
Step 3: Taming Persistent Nape Cowlicks
Re-wet stubborn cowlick roots completely using a fine water spray bottle mist. Hold strands down firmly against scalp using a flat paddle brush surface. Blow warm air directly over cowlicks while brushing left then right repeatedly. Dual-directional brushing breaks natural follicle resistance, forcing hair to lay flat.
Preventive Methods for Flawless Styling
Always evaluate your natural hair texture before selecting styling products and heat settings. Avoid using too much heavy styling paste that weighs down short hair strands.
Check your dryer filter monthly to maintain proper airflow power and temperature safety. Practice your brush techniques with heat turned off to build muscle memory safely without risking heat damage.
Complete Tools & Product Selection Guide
Essential Equipment for Styling Short Hair
Achieving professional results requires investing in quality styling tools designed specifically for short lengths. Look for hair dryers equipped with ionic technology and powerful wattage performance. Ionic dryers break down water droplets quickly, reducing heat exposure and overall drying time. Select round ceramic brushes with barrel diameters ranging between one and one-and-a-half inches. Ensure your duckbill sectioning clips feature strong springs that hold short layers securely without slipping.
A rat-tail comb is essential for creating crisp parts and isolating small sub-sections. Having the right equipment transforms your daily styling routine into a seamless, enjoyable experience. The choice between ceramic and boar bristle brushes comes down to your primary styling goal. If your main challenge is smoothing coarse, unruly waves, natural boar bristles provide superior tension and scalp oil distribution.
If your hair is fine and lacks volume, ceramic barrels heat up like a curling iron, imparting bounce, elasticity, and shape memory quickly. High-wattage dryers equipped with multiple heat and speed settings allow you to customize temperature to your specific hair density, preventing accidental thermal damage while maximizing efficiency.
Layering Products for Flexible Hold and Shine
Product application order is just as important as choosing the right formulas for your haircut. Always apply lightweight liquid heat protectants first onto clean, damp hair strands. Follow with a volumizing mousse or root-lifting spray concentrated near root bases. Avoid applying rich cream products near scalp areas to prevent premature oiliness and weight.
Once your style is dry, finish with flexible-hold hairsprays or texturizing mists that allow natural movement. Use nourishing hair serums sparingly on ends to add mirror-like reflective shine. Strategic product layering guarantees your voluminous shape stays intact all day long. Think of product application as building a house: heat protectant is the foundation, mousse is the framing, and texturizing spray is the weather-proof sealant.
When you layer products correctly, each formula performs its specific job without interfering with others. Avoid heavy silicone serums on damp hair before drying, as oil can heat up on the hair shaft, cooking strands rather than styling them gently. Stick to water-based prep products on damp hair, saving dry oils and finishing serums for dry ends as the final touch.
Conclusion: Embrace Your Voluminous Style
Mastering a salon-quality look for your short haircut is entirely within your reach. By following these ten detailed steps, you can achieve incredible body, shine, and shape at home. Remember that practice builds confidence, muscle memory, and speed over time. Experiment with inward turns, flipped tips, and curtain layers to find your personal signature look.
Invest in quality tools, protect your strands from heat, and enjoy your hair transformation. Your short bob is a versatile canvas ready for stunning, head-turning volume every single day! Developing a routine that works for your unique lifestyle transforms hair care from a chore into a rewarding self-care ritual.
As you become familiar with hand placements and airflow angles, styling your bob will take under fifteen minutes each morning. Embrace the natural movement of your haircut, adjust techniques for changing weather seasons, and walk out the door every day with the confidence that comes from a flawless, professional-looking style.
Leave a Reply