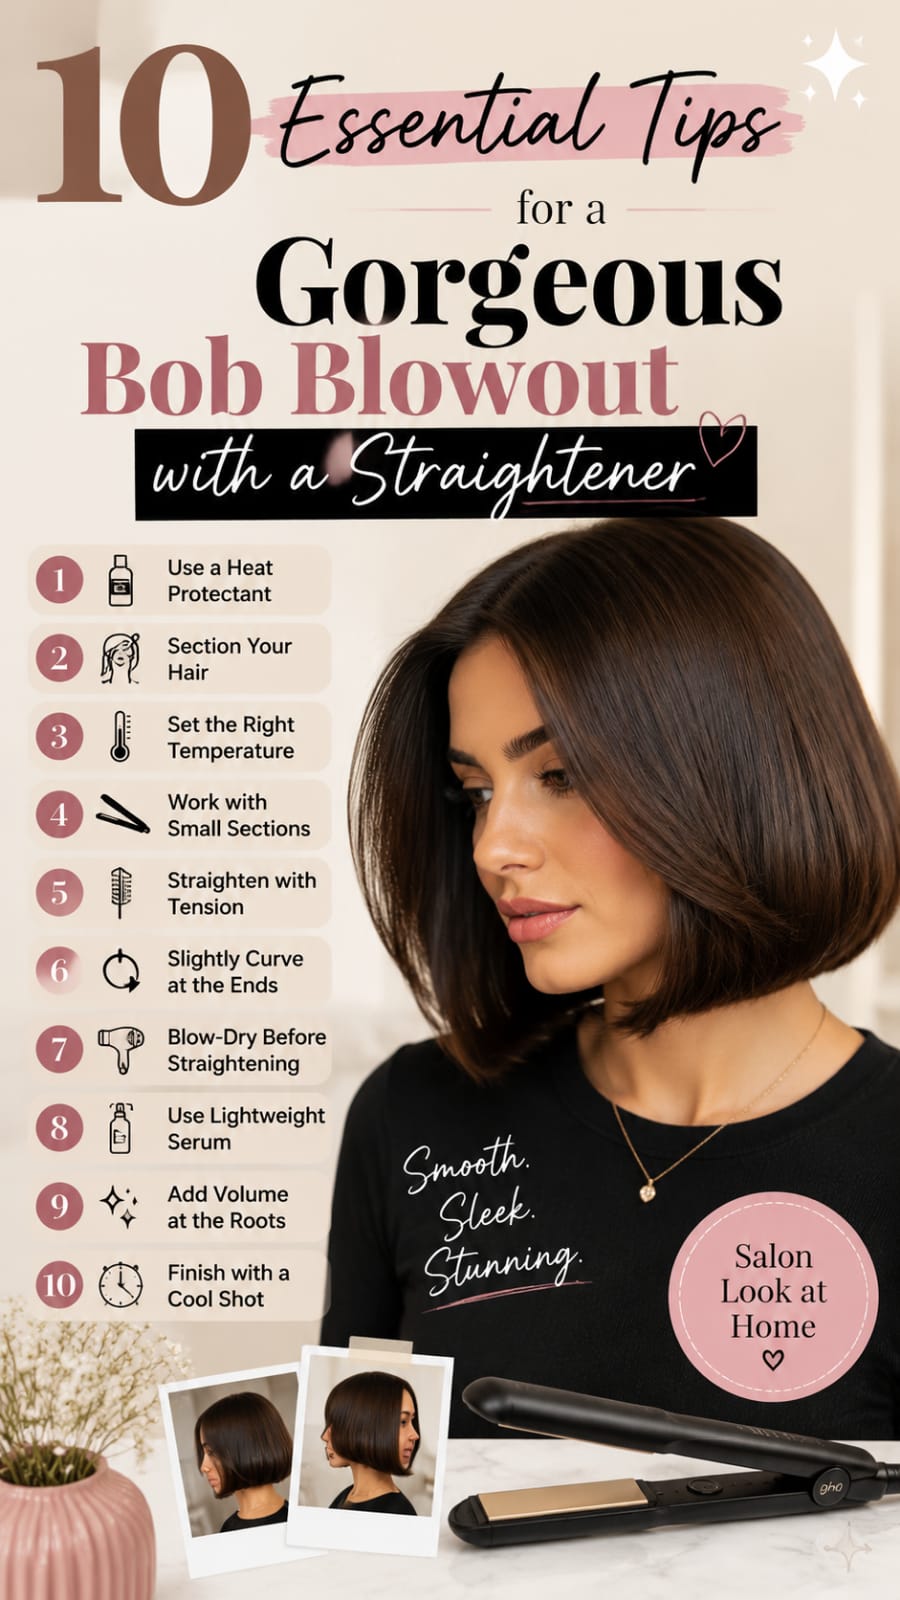
A sleek bob blowout is timeless. It looks fresh, polished, and full of life. Many people think you need a round brush and a heavy hairdryer. That is simply not true. You can get the exact same salon-quality finish using a flat iron.
Flat irons are remarkably versatile tools. They smooth out frizz while creating soft, natural curves. This technique gives your hair bounce, shine, and beautiful movement without extra effort. You get complete control over every single strand.
Achieving a flawless blowout at home takes the right approach. You need proper technique, heat control, and solid preparation. Short and medium hair lengths respond amazingly well to flat iron styling. You can create volume, sleekness, or soft, bevelled ends with ease.
This guide breaks down the entire process step by step. You will learn how to prepare your strands correctly. We will cover tool selection, heat management, and advanced wrist movements. You will also learn how to make your gorgeous style last for days.
Get ready to transform your daily hair routine. Follow these detailed tips to master the ultimate flat iron blowout at home.
1. Prep Your Hair with the Right Hydrating Products
Great styling always begins in the shower. Your hair needs a clean, well-hydrated foundation before any heat touches it. Moisture is the key to achieving natural movement and intense shine. Without proper moisture, heat styling can make your hair look stiff and dry.
Start with a lightweight smoothing shampoo. Follow with a nourishing conditioner focused on your mid-lengths and ends. Avoid applying heavy conditioners directly to your roots. Heavy products weigh down short hair and destroy natural volume before you even begin styling.
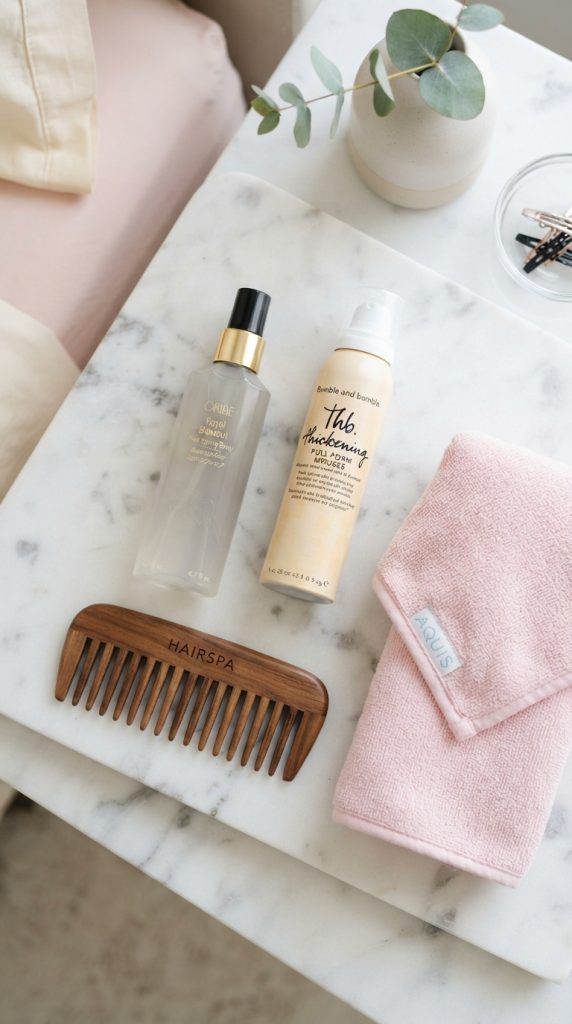
Towel dry your hair very gently using a soft microfiber towel. Never rub your hair aggressively with a rough towel. Rough friction damages the hair cuticle and creates instant frizz. Instead, gently squeeze out excess water until your hair is damp.
Now it is time to apply your styling products. A leave-in conditioning spray helps detangle and smooth your strands. Next, apply a lightweight volumizing mousse to your roots. Mousse provides the necessary structure and lift for a bouncy look.
Prepping Your Short Bob Haircut
Short styles require precise product placement. Apply a dime-sized amount of heat protectant cream through your mid-lengths. Make sure every strand is evenly coated from root to tip. Heat protectant acts as an invisible shield against thermal damage.
Comb through your hair with a wide-tooth comb. This distributes the products evenly across all layers. Even distribution prevents greasy spots and ensures consistent heat protection throughout your hair.
Measuring Product Amounts Accurately
Over-applying product is a common mistake when styling shorter cuts. Too much product makes hair look dull, heavy, and oily. Start with small amounts and add more only if necessary.
For short styles, a dime-sized product amount is usually plenty. Spread the product across your palms before touching your hair. This ensures an even distribution across both hands. You will avoid depositing giant blobs of product in a single spot.
Massaging Treatments Into Ends
The ends of your hair are the oldest and most fragile parts. They require extra hydration and thermal protection during preparation. Massage a small amount of serum into the tips gently.
Pressing product into the tips seals split ends temporarily. It keeps the tips looking sharp, clean, and healthy. Avoid getting heavy serums on the top layers of your crown. Keep oil-based products strictly confined to the lowest two inches of hair.
Selecting Lightweight Heat Protectants
Choose heat protectants that offer thermal protection up to 450 degrees. Look for formulas containing argan oil, keratin, or silk proteins. These ingredients seal the cuticle and lock in moisture while adding a glossy finish.
Avoid heavy oils or waxes before flat ironing. Heavy oils can fry the hair under high heat. Stick to light sprays, creams, or serums designed specifically for hot iron tools.
Understanding Thermal Spray Polymers
Modern heat protectants use synthetic polymers to protect hair shafts. Polymers form a protective barrier around the outer hair layer. This barrier slows down heat transfer so hair heats up safely.
Look for ingredients like dimethicone or hydrolyzed wheat protein. These ingredients fill in porous gaps along damaged hair shafts. Smooth hair surfaces conduct heat far more evenly than damaged hair. Even heat transfer leads to faster, safer styling passes.
2. Master the Art of Rough Drying Before Styling
Never use a flat iron on wet or damp hair. Ironing damp hair boils the moisture inside the hair shaft. This causes severe, permanent damage known as bubble hair. Your hair must be 100 percent dry before ironing.
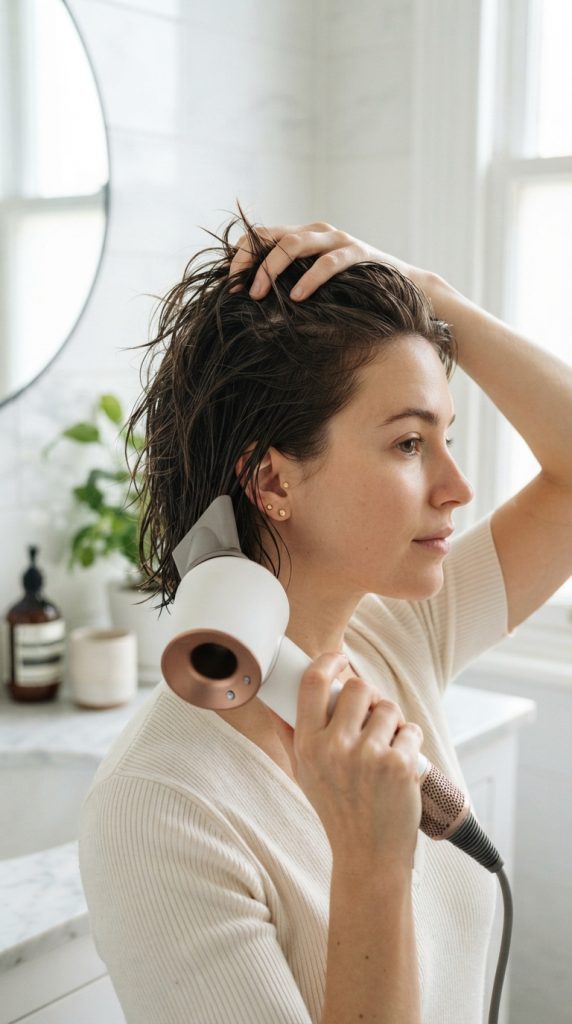
Rough drying sets the initial shape and volume of your style. Use your hairdryer on a medium heat setting. Point the nozzle downward along the hair shaft. This helps seal the cuticle and minimizes unwanted frizz right from the start.
Use your fingers to toss your hair gently while drying. Flip your head upside down for a few minutes. Drying your roots in the opposite direction creates instant, dramatic root volume.
Once your roots are dry, lift your head back up. Finish drying the rest of your hair until no dampness remains. Feel around your nape and behind your ears. These areas often hold hidden moisture.
Understanding the Dangers of Damp Flat Ironing
Ironing hair that holds moisture creates trapped steam inside the core. That internal steam expands rapidly and causes structural cracks. Over time, these microscopic cracks turn into split ends and severe breakage.
Always perform a dry test before touching any hot iron. Press small sections between your fingers to feel for cool spots. Cool spots indicate hidden dampness lurking beneath the surface layers. Take extra time to dry your hair thoroughly to preserve strength. Patient drying creates a safe canvas for your hot flat iron.
Positioning the Hairdryer Nozzle Properly
Nozzle positioning plays a huge role in achieving maximum hair smoothness. Always attach a narrow concentrator nozzle to your hairdryer barrel. The nozzle directs airflow in a precise, controlled stream across strands.
Angle the nozzle downward at a 45-degree direction at all times. Blowing air down the hair shaft lays the cuticles flat. Smooth cuticles reflect light dramatically and prevent frustrating surface flyaways. Never blow air upward from the ends toward the roots. Upward airflow roughs up the cuticle and creates immediate frizz.
Drying Your Classic Bob Cut
Focus on lifting the crown area while rough drying. Lift small sections straight up into the air with a vent brush. Direct warm air at the roots for five seconds. Allow the roots to cool for three seconds before releasing.
This technique builds a sturdy base of volume. It keeps your hairstyle from looking flat or stuck to your head.
Directional Drying Techniques
Directional drying controls how your hair falls naturally. Dry the side sections forward toward your face. This creates a soft, framing effect that highlights your jawline.
For the back sections, dry the hair upward and backward. This prevents flat spots and ensures a smooth, seamless transition around your head.
Over-Direction for Maximum Lift
Over-direction means pulling hair opposite to its natural falling direction. Pulling hair forward while drying creates backward volume when tossed back. Pulling hair left creates right-side volume when flipped over.
Use over-direction across your natural part line for dramatic height. Lift hair from the left side and dry it toward the right. Flip the hair back to its original side once dry. You will notice instant, weightless lift along your part line.
3. Choose the Ideal Straightener for Short Hair
Not all flat irons are created equal. The size and design of your iron play a massive role in your styling success. Plates that are too wide will make detailed styling nearly impossible on shorter lengths.
Look for a flat iron with plates that are one inch wide or narrower. Half-inch to one-inch plates give you maximum precision and control. They allow you to get close to the roots without burning your scalp.
Select an iron with floating plates and rounded outer edges. Floating plates flex with your hair, preventing harsh line snags. Rounded edges are essential for creating soft, curved ends instead of pin-straight spikes.
Choose high-quality plate materials like ceramic or titanium. Ceramic plates distribute heat evenly and gently. Titanium plates heat up quickly and maintain high heat efficiently. Both materials help reduce frizz and boost shine.
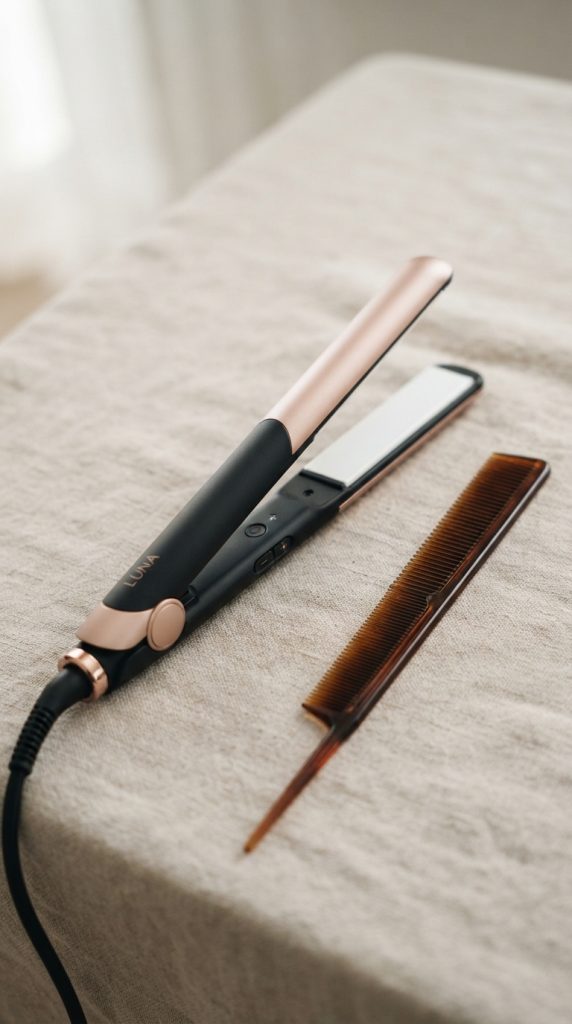
Plate Width Selection Guidelines
Using two-inch wide plates on shorter styles is a common recipe for frustration. Wide plates cannot grip short nape hairs properly. They also prevent you from flexing your wrist near the ends.
Stick strictly to three-quarter-inch or one-inch plate widths. Narrow plates give you the mobility needed to bevel edges effortlessly. They also let you reach right down to the root line without scorching your skin.
Invest in a tool designed for precision styling. Ergonomic, lightweight flat irons reduce wrist fatigue during detailed section work.
Iron Features for Your Sleek Bob
Adjustable temperature controls are a non-negotiable feature. Different hair textures require completely different heat levels. Fixed heat irons can easily scorch fine or delicate hair strands.
Look for irons with digital temperature screens. This allows you to monitor and control the exact heat applied to your hair.
Ceramic Versus Titanium Plates
Ceramic plates are ideal for fine, thin, or color-treated hair. They deliver gentle infrared heat that protects delicate strands. Ceramic glides smoothly and minimizes the risk of hot spots.
Titanium plates work best for thick, coarse, or highly textured hair. They heat up rapidly and transfer heat instantly. Titanium helps tame stubborn frizz and coarse textures quickly.
Inspecting Edge Curves and Bevels
Examine the outer casing of your flat iron before buying. Square, boxy iron casings leave sharp line dents in your hair. You need a casing with smooth, curved outer edges.
Curved outer edges heat up slightly along with the plates. This exterior warmth gently molds the hair as you curve your wrist.
It mimics the action of a round brush, producing rounded blowout shapes. Check that the plate edges sit flush without sharp gaps that pull hair.
4. Section Your Hair for Maximum Control
Styling large chunks of hair at once leads to uneven results. Some strands get too much heat, while others stay untouched. Sectioning gives you complete control and ensures every strand looks flawless.
Divide your hair into clean, manageable horizontal tiers. Use sectioning clips or duckbill clips to keep loose hair out of your way. Working in neat sections saves time and produces a far more polished blowout.
Start at the bottom tier near the nape of your neck. This is usually the shortest and hardest area to style. Clip the rest of your hair securely up on top of your head.
Each section should be about one inch wide and no thicker than the flat iron plate. Thin sections allow heat to penetrate evenly across every strand.
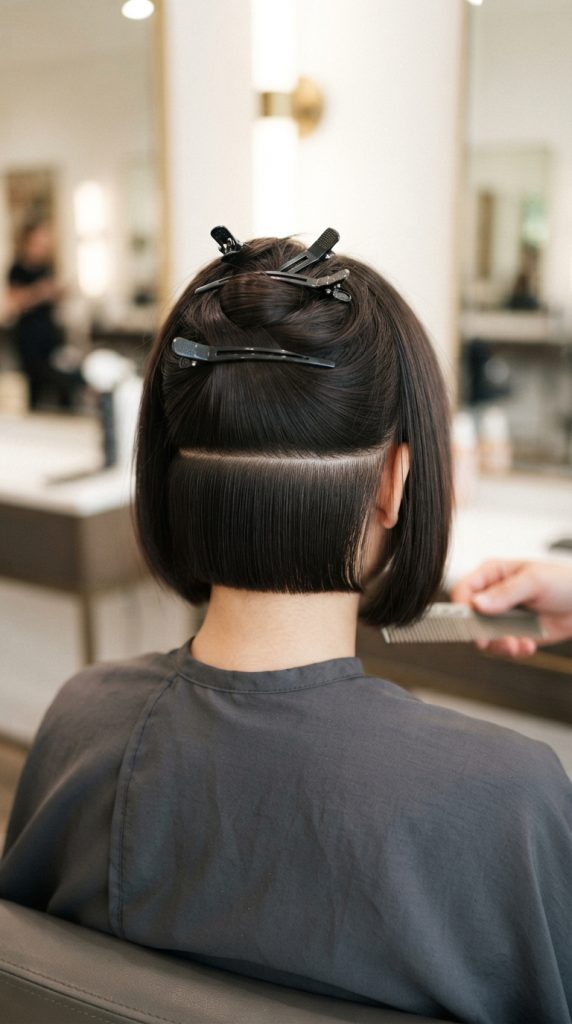
The Four-Quadrant Sectioning Method
Dividing your head into four equal quadrants keeps your workflow clean and organized. Make a straight parting from the middle of your forehead to your nape. Next, part your hair from ear to ear across your crown.
Twist and clip three of the quadrants securely out of your way. Work on one quadrant at a time, starting from the back lower section.
This systematic approach guarantees that no hidden strand is missed. It also keeps pre-styled sections separate from untouched sections.
Sectioning Your Textured Bob Style
Create clean sub-sections within each quadrant as you work upwards. Take horizontal slices that match the exact width of your iron plates.
Horizontal slices build structured shape and internal volume. If you want a piecy texture, try taking vertical slices along the side sections instead.
Vertical sectioning creates looser, more modern movement. Experiment with both slicing techniques to see which flatters your cut best.
Proper Clip Techniques
Use smooth, non-snagging alligator clips to hold your hair back. Avoid tight elastic bands while styling. Elastic bands leave stubborn dent marks in damp or warm hair.
Keep your sections clean and straight using a tail comb. Crisp section lines prevent stray hairs from catching in the flat iron plates.
Managing Nape Hair Precision
The bottom nape section requires specialized attention due to its short length. Hair near the neck line is often coarse or grows in conflicting directions.
Take tiny, quarter-inch horizontal slices across the nape base. Place your flat iron as close to the scalp as safely possible.
Pass the iron down quickly while turning the tip slightly inward. This anchors the foundation of your haircut so the top layers fall smoothly over it.
5. Dial in the Perfect Temperature Settings
Temperature control is critical for maintaining healthy hair. Excessive heat breaks down keratin proteins and destroys hair elasticity. Using the right temperature keeps your hair healthy, soft, and bouncy.
Fine or thin hair requires lower heat settings. Keep your iron between 250 and 300 degrees Fahrenheit. Fine strands absorb heat rapidly and can burn easily if temperature is too high.
Medium or wavy hair performs best at moderate temperatures. Set your flat iron between 300 and 350 degrees Fahrenheit. This range provides enough heat to reshape strands without causing unnecessary damage.
Thick, coarse, or curly hair needs higher heat to smooth out completely. Set your iron between 350 and 400 degrees Fahrenheit. Never exceed 400 degrees unless instructed by a professional stylist.
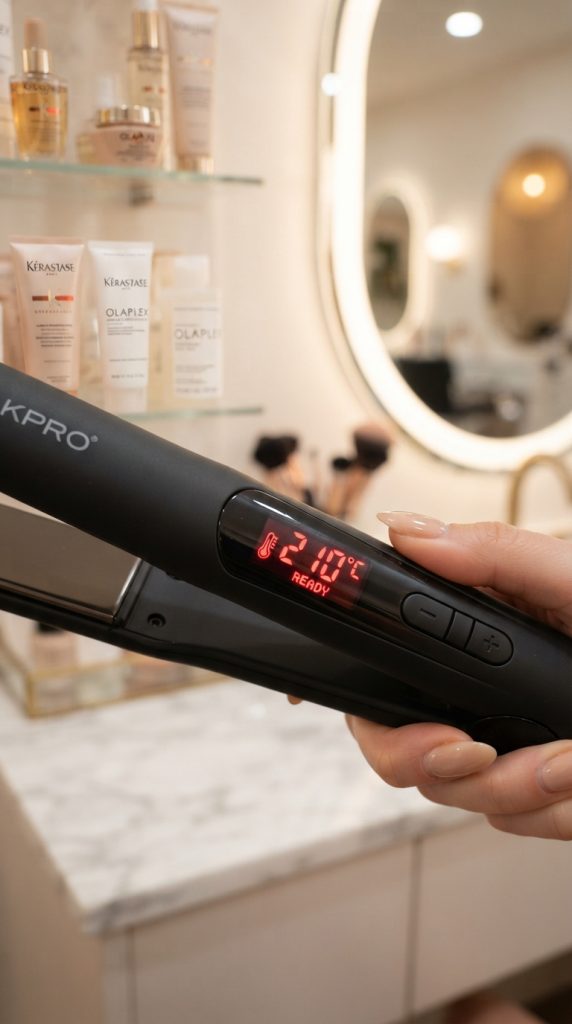
Testing Heat Requirements Safe Methods
Never guess the right temperature for your specific hair condition. Start your iron at the lowest possible recommended setting first.
Perform a single pass on a hidden section near your bottom nape. Observe how the hair responds to that initial heat pass. If the section smooths out easily, that temperature is ideal.
If the section remains frizzy, increase the temperature by ten degrees. Finding the lowest effective temperature prevents unnecessary long-term thermal damage.
Protecting Fine Versus Thick Hair
Fine hair needs extra care during heat styling. Always use a continuous pass motion. Never let the iron sit on one spot for more than two seconds.
Thick hair can handle slightly more heat, but tension is key. Maintaining firm, steady tension lets you smooth thick hair quickly without reheating sections.
Heat Rules for Every Blunt Bob
Never apply maximum heat to the delicate front sections around your face. Hair framing your face is naturally thinner and more fragile. Lower your iron temperature by 20 degrees when styling front pieces.
Do a test pass on a small, hidden layer near your neck. Check if the hair smooths out smoothly in one pass. If it requires multiple passes, adjust your temperature slightly.
Adjusting Heat for Chemically Treated Hair
Bleached, highlighted, or chemically relaxed hair loses its natural heat resistance. Damaged cuticles allow heat to penetrate into the inner core too fast.
Keep your temperature below 300 degrees Fahrenheit for color-treated hair. High heat can strip artificial color molecules and cause rapid fading.
Use a dedicated heat protectant serum formulated specifically for processed hair. Extra care preserves both your vibrant hair color and structural integrity.
Here is the second half of your comprehensive guide (Points 6 through 10 + Conclusion), written in the exact same format with detailed explanations, short paragraphs (under 140 words), and simple sentence structures (under 20 words).
6. Perfect the Curved Wrist Motion at the Ends
The main difference between pin-straight hair and a blowout is movement. A blowout features soft, rounded ends that curve gracefully inward. You achieve this classic shape using a subtle wrist rotation.
Clamp your flat iron near the mid-lengths of your section. Hold the iron horizontally or at a slight diagonal angle. Slide the iron down smoothly toward the ends of your hair.
When you reach the last two inches of the section, slowly turn your wrist inward. Rotate your wrist toward your neck in a gentle semi-circle motion. Keep the iron moving continuously as you create this curve.
Release the hair gently as it slides off the end of the plates. The hair will fall into a soft, bevelled curve automatically.
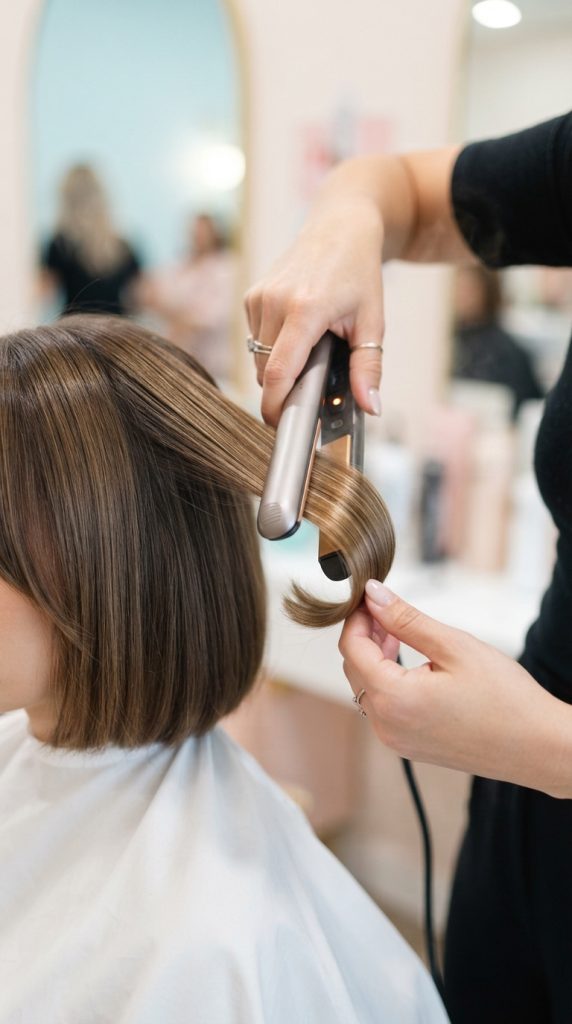
Shaping Ends on a Short Bob
Short hair requires a delicate touch at the ends. Do not over-rotate your wrist, or you will create tight, unnatural curls. Aim for a subtle inward sweep that frames your jawline beautifully.
Hold the shape with your fingers for two seconds right after releasing the heat. Letting the hair cool in position locks in the soft curve.
Executing the C-Shape Wrist Technique
Creating the perfect blowout finish relies on a smooth C-shape wrist movement. Imagine drawing a capital letter C in the air with the tip of your iron.
Start by clamping the iron flat against your mid-lengths. Glide straight down until you approach the bottom two inches. Slowly turn your knuckles under toward your chin as you pull down.
This subtle curve molds the hair ends inward naturally. It gives your ends that plush, full look typical of professional blowouts.
Wrist Angle and Entry Techniques
Maintain a smooth, fluid motion from roots to ends. Pausing mid-strand creates unsightly horizontal clamp marks. If you create a dent, let the hair cool completely before re-ironing it.
Keep your elbow lifted slightly while styling. A higher elbow position makes rotating your wrist easier and more consistent on both sides.
Troubleshooting Flipping and Straight Ends
If your ends flip outward instead of inward, check your iron angle. Pulling the iron straight down toward your shoulders can cause ends to flare out.
Always direct the iron slightly inward toward your throat as you finish the pass. This inward directional pull forces the hair to wrap toward your neck.
If the ends look too straight, you rotated your wrist too late. Start your wrist rotation slightly higher up the hair shaft on your next pass.
7. Lift the Roots to Create Lasting Volume
Flat irons are famous for straightening, but they can also build incredible height. Creating root lift prevents your hairstyle from looking flat or plastered against your skull.
Select a one-inch section at the top crown of your head. Lift the section straight up into the air at a 90-degree angle from your scalp. Clamp the flat iron right at the root, taking care not to touch your scalp.
Gently pull the iron upward toward the ceiling for the first two inches. As you lift upward, curve the iron slightly backward. This creates an invisible arch at the root that supports high volume.
Once you pass the root area, continue gliding down the rest of the strand normally. This vertical lift technique builds instant body that lasts all day long.
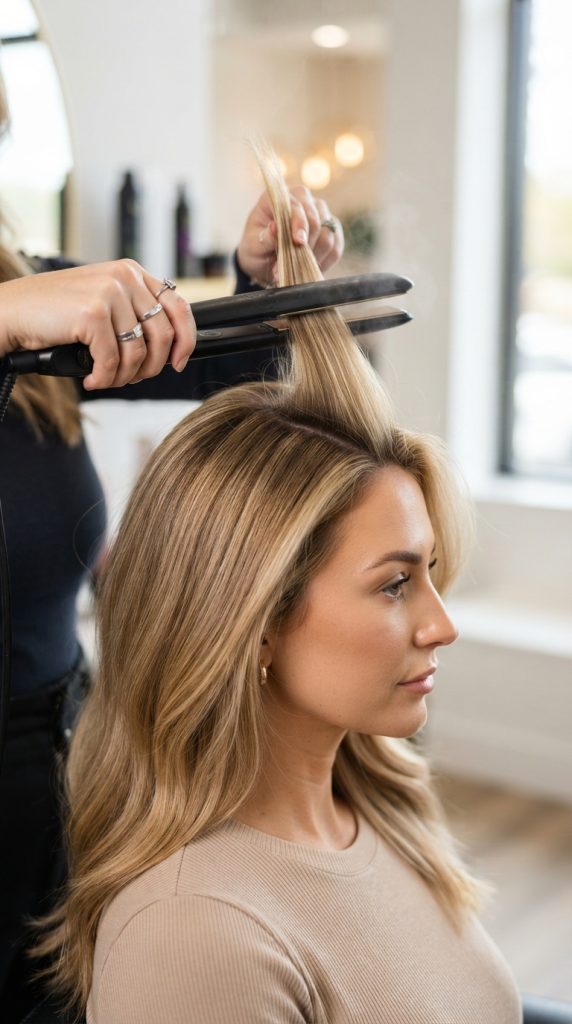
Adding Root Lift to Your French Bob
French styles look best with effortless, airy volume at the crown and sides. Lift side sections outward away from your face at a 45-degree angle.
This over-direction technique creates soft, romantic fullness around your cheeks and temples.
The Rainbow Arc Lifting Method
Picture a rainbow arc when working on your crown sections. Clamp the iron near the root and lift straight up toward the ceiling.
As you glide the iron through, travel in a rounded arch motion backward. This upward and backward arch bends the base of the hair shaft.
When the hair falls back down, that bend acts as a natural spring. It keeps your hair lifted off your scalp without teasing or backcombing.
Cooling at the Root
After lifting a root section, hold it elevated with your fingers for a few seconds. Warm hair is pliable, but cold hair sets into shape.
Allowing the root to cool while elevated ensures maximum height and volume. You can also spray a light mist of dry shampoo at the root for extra lift.
Using Root-Lifting Combs and Clips
Combine flat iron techniques with setting clips for extreme volume needs. After lifting a crown section with heat, insert a small duckbill clip under the root base.
Leave the clip in place while you work on lower sections. The clip supports the heated root in an upright position until it cools.
Removing the clips at the end reveals dramatic, long-lasting height. This extra step works wonders on fine or heavy hair types.
8. Smooth the Top Layers with a Soft Glide
The top canopy layer of your hair receives the most sun exposure and environmental stress. It is often the frizziest and most delicate part of your head. Styling this layer correctly gives your blowout a glass-like finish.
Unclip the final top section of your hair. Take thin, wide sub-sections to ensure full, even heat coverage. Hold the hair taut with a fine-tooth comb placed right in front of your flat iron.
Chasing the comb with your iron is an elite styling technique. The comb aligns every single hair strand perfectly before the heat plates make contact. This eliminates snags and delivers maximum smoothness in a single pass.
Glide the iron slowly and steadily down the entire length of the section. Keep your pressure consistent from the root down to the tip.
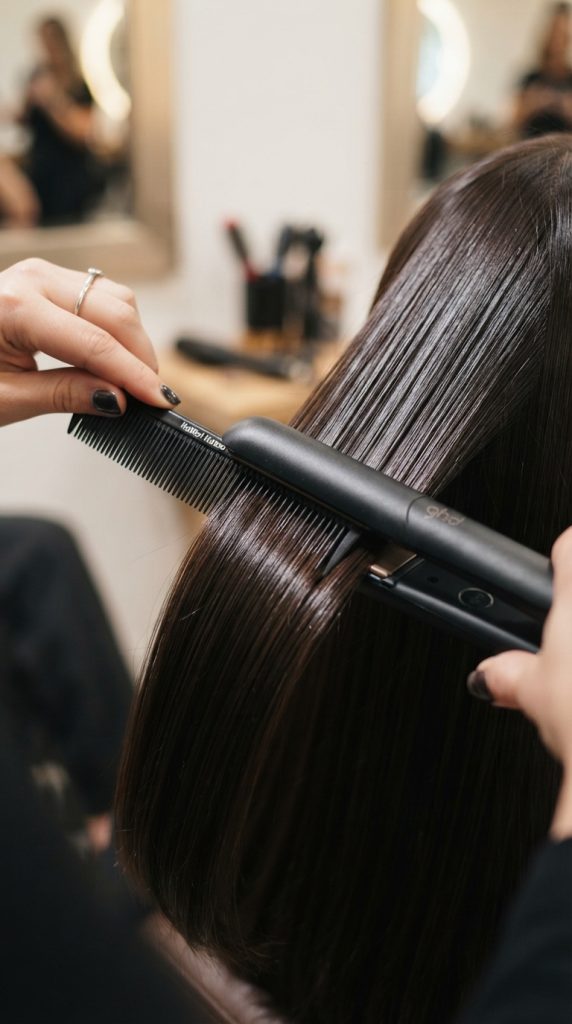
Gliding Through Your Layered Bob
Layered styles require special attention to detail. Treat each layer as its own mini-section. Curve the ends of shorter layers slightly inward to emphasize the cut’s texture.
Curving short layers creates dimensional depth and highlights your hairstylist’s cut.
Mastering the Chase Method with a Fine Comb
The comb chase method is essential for a glass-skin hair texture. Insert a heat-resistant fine-tooth comb into the section near your root.
Place your flat iron directly behind the teeth of the comb. Move both hands down the hair length at the exact same speed.
The comb separates each hair strand so heat distributes evenly. It prevents overlapping strands from creating uneven bumps or lingering frizz.
Tension Control and Continuous Passes
Maintaining proper tension is the secret to a high-shine finish. Pull the section firm and taut, but do not yank your hair aggressively. Firm tension allows low heat to smooth hair fast.
Never clamp down too hard on the iron plates. Hard clamping crushes hair strands and creates harsh line creases. Use smooth, medium pressure for best results.
Refining Front Face-Framing Pieces
Front layers require extra delicacy and soft directional shaping. Pull front pieces forward toward your nose before applying the iron.
Curve your wrist gently inward right at the cheekbone level. This creates a soft, face-hugging curve that frames your features beautifully.
Avoid pulling front pieces straight down beside your cheeks. A forward curve softens your facial features and adds sophisticated style.
9. Lock in Moisture and Bounce with Cooling Techniques
Heat opens the hair cuticle and reshapes its bonds. Cold air seals the cuticle and locks that new shape permanently in place. Skipping the cooling phase causes your blowout to lose volume and fall flat quickly.
Once you finish ironing a section, do not touch it immediately. Let the warm hair sit untouched for a few moments while it cools down completely.
If your hairdryer has a cool shot button, blast your finished hair with cold air. Direct the cool airflow from roots to ends. This cool blast seals the cuticle layer, locking in shine and blocking out humidity.
Finish your style with a few drops of lightweight hair oil or shine serum. Warm the serum between your palms and gently smooth it over your top canopy.
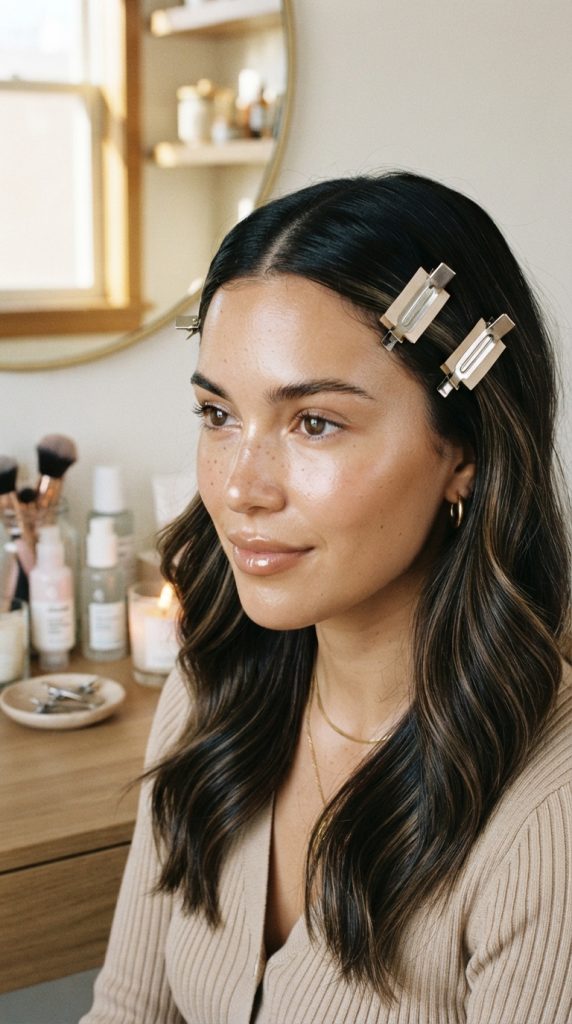
Setting the Shape of Your Chic Bob
Use small metal setting clips to hold front face-framing sections in place while cooling. Slide a piece of cardstock under each clip to prevent dent marks.
This sets a soft, elegant wave around your face while you do your makeup.
Utilizing Metal Setting Clips for Shape Memory
Metal bill clips are incredible tools for securing heat-styled shapes. After curving an important section inward, roll the warm end around your finger.
Pin the soft roll flat against your head using a crease-free metal clip. Allow the section to cool entirely while clipped in place.
Unpinning the hair after ten minutes reveals maximum shape retention. The curved ends will resist dropping throughout the day.
Serum and Finishing Touches
Apply a light mist of flexible-hold hairspray over your finished hair. Choose hairsprays that offer touchable hold without stiffness or crunchiness.
Spray from ten inches away to ensure a fine, even mist. Light hairspray protects your style against atmospheric moisture and wind.
Applying Lightweight Gloss Serums
Serums add stunning, light-reflecting shine to your final blowout. Rub two drops of serum thoroughly between your hands until palms feel warm.
Gently glide your palms over the outer surface of your styled hair. Lightly sweep hands over the ends to smooth any remaining flyaways.
Avoid applying serum near your scalp or roots. Keeping oils near the ends preserves all the root volume you worked hard to build.
10. Maintain Your Blowout Style for Days
A great blowout should last anywhere from two to three days. Protecting your style overnight saves you precious morning styling time. Simple evening habits preserve your volume and keep your hair sleek.
Switch to a pure silk or satin pillowcase immediately. Traditional cotton pillowcases create rough friction against your hair while you sleep. Friction leads to bedhead, frizz, split ends, and flattened volume. Silk allows your hair to glide smoothly without tangling.
Before bed, gather your hair loosely at the top of your head. Use a soft silk scrunchie to secure it loosely. Avoid tight ponytails, which leave stubborn indentations across your hair.
Protect your hair from humidity during showers. Wear a lined, waterproof shower cap to keep ambient steam away from your smooth strands.

Nighttime Protection Rituals
For short hair, try the pin-curl method before going to sleep. Wrap large sections of hair around your finger into soft loops. Secure each loop flat against your head using smooth bobby pins.
In the morning, remove the pins and shake out your hair. Your volume and curved ends will look freshly styled.
Wrapping Short Hair with Silk Scarves
Wrapping your head in a silk scarf keeps short hair flat and smooth overnight. Smooth your hair in a circular pattern around your head using a paddle brush.
Tie a silk scarf snugly over the smoothed hair to lock it in place. This technique prevents bedhead flattening and eliminates night friction completely.
Unwrap your hair in the morning and comb it into place. You will find your blowout looks just as smooth as the day before.
Morning Touch-Up Strategies
Do not re-apply high heat to your entire head every morning. Over-ironing daily causes severe heat damage and dryness. Instead, use dry shampoo at your roots to absorb night oil.
Only touch up the top canopy layer or front face-framing pieces if necessary. Keep your iron on a low heat setting for morning quick fixes.
Extending Blowout Longevity with Dry Shampoo
Spray dry shampoo at your roots on the second morning before styling. Hold the can eight inches away from your scalp to avoid white powdery buildup.
Allow the powder to absorb natural scalp oils for two minutes. Massage your roots gently with your fingertips to blend the product completely.
Dry shampoo restores lost root volume and neutralizes scalp oils. It keeps your blowout looking fresh, clean, and airy for extra days.
Conclusion
Mastering a salon-quality blowout at home is entirely achievable with a flat iron. By following these ten essential tips, you can transform your hair with confidence. Proper preparation, heat control, and wrist movement are your keys to success.
Remember to prioritize hair health by always using heat protection. Invest in high-quality tools with adjustable heat settings and rounded plates. Take your time sectioning your hair, and master the inward wrist curve for bouncy ends.
With a little practice, your flat iron will become your favorite styling tool. Enjoy your sleek, glossy, and voluminous hairstyle that turns heads wherever you go.
Leave a Reply