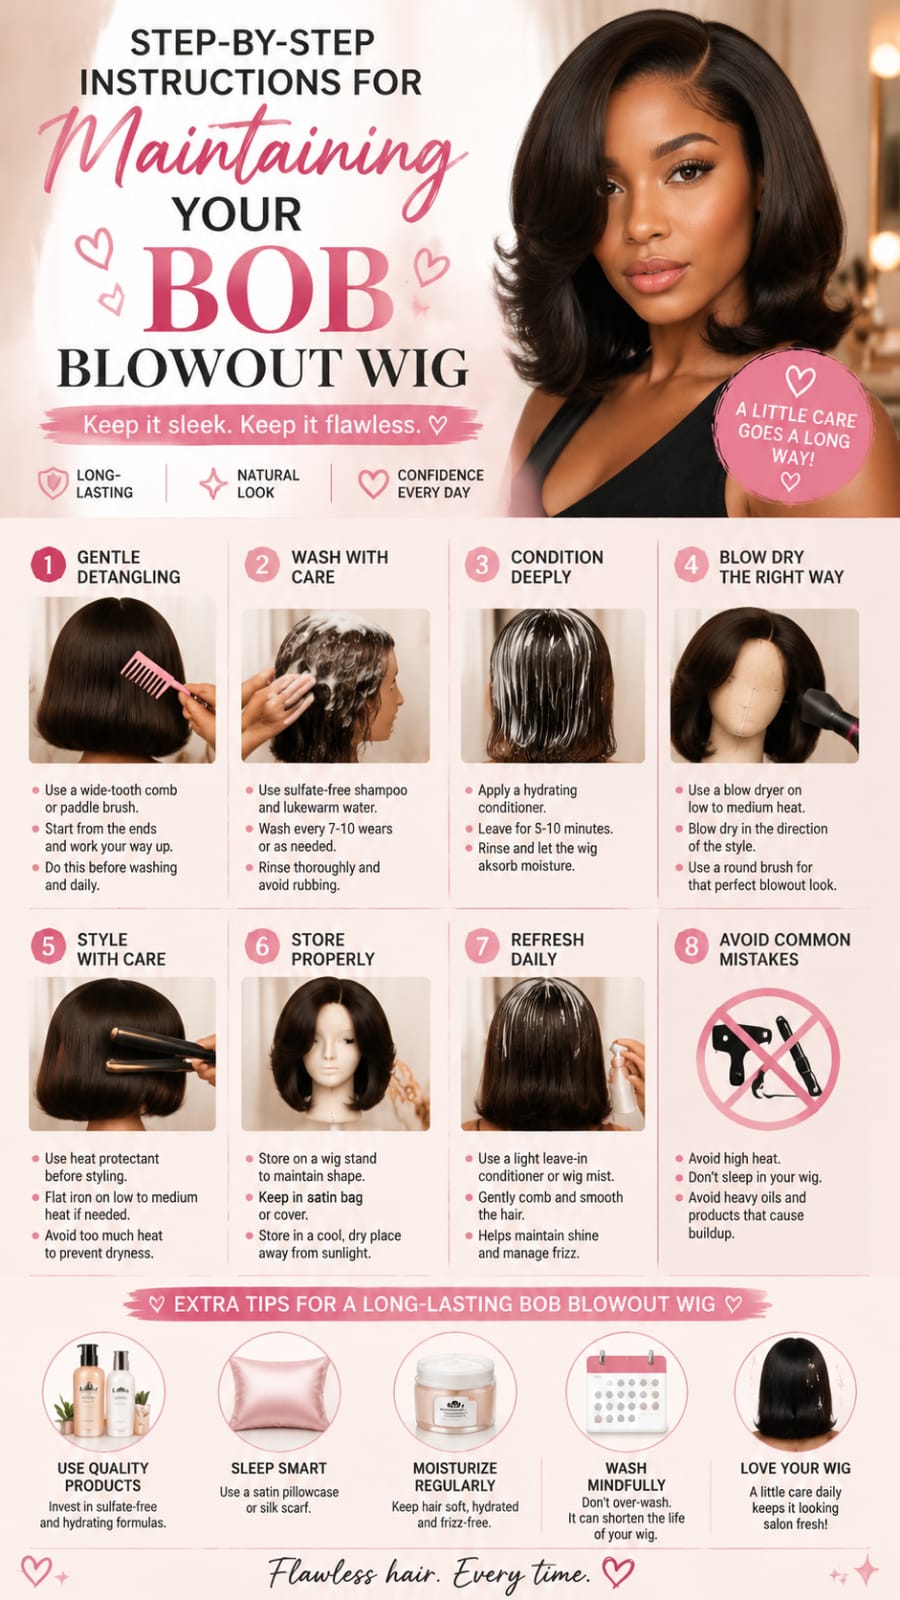
Maintaining a fresh blowout of bob requires consistent care, detailed attention, and the right hair routines. A full, voluminous look transforms your daily appearance effortlessly, giving you that polished, salon-fresh confidence every time you step out. However, regular daily wear, weather exposure, friction against clothing, and natural oil accumulation can cause stubborn tangles, dullness, or severe frizz over time.
Proper maintenance preserves the natural movement, original shine, and structured shape of your unit. Without a well-planned and structured upkeep routine, both synthetic and human hair fibers rapidly lose their original soft texture and flexibility. Repeated heat styling, excessive product buildup, atmospheric humidity, and physical wear gradually weaken the hair strands, causing premature shedding and irreversible damage.
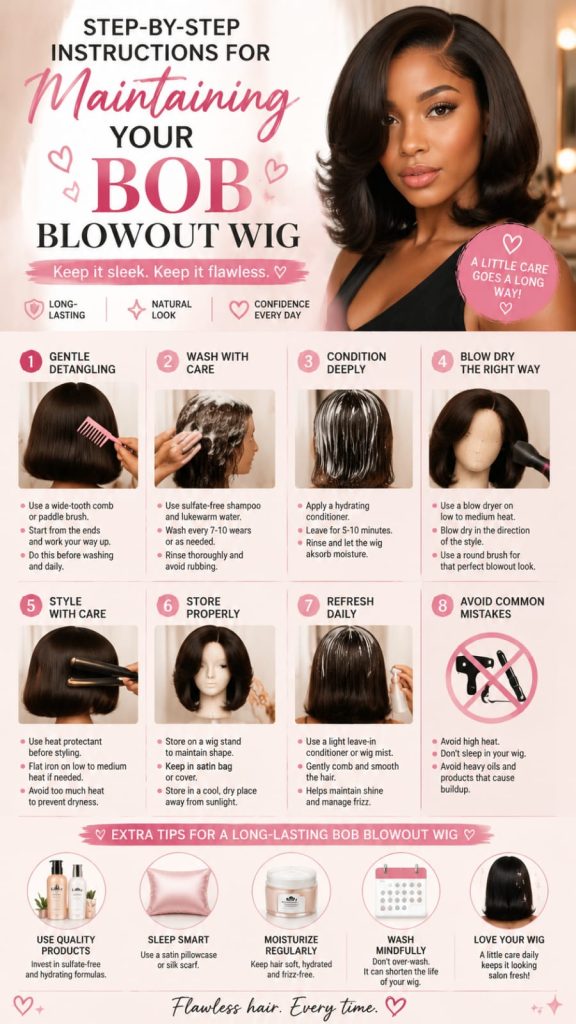
This ultra-detailed guide delivers every single step required for long-term hair preservation and flawless daily presentation. You will learn expert-level preparation techniques, gentle washing methods, specialized conditioning systems, safe heat application rules, and proper post-wash handling. Each section breaks down real, actionable solutions for common styling challenges and structural degradation.
By following these targeted steps, your unit will retain its signature bounce, rich luster, and perfect structural integrity. You can easily achieve and enjoy salon-quality results directly from your home routine while protecting your valuable hair investment. Let us explore the fundamental techniques and professional secrets for complete hair care success.
1. Preparing Your Unit for Deep Cleaning
Proper preparation work prevents unnecessary shedding and severe structural damage during the washing process. Never submerge a messy, tangled, or product-heavy wig directly into a basin of water. Water causes existing tangles to swell and lock together, making gentle detangling nearly impossible afterward and leading to severe strand breakage.
Essential Detangling Tools and Pre-Wash Steps
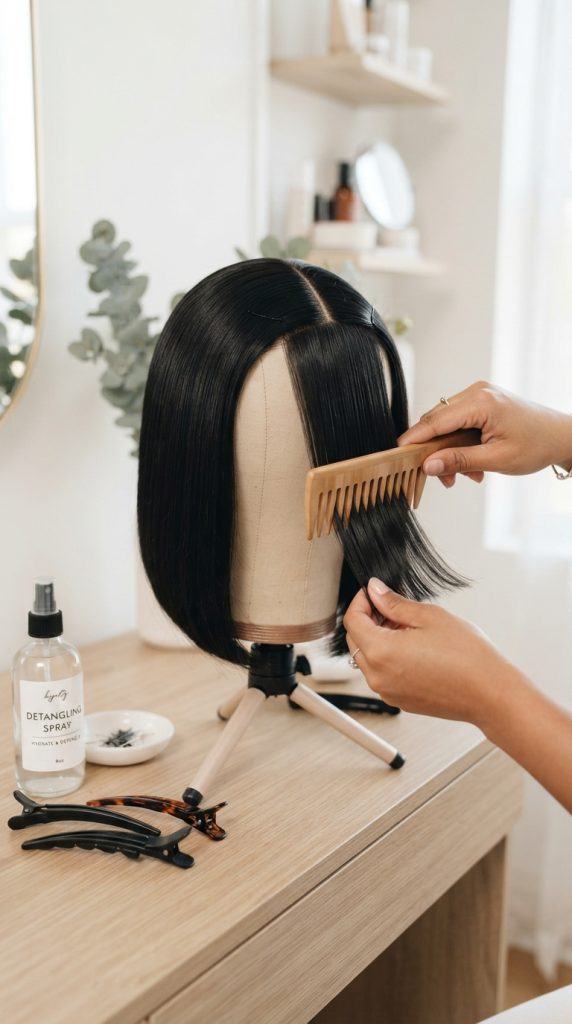
- Wide-Tooth Wooden or Hard Rubber Comb: Always start detangling at the bottom ends of the hair. Work your way upward slowly and patiently toward the wig cap foundation.
- Soft Bristle Paddle Brush: Use soft, natural bristles for gentle surface smoothing across longer sections without snatching delicate lace fibers.
- Lightweight Detangling Slip Spray: Apply a lightweight, alcohol-free slip formula to soften stubborn knots and lubricate fibers before brushing.

Start by mounting the unit securely onto a high-density canvas block or sturdy mannequin head. Secure the foundation cap with flat-headed T-pins placed through the ear tabs and nape area. Avoid sticking pins directly through delicate lace frontal areas, as this creates micro-tears that expand over time.
Divide the entire unit into four equal, manageable sections using wide plastic sectioning clips. Isolating sections allows you to work methodically without missing hidden tangles deep near the nape. The nape area experiences the most friction against shirts and coats, making it prone to heavy matting.
Spray a light mist of detangling spray onto the lower half of the first section. Hold the hair firmly above the section you are combing with one hand. This hand placement absorbs the tension and prevents direct strain on the delicate cap knots.
Begin combing from the very tip of the strands, working out small knots with short, gentle strokes. Once the ends flow smoothly, move your comb two inches higher up the hair shaft. Continue this step-by-step upward progression until your comb glides effortlessly from root to tip. Repeat this precise process for all four sectioned areas.
Inspect the inner lining of the cap for accumulated lace tape, liquid adhesive residue, or scalp oils. Spray a small amount of specialized adhesive solvent or ninety-nine percent isopropyl alcohol onto a soft cloth. Lightly dab the solvent onto the sticky areas along the front perimeter.
Use a clean, soft-bristled toothbrush to gently lift loosened glue residue from the delicate mesh base. Clean cap bases ensure a comfortable, sanitary fit and prevent bacteria growth during wear. Furthermore, removing old glue allows fresh adhesives to bond far more effectively during your next installation.
Pre-treating strands before water exposure preserves overall fiber strength and prevents moisture shock. For human hair units, apply three drops of light Argan oil across dry ends before washing. This protective oil barrier seals vulnerable split ends against harsh cleansing agents in water.
Allow the pre-wash oil treatment to absorb into the fibers for ten minutes before proceeding. Completing this rigorous preparation routine once every two weeks maintains exceptional fiber integrity over time. Gentle preparation sets up the absolute cleanest foundation for deep, rich moisture restoration in subsequent steps.
2. Choosing and Applying the Right Cleansing Products
Using standard drugstore shampoos can quickly ruin high-quality hair fibers and strip vital coating layers. Common household formulas contain harsh sulfates, parabens, and high alcohol contents designed for natural scalps. These harsh chemical cleansers strip necessary moisture from unattached hair, leaving strands stiff, dry, and prone to snapping.
Recommended Cleansing Product Types and Water Guidelines
- Sulfate-Free Hydrating Shampoo: Gently washes away environmental dirt and styling residue without removing vital moisture layers.
- Color-Safe Neutralizing Cleanser: Preserves rich color tones, prevents early oxidation, and stops unwanted brassy undertones.
- Moisturizing Cream Conditioner: Restores extreme softness, seals open surface scales, and smooths down raised cuticles completely.
Clarifying shampoos should be used sparingly, approximately once every month or after heavy product use. Excessive use of stripping cleansers creates frizzy, dull, and completely unmanageable textures instantly. Always select lukewarm or cool water over hot water during every phase of the wash cycle.
Hot water opens hair cuticles excessively, dissolves knot sealants, and degrades cap elasticity completely. Lukewarm water cleanses efficiently while keeping delicate cap stitching, elastic bands, and hand-tied knots entirely safe. Fill a clean, deep basin or sink with lukewarm water before introducing your cleanser.
Pour a quarter-sized amount of sulfate-free shampoo directly into the standing water bath. Stir the water vigorously with your hand until the soap dissolves into a smooth, balanced liquid solution. Never apply concentrated, un-diluted shampoo directly onto the hair or lace foundation of your unit.
Direct shampoo application creates concentrated residue pockets that are extremely difficult to rinse out thoroughly. Hold your unit firmly by the back ear tabs or nape base. Submerge the hair slowly into the prepared soapy bath, ensuring all fibers are fully soaked.
Swish the unit gently from side to side in slow, fluid wave movements for three minutes. Allow the soapy water to flow naturally through the mesh fibers and between strand layers. Never scrub, rub, or massaged the hair vigorously like you would with natural scalp hair.
Rubbing strands together creates massive friction, roughs up the smooth cuticle layer, and causes severe tangling. Lift the unit out of the bath and allow soapy water to drain out naturally. Gently squeeze excess water out from the top down to the tips using open palms.
Place the unit under a gentle tap stream of clean, cool running water to rinse thoroughly. Ensure the water stream flows strictly in a downward direction from root to tip. Downward rinsing flushes out remaining soap bubbles while keeping the hair cuticles lying completely flat.
Continue rinsing until the water running off the ends is crystal clear and completely foam-free. Trapped shampoo residue leaves a dull film on the hair, causing it to look greasy and stiff once dried. Take your time during the rinse phase to guarantee every trace of cleanser is gone.
3. Deep Conditioning and Fiber Restoration Systems
Deep conditioning delivers rich, essential hydration deep into the core of each individual hair strand. Unlike natural hair, wig fibers receive no natural sebum oils from a live human scalp. Therefore, artificial hydration treatments are absolutely vital to maintain flexibility, bounce, and a silk-like shine.
The Conditioning Process and Mask Application Protocol
- Mid-Shaft Application: Apply rich cream products evenly starting two inches below the cap down to the ends.
- Avoid the Lace Base: Keep heavy creams completely away from hand-tied lace knots to prevent severe strand shedding.
- Controlled Thermal Soaking: Allow deep conditioning treatments to penetrate fibers for fifteen to twenty full minutes under mild heat.
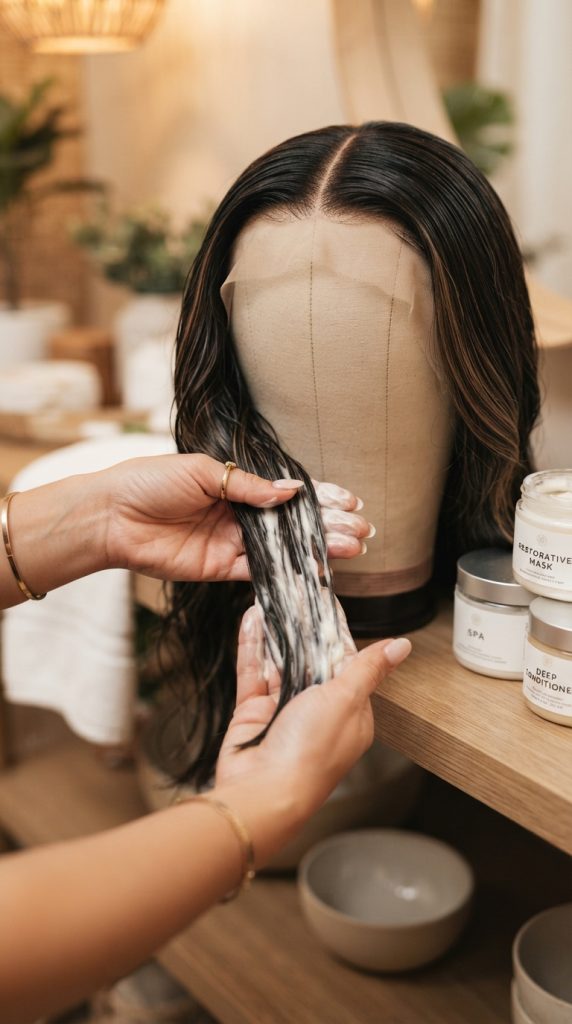
Select a rich, deep-conditioning treatment mask containing natural Argan oil, shea butter, or hydrolysed keratin proteins. Scoop a generous amount of mask product onto your palms and rub your hands together. Carefully work the conditioner through the mid-shaft areas down toward the bottom ends.
Use your fingers to comb the conditioning mask through small sections for even coverage. Keep all heavy conditioners, oils, and butter masks at least two inches away from the cap. Applying oily products directly onto lace knots loosens the tiny hand-tied knots, causing massive hair loss.
Details:
Focus the majority of your product application on the lower ends of the hair. The bottom tips endure the highest amount of daily friction, heat exposure, and environmental dryness. Once the mask is distributed, comb through the hair with a wide-tooth comb to ensure complete saturation.
To maximize hydration, wrap the conditioned hair loosely in a warm, damp microfiber towel. Alternatively, place the wrapped unit inside a clean plastic shower cap to trap ambient heat. The gentle trapped heat swells the hair shaft slightly, allowing rich nutrients to penetrate deep inside.
Allow the deep treatment to rest on the hair fibers for a full twenty minutes. Do not rush this waiting period, as fibers need adequate contact time to absorb hydrating oils. Once the conditioning time is complete, remove the towel or plastic cap carefully.
Rinse the unit thoroughly using cold water for at least two to three full minutes. Cold water is essential during this final rinse step because it contracts and seals hair cuticles. Sealed cuticles lock the newly absorbed moisture inside while reflecting light for maximum natural shine.
For synthetic fiber units, skip heavy organic butter masks and use specialized synthetic conditioners instead. Synthetic fibers cannot absorb natural plant oils and require specialized liquid silicone formulas to restore smooth glides. Spraying a dedicated synthetic fiber conditioner helps maintain sleek softness without leaving sticky residues behind.
Perform this complete deep conditioning routine after every three wash cycles to sustain continuous bounce. Regular hydration prevents stiff, lifeless hair strands and keeps your hair looking soft, touchable, and full of natural movement.
4. Professional Drying Techniques for Maximum Volume
Drying your unit incorrectly destroys the original shape, ruins crown volume, and causes severe heat damage. Applying high heat directly to soaking wet hair boils trapped water inside the shaft, causing permanent blistering. Combining passive air drying with controlled low-heat blow-drying yields the safest, most voluminous results possible.
Safe Drying Steps and Equipment Handling
- Microfiber Towel Blotting: Wrap the wet unit in a soft towel and press firmly without twisting.
- Controlled Air-Drying: Allow the hair to reach eighty percent dryness naturally on a ventilated stand.
- Directional Blow-Drying: Use a concentrator nozzle and a cool-shot setting combined with a tension brush.

Never rub, wring, or twist your wet hair unit with a standard terrycloth bath towel. Rough towel friction instantly tears delicate wet strands and creates severe, uncontrolled surface frizz. Lay the freshly rinsed unit flat onto a large, dry microfiber towel or clean cotton shirt.
Fold the towel over the hair and press firmly down with flat hands to absorb heavy water droplets. Move your hands slowly down the towel from top to bottom, squeezing gently along the length. Repeat this pressing process with a dry section of the towel until water stops dripping entirely.
Mount the damp unit securely onto a breathable canvas block or collapsible plastic wig stand. Use flat T-pins to secure the unit through the ear tabs and nape base area tightly. Place the stand in a well-ventilated, dry room away from dusty areas and direct sunlight exposure.
Allow the hair strands to air-dry naturally until the unit reaches roughly eighty percent dryness. Air-drying minimizes overall thermal exposure, protecting delicate fiber structures from unnecessary stress. Never place wet units near space heaters, radiators, or open window sills with harsh sunlight.
Once the hair is mostly dry, attach a flat concentrator nozzle to your blow-dryer barrel. Set your dryer to a medium speed setting with low heat or cool air options activated. The concentrator nozzle is crucial because it focuses air streams precisely, preventing random flyaway hairs.
Divide the hair into small horizontal sections using gentle sectioning clips starting from the bottom nape. Take a two-inch wide section of hair and place a small round ceramic barrel brush underneath it. Position the brush right near the root area, maintaining gentle, even tension on the hair fibers.
Direct the blow-dryer nozzle downward toward the brush, keeping the barrel two inches away from strands. Glide the brush and dryer down the hair length simultaneously in one continuous, smooth motion. As you reach the ends, turn the round brush inward toward the neck to create a soft curve.
Repeat this downward drying stroke two or three times until the section is completely dry and polished. The downward air stream forces raised cuticle edges to lie down flat against the strand body. Flat cuticles create a smooth surface that reflects light perfectly, giving your hair an instant glass-like finish.
Continue this method section by section, moving upward toward the top crown area of the cap. When drying the top crown layers, lift the round brush straight up toward the ceiling. Directing air underneath lifted root sections builds long-lasting, airy volume at the crown without heavy teasing.
Always inspect the interior lining of the cap to confirm the mesh base is dry. Wearing or storing a unit with a damp inner cap encourages bacterial growth, skin irritation, and unpleasant odors. If the cap remains damp, blow cool air directly into the interior until every stitch is bone dry.
5. Precise Heat Styling and Shape Preservation
Maintaining an iconic, sleek blowout requires precise thermal control and proper styling mechanics. Direct thermal styling tool application re-shapes hair fibers effectively, but unmonitored high heat degrades elasticity rapidly. Protect your investment by executing strict thermal safety standards during every styling session.
Crucial Thermal Styling Rules and Execution Steps
- Thermal Barrier Application: Spray an ultra-fine coat of lightweight thermal protectant across dry strands.
- Strict Temperature Limits: Keep heat styling tools under three hundred and twenty degrees Fahrenheit max.
- Precision Sectioning: Work in thin, one-inch wide horizontal rows for complete thermal control.

Always apply a high-grade thermal protectant spray before touching hair with flat irons or hot brushes. Thermal protectants create a microscopic shield over the cuticle, slowing heat transfer and preventing moisture loss. Allow the protective spray mist to air-dry completely for two minutes before applying hot metal surfaces.
Never apply hot styling tools to damp strands containing wet product spray or water droplets. Heating wet hair creates steam pockets inside the internal cortex, causing permanent structural hollows and snapping. Always verify strands are completely dry to the touch before starting your iron passes.
Set your digital flat iron or thermal hot brush to a controlled temperature setting. For human hair units, maintain temperatures between two hundred and eighty to three hundred and twenty degrees Fahrenheit. For heat-safe synthetic blends, keep temperatures strictly below two hundred and sixty degrees Fahrenheit.
Separate the hair into clean, thin horizontal rows using sectioning clips, starting at the nape. Working with thin sections ensures heat distributes evenly through every strand without needing multiple passes. Clamping thick chunks forces you to re-apply heat repeatedly, which fries surface strands while inside fibers remain unstyled.
Take a single one-inch wide section of hair and comb through it with a fine-tooth chasing comb. Place your thermal flat iron directly behind the comb, close to the root foundation area. Smoothly chase the comb down the length of the hair with the flat iron following right behind.
Glide the iron downward at a steady, uninterrupted speed from the root toward the ends. As you approach the bottom two inches of the hair shaft, bevel your wrist slightly inward. Turning your wrist gently creates that classic, rounded blowout bend at the bottom of the style.
Never pause, stop, or clamp down in one spot while sliding thermal irons down hair strands. Pausing hot iron plates on a single spot burns hair fibers instantly, leaving permanent horizontal indentation lines. Move the iron in one continuous, sweeping motion from top to bottom for a completely seamless finish.
Limit direct thermal styling to once or twice a week max to prevent long-term thermal breakdown. On non-styling days, rely on cold-setting techniques like silk wrapping to preserve the existing shape. Minimizing thermal exposure keeps hair strands flexible, soft, and full of natural life for months.
Continuing from our comprehensive foundational preparation, washing, deep conditioning, and initial blow-drying protocols, this second part covers the remaining crucial pillars of long-term wig care. Maintaining that salon-fresh curve and glossy finish requires everyday protection, precise edge handling, specialized storage, and proactive maintenance against daily wear.
6. Preserving Lace Integrity and Cap Architecture
The lace base and internal cap construction form the actual foundation of your hair unit. If the thin mesh tears, stretches out, or loses its structural shape, even the highest quality hair strands will look unnatural and misaligned on your head. Careful handling of the delicate lace frontal and cap edges is critical for maintaining an invisible, realistic hairline.
Essential Lace Care Rules and Techniques
- Gentle Cleaning Solvents: Always dissolve stubborn wig glue and lace tape residue using dedicated adhesive solvents rather than pulling or scrubbing.
- Protection of Hand-Tied Knots: Avoid applying heavy tension, stiff gels, or abrasive brushes directly across delicate lace areas to prevent strand shedding.
- Cap Shape Preservation: Store your unit on properly proportioned head mounts to prevent internal elastic bands from stretching out over time.

Adhesive residue from tapes and liquid lace glues accumulates quickly along the front hairline. Never attempt to peel off dry glue with your fingers or scratch it away using fingernails. Scraping dry adhesive tears the delicate mesh fibers, leaving jagged holes and ruining the invisible lace edge completely.
To clean the lace safely, place your unit flat on a clean towel with the inner cap facing upward. Saturate a soft cotton pad or micro-fiber cloth with specialized wig adhesive solvent or pure isopropyl alcohol. Press the saturated pad gently against the underside of the glue-covered lace and hold it in place for thirty seconds.
The solvent breaks down the sticky chemical bonds of the glue, turning hard adhesive into a soft, gel-like substance. Once softened, gently wipe the residue away from the lace using small, outward strokes. Always wipe away from the hair strands toward the outer edge of the lace so you do not drag dissolved glue further into the hair fibers.
After the glue is removed, inspect the fine hand-tied knots along the front parting area. These tiny knots hold individual hair strands onto the lace base. Avoid brushing or combing harshly over these knotted areas while wet, as wet fibers slip out of knots far more easily.
Elastic bands and adjustable cap straps give your unit a snug, custom fit against your scalp. Over time, sweat, natural head oils, and improper storage cause elastic materials to lose stretch and loosen. Inspect your cap straps monthly to ensure the hooks, slides, and elastic bands remain firm and fully functional.
7. Daily Nighttime Protection Routines
Friction during sleep is one of the primary causes of sudden matting, severe tangling, and lost hair volume. Tossing and turning against standard cotton pillowcases creates rough friction that strips moisture, roughs up the cuticle layer, and crushes carefully styled rounded ends. Establishing a structured nightly care routine protects your investment while you rest.
Nighttime Style Preservation Methods
- Unit Removal: Whenever possible, unmount non-glued units at night to eliminate friction against bedding completely.
- Satin and Silk Wraps: Secure hair with smooth satin scarfs and roomy bonnets to lock in hydration and prevent surface friction.
- Friction-Free Bedding: Use high-grade silk or satin pillowcases as an extra safety layer against stray strand breakage.

If your unit is custom-fitted, glueless, or worn with removable clips, removing it every night before bed is the absolute best practice. Once removed, brush the hair smooth with a soft paddle brush and place it on a wig stand overnight. This simple thirty-second habit eliminates eight hours of friction damage and keeps the hair curve perfectly intact.
If your unit is professionally installed and bonded down, you must prepare the hair thoroughly before lying down. Start by gently combing through the strands from ends to roots to remove any small tangles accumulated during the day. Apply two drops of lightweight hair oil to your palms and smooth it lightly over the bottom ends.
To preserve the sleek shape of your style, perform a classic wrap technique. Divide the hair into two broad sections, wrapping the hair smoothly around the circumference of your head in a circular, flat motion. Secure the wrapped hair loosely with flat metal double-prong clips or large plastic hair pins.
Place a wide, soft satin scarf flat against your front hairline, covering the lace edge entirely. Tie the scarf firmly at the nape of your neck to hold the front perimeter flat while you sleep. Next, slip a roomy satin bonnet over the rest of the wrapped length to keep the curved ends tucked away safely.
Satin and silk materials feature ultra-smooth surfaces that allow hair strands to slide effortlessly without catching or pulling. Never go to sleep with damp, wet, or un-wrapped hair under any circumstances. Moisture combined with nighttime friction causes severe root matting and sour cap odors that are extremely difficult to undo.
In the morning, gently remove your bonnet and scarf. Take out any placement clips and allow the wrapped hair to fall down naturally. Lightly shake your head, then run a wide-tooth comb through the hair to revive instant volume and natural movement with zero restyling needed.
8. Managing Frizz, Static, and Daily Flyaways
Atmospheric moisture, static electricity, and dry indoor heating environments constantly threaten to turn a sleek style into a frizzy, uncontrolled mess. Frizz happens when dry, raised cuticles absorb surrounding air moisture, causing individual hair strands to swell outward. Controlling surface friction and locking out humidity restores a smooth, glassy finish effortlessly.
Effective Anti-Frizz and Smoothing Solutions
- Weightless Finishing Serums: Use light silicone-based or natural oil serums to coat strands without causing heavy, greasy buildup.
- Precision Flyaway Taming: Apply light edge gels or hairsprays using a soft spoolie brush for targeted control along partings.
- Anti-Humidity Shielding: Spray a light, fine layer of humidity-resistant finishing mist before stepping outdoors into damp weather.
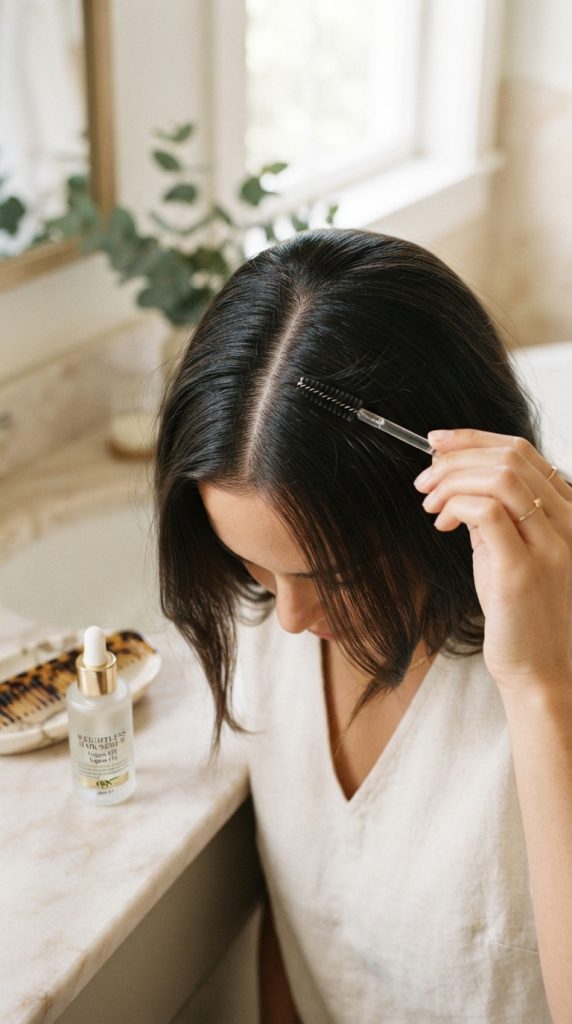
When dealing with daily flyaway hairs along the crown or center part, avoid spraying heavy, stiff hairsprays directly onto the hair. Heavy sprays create sticky residues that attract dirt and turn stiff, requiring frequent, unnecessary washing. Instead, spray a light mist of flexible hold spray onto a clean spoolie brush or clean toothbrush.
Gently comb the damp spoolie brush over stray, sticking-up hairs along the parting line. The fine bristles target individual loose strands directly without flattening the natural, airy lift of the crown volume beneath it. This precise technique keeps your parting looking exceptionally clean, defined, and completely natural.
For mid-day static cling or surface frizz caused by clothing friction, use lightweight finishing oil serums. Dispense a tiny, dime-sized drop of serum into your palm and rub your hands together until warm. Lightly glide your open palms over the top surface of the hair, focusing on the ends and outer perimeter layers.
Always avoid applying oils, heavy serums, or rich pomades directly onto the root base near the cap. Heavy products weigh down root volume instantly, turning a bouncy style into a flat, stringy, greasy-looking shape. Keep all heavy finishing products concentrated strictly from the mid-shaft down to the bottom tips.
In humid weather environments, protect your hair by applying an anti-humidity seal spray. Anti-humidity sprays utilize lightweight polymers that form an invisible moisture barrier around each individual hair shaft. This protective coating blocks external dampness from penetrating cuticles while sealing internal hydration inside strands.
Keep your hands out of your hair throughout the day as much as possible. Constantly touching, twisting, or running fingers through hair strands transfers natural skin oils and generates static friction. Minimal touching preserves a clean, smooth texture and ensures long-lasting style memory from morning to night.
9. Storing Your Unit Properly When Not in Use
Improper storage destroys carefully crafted styles faster than regular daily wear. Leaving your unit tossed in a crowded drawer, thrown on a chair, or squeezed into tight bags crushes the curved ends, creates permanent creases, and tangles fibers completely. Storing your hair investment properly ensures it remains fresh, shaped, and ready for instant wear anytime.
Optimal Storage Solutions and Techniques
- Mannequin Heads and Blocks: The ideal choice for daily wear, preserving crown volume, bob curvature, and overall cap structure.
- Breathable Satin Bags: The best option for dust-free, compact travel protection and dark, cool closet storage.
- Original Box Packaging: Protects delicate fibers during long-term seasonal storage while keeping hair completely flat and safe.

For daily worn units, invest in a high-quality canvas block head or lightweight plastic mannequin stand. Place the stand in a clean, dry room away from direct window sunlight, heating vents, or damp bathrooms. Direct sunlight fades hair color over time, while heating vents and bathroom steam degrade cap elasticity and invite mildew growth.
Before mounting your unit onto a mannequin stand for short-term storage, comb through the hair completely to clear out all minor tangles. Place the internal cap over the top of the foam or canvas head gently, adjusting the ear tabs so the unit sits straight. Allow the curved ends of the hair to fall naturally around the neck area without being pressed against walls or flat surfaces.
For long-term storage or travel, make sure the hair is freshly washed, deeply conditioned, and one hundred percent dry. Storing a damp wig inside sealed containers creates trapped moisture pockets that destroy cap stitching and cause strong, unpleasant mildew odors. Once dry, spray a light conditioning mist through the strands and comb thoroughly.
Fold the unit carefully along its natural structural seams, tucking the lace frontal inside the inner cap cavity to protect delicate mesh edges from snagging. Wrap a soft, wide hairnet around the folded hair to hold strands neatly in place. Slide the net-wrapped unit into a breathable satin storage bag or soft silk pouch.
Avoid storing units inside airtight plastic zip bags for long periods unless using specialized vacuum sealing with desiccants. Standard sealed plastic traps ambient humidity and prevents natural air circulation, leading to stiff, stale-smelling fibers. Storing your hair in dark, breathable satin bags protects against dust, friction, and light exposure.
When taking a unit out of storage, remove the hairnet and give the unit a gentle, firm shake from the nape base. Mount the unit on a block head and brush through with a paddle brush to revive soft volume instantly. Proper storage methods save valuable restyling time and keep your hair looking brand new every single season.
10. Troubleshooting Common Wear and Tear Issues
Even with meticulous daily maintenance, regular wear causes gradual minor damage to every hair unit over time. Dry ends, reduced crown volume, lace fraying, and product stiffness are natural occurrences during the lifecycle of a wig. Knowing how to fix and troubleshoot these common issues quickly extends overall usability and saves money on frequent replacements.
Troubleshooting Methods and Repairs
- Trimming Frayed or Dry Tips: Carefully snip away split, straw-like tips with sharp shears to maintain a clean, crisp baseline curve.
- Clarifying Product Buildup: Use diluted apple cider vinegar washes to dissolve stubborn mineral deposits and heavy styling products.
- Restoring Flattened Crown Volume: Lightly backcomb underlying hair layers near the cap base to restore height and airy lift.

When the ends of your hair begin to look stiff, dry, or frayed from friction against winter coats and scarves, a minor trim is required. Secure the unit onto a block head and comb the hair completely flat. Using sharp hair-cutting shears, trim off one-quarter inch of damaged tips across the bottom edge.
Always cut in tiny vertical snips (point cutting) rather than harsh horizontal cuts to keep the edge soft and natural. Trimming away split ends instantly refreshes the sharp, clean perimeter of your style, making the hair look healthy and full once again. Regular micro-trims prevent split ends from traveling further up the hair shaft.
If the hair feels heavy, sticky, or lifeless despite regular shampooing, heavy product buildup is likely present. Remedy this by performing a gentle clarifying rinse using diluted raw apple cider vinegar. Mix one part organic apple cider vinegar with four parts warm water in a clean bowl.
Submerge the clean unit into the diluted vinegar bath for five minutes, swishing gently. Vinegar natural acids break down stubborn silicones, heavy oils, and hard water mineral deposits effortlessly. Rinse thoroughly with cool running water and follow up with a rich moisturizing treatment mask to restore optimal hydration levels.
If the crown area loses its natural volume and sits flat against the cap, restore lift using dry shampoo and strategic backcombing. Spray a small amount of weightless dry shampoo directly into the root areas underneath the top crown layer. Allow the dry shampoo powder to absorb surface oils for two minutes, then brush it out completely.
Lift a horizontal layer of hair near the crown, leaving the topmost surface layer untouched. Place a fine-tooth tail comb two inches above the roots and gently push the comb downward toward the cap in short strokes. This gentle backcombing creates a soft cushion of airy support hidden beneath top layers.
Smooth the un-touched surface layer back over the backcombed cushion to hide the textured lift beneath. This simple technique restores full, bouncy crown volume without applying direct heat or damaging surface hair fibers. Addressing minor wear issues promptly keeps your unit looking pristine, vibrant, and stylish for its maximum possible lifespan.
Leave a Reply