
The iconic 90s aesthetic has made a massive comeback in modern hair trends. Among these styles, the voluminous short cut stands out as a timeless look. Learning how to master a proper bob blowout gives your hair instant lift and bouncy movement. This classic style focuses on rounded ends, soft face-framing curves, and lush root volume. Whether you have fine strands or thick locks, this technique transforms flat hair into a dramatic statement. You do not need a daily salon visit to achieve this fluffy look at home. With the right tools and proper heat techniques, you can easily replicate this legendary aesthetic.

Achieving the perfect 90s shape requires a strategic approach from start to finish. Prep work is just as important as the actual drying process itself. Applying lightweight volumizing products provides the foundation needed for long-lasting bounce and hold. Using rounded ceramic brushes helps shape each section while directing airflow precisely from roots to tips. Velcro rollers then lock in the lifted shape as the hair cools down completely. Finishing with light oils and flexible hold sprays ensures your style remains touchable without feeling stiff. Follow this comprehensive step-by-step breakdown to elevate your everyday hair routine with effortless retro glamour.
1. Preparing Your Hair with the Right Wash Routine
Creating incredible volume begins directly in the shower with your cleansing routine. You must remove any heavy product buildup that weighs down your strands. Use a gentle clarifying or volumizing shampoo to cleanse your scalp thoroughly. Focus the shampoo application directly on your roots to maximize natural lift. Avoid heavy, moisture-rich conditioners that flatten short haircuts and ruin bouncy shapes. Instead, apply a lightweight, volumizing conditioner only to your mid-lengths and ends. Rinse your hair completely with cool water to seal the hair cuticle smoothly.

Proper towel-drying technique prevents unwanted frizz before you even turn on your dryer. Never rub your wet hair aggressively with a standard rough cotton towel. Gently squeeze excess water out using a microfiber towel or a soft t-shirt. Your hair should be damp rather than soaking wet before applying prep products. Gently detangle your strands using a wide-tooth comb starting from the ends up. Preparing a clean, weightless base ensures your styling products perform at their highest potential. This crucial initial step sets the stage for a seamless styling session.
A great bob blowout starts long before heat touches your hair. When hair cuticles are clean, light, and free of silicone residue, air flows through easily. This gives your roots natural buoyancy and reduces total drying time significantly. Make sure to rinse all conditioner out thoroughly using lukewarm or cool water. Leftover product creates a heavy film that collapses bouncy curves within hours. Invest time in proper pre-wash habits to guarantee maximum hold throughout the day.
Prep Methods for Maximum Root Lift
- Gently blot excess water using a microfiber towel without friction.
- Apply a lightweight volumizing conditioner strictly on the hair ends.
- Detangle wet strands carefully with a wide-tooth comb to avoid breakage.
- Use clarifying shampoo once a week to prevent heavy product build-up.
- Rinse thoroughly with cool water to enhance natural shine and smoothness.
2. Applying Heat Protectant and Volumizing Mousse
Protecting your hair strands from heat damage is non-negotiable for maintaining healthy shine. Apply a generous layer of heat protectant spray evenly across all sections. Next, distribute a high-quality volumizing mousse from your roots to your mid-lengths. Mousse provides the essential grip and memory needed for a long-lasting bob blowout. Work the product through your hair using your fingers for even coverage. Be careful not to apply heavy cream products that deflate your natural volume.

The combination of heat protection and styling mousse creates an invisible supportive matrix. This structure holds the rounded 90s shape while shielding against thermal stress. Make sure your hair is evenly damp so the mousse spreads smoothly. You can use a fine-tooth comb to distribute the styling foam evenly. Proper application prevents sticky spots and ensures a soft, touchable texture throughout. Taking time during product application yields vastly superior styling results that last all day.
Choosing the right mousse formulas makes a huge difference in overall texture. Look for alcohol-free styling foams designed specifically for fine or medium hair density. These formulas deliver high memory hold without causing dryness or stiff crunchiness. Spread the foam gently through every layer from top to bottom. Ensure every root zone gets an equal amount of product support. Proper product layering lays down the foundation for incredible shape memory and resilience.
Ways to Evenly Distribute Volumizing Foam
- Dispense an egg-sized dollop of mousse into your palm first.
- Comb the product through damp hair from roots to mid-lengths.
- Layer a weightless heat protectant spray to defend against thermal styling.
- Use a wide-tooth comb to spread product evenly from front to back.
- Focus extra root-lifting mousse near the crown for maximum elevation.
3. Rough Drying to Remove Excess Moisture
Never attempt to style soaking-wet hair directly with a round brush. Doing so leads to arm fatigue, heat damage, and flat styling results. Use your hair dryer on medium heat to rough-dry your hair first. Target about seventy percent dryness before introducing any styling brushes into the mix. Flip your head upside down while drying to encourage maximum root lift. Use your fingers to gently toss the hair around and speed up drying.
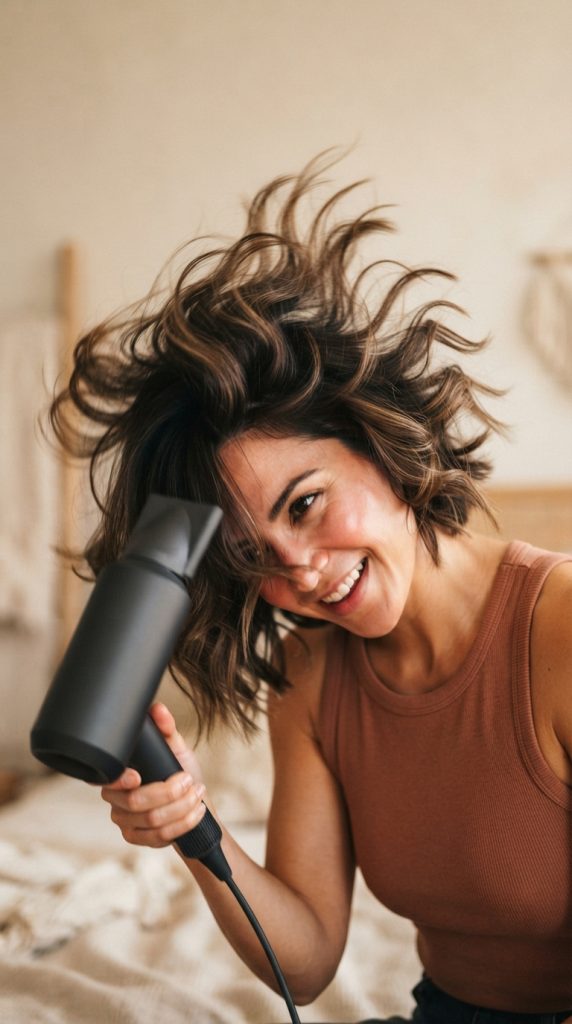
Flipping your head back up reveals instant lift at the crown area. Focus the airflow down the hair shaft to keep cuticles relatively smooth. Keep the dryer moving continuously to prevent concentrating heat on single spots. Stop rough-drying once your hair feels barely damp to the touch. This ideal moisture level allows you to shape the hair efficiently without over-drying. Proper rough drying saves significant time during the structured round-brushing phase.
Rough drying allows you to set the direction of root growth before precision styling. When you blow air against the root growth direction, you create natural volume. This mechanical lift works together with your volumizing mousse for double the bounce. Keep your dryer moving continuously across all sections of your head. Never hold high heat in one location for more than a few seconds. This preserves strand health while preparing hair for the round brush sectioning phase.
Steps for Quick and Safe Rough Drying
- Set your blow dryer to medium heat and high airflow speed.
- Flip your head upside down to lift roots away from the scalp.
- Shake hair gently with fingers until strands are mostly dry.
- Direct airflow down the hair shaft to maintain a smooth cuticle.
- Stop drying as soon as hair reaches seventy percent dryness level.
4. Sectioning the Hair for Controlled Styling
Clean sectioning is the secret to achieving a balanced, professional finish at home. Divide your damp hair into neat, manageable horizontal layers using sectioning clips. Separate the bottom section at the nape of your neck to begin styling. Secure the top sections firmly on top of your head out of the way. Working in small, controlled parts prevents wet hair from touching freshly dried areas. It also ensures every single strand receives focused heat and shaping attention.

Your section size should match the diameter of your round brush for best control. Sections that are too thick will not dry evenly or curve properly. Keep your partings clean and straight using a tail comb for precision. Take your time setting up your clips before turning on the dryer. Proper organization makes the styling process much faster and far less overwhelming. As you finish each layer, unclip the next section directly above it.
Working in structured tiers allows heat to penetrate every strand completely. When you hurry and grab oversized sections, the core remains damp and flat. This causes the entire hairstyle to collapse shortly after you finish styling. Use professional duckbill clips that grip short hair tightly without leaving heavy creases. Keep all top hair pinned high up so it stays cleanly out of your way. Precision sectioning guarantees smooth, cohesive, and long-lasting dramatic curves throughout your hair.
Methods for Proper Hair Sectioning
- Divide hair into three horizontal tiers using strong duckbill clips.
- Isolate the nape of the neck as your starting foundation layer.
- Keep section widths equal to the width of your round brush.
- Use a pintail comb to create clean, straight horizontal partings.
- Keep top sections pinned securely away from active styling areas.
5. Master the Round Brush Technique for Ends and Roots
The round brush technique is where the true transformation takes place. Select a medium-sized ceramic round brush for classic 90s curves and bounce. Place the brush under a hair section directly at the scalp level. Direct the dryer nozzle downwards while lifting the brush upwards for root height. Pull the brush smoothly down toward the ends while rotating it inwards continuously. This motion creates that signature inward curve characteristic of a classic bob blowout.

Repeat this movement two to three times on each individual section of hair. Ensure the heat is directed along the brush barrel for even thermal distribution. Finish each pass by blasting the rolled hair with a cool shot of air. The cool air sets the shape and locks in smooth, high-shine results. Keep tension firm on the brush as you glide through to smooth frizz. Mastering this fluid rolling motion yields smooth, curved ends with stunning overall shape.
Brush material plays a key role during this essential styling step. Ceramic barrels retain heat evenly, acting like a warm styling iron. Wild boar bristle brushes add intense smoothing power and distribute scalp oils beautifully. Choose a hybrid brush to get both heat distribution and tension control. Keep your wrists relaxed as you roll the brush barrel inward towards your neck. Consistent tension and heat control produce luscious, camera-ready volume every time.
Ways to Perfect Your Round Brush Roll
- Position brush beneath section right at root level for max height.
- Maintain steady tension while pulling brush down through hair length.
- Turn brush barrel continuously inward near ends for classic 90s curve.
- Direct dryer nozzle down hair shaft to keep cuticles completely flat.
- Apply cool shot setting for five seconds to lock shape instantly.
6. Utilizing Velcro Rollers for a High-Impact Bob Blowout
While round brushing creates the initial shape, velcro rollers lock in long-lasting height. As soon as you finish drying a section with the round brush, roll it immediately onto a velcro roller. Roll the hair away from your face at the top and inward along the sides and back. Secure each roller near the root with a duckbill clip so it stays firmly in place. Securing hot hair on rollers forces the hair structure to set in a lifted shape.

Leave the rollers in your hair for at least fifteen to twenty minutes while doing makeup. This cooling window is vital for setting a bouncy bob blowout that lasts all day without drooping. If you remove rollers while hair is still warm, the shape will drop quickly. Patience during this step makes all the difference between a flat finish and true volume. Once the hair is cold to the touch, you are ready for removal.
Selecting the correct roller size determines the ultimate body of your hair. Medium-sized rollers yield tighter, curlier ends, while larger ones provide smooth waves and maximum height. Make sure to smooth the ends around the barrel cleanly before rolling down to prevent bent tips. For extra durability, lightly mist each rolled section with a weightless setting spray before letting it cool.
The cooling process allows the hydrogen bonds in your hair to lock into their new curved state. When heat softens the hair structure, rollers establish a fresh, springy memory. Skipping this crucial cooling window is the primary reason many styles collapse before midday. Allow the rollers to sit until every single section feels completely room temperature.
Methods for Setting Velcro Rollers Correctly
- Roll hair sections tightly while still hot from the dryer heat.
- Direct top crown rollers backward for maximum high-impact lift.
- Clip each roller securely at the base using sturdy duckbill clips.
- Allow rollers to cool completely for at least fifteen minutes minimum.
- Mist lightly with flexible hold spray while hair sets on rollers.
7. Perfecting Face-Framing Layers and Fringe in a Bob Blowout
The face-framing sections are the main focal point of a retro nineties haircut. To style these front pieces, place your round brush behind the section and roll upward away from your face. Direct the dryer airflow forward over the brush to create soft, swept-back wing curves. This backward movement lifts the front layers, framing your cheekbones and eyes beautifully.
If you have curtain bangs or shorter cheek-length layers, use a smaller round brush for control. Roll these pieces away from your face, heat thoroughly, and set them in a roller angled backward. Cooling these front pieces away from the face ensures they fall back with effortless, airy movement. This dynamic sweeping motion elevates the entire look with classic retro Hollywood glamour.
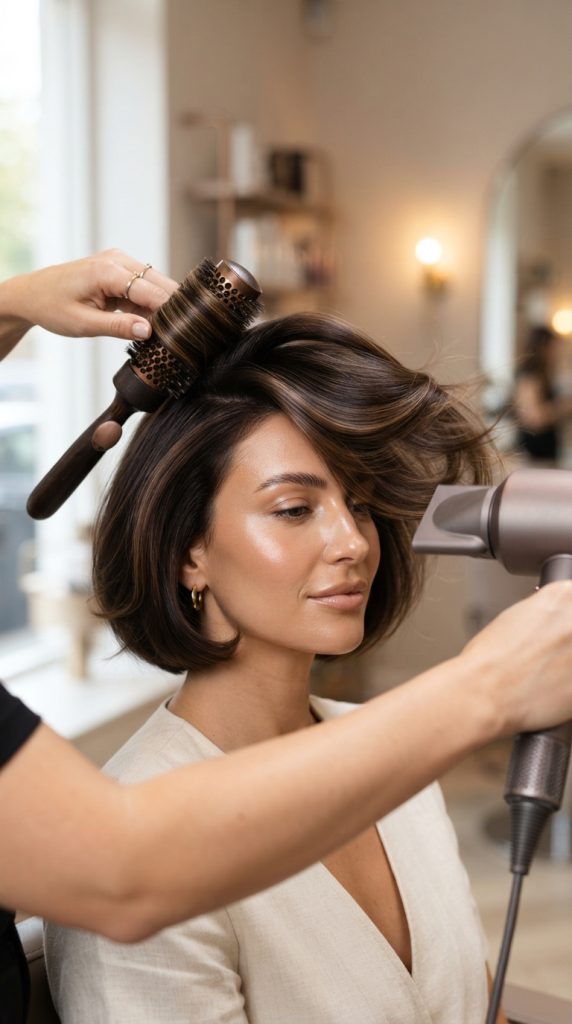
Pay close attention to how you release these front sections once cooled. Gently unwind the rollers following the direction of the roll rather than pulling down abruptly. Use your fingers to sweep the layers back, allowing them to naturally drape around your features. A dedicated focus on face-framing details ensures your overall hair shape looks intentional and professionally sculpted.
Front sections frame your features and draw immediate attention to your jawline and cheeks. Directing the airflow upward away from your face creates that soft, wings-and-curtain silhouette. Ensure you hold continuous tension on the round brush as you glide through the front layers. Consistent airflow paired with steady brush movement prevents unwanted front-facing frizz or kinked ends.
Steps to Style Flattering Front Layers
- Pull front hair sections forward and upward with your round brush.
- Roll hair away from face while applying steady dryer heat.
- Place front sections in rollers angled backward off the forehead.
- Allow front pieces to set completely to establish lasting movement.
- Gently sweep layers back using fingers after removing the rollers.
8. Unwinding Rollers with Precision for Your Bob Blowout
Removing your rollers incorrectly can ruin the smooth volume you just built. Always wait until every single strand is completely cool to the touch before unclipping. Start removing rollers from the bottom layer at the nape of your neck and work up. Unroll each section gently by rotating the roller down, following the natural curve of the curl. Never yank or pull rollers straight out, as this creates instant frizz and disrupts shape.

As you release each section, let the curved end fall naturally into place. You will notice immediate, exaggerated bounce and rounded movement through the ends. If a section feels slightly stiff, gently twist it around your finger to reshape it. Taking your time during this unwinding phase protects the integrity of your bob blowout and preserves shine.
Handling your freshly unrolled hair delicately maintains maximum structural lift. Avoid running heavy paddle brushes through the style right away, which flattens internal volume. Instead, let the newly released sections rest for a moment to adjust to room temperature. This short resting window locks in the dynamic, airy structure you worked so hard to create.
Each unwound section should reveal a bouncy, defined curl that holds its structure effortlessly. Support the base of each root as you gently roll the barrel out of your hair. This reduces unnecessary tension on delicate strands and keeps your scalp volume intact. Patience during removal protects the smooth surface cuticle and minimizes static electricity.
Ways to Safely Unwind Styling Rollers
- Remove clips starting from bottom nape sections up to crown.
- Unroll each roller gently along its natural curve without pulling.
- Support the base of the hair section as you unwind the barrel.
- Re-twist ends around your finger if needed to refine shape.
- Avoid brushing immediately to preserve defined root height.
9. Blending and Fluffing Your Bob Blowout for Natural Movement
Once all rollers are out, it is time to blend the sections together into a seamless shape. Flip your head upside down and gently shake your roots with your fingertips. This shaking action breaks up any roller partings and creates a full, seamless cloud of hair. Flip your head back up and use a wide-tooth comb or hands to direct hair into place.

Avoid using fine-tooth combs or heavy brushes, which strip away the fluffy texture. Instead, rake your fingers through the length from underneath to encourage full, airy body. Push up on the roots with your palms to create continuous height around the crown. The end goal is soft, touchable fullness that moves naturally whenever you turn your head.
Balancing control with touchable texture is essential during the blending phase. You want your hairstyle to look effortless, full of life, and full-body, rather than rigid or spray-locked. Gently piece out individual face-framing ends using a tiny dot of light hair serum for defined contrast. This contrast brings out the rich dimension and classic shape of short layered cuts.
Gently shaking the roots frees up the internal airflow between individual hair sections. This creates that iconic light-as-air fullness characteristic of late twentieth-century magazine styles. If you notice any obvious roller lines, lightly massage the scalp in circular motions. This effortlessly merges separate sections into one continuous, gorgeous curtain of hair.
Methods to Blend and Volume-Boost Hair
- Flip head upside down and massage roots gently with fingertips.
- Flip head back and comb through using a wide-tooth comb.
- Rake fingers through hair from underneath to lift internal layers.
- Gently tease crown roots lightly for extra long-lasting height.
- Style part line slightly off-center for classic asymmetry.
10. Locking in Hold and Adding High-Shine Finish to a Bob Blowout
The final step is locking in your voluminous style so it resists humidity and sagging. Choose a flexible, touchable hairspray that provides reliable hold without feeling crunchy. Hold the can about twelve inches away from your head and mist evenly across all layers. Next, warm a tiny pea-sized drop of lightweight hair oil between your palms. Gently smooth your hands over the surface ends to eliminate flyaways and boost shine.
This finishing step shields your hair against ambient moisture while providing a glossy sheen. For extra root support throughout the day, spray a bit of dry shampoo right at the crown. This absorbs excess oil and maintains continuous lift for days. With proper finishing techniques, your classic bob blowout remains gorgeous, bouncy, and full of retro volume.

Maintaining your finished look overnight requires just a simple routine. Sleep on a silk or satin pillowcase to reduce surface friction and prevent morning frizz. You can also wrap your hair loosely in a silk scarf to preserve rounded ends while sleeping. A quick morning touch-up with dry shampoo and a hand-fluff restores full body instantly the next day.
A proper finish acts as an invisible shield against changing weather and humidity levels. Flexible hold hairsprays allow the hair to move naturally when you walk while returning to its curved shape. Always apply finishing oils with a light touch, focusing exclusively on the tips. Keeping products away from the scalp area ensures your root lift remains high all day long.
Steps to Finish and Preserve Your Style
- Mist flexible hold hairspray evenly from twelve inches away.
- Smooth a tiny drop of shine oil onto ends to tame frizz.
- Apply texturizing spray at roots for long-lasting structural support.
- Sleep on a silk pillowcase to protect rounded shape overnight.
- Revive volume the next morning using dry shampoo at roots.
Leave a Reply