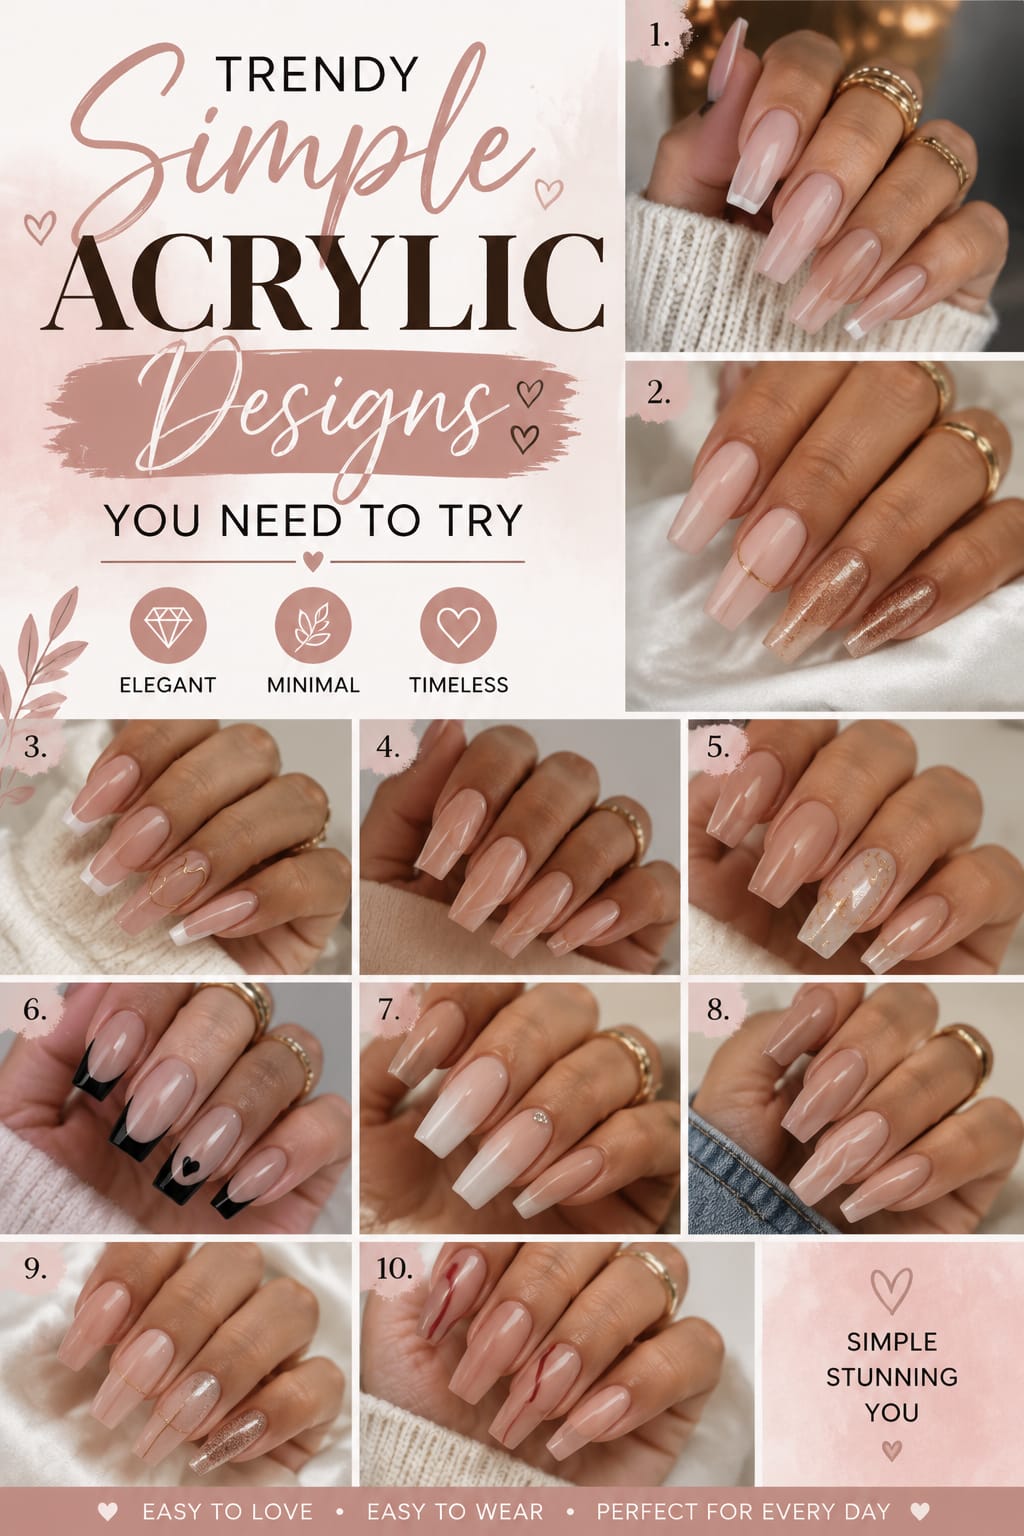
Nail art has taken the beauty world by storm over recent years. People everywhere are looking for chic ways to elevate their everyday style without feeling weighed down by excessive clutter. You do not need overly complex patterns or heavy embellishments to make a dramatic style statement. Clean, deliberate looks are currently dominating social media feeds and salon request lists everywhere. Choosing a simple acrylic set gives you a fresh, ultra-polished appearance that easily transitions from casual daywear to formal evening events.
Minimalist aesthetics continue to trend because they offer incredible versatility and timeless charm. A subtle look enhances your natural beauty while maintaining a sophisticated edge that fits into any wardrobe seamlessly. Many people wrongly assume that acrylics always mean long, dramatic claws with heavy glitter and three-dimensional gems. However, modern beauty trends favor subtle lengths, soft shapes, and clean finishes. A simple acrylic application provides the structural durability of traditional enhancements without looking over the top or feeling uncomfortable during daily tasks.
Finding the right balance between personal style and practical wearability can be tricky for busy individuals. That is why minimalist manicures are the ultimate solution for modern life. They require far less maintenance than intricate art while keeping your hands looking pristine for weeks. Whether you prefer muted nudes, soft pastels, or clean geometric lines, these designs fit every personality and lifestyle. Let us explore the absolute best simple acrylic concepts that you should definitely try for your next salon visit or home nail session.
1. Classic French Tips with a Simple Acrylic Base
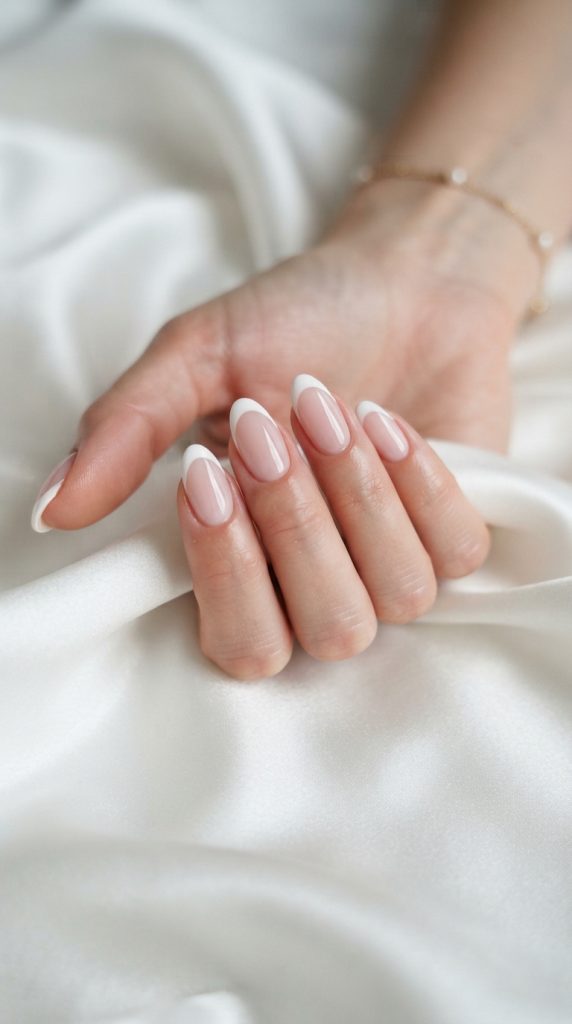
The classic French manicure remains one of the most timeless options in the entire nail world. It features a natural pink base paired with crisp white tips along the free edge. This design creates an instantly clean and elongated silhouette for any hand or finger shape. It works exceptionally well on short to medium square or soft almond shapes. The simplicity of this look keeps your hands looking effortless yet instantly refined for any occasion.
Achieving a high-end French tip requires strict attention to symmetry and clean smile lines. The contrast between the bed and the tip must look crisp rather than blurry or uneven. A quality base conceals natural nail flaws while highlighting the bright tip edge. This design acts as an instant pick-me-up for your hands, making them look longer and slender. It never goes out of style regardless of fast-changing fashion seasons.
Step-by-Step Method
To achieve this iconic style, start by prepping the natural nail surface carefully to remove excess oil. Apply a thin layer of primer across the entire surface to ensure maximum product adhesion. Build a smooth, durable foundation using a neutral pink or nude powder blend. Once the base cures, paint a precise white crescent line along the free edge using a fine liner brush. Seal the entire design with a clear topcoat to lock in shine.
Style & Color Variations
You can easily adapt this style to suit different seasons and shifting personal moods. Swap the traditional white tips for soft pastel shades like lavender, baby blue, or fresh mint green. Alternatively, try a matte topcoat over the entire nail for a modern texture contrast. You can also add a tiny thin gold foil line right beneath the French crescent for subtle glam.
Maintenance Tips
To keep French tips pristine, reapply a shiny topcoat every five days at home. Protect the white tips from chemical staining by wearing gloves while cleaning or using hair dyes. Keep cuticles hydrated with daily oil applications to prevent lifting around the base area.
2. Minimalist Milky White Simple Acrylic Polish Look
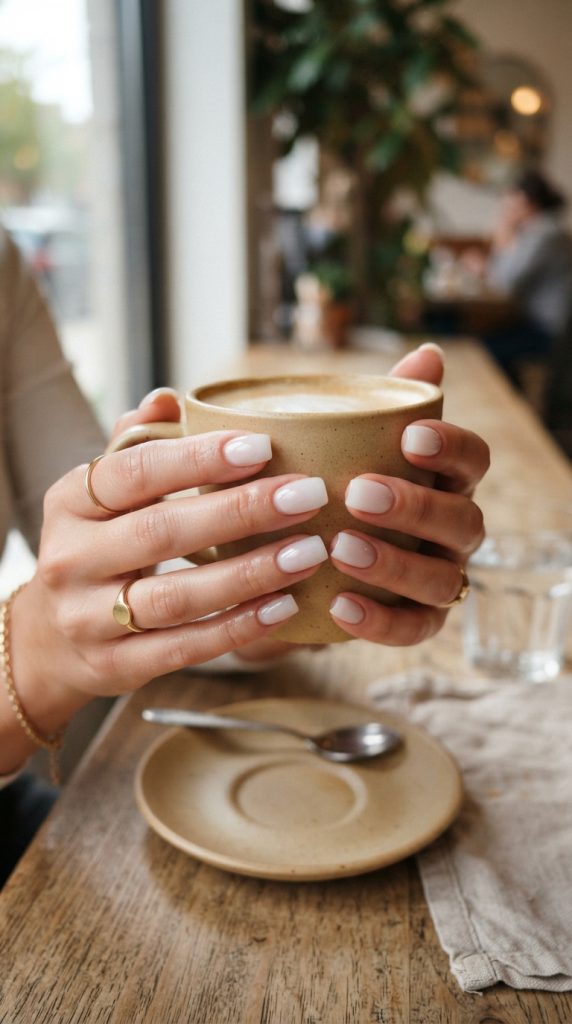
Milky white nails offer a soft, cloud-like aesthetic that feels modern and incredibly fresh. Unlike stark white polishes, milky tones have a semi-sheer finish that looks soft and natural against skin. This look complements every skin tone effortlessly and gives off a clean, high-end visual vibe. It is ideal for anyone who loves low-maintenance aesthetics with maximum visual impact and elegance.
The appeal of milky white lies in its subtle depth and luminous appearance under natural light. It hides imperfections on your natural nail plate while giving a healthy, glowing appearance. The color looks sophisticated without looking harsh or overly artificial. It pairs seamlessly with gold jewelry, silver rings, and minimalist wardrobe pieces. It is a absolute favorite for brides, professionals, and minimalist enthusiasts alike.
Step-by-Step Method
Creating the perfect milky finish requires careful layering techniques during the application process. Begin by constructing the overall shape using a semi-translucent white powder blend. Ensure the product thickness remains completely uniform across the entire surface of the nail bed. File down any uneven areas gently until the surface feels smooth to the touch. Finish with a glass-like glossy topcoat to enhance the luminous, semi-sheer visual effect.
Style & Color Variations
This versatile style serves as a fantastic foundation for subtle personal artistic touches. You can layer a faint pearl chrome powder over the milky white base for a glazed doughnut finish. Another popular method is adding a single tiny rhinestone near the cuticle of one accent finger. You could also mix in micro-shimmer to give the set a subtle winter glow.
Maintenance Tips
Milky white colors can show dirt easily, so scrub under your nails daily with a soft brush. Avoid using harsh colored lotions or soaps that might stain the pale surface over time. Apply cuticle oil twice daily to preserve the soft aesthetic of the surrounding skin.
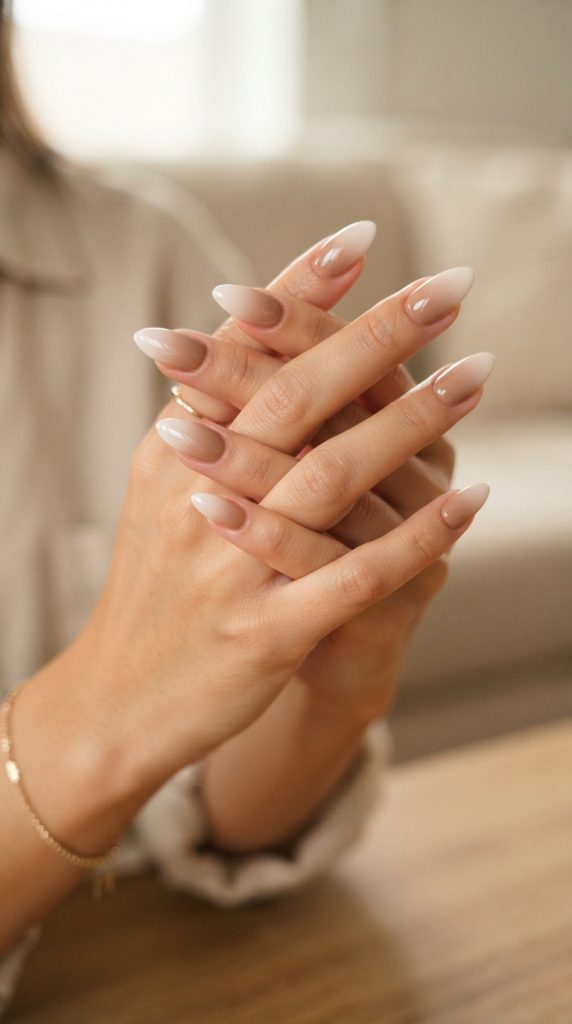
3. Soft Nude Ombre Simple Acrylic Style
The nude ombre style transitions seamlessly from a rich skin-tone shade into a gentle tip color. This seamless gradient creates an elongating effect on your fingers, making them look slender and elegant. It eliminates harsh contrast lines, giving your manicure an airy, softly blended finish. It is a fantastic go-to look for professional workplace environments and formal gatherings alike.
The beauty of a gradient lies in its forgiving grow-out phase compared to solid colors. As your natural nail grows out, the nude base hides the line of demarcation near the cuticle line. This allows you to wear the set longer between salon refill visits. It balances modern nail craftsmanship with everyday practical convenience. It gives a luxurious appearance that matches any outfit seamlessly.
Step-by-Step Method
Building a smooth gradient requires precise blending techniques while the material is still wet. Start by placing the deeper nude powder near the cuticle area carefully. Feather the material lightly down toward the center of the nail plate using long strokes. Next, place a lighter shade or white powder at the tip and work it upward to meet the nude. Buff the dried surface carefully to create a flawless transition line.
Style & Color Variations
You can customize this soft gradient in several interesting ways to suit your preference. Try using a dusty rose shade for the base instead of a classic beige nude. You can also experiment with a soft peach tone blended into a creamy off-white tip. Applying a satin matte topcoat over the finished ombre adds a chic, modern tactile feel.
Maintenance Tips
Maintain the smooth gradient look by buffing away any edge snags carefully using a fine block. Keep your hands well-moisturized with rich hand cream to keep the cuticle transition looking clean. Topcoat the tips every week to prevent chipping near the lighter edge.
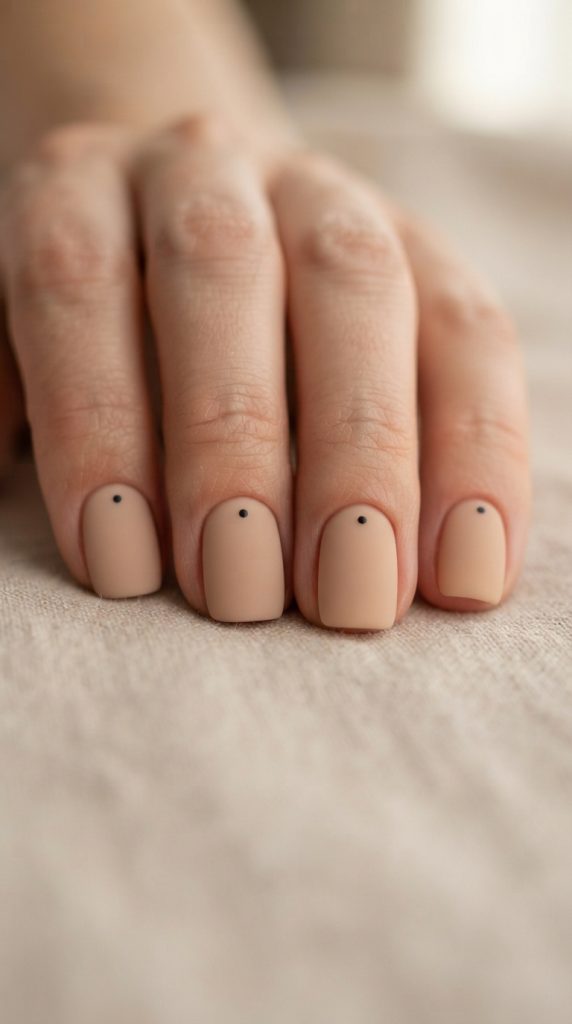
4. Barely-There Micro Dots Simple Acrylic Design
Micro dots offer a subtle nod to art without feeling overwhelming, busy, or crowded. This design features an ultra-clean neutral base accented by a tiny dot near the cuticle or center. It is the ultimate choice for minimalist lovers who want a hint of creativity. The design remains low-key while adding a unique geometric detail to your everyday hands.
This style focuses on negative space, allowing your natural nail shade to take center stage. The tiny placement of dots adds an intriguing detail that captures attention upon closer inspection. It is fast to execute yet looks like a professional artistic design. It works exceptionally well on short nails where space is limited.
Step-by-Step Method
To execute this dot technique cleanly, construct a solid, clean nude foundation first. Ensure the surface is completely level and smooth before applying any decorative details. Dip a small dotting tool into black, white, or metallic gel polish lightly. Carefully tap a single micro dot near the cuticle line on each finger. Let it cure fully before sealing everything beneath a durable topcoat layer.
Style & Color Variations
There are many fun ways to play with micro dot layouts while staying strictly minimal. Use a rich burgundy dot during fall months for a subtle autumnal vibe. Try placing two tiny vertical dots near the base of your ring finger for an abstract touch. Alternatively, use metallic gold paint to create shiny dots that catch light beautifully.
Maintenance Tips
Ensure the dots are completely covered by your topcoat so they do not wear off prematurely. Avoid picking at the raised dot points if you use textured gel paint. Wipe your nails with rubbing alcohol weekly to restore high shine over the neutral base.
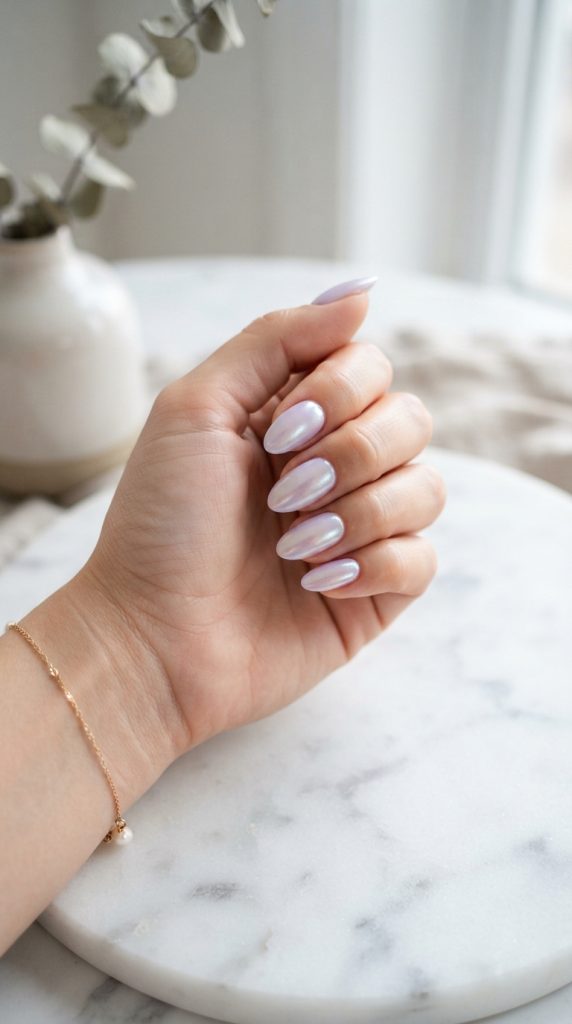
5. Subtle Chrome Glaze Simple Acrylic Finish
Chrome finishes are no longer reserved solely for loud metallic or extreme mirror statements. A subtle glaze over a neutral base offers an ethereal glow that feels modern and chic. This technique reflects light softly, creating an iridescent sheen similar to a polished natural pearl. It enhances simple manicures by adding depth without cluttering the nail with gems.
The chrome glaze trend brings a high-fashion, high-shine element to basic shapes and lengths. It transforms a standard pale shade into an eye-catching, multidimensional surface. Depending on how the light hits your hands, the shimmer shifts delicately. It adds instant luxury to short or medium lengths without feeling loud or ostentatious.
Step-by-Step Method
Achieving this glowing finish depends on proper powder application over the base layer. Build your set using a sheer pink or soft beige base shade. File and buff the surface until it is completely scratch-free and even. Apply a coat of non-wipe gel topcoat and cure it briefly under your LED light. Gently rub a fine iridescent chrome powder over the surface using a applicator tool until it shines.
Style & Color Variations
You can modify this glowing aesthetic by changing your underlying base color shade. A pale lavender base underneath chrome powder creates a mystical cooler color reflection. A soft peach base delivers a warm, golden sun-kissed sheen. You can also leave four nails fully glossy while applying a matte finish to one accent finger.
Maintenance Tips
Chrome can rub off at the tips if not sealed correctly, so cap the edges with topcoat thoroughly. Avoid filing the tips after chrome application, as this breaks the protective seal. Use gentle, sulfate-free soap when washing hands to preserve the iridescent sheen.
Here is Part 2, containing Points 6 through 10 and the Conclusion written in the exact same deep, step-by-step, Pinterest-style format.
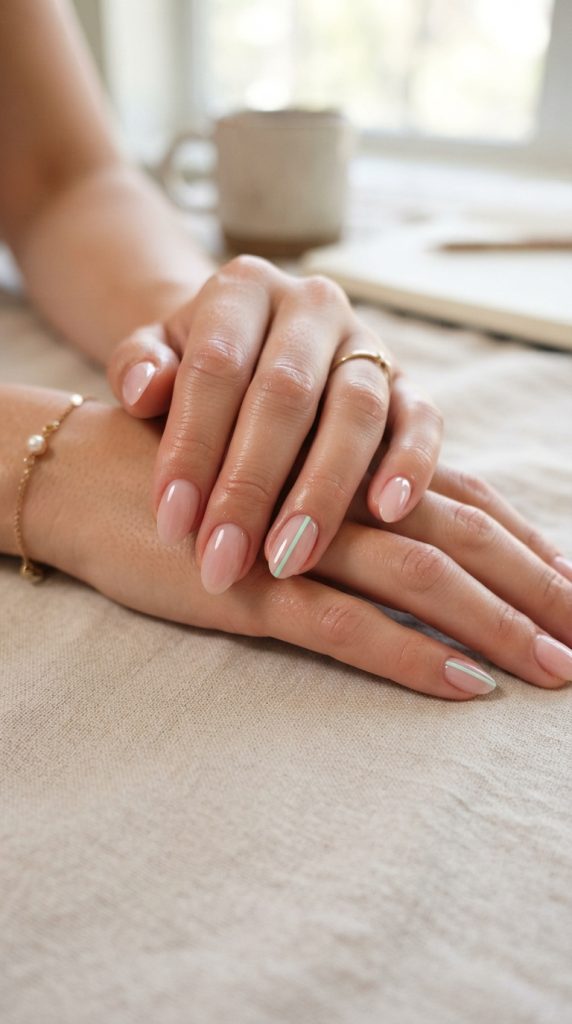
6. Subtle Pastel Accent Lines on a Simple Acrylic Base
Adding thin pastel lines over a simple acrylic foundation gives a playful touch without feeling overly loud. This design uses fine geometric art on a single finger or across all tips to create clean visual interest. Soft shades like lavender, sage green, or butter yellow bring a light aesthetic that suits spring and summer fashion. It balances modern minimalism with a soft pop of color.
Linear details keep the overall manicure structured and crisp. Fine lines elongate your nail bed visually, creating an impression of longer, slender fingers. This style appeals to people who want subtle creativity while keeping their look professional for work or school. It provides a contemporary art feel that pairs effortlessly with everyday casual outfits and simple jewelry piece choices.
Step-by-Step Method
Begin by creating a smooth, even simple acrylic base using a pale cover pink shade. Buff the surface completely flat so your line work glides on smoothly without bumping. Using a long, fine striping brush, dip into your chosen pastel gel polish color. Draw a single thin line diagonally or vertically across the nail surface in one steady stroke. Cure under your LED lamp for sixty seconds and finish with a high-shine topcoat layer.
Style & Color Variations
You can easily tweak this fine-line style by experimenting with different color combinations. Try using two contrasting pastel lines, like baby pink and sky blue, intersecting on an accent nail. You can also swap pastel gel polish for a metallic rose gold paint for a formal evening look. Applying a velvety matte topcoat creates a soft, frosted finish that highlights the delicate line work beneath.
Maintenance Tips
To preserve thin detail lines, ensure your topcoat completely seals the edges of the painted line. Avoid using harsh nail tools or sharp edges to scratch at the surface art. Reapply a clear topcoat every week to protect the delicate lines from daily friction and wear.
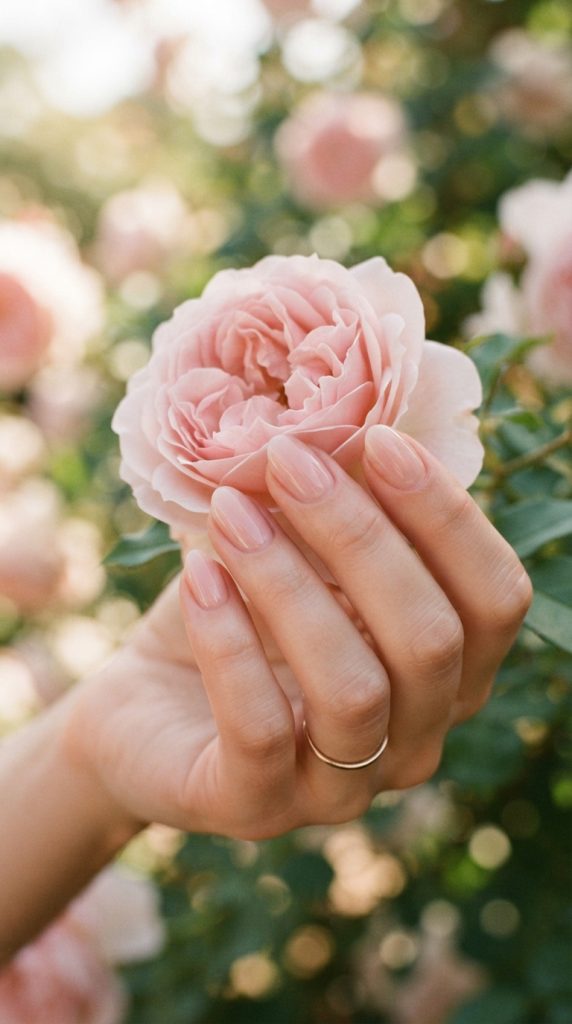
7. Sheer Blush Pink Simple Acrylic Finish
A sheer blush pink simple acrylic set delivers the ultimate clean girl aesthetic with minimal effort. This style relies on soft, translucent pink powder formulations that mirror the natural tone of healthy nail beds. It offers a subtle enhancement that makes your hands look immaculate, polished, and naturally well-groomed. It is an ideal choice for minimalist dressers and professional environments.
The true beauty of a sheer blush finish lies in its effortless versatility across all skin tones. It provides a soft, glowing flush of color that elevates your overall appearance without looking heavy. Because the coverage is sheer, grow-out lines remain virtually invisible near the cuticle area for weeks. This makes it one of the most low-maintenance options available for busy schedules and long travel plans.
Step-by-Step Method
Prepare the natural nail surface by pushing back cuticles and removing surface oils thoroughly. Apply a coat of acid-free primer to create maximum bond strength. Lay down a thin, balanced layer of sheer blush pink simple acrylic powder across the entire nail plate. Work quickly to keep the surface smooth and self-leveled before it sets completely. Gently file the edges, buff to a high polish, and seal with a glossy topcoat layer.
Style & Color Variations
You can subtly elevate a blush base by adding a dusting of fine micro-shimmer powder into the mix. Another chic variation involves applying a glossy topcoat on four fingers and a velvet matte finish on your thumb. You can also place a single clear tiny crystal near the cuticle base of your ring finger for subtle elegance.
Maintenance Tips
Keep sheer pink shades looking fresh by washing away dark residues or dye transfers quickly. Apply a nourishing cuticle oil every morning and night to keep surrounding skin looking pristine. Topcoat your set every seven days to keep the translucent color glass-like and free from dull surface scratches.
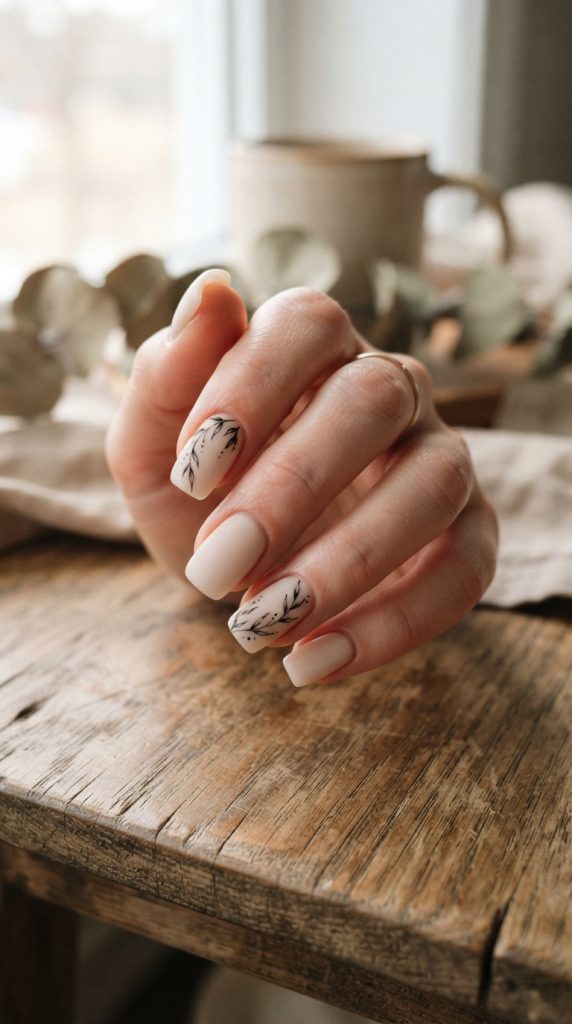
8. Delicate Botanical Stems on Simple Acrylic Nails
Botanical stem art brings a soft, natural element to a simple acrylic foundation. This design uses tiny hand-painted leaf vines or delicate flower stems over a neutral base. The artwork remains light and airy, avoiding heavy color blocks or complex floral layering. It offers a fresh, earthy feel that fits beautifully into spring aesthetics and relaxed weekend wear styles.
Featuring natural elements adds a gentle, artistic flair to your hands without crowding the nail area. The key to keeping this look minimal is utilizing negative space effectively around the leaf illustrations. Placing the stems off-center creates an effortless, organic aesthetic that looks like custom artwork. It is a fantastic option for nature lovers who appreciate fine, delicate hand-painted details.
Step-by-Step Method
Construct a clean, even simple acrylic base using a neutral beige or soft nude powder. Buff the nail plate until it is scratch-free and wipe away any remaining dust using isopropyl alcohol. Using a fine detail brush, paint a slender curved stem using black or deep sage green gel paint. Add small teardrop shapes along the stem to form tiny leaves with light pressure. Cure under your lamp and seal the delicate detail with a coat of high-gloss topcoat.
Style & Color Variations
You can change up this floral concept by swapping green leaf paint for metallic gold foil leaves. Try placing the botanical stem on only one accent finger while leaving the remaining nails completely plain nude. You can also use white paint for a lace-like botanical effect that looks gorgeous for bridal occasions and summer parties.
Maintenance Tips
Because fine brushwork can wear off if exposed to harsh friction, always cap your free edge with topcoat. Wear protective household gloves when washing dishes or handling abrasive cleaning chemicals. Gently massage hand lotion around your fingers to keep the canvas looking fresh and clean.
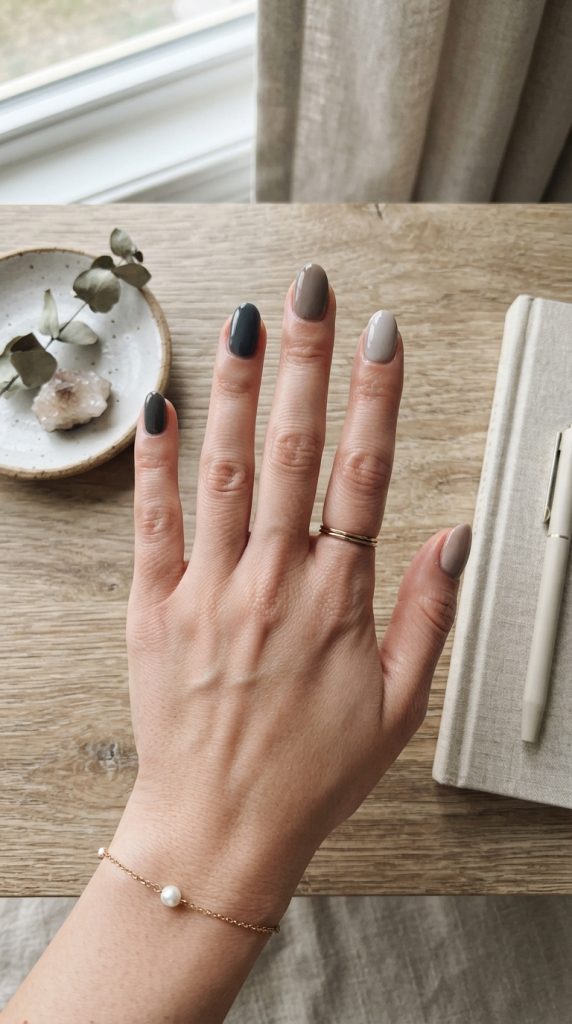
9. Monochromatic Muted Tones Simple Acrylic Set
Monochromatic muted sets feature different subtle shades from the same color family across your fingers. For example, using five varying tones of soft beige, taupe, or soft grey creates a modern gradient. This style keeps your look minimal and clean while adding an interesting visual flow across your hands. It is an elevated way to wear neutral polish without feeling repetitive or plain.
This design strategy brings depth and modern sophistication to short and medium nail shapes. The muted palette ensures that the color variation feels cohesive rather than chaotic or mismatched. It pairs exceptionally well with cozy knitwear, structured blazers, and minimalist gold accessories. It is ideal for anyone who loves neutral aesthetics with a playful, contemporary design twist.
Step-by-Step Method
Select five muted gel polishes that belong to the same tonal family, ranging from light to deep. Prepare a smooth simple acrylic foundation on all fingers using a clear or neutral base powder. File and shape the edges uniformly across all five nails to maintain strong visual consistency. Paint each nail with its corresponding shade from the muted gradient family, curing each layer completely. Seal all five fingers with a durable topcoat for a cohesive glossy or matte appearance.
Style & Color Variations
You can experiment with monochromatic families like soft dusty blues, muted sage greens, or warm sandy terracottas. Try finishing the entire set with a soft velvet matte topcoat to enhance the cozy, muted tone feel. You can also add a glossy topcoat to just the pinky and thumb for a subtle contrast in light reflection.
Maintenance Tips
Muted shades show surface scuffs easily, so wipe your nails with alcohol to clean away marks. Reapply your choice of topcoat every few days to keep the color gradient looking rich and vibrant. Avoid prolonged exposure to heavy tanning lotions that could discolor pale taupe or cream shades.
10. Floating Gold Foil Accent on Simple Acrylic
Floating gold foil accents provide a touch of luxury without cluttering a simple acrylic set. This look features tiny, organic fragments of gold leaf suspended over a translucent or neutral nude base. The foil catches the light randomly, giving your hands a sophisticated shimmer as you move. It is the perfect choice for holiday celebrations, weddings, or formal dinner events.
Using foil fragments creates a high-end, organic art texture that never looks stamped or repetitive. Because each piece of gold foil settles differently, every single nail becomes a unique piece of subtle jewelry. The negative space around the foil keeps the design light, balanced, and refined. It offers a fast way to upgrade a standard neutral set into something memorable and chic.

Step-by-Step Method
Build a smooth, natural simple acrylic base using your favorite sheer pink or nude shade. Before the surface is sealed, apply a tiny speck of foil adhesive or stickiness from cured gel polish. Use tweezers to carefully place small, broken flakes of gold foil onto selected areas of the nail. Press the foil down gently so it lays completely flat against the surface without raised edges. Cap the entire nail with two thick layers of topcoat to seal the foil permanently.
Style & Color Variations
Swap traditional yellow gold foil for silver, rose gold, or iridescent foil pieces to change the metallic tone. You can concentrate the foil flakes strictly near the cuticle line to create an inverted foil ombre effect. Alternatively, apply a matte topcoat over the foil to give it a unique, antique brushed-gold appearance.
Maintenance Tips
Ensure the foil is completely smooth and sealed under topcoat so it does not snag on clothing. If a foil edge feels textured, buff it down gently and reapply another topcoat layer. Keep cuticles nourished with hydrating oils to ensure the metallic shimmer stands out against clean skin.
Conclusion
Embracing simple acrylic designs allows you to enjoy long-lasting, durable manicures without sacrificing elegance. Minimalist styles prove that clean lines, subtle colors, and thoughtful details can make a powerful fashion statement. From timeless French tips and glowing milky whites to delicate gold foil accents, these ten designs offer endless inspiration for your next nail update.
Choosing subtle looks also saves time at the salon and reduces the daily wear and tear seen on intricate art. These low-maintenance options complement every wardrobe, skin tone, and personal aesthetic effortlessly. Try incorporating one of these chic, trendsetting concepts into your routine to keep your hands looking fresh, polished, and timelessly beautiful.
Leave a Reply