
Ethereal white nails are the ultimate beauty statement. They look clean, fresh, and incredibly elegant. Achieving this dream look at home is much easier than you think. You only need the right tools and products.
A perfect manicure starts with a flawless canvas. Painting white nails can sometimes be tricky. The polish can look streaky or uneven if you are not careful. That is why having a step-by-step guide is so important.
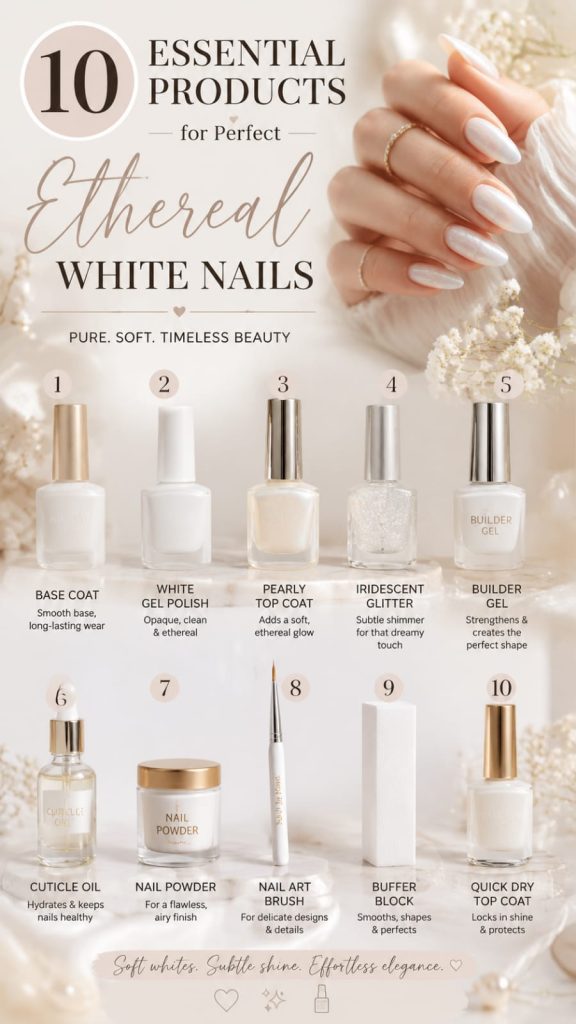
This comprehensive guide will walk you through ten essential products. These items will help you get those stunning white nails. Each product serves a specific purpose in your manicure routine. We will explain how to use them for the best results.
Let us dive into the world of beautiful, dreamy manicures. You will learn the secrets to a long-lasting, streak-free finish. Get ready to transform your hands with these essential beauty secrets.
1. The Nourishing Cuticle Remover Gel
Step 1: Apply a small drop of cuticle remover gel to the base of each nail.
Step 2: Let the gel sit for exactly sixty seconds to soften the dead skin.
Step 3: Gently push back the cuticles using a rounded wooden cuticle stick.
Step 4: Wipe away the excess gel and softened skin with a damp cotton pad.
Step 5: Wash your hands thoroughly with warm soapy water to stop the chemical action.

Perfect white nails require a very clean and tidy nail bed. Any leftover dead skin will ruin your overall look. Cuticle remover gel is the secret to a professional finish. It quickly softens tough skin around your nails. This makes it incredibly easy to push back your cuticles safely.
Using this product prevents you from cutting your cuticles. Cutting can lead to painful infections and uneven nail edges. A good gel formula hydrates the skin while working its magic. It contains soothing ingredients like aloe vera or chamomile extract. This ensures your fingers look neat, healthy, and completely pampered.
To use it, simply squeeze a small amount onto your cuticles. Let it sit for about one minute before pushing gently. Always wash your hands thoroughly after using a cuticle remover. This stops the active ingredients from drying out your skin. Your nail beds will instantly look longer and much neater. This simple step creates the perfect frame for your white polish.
This gel is also highly beneficial for the overall health of your nail matrix. It gently exfoliates without the need for harsh scrubbing. Over time, regular use prevents hangnails from forming. Your manicures will start looking much cleaner right from the start.
Many professional nail salons swear by this specific preparation step. It ensures that the base coat adheres perfectly to the actual nail plate. If polish touches overgrown cuticle skin, it will lift and peel very quickly. Thus, this gel acts as insurance for your beautiful manicure.
2. The Professional Dual-Sided Nail Buffer
Method 1: Use the green side to gently smooth away ridges and uneven bumps.
Method 2: Use the white side to buff the nail to a brilliant shine.
Method 3: Always buff in one direction to avoid weakening your natural nails.
Method 4: Clean the buffer surface with a dry brush after every single use.
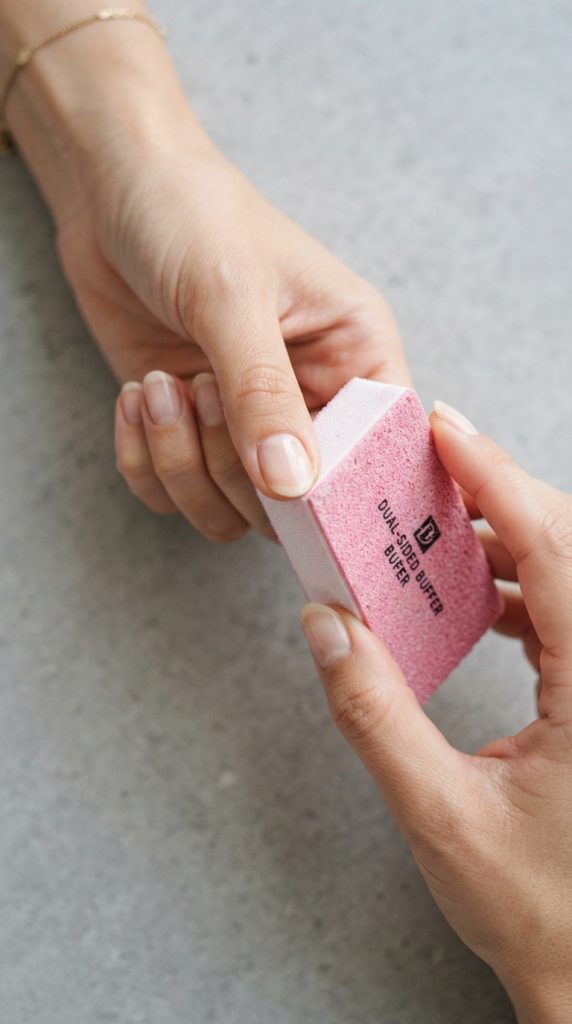
An uneven nail surface is the enemy of white polish. White pigment tends to highlight every single ridge and bump. A high-quality nail buffer is absolutely essential for this reason. It creates a perfectly smooth canvas for your base coat. Without buffering, your white nails might look patchy and unprofessional.
A dual-sided buffer offers two different grits for your manicure. The rougher side gently removes ridges and stains from your nails. The smoother side polishes the surface to a healthy shine. Buffing also stimulates blood flow to your nail beds. This promotes healthier and faster nail growth over time.
Do not over-buff your nails, as this can make them thin. Limit your buffing routine to once every two weeks. Focus on the areas near the cuticle and the free edge. Wipe away any remaining dust with a dry lint-free wipe. Your nails will feel silky smooth and ready for polish.
Proper buffering also removes natural oils from the surface of your nails. These oils can prevent your polish from bonding correctly. By removing them, you ensure your manicure lasts much longer. It is a simple step that yields professional-grade results.
You should always choose a buffer with a flexible foam core. This design distributes pressure evenly across the curved nail plate. It prevents you from filing too deeply in any one spot. Consistent, gentle pressure is the secret to a perfect prep.
3. The Strengthening Ridge-Filling Base Coat
Way 1: Apply one thin coat starting from the center of your nail.
Way 2: Let the base coat dry completely for two minutes before painting.
Way 3: Cap the free edge of your nail to prevent future chipping.
Way 4: Apply a second layer if you have exceptionally deep natural ridges.
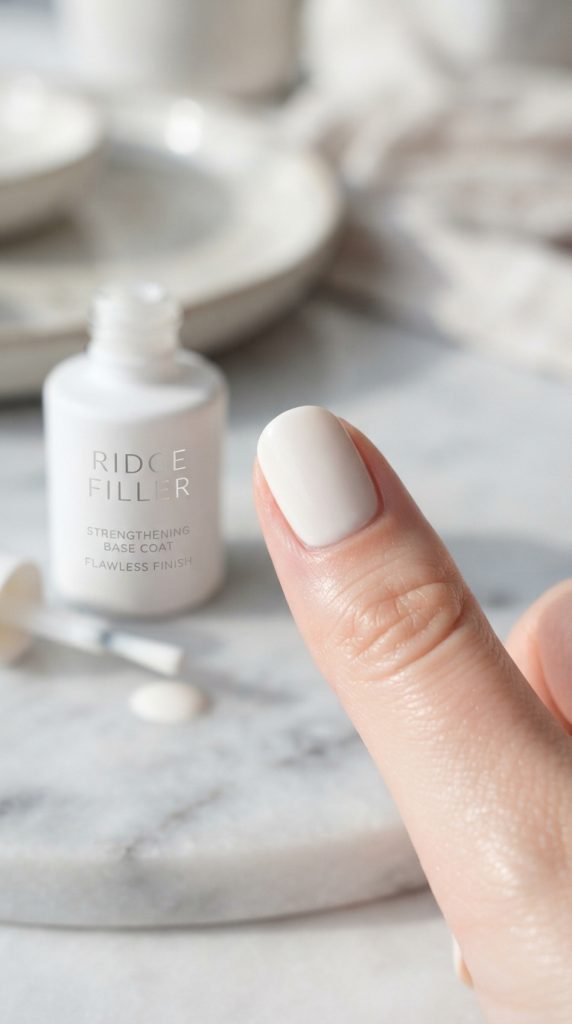
A ridge-filling base coat is a total game-changer for white manicures. It acts like a primer for your fingernails. It fills in any microscopic grooves that the buffer missed. This ensures your white nails look incredibly smooth and even. It also prevents the white polish from staining your natural nails.
This product acts as an adhesive layer for your color. It helps the polish grip onto your nail much better. This means your beautiful manicure will last days longer without chipping. Many ridge-filling base coats also contain strengthening ingredients like keratin. This helps to fortify weak, peeling, or brittle nails.
Apply a very thin, even layer across your entire nail. Make sure you cover the very tip of your nail too. This sealing technique protects your manicure from daily wear and tear. Allow it to dry completely before moving to the next step. A solid foundation is the key to a gorgeous, salon-quality finish.
Standard base coats are often too thin to hide structural nail imperfections. A specialized ridge-filling formula contains micro-ingredients that settle into low spots. This levels out the surface automatically as it dries. You will notice an immediate difference in how your polish glides on.
It also acts as a protective barrier against yellowing. Highly pigmented polishes can sometimes discolor the natural nail plate underneath. This base coat keeps your natural nails looking healthy and clean. It is a vital step you should never skip.
4. The High-Pigment Milky White Polish
Step 1: Roll the polish bottle between your palms to mix the pigment.
Step 2: Wipe excess polish off the brush on the rim of the bottle.
Step 3: Apply three extremely thin coats instead of one thick coat.
Step 4: Allow each layer to dry for three minutes before applying the next.

The star of the show is your polish. For an ethereal look, choose a soft, milky shade. This looks much softer and more sophisticated than stark white. It gives your fingers a delicate, dreamlike appearance that suits everyone. The right formula should be buildable and self-leveling.
A high-quality milky polish offers a beautiful, semi-translucent finish. It mimics the look of expensive gel manicures at home. Look for formulas that are free from harsh chemical ingredients. This keeps your natural nails healthy under your gorgeous manicure. The brush shape also matters when choosing your perfect polish.
A wide, rounded brush makes application incredibly quick and easy. It hugs the curve of your cuticle for a clean line. Apply your first coat very lightly and do not worry about streaks. The second and third coats will build up the beautiful opacity. This creates a stunning depth that defines the ethereal aesthetic.
Choosing the right shade of white nails can completely transform your hands. Cooler white tones look striking on olive skin. Warmer, creamy whites complement fair or deep skin tones beautifully. Experimenting with different undertones helps you find your perfect match.
Many people make the mistake of painting thick layers to save time. This is the main reason why white nails look messy. Thick layers trap air bubbles and dry very slowly. Thin layers dry quickly and create a strong, even bond.
5. The Precision Clean-Up Brush
Method 1: Dip the fine brush into pure acetone and wipe excess on a paper towel.
Method 2: Trace the brush slowly around the edges of your painted nail.
Method 3: Clean the brush head regularly during the process for sharp lines.
Method 4: Store the brush with its cap on to protect the delicate bristles.
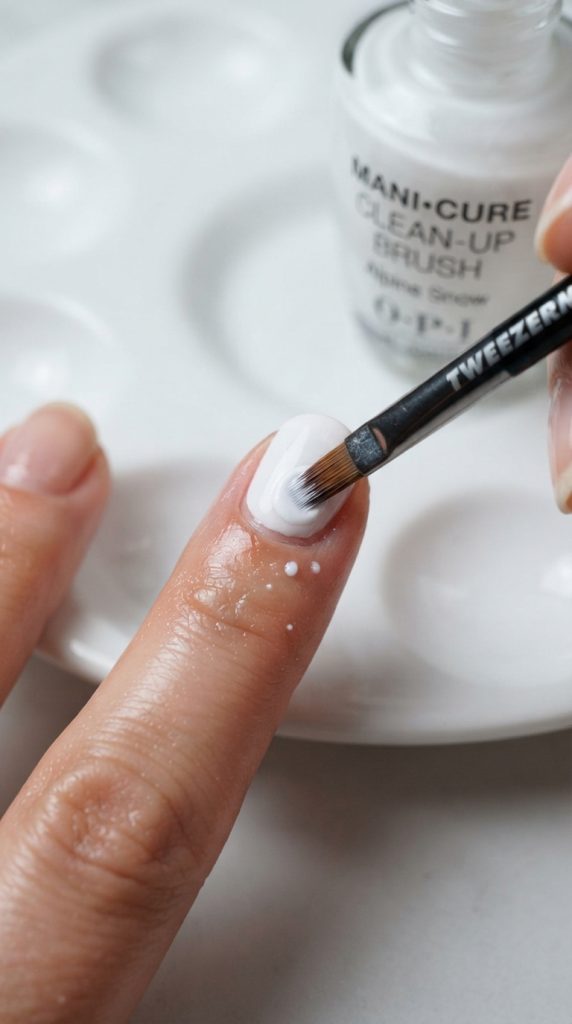
No one can paint their nails perfectly every single time. Smudges and messy edges are bound to happen during application. A precision clean-up brush is the ultimate secret of nail artists. It easily removes any stray polish from your surrounding skin. This gives your white nails a crisp, professional look.
Choose a brush with stiff, synthetic bristles for the best control. Angled or flat brush heads work best for cleaning cuticles. Gently dip the brush into a small cap of acetone. Wipe off any excess liquid so it does not flood your nail. Carefully trace the brush along your cuticle line to erase mistakes.
This tool is much more precise than using cotton swabs. Cotton swabs can leave fuzzy fibers behind on wet polish. A clean-up brush ensures your lines are incredibly sharp and neat. This small step elevates your manicure from homemade to salon-perfect. It is an absolute must-have for any nail enthusiast.
Using acetone can dry out the skin around your fingertips. To prevent this, choose a clean-up brush that is highly precise. This ensures the acetone only touches the paint, not your skin. It keeps the entire area looking hydrated and clean.
Always clean your brush immediately after you finish painting your hands. If the polish dries on the bristles, the brush will ruin. Rinse it in clean warm water and reshape the tip. This simple care routine makes your tools last for years.
6. The Long-Wear Gel-Effect Top Coat
Way 1: Apply a generous bead of top coat to the center of your nail.
Way 2: Glide the brush lightly over the nail without applying heavy pressure.
Way 3: Reapply this top coat every three days to maintain the shine.
Way 4: Cap the free edge of your nail to lock in the color layers.

Your beautiful white nails deserve to last as long as possible. A gel-effect top coat provides amazing shine and incredible durability. It seals in your color and protects it from daily damage. This product gives you the look of gel without a UV light. It creates a beautiful, plump finish that catches the light wonderfully.
This top coat prevents your white polish from turning yellow over time. Sunlight and daily activities can sometimes discolor light nail polishes. A good top coat contains UV inhibitors to protect your color. It also prevents chipping, cracking, and premature wear on your tips.
Apply the top coat once your white polish is slightly dry. Be sure to seal the free edge of your nail again. This locks the color coats between your base and top layers. Your nails will dry to a brilliant, glass-like shine. This shine is essential for creating that coveted ethereal glow.
A high-quality top coat can extend your manicure by a full week. It acts as a shield against water, cleaning products, and friction. Without a top coat, your white nails will chip within days. This step is non-negotiable for long-lasting beauty.
Make sure you do not shake the top coat bottle before use. Shaking creates tiny air bubbles in the formula. These bubbles will transfer onto your nails and ruin the smooth finish. Gently roll the bottle to mix the ingredients instead.
7. The Quick-Dry Polish Drops
Step 1: Wait sixty seconds after applying your final top coat layer.
Step 2: Squeeze one single drop onto the center of each painted nail.
Step 3: Let the oil spread naturally across the entire nail surface.
Step 4: Gently blot any excess oil from your fingers using a soft tissue.

Waiting for white polish to dry can be very frustrating. One accidental bump can ruin your hard work in a second. Quick-dry polish drops are the perfect solution to this common problem. They accelerate the drying time of your manicure significantly. They also help to condition your surrounding skin at the same time.
These drops usually contain volatile silicones that evaporate quickly. This process pulls the solvents out of your nail polish faster. Many formulas also include nourishing oils like jojoba or coconut oil. This adds an extra layer of hydration to your freshly manicured hands. It protects wet polish from dust, hair, and smudges.
Simply apply one drop to each nail after your top coat. The liquid will glide over your nail and dry it quickly. Within minutes, your nails will be dry to the touch. This product saves you time and protects your beautiful art. It is a lifesaver for busy people who love pretty nails.
Using quick-dry drops also prevents fabric texture from pressing into your polish. This is a common issue when painting nails before bed. The drops create a slippery barrier that protects the drying surface. Your white nails will remain perfectly smooth and shiny overnight.
Always hold the dropper slightly above your nail plate. Do not let the glass dropper touch your wet polish directly. This prevents contamination of the bottle and protects your wet paint. It is a clean and efficient way to speed up drying.
8. The Ultra-Hydrating Cuticle Oil Pen
Method 1: Click the pen to dispense a small amount of nourishing oil.
Method 2: Brush the oil generously around your cuticles and under the nail.
Method 3: Massage the oil into your skin using circular, gentle motions.
Method 4: Apply the oil right before going to bed for overnight repair.
Method 5: Reapply after washing your hands to seal in moisture instantly.

Hydration is key to keeping your white nails looking beautiful. Dry, peeling skin will distract from even the most perfect manicure. A cuticle oil pen is convenient, portable, and highly effective. It allows you to moisturize your nails on the go. Consistent use keeps your cuticles looking healthy and completely soft.
Look for oils that contain natural ingredients like sweet almond oil. Vitamin E is also excellent for repairing dry, damaged skin barriers. The pen format makes application mess-free and very easy to control. You can keep one in your purse, desk, or makeup bag. Apply it multiple times throughout your busy day.
Massaging the oil also increases blood circulation to your nail matrix. This encourages your natural nails to grow stronger and much faster. Healthy cuticles prevent painful hangnails from forming around your fingertips. This simple daily habit ensures your hands always look photogenic and neat.
When you use cuticle oil regularly, it actually helps your polish stay flexible. Dry polish is much more likely to chip and crack under pressure. The oil penetrates the polish layers to keep them slightly pliable. This simple trick extends the lifespan of your white nails.
You should apply the oil to the underside of your nail tip as well. This hydrates the hyponychium, which is the skin under your nail bed. Keeping this area moisturized prevents the nail from curling and peeling away. It is a small step that makes a massive difference.
9. The Restorative Hand Cream with SPF
Way 1: Squeeze a dime-sized amount of cream onto the back of your hands.
Way 2: Rub the backs of your hands together to warm up the product.
Way 3: Massage the cream into your fingers, palms, and wrists thoroughly.
Way 4: Focus extra product on the dry areas between your fingers.
Way 5: Reapply the cream every two hours when spending time outdoors.
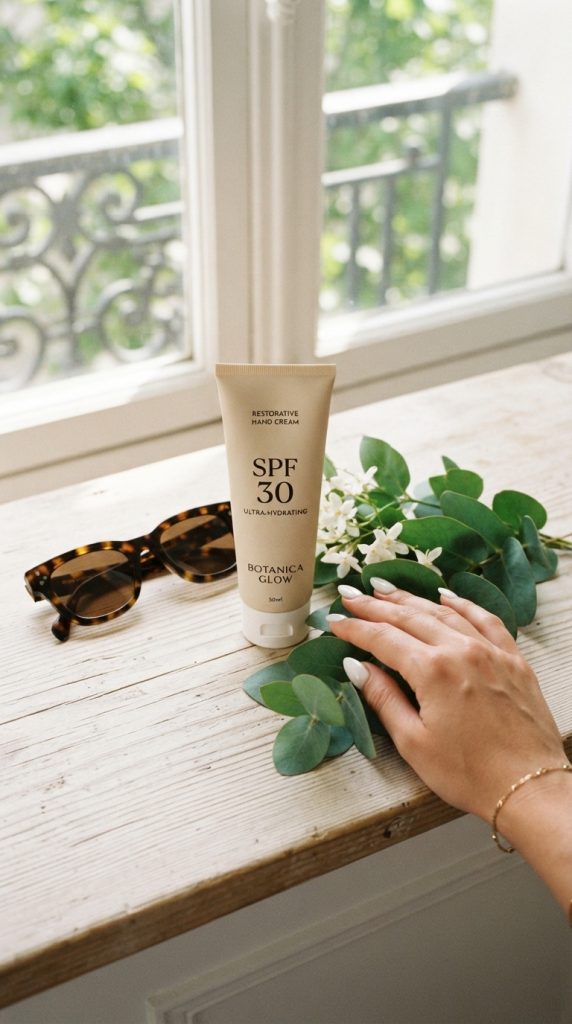
Your stunning white nails look best when paired with soft hands. A restorative hand cream is essential for maintaining youthful skin. Choosing a hand cream with SPF protects your skin from sun damage. The sun can cause premature aging and dark spots on your hands. Protection is key for keeping your hands looking beautiful.
A great hand cream should absorb quickly without feeling greasy. It should contain hydrating ingredients like hyaluronic acid or shea butter. These ingredients lock in moisture and protect your skin barrier. Apply your hand cream after washing your hands to prevent dryness.
Massage the cream deeply into your fingers and around your nails. This provides continuous hydration to your cuticles and nail beds. Your hands will feel incredibly soft, smooth, and deeply nourished. This completes your beautiful manicure routine and protects your skin investment.
UV rays from the sun can also cause white polish to turn yellow. By using a hand cream with SPF, you protect your color too. It acts as an external shield for both your skin and paint. Your manicures will remain bright, clean, and ethereal for weeks.
Keep a bottle of hand cream next to every sink in your home. This reminds you to moisturize immediately after washing your hands. Soap can strip away natural lipids, leaving your skin vulnerable. Regular replenishment keeps your hands looking as youthful as your nails.
10. The Gentle Non-Acetone Polish Remover
Step 1: Soak a clean cotton pad with the non-acetone remover.
Step 2: Press the soaked pad firmly onto your nail for ten seconds.
Step 3: Wipe the polish away in one clean, downward motion.
Step 4: Use a cotton swab to clean any residue from the side walls.
Step 5: Rinse your hands with fresh water and apply oil immediately.

When it is time to change your polish, choose a gentle remover. Non-acetone polish removers are much kinder to your natural nails. They do not strip away your skin’s natural, protective oils. This prevents your nails from becoming dry, brittle, and prone to breaking. It is the best choice for maintaining nail health.
These removers often feature pleasant scents instead of harsh chemical odors. Many formulas are enriched with soy, protein, or essential oils. This helps to condition your nails even as you remove the polish. It safely dissolves white nails polish without leaving a chalky residue behind.
Press the soaked cotton pad onto your nail and hold it there. This allows the remover to break down the polish layers easily. Wipe the pad down your nail to remove the dissolved color. Wash your hands afterward to prepare for your next beautiful manicure. Healthy nails are the ultimate secret to beautiful hands.
Standard acetone can cause the layers of your nail plate to split. This leads to peeling tips that make future manicures look bumpy. A non-acetone formula takes a little longer but protects your nail structure. It keeps your natural canvas strong, smooth, and ready for color.
After removing your old polish, always give your nails a brief break. Let them breathe for a few hours before applying new products. This allows the natural moisture levels of your nails to rebalance. Your next set of white nails will look even more spectacular.
Leave a Reply