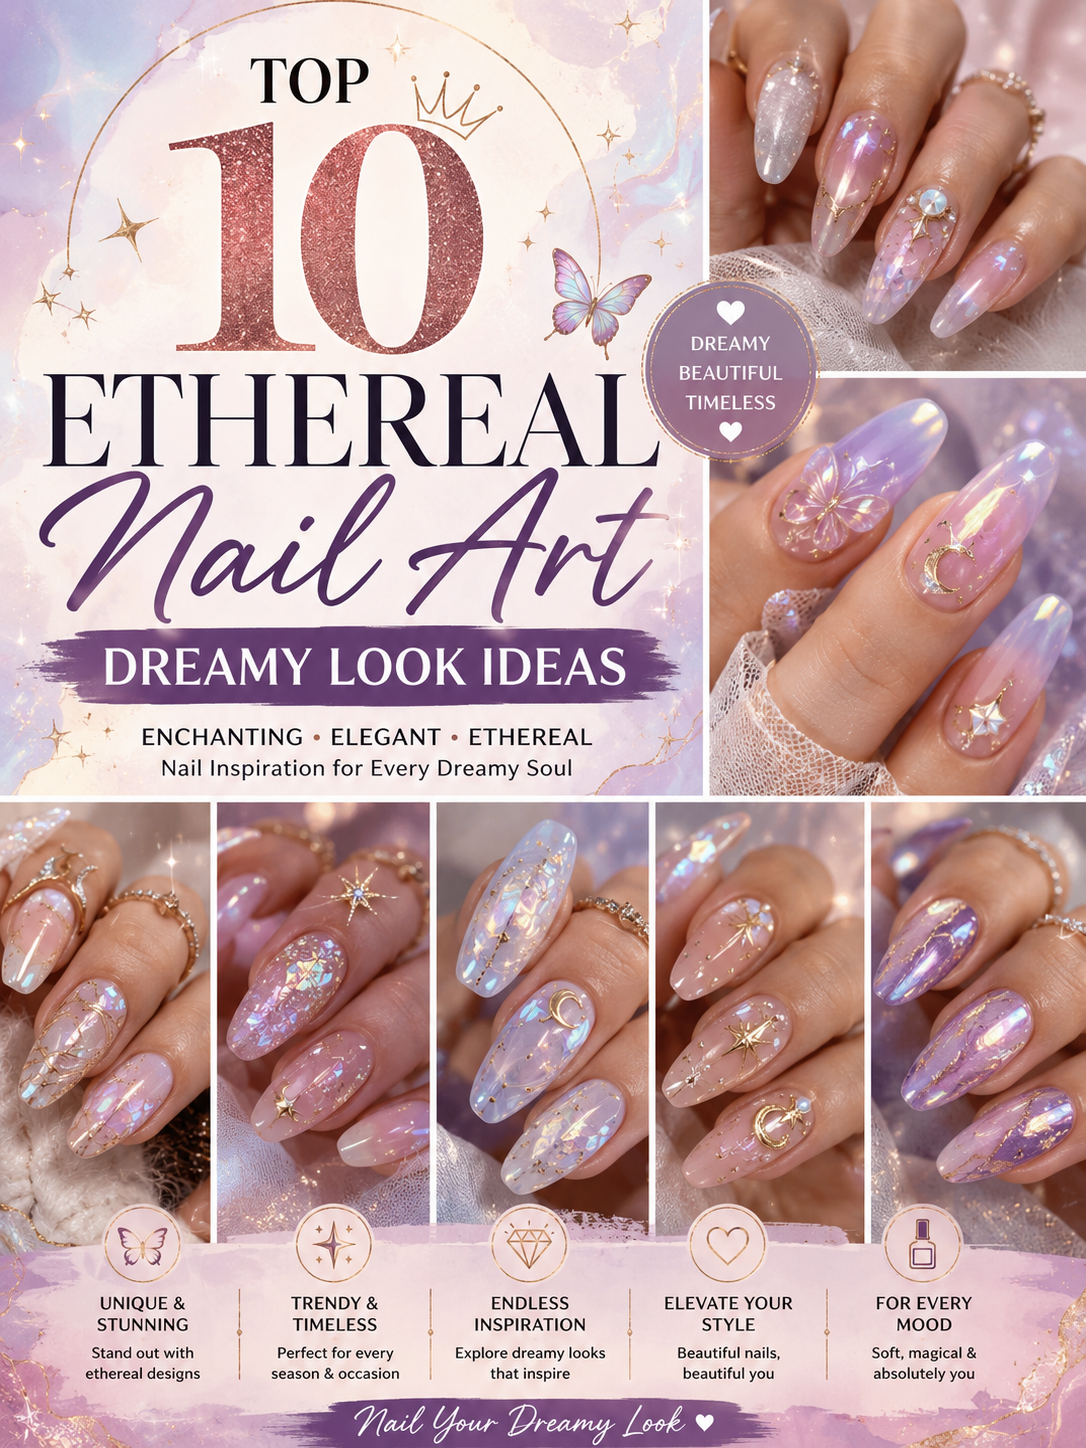
The world of nail art has evolved into a breathtaking canvas where imagination meets technical precision. If you have been searching for a way to elevate your aesthetic, ethereal nail art provides the perfect intersection of elegance, mystery. Dreamy otherworldly designs are more than just manicure; they are a form of self-expression that turns your fingertips into tiny masterpieces. Whether you are prepping for a special event . The simply want to carry a bit of magic with you throughout your daily routine, exploring different. Nail art techniques is the best way to find your signature ethereal style. In this comprehensive guide, we will dive deep into ten stunning concepts that define the dreamy trend. Ensuring your hands always look like they belong in a fairytale.
1. Celestial Stardust and Constellation Nail Art
Celestial-themed nail art has captured the hearts of trendsetters everywhere, and for good reason. There is something inherently soothing and expansive about wearing the night sky on your fingertips. To achieve this look, start with a base of deep navy, midnight blue, or even a soft, hazy violet. Once the base is cured, it is time to layer in the stardust. Using a fine-tipped brush, delicate gold or silver foil flakes are placed strategically to mimic distant galaxies. This nail art style relies on depth; by applying small, twinkling dots of white polish in varying sizes, you create the illusion of twinkling stars.

Step-by-Step Application Method
- Step 1: Base Coat Preparation: Apply a high-quality gel base coat to clean, prepped nails and cure for 30 seconds. Paint two thin layers of deep midnight blue or dark indigo polish.
- curing between each layer to build a rich, opaque night-sky canvas.
- Step 2: Creating Cosmic Depth: Dab a tiny amount of sheer violet or magenta polish onto a clean makeup sponge. Lightly press the sponge onto the center of the nail to create a soft.
- cosmic nebula cloud, then cure for 30 seconds.
- Step 3: Laying the Stardust:
- Take a fine-tipped detail brush and apply tiny flakes of silver or gold foil across the nebula cloud. Press them flat against the sticky layer of the gel to ensure a smooth texture.
- Step 4: Mapping the Constellations:
- Use a dotting tool dipped in white liner gel to place the main anchor stars of your chosen constellation. Take a long-liner brush and draw whisper-thin lines connecting these dots to form the constellation structure.
- Step 5: Sealing the Universe:
- Apply a layer of sheer, micro-glitter top coat over the entire design to add an overall cosmic shimmer. Finish with a thick layer of high-gloss top coat, ensuring the free edge is capped, and cure for 60 seconds.
2. Iridescent Opal Shimmer and Chrome Accents
If you want a manicure that shifts and dances under every light,
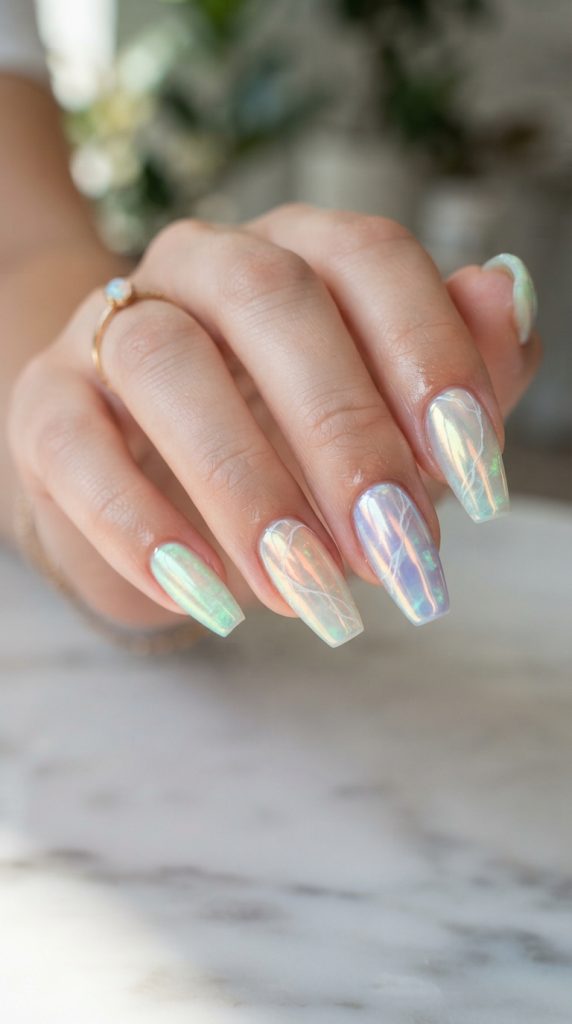
iridescent opal nail art is the ultimate choice for your collection.
This look mimics the natural, multifaceted glow of a precious opal gemstone. Creating a sense of luxury that feels completely ethereal. To begin this nail art process, utilize a sheer, milky white or pale pink base coat. The magic happens when you apply a high-quality iridescent powder or chrome pigment over the surface. By lightly buffing the powder into the tacky layer of your gel polish.
you transform a plain base into a swirling, pearlescent dream.
Step-by-Step Application Method
- Step 1: Sheer Foundation: Prep the nails and apply a clear base coat. Follow with two coats of a highly translucent, milky white jelly polish, curing each layer completely to maintain a glass-like depth.
- Step 2: Chrome Powder Activation:
- Apply a specialized no-wipe top coat and cure it for exactly 20 seconds (leaving it slightly warm but dry). Dip a silicone applicator into your iridescent opal chrome powder and
- rub it firmly across the nail surface until a mirror sheen develops.
- Step 3: Creating Gemstone Inclusions: Use a lint-free wipe to clean excess powder from the skin. Take a thin detail brush dipped in a mixture of white gel paint and clear base coat,
- then draw soft, squiggly lines across the nail to mimic natural stone fractures.
- Step 4: Diffusing the Veins: Before curing the lines,
- take a clean brush dampened with a drop of alcohol and gently tap the edges of the white veins.
- This diffuses the pigment, making the lines look like they are floating deep inside a real opal gemstone.
- Step 5: Double Encapsulation: Cure the design for 30 seconds. Apply a thin layer of clear builder gel to lock in the chrome
- powder and smooth out any texture from the veining,
- then finish with a high-shine top coat and cure for 60 seconds.
3. Gossamer Wings and Butterfly Motif Designs
There is nothing more ethereal than the delicate, translucent beauty of insect wings.
Incorporating them into your nail art is a fantastic way to embrace your romantic side. This trend moves away from chunky, literal butterfly stickers and toward a more sophisticated, artistic interpretation of gossamer wings. To create this nail art, start with a transparent or nude base creating a stained glass effect.
Using a thin liner brush and a dark, moody polish, outline the intricate, vein-like patterns of wings across the nail bed.

Step-by-Step Application Method
- Step 1: Transparent Canvas: Protect your natural nails with a clear structure gel base coat. Apply one very thin layer of a sheer, skin-toned nude polish just to even out the nail bed.
- while keeping it mostly transparent, then cure.
- Step 2: Structural Outline: Dip a long, ultra-fine liner brush into a
- highly pigmented black or deep espresso brown gel paint. Carefully draw the curved outer frame of a fairy or butterfly wing along one side of the nail.
- Step 3: Intricate Vein Work: Pull incredibly thin, web-like lines from the base of the wing frame toward the outer edges. Keep your hand steady and let the brush barely touch the nail surface to ensure the veins look delicate and light.
- Step 4: Stained Glass Tinting: Mix a drop of clear top coat with pastel pink, lavender, or mint green gel polish on a palette. Use a small detail brush to fill in the spaces between the dark veins with this custom sheer tint, creating a translucent color wash.
- Step 5: Magical Highlights: Use a dotting tool to place microscopic white dots along the outer border of the wing. Apply a generous layer of high-gloss gel top coat over the entire nail art.
- Cure for a full minute to achieve a glass-like finish.
4. Enchanted Forest Moss and Pressed Flower Art
Bringing a piece of nature to your fingertips is a hallmark of the ethereal aesthetic. Enchanted forest nail art focuses on textures that feel as if they were plucked straight from a mossy, woodland floor. To execute this look, you do not necessarily need actual dried flowers, though they are a popular option. Instead, you can create a forest floor base using shades of sage green, deep olive, and earthy taupe. For the nail art aspect, use a sponge to dab on different shades of green, creating a textured, moss-like gradient.

Step-by-Step Application Method
- Step 1: Earthy Base Setup: Apply a foundational base coat and cure it. Paint the nails with a soft, muted sage green or neutral taupe polish as your forest background, then cure for 30 seconds.
- Step 2: Sponging Moss Textures: Tear off a tiny, jagged piece of a dense makeup sponge. Dip the textured edge into a mixture of dark olive green and earthy brown polishes, then gently tap it onto the nail randomly to create a realistic, mossy look.
- Step 3: Securing Natural Elements: Apply a thin, uncured layer of clear base coat or foil glue. Using precision tweezers, carefully place tiny pieces of real pressed flowers .
- gold leaf flakes onto the wet gel, adjusting their placement before curing.
- Step 4: Adding Dewdrop Dimension: Cure the flowers for 30 seconds to lock them down. Take a high-viscosity, thick builder gel on a dotting tool and place a few distinct,
- raised droplets on top of the moss and flowers to simulate morning dew.
- Step 5: Final Protective Layer: Immediately cure the dewdrops for 10 seconds to freeze their 3D shape. Coat the surrounding flat areas with a matte or satin top coat to emphasize the organic texture, keeping the dewdrops glossy, then perform a final 60-second cure.
5. Ethereal Aura Gradients and Soft Focus Blurs
Aura nail art is arguably one of the most popular trends in the dreamy aesthetic space, and it is easy to see why. The goal here is to create a soft, blurred effect that mimics a glowing energy field. To achieve this, you need a creamy base color and a contrasting, more vibrant shade for the center. The key to this nail art technique is the blending process. After applying your base color, place a small dot of your secondary color in the center of the nail. Using a soft, fluffy eyeshadow brush or a dedicated nail art sponge, gently pat and blend the center color outward.

Step-by-Step Application Method
- Step 1: Creamy Foundation: Prep your nails and apply a clear gel base coat. Apply two layers of an opaque, creamy base color such as pastel lavender, soft cream, or pale pink, and cure each layer completely.
- Step 2: Wet Gel Technique: Apply a thin layer of clear blooming gel or a slow-drying clear base coat over the cured nail, but do not cure it yet; leave it completely wet to allow the colors to spread naturally.
- Step 3: Central Aura Placement: Drop a medium-sized bead of your contrasting aura color (like vibrant magenta or sky blue) right into the center of the wet nail using a dotting tool or the polish brush.
- Step 4: Softening the Edges: Wait 10 to 15 seconds to let the blooming gel naturally spread and blur the edges of the central color. Take a soft, fluffy ombre brush and lightly tap the outer borders of the circle to ensure a perfect, seamless blend.
- Step 5: Enhancing the Glow: Cure the blurred aura for 30 seconds. Rub a sheer, pearlescent pigment powder over the entire nail to blend the two colors together harmoniously, then finish with a high-gloss top coat and cure for 60 seconds.
6. Victorian Lace and Intricate Filigree Details
Stepping into a more vintage, romantic space, Victorian lace nail art brings a sense of refined elegance to the ethereal category. This look is all about precision and detail, creating a sophisticated manicure that looks like fine embroidery. To begin, use a soft, muted base such as cream, antique rose, or soft grey. The nail art itself is created using fine-tipped brushes and white or black gel liner to paint delicate, swirling patterns that resemble lace fabric. This includes small dots, thin cross-hatching, and rounded loops.

Step-by-Step Application Method
- Step 1: Vintage Canvas: Prepare the nails and apply your base coat. Apply two coats of a vintage-inspired muted color, such as antique rose or a dusty cream, then cure them completely.
- Step 2: Removing the Sticky Layer: Wipe the cured nail surface with rubbing alcohol to remove the tacky residue. A dry, matte-like surface prevents the fine lines of your lace design from bleeding or spreading out.
- Step 3: Sketching the Lace Border: Dip an ultra-thin, long-liner brush into an intense white gel liner paint. Draw a delicate, curved mesh line across the tip or down the side of the nail to serve as the border for your lace.
- Step 4: Filling the Filigree Details: Use the very tip of your brush to fill the inside of the mesh with micro-dots, tiny intersecting diagonal lines, and small half-circles to mimic real woven lace fabric.
- Step 5: Jewelry Accents and Seal: Add a tiny drop of rhinestone glue near the cuticle area and place a micro-pearl or small gold bead into it. Cure for 30 seconds, then seal the entire lace design with a matte or glossy top coat, curing for 60 seconds.
7. Frosted Crystal and Icy Marble Textures
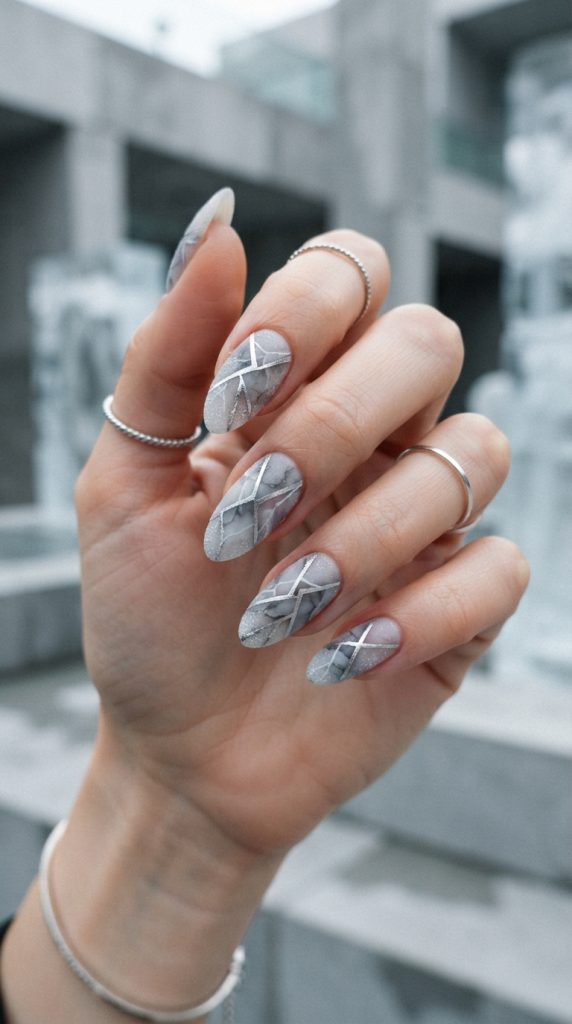
For those who lean toward a colder, more high-fashion aesthetic, frosted crystal nail art offers a clean, architectural look that feels like a winter dream. This style mimics the appearance of frozen quartz or natural stone, characterized by sharp, angular lines and a cooling color palette. To start this nail art, choose a base of cool-toned grey, icy blue, or sheer white. Using a thin, long-liner brush, create random, jagged lines that cross over the nail in different directions. These lines should be thin, using a slightly darker or more opaque shade than your base.
Step-by-Step Application Method
- Step 1: Ice Base Formation: Standardize your nail preparation and apply a base coat. Paint the nail with a sheer, icy blue or cold quartz-grey polish and cure for 30 seconds.
- Step 2: Angular Veining: Dip a fine liner brush into a highly opaque white gel paint. Draw sharp, geometric, jagged lines that cross over one another at unexpected angles, mimicking the natural fractures found inside frozen crystals.
- Step 3: Alcohol Smudging Method: Before curing the white lines, dip a clean, flat gel brush into isopropyl alcohol. Lightly tap one side of the white lines to dissolve and smudge the paint outward, leaving the other side sharp and defined.
- Step 4: Shimmer Inclusions: Cure the smudged veins for 30 seconds. Take a detail brush and apply a highly reflective silver glitter or platinum paint in thin streaks directly alongside the sharp edges of the white veins.
- Step 5: Matte Frosting Finish: Apply a high-quality matte top coat over the entire design and cure for 60 seconds. The matte finish removes the glossy shine, perfectly replicating the cloudy, velvety texture of natural frosted quartz.
8. Whimsical Watercolor Washes and Abstract Art
Watercolor nail art is the definition of dreamy. It relies on the concept of fluid, blending colors that seem to melt into one another, much like paint on a wet canvas. To master this technique, you can use specific watercolor inks or create a DIY version by diluting standard gel polishes with a clear top coat or a blooming gel. Blooming gel is a must-have tool for this type of nail art; as you place your drops of color onto the wet surface, the gel causes the pigment to spread out, creating soft, organic edges that are impossible to replicate with a standard brush.

Step-by-Step Application Method
- Step 1: Bright Canvas Setup: Apply your base coat and cure it. Paint the nails with a stark white or very light pastel cream polish to ensure that your watercolor overlay colors remain bright and visible, then cure.
- Step 2: Prep with Blooming Gel: Apply a generous but even layer of clear blooming gel over the entire nail surface, making sure not to cure it so the watercolor effect can take place.
- Step 3: Dropping the Colors: Select three coordinating pastel colors (such as peach, lavender, and mint). Use a detail brush to place irregular, random drops of these colors directly onto the wet blooming gel.
- Step 4: Swirling the Wash: Watch the colors expand. Take a clean, fine liner brush and gently pull the edges of the colors into one another, creating an abstract, cloudy marble swirl. Cure immediately for 30 seconds once you like the pattern.
- Step 5: Glossy Overlay: To make the abstract washes look fluid and watercolor-like, apply a generous layer of ultra-glossy top coat over the cured design, capping the tips, and cure for a final 60 seconds.
9. Moonlight Pearl and Chrome Mirror Finishes
Moonlight pearl nail art focuses on that soft, luminous glow that only a pearl possesses. Unlike the iridescent opal trend, this look is more about a uniform, soft radiance that mimics the surface of a classic pearl. To achieve this, start with a sheer, milky white or champagne base. The essential element here is a white or pearl-colored chrome powder. When buffed over the nail, it creates a smooth, mirror-like finish that reflects light in a soft, diffused way. For a true dreamy effect, you can layer this over different base colors—a lavender base with a pearl chrome creates a stunning, surreal effect.

Step-by-Step Application Method
- Step 1: Luminous Base: Follow standard nail prep and apply a clear base coat. Paint the nail with a very sheer layer of soft cream or pearly champagne gel polish, then cure it completely.
- Step 2: Top Coat Preparation: Apply a specialized no-wipe glossy top coat over the color and cure it in your lamp for only 15 to 20 seconds. It needs to be dry but still hold enough residual warmth to bond with the powder.
- Step 3: Buffing the Pearl Glow: Dip a soft eyeshadow sponge applicator directly into your white pearl chrome powder. Using firm, downward strokes, buff the powder from the cuticle line down to the free edge until a flawless, liquid-pearl finish appears.
- Step 4: Dusting and Cleaning: Use a very soft, clean makeup brush to sweep away any stray chrome particles from the side walls and skin, ensuring a clean, crisp perimeter around the nail bed.
- Step 5: Double Sealing Protection: Apply a thin layer of clear base gel over the chrome to prevent chipping, cure for 30 seconds, and finish with a long-lasting, glossy top coat before a final 60-second cure.
10. Floating Gemstones and 3D Bubble Accents
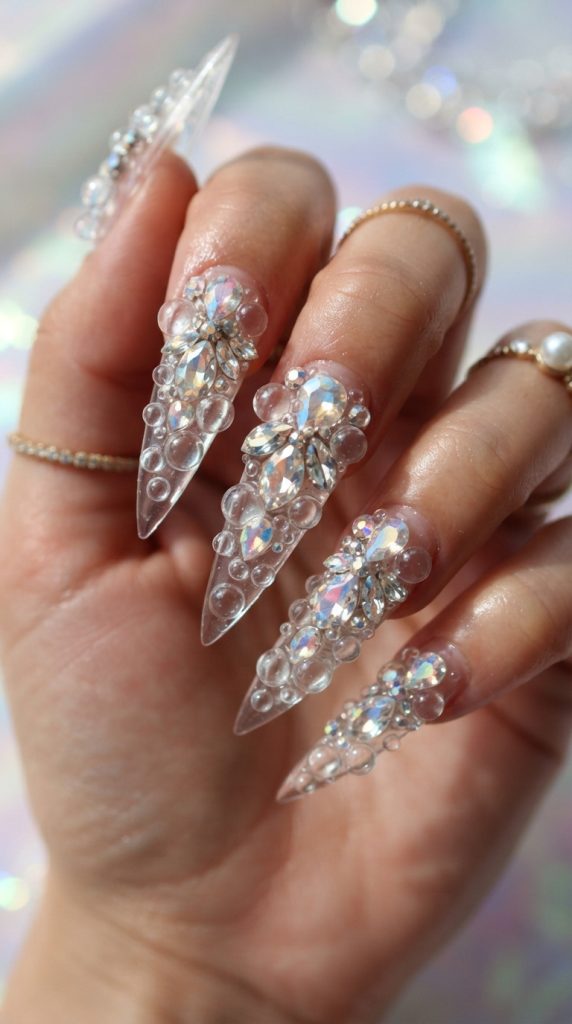
For the final ethereal look, we move into 3D territory. Floating gemstone nail art uses embellishments to create the illusion that jewels are suspended in the air above your nail. To do this, start with a neutral, sheer base—this allows the 3D elements to really stand out. Use a strong nail glue or a thick clear builder gel to attach small, high-quality crystals, rhinestones, or even tiny dried flower buds. To add the bubble effect, use a clear, thick gel to create small, raised dots that resemble water droplets or air bubbles.
Step-by-Step Application Method
- Step 1: Glass-Like Foundation: Prep the nails thoroughly and apply a structure base coat. Paint the nail bed with a single coat of ultra-sheer pink or clear jelly polish to create a highly natural, glass-like background, then cure.
- Step 2: Placing the Anchor Gems: Squeeze a small bead of high-viscosity, thick gemstone glue onto the center of the nail bed. Use a wax pen to pick up your chosen crystals or micro-gems, pressing them firmly into the glue.
- Step 3: Securing the 3D Elements: Flash-cure the gems for 10 seconds using a handheld UV light to lock them instantly into place so they do not slide around during the rest of the application.
- Step 4: Formulating the Water Bubbles: Dip a round dotting tool into a thick, non-leveling hard gel. Carefully lift the tool to create a perfect sphere of gel, then place it onto the nail surface away from the gems to look like a floating air bubble.
- Step 5: Full Structural Lock: Repeat the bubble placement in varying sizes across the nail. Once satisfied, immediately place the entire hand into a powerful UV/LED lamp for a full 90-second cure to ensure the thick 3D elements harden completely without losing their shape.
Understanding the Ethereal Nail Art Trend
The trend of ethereal nail art has captivated beauty enthusiasts because it offers a departure from the high-maintenance, bold, and sometimes aggressive styles that often dominate social media. Instead, these dreamy designs prioritize softness, translucency, and a sense of wonder. By focusing on light-refracting powders, soft gradients, and delicate hand-painted details, you can create a look that feels personal and artistic. Whether you are choosing the cosmic route with stardust or the vintage elegance of lace, the core principle remains the same: embrace the whimsical. As you practice these techniques, you will find that the process of creating nail art becomes just as rewarding as the final result itself. It is a mindful activity that encourages you to slow down, pay attention to detail, and celebrate your creative side.
Choosing the Right Base for Your Dreamy Manicure
The foundation of any great nail art look is the base. For ethereal styles, you generally want to avoid overly opaque, heavy colors unless they are part of a specific dark-themed design like the celestial look. Sheer polishes, jelly tints, and milky white bases are your best friends. They provide a nude canvas that allows for layering, which is critical for creating depth. Depth is the secret ingredient in making nail art look professional and dreamy rather than flat. By layering sheer colors or using techniques like the blooming gel method, you create a sense of dimension that draws the eye in. Always invest in high-quality base coats and top coats, as these will protect your hard work and ensure that your intricate nail art stays looking fresh and luminous for as long as possible.
The Importance of Tools and Precision
While you can certainly achieve beautiful results with basic tools, the right equipment can take your nail art to the next level. A high-quality liner brush is non-negotiable for styles like Victorian lace or constellation designs; you need a brush that holds its shape and allows for fine, controlled strokes. Similarly, having a variety of sponges—both dense makeup sponges and softer eyeshadow applicators—will give you different textures for your aura and forest-themed designs. When working with powders and chromes, keep a clean, fluffy brush nearby to remove excess dust before applying your top coat. This prevents the powder from transferring where you don’t want it, keeping your nail art clean and polished. Remember, the goal is a seamless, professional finish, and the right tools make achieving that much easier.
Sustaining the Magic: Long-Term Care
Once you have invested hours into your stunning, ethereal nail art, you want to ensure it lasts. Dreamy, intricate designs are prone to chipping if not properly sealed. Always cap the free edge of your nails with your top coat, as this is the most common point of wear. If you have incorporated 3D elements like pearls or crystals, be extra cautious with your hands, as these are the most likely parts of the design to snag or pop off. Using a high-quality cuticle oil daily will not only keep your nails and skin healthy, but it also adds a beautiful sheen that complements your nail art. A well-hydrated cuticle makes any manicure look more expensive and well-maintained. By treating your hands with care, you allow your dreamy nail creations to remain vibrant and intact for weeks, keeping that ethereal magic alive.
Exploring Personal Style Through Nail Art
Finally, remember that nail art is an extension of your personal style. While these ten ideas serve as a fantastic starting point, the most beautiful designs are the ones that resonate with you personally. Do not be afraid to mix and match these concepts. Perhaps you love the aura trend but want to add a touch of celestial stardust to the center, or maybe you want to combine the frosted marble look with a single lace accent nail. The freedom to experiment is the greatest joy of the nail art hobby. Start by trying one or two techniques that appeal to you most, and gradually build up your skills. As you get more comfortable, you will find yourself naturally combining these dreamy elements into something that is uniquely yours, solidifying your place in the world of beautiful, ethereal nail design. Experimenting with different textures and light-reflective materials will eventually lead you to develop a signature look that feels authentic to your personality and style, ensuring that every time you look at your hands, you see a small, sparkling piece of art that inspires you daily.
Leave a Reply