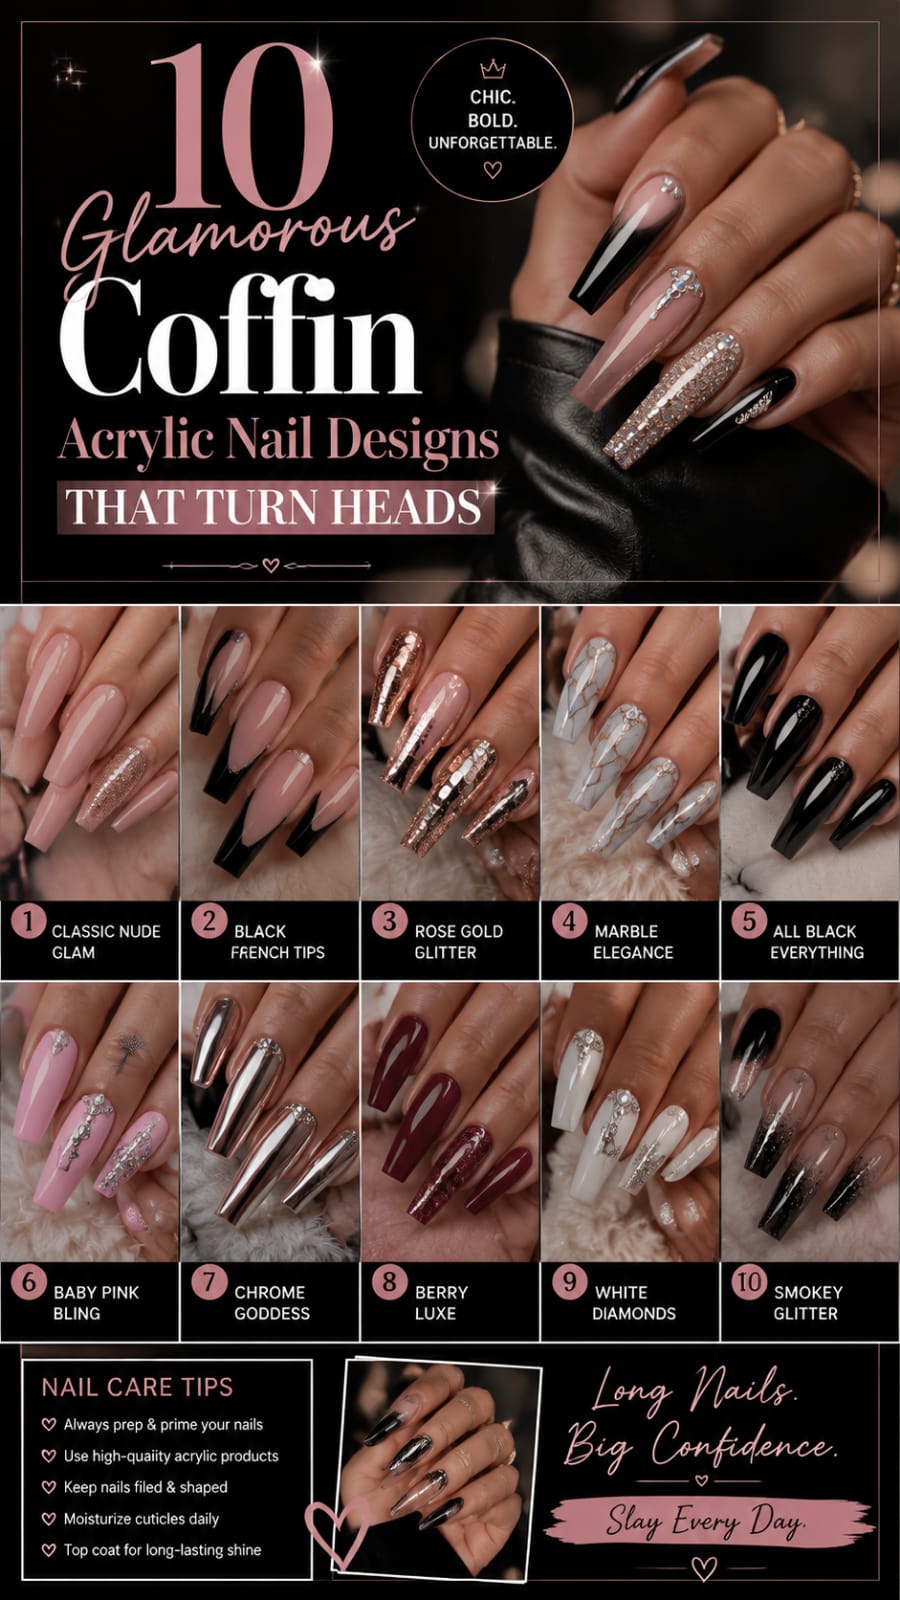
Introduction: The Timeless Appeal of Coffin Nails
Nail art has evolved into a powerful form of self-expression today. Among all popular shapes, coffin nails stand out as a true statement. Their tapered sides and flat top create a dramatic, elegant look. When combined with acrylic enhancements, this shape offers unmatched durability and length. You can experiment with intricate art, bold colors, or subtle textures easily. The strong foundation allows for endless creativity across every single set. Whether preparing for an event or refreshing your style, coffin shapes deliver.
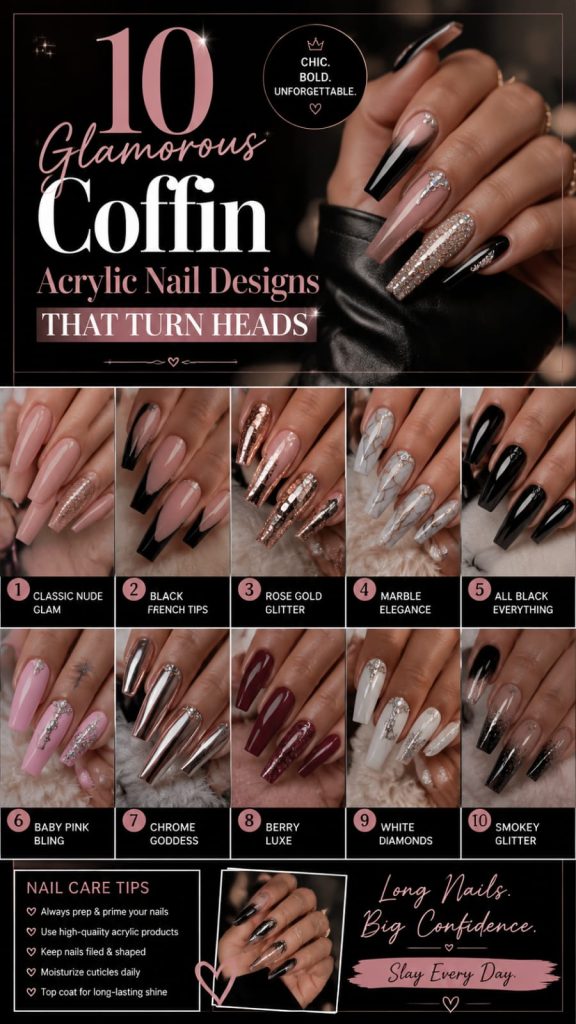
They elongate your fingers while giving a modern, sophisticated edge. Modern techniques make wearing long sets comfortable and long-lasting for weeks. In this comprehensive guide, we explore ten breathtaking trends transforming manicures. Each section provides practical steps, maintenance methods, and clever styling ideas. Get ready to discover your next favorite manicure transformation right here. The coffin shape, also known as a ballerina shape, has cemented its place in beauty culture. It bridges the gap between classic manicures and bold contemporary aesthetics seamlessly.
Choosing acrylic extensions provides structural integrity that natural nails often lack at long lengths. It allows you to maintain clean, crisp side walls without fear of constant snapping or chipping. Modern technicians can tailor the taper to match your hand shape perfectly. Whether you prefer a dramatic narrow taper or a wider, softer flat edge, versatility remains unmatched. The extended surface area acts like a blank canvas waiting for creative color combinations. Exploring different finishes, from ultra-glossy top coats to velvet mattes, transforms the overall vibe effortlessly. Investing time in quality acrylic application ensures your investment remains stunning through daily activities.
1. Classic French Ombré Coffin Style
Why French ombré options dominate modern acrylic trends
The classic French manicure receives a modern update with seamless ombré shading. Instead of a crisp white line, colors blend softly together effortlessly. This style creates a soft, sophisticated gradient perfect for any occasion. Using acrylic powder allows technicians to blend shades smoothly from cuticle to tip. The nude base transitions into a soft white, elongating your hands naturally. It offers a subtle beauty that pairs well with formal wear. Many prefer this look because it grows out without obvious lines. The gentle fade hides natural nail growth better than solid colors.
It remains a top choice for brides, professionals, and minimalist lovers. The secret behind a flawless ombré lies in the quality of liquid and powder manipulation. Technicians work quickly while the material stays workable to create a smooth transition zone. Unlike gel polish painted on top, color integrated into structural acrylic layers creates unmatched visual depth. The soft white tip creates an illusion of extra length while keeping the look grounded. It balances classic bridal aesthetics with modern structural trends effortlessly. Furthermore, this design serves as an ideal backdrop for subtle additions like tiny rhinestones or fine shimmer.
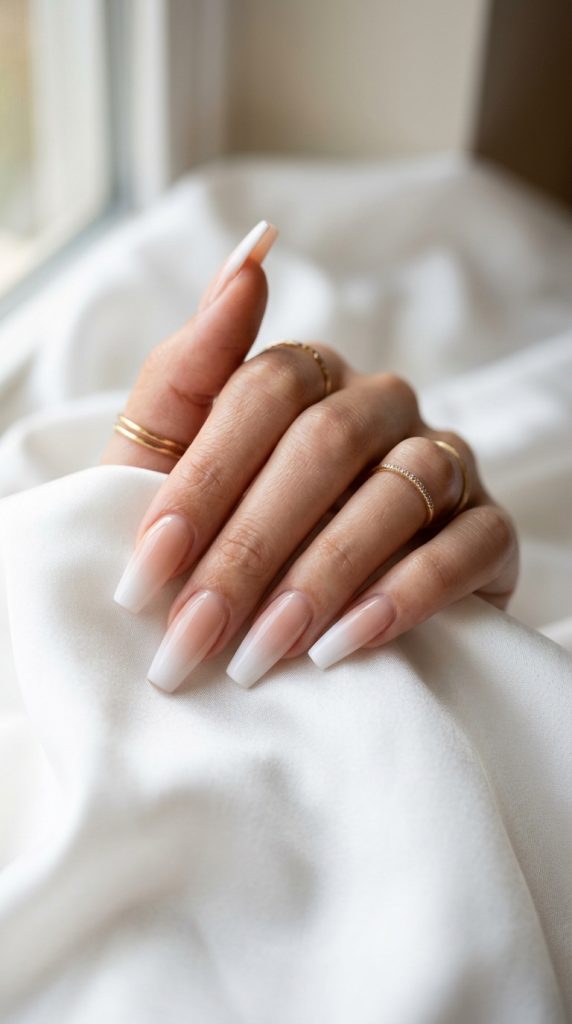
Additionally, the versatility of French ombré makes it suitable for diverse wardrobe styles. It transitions effortlessly from morning corporate meetings to evening black-tie events without missing a beat. The natural nude tone near cuticles flatters every skin tone when custom-blended accurately. Because the growth line stays hidden under sheer nude tones, manicures look fresh longer. It reduces the visual urgency for constant touch-ups while maintaining a polished appearance. For those transitioning into long enhancement extensions, French ombré provides an easy-to-wear entry point.
Step-by-Step Application Guide for Ombré Formats
Method 1: The Core Powder Blending Technique
Start by prepping the natural bed thoroughly to ensure strong adhesion. Apply a tailored form or tip to build the coffin shape. Pick up a bead of nude acrylic and lay it near cuticles. Sweep the product down toward the middle of the nail bed. Next, place a white bead at the free edge tip. Blend it upward into the nude shadow smoothly while still wet. This seamless blending creates a soft gradient that looks completely natural.
Method 2: Dual-Color Dip System Approach
Apply a clear base coat evenly over the prepped nail surface. Dip the tip into white powder at a precise forty-five-degree angle. Tap off excess product to keep the transition soft and even. Dip the entire nail into a nude base powder layer next. Repeat this process twice to achieve smooth, rich color coverage. Seal the surface with a clear top coat layer for durability and shine.
Method 3: Encapsulated Shimmer Gradient Addition
Apply your standard nude to white gradient using preferred extension powders. Before the surface sets, scatter fine iridescent glitter over the middle transition zone. Cap the entire art piece with clear protective powder smoothly. File and shape the edges precisely to restore crisp coffin side walls. The encapsulated shimmer catches light softly whenever you move your fingers.
Maintenance Ways to Keep Gradients Pristine
Apply cuticle oil daily to keep surrounding skin soft and hydrated. Avoid using your nails as tools to open cans or boxes. Wear protective gloves while doing household chores or washing dishes often. Schedule fill-in appointments every two to three weeks without fail. Buff the surface gently and apply a fresh topcoat weekly. This keeps the ombré transition looking clean, shiny, and brand new.
Consistent maintenance prevents yellowing and premature lifting along side walls. When washing hands, choose gentle soaps that do not strip natural skin moisture. Keeping natural beds nourished with vitamin-rich oils ensures strong foundation support beneath extensions. If minor surface scuffs appear, light buffing restores smooth light reflection instantly.
2. Deep Velvet Burgundy with Gold Foil
How rich burgundy acrylic choices create autumn glamour
Burgundy represents ultimate luxury and depth during cooler autumn and winter months. Pairing deep red hues with gold leaf accents creates instant drama. The dark base contrasts sharply against shimmering metallic foil highlights effortlessly. When sculpted with acrylic, the rich color gains incredible depth and shine. The shape amplifies the regal feel of rich wine-toned polished sets. It feels like wearing fine jewelry right on your fingertips daily. This design works wonderfully for holiday parties, formal dinners, or cozy dates.
It balances dark, moody aesthetic vibes with brilliant eye-catching shine. You will find yourself admiring your hands constantly under bright lights. Deep red tones have long symbolized royalty, passion, and high fashion statement choices. When executed on extended shapes, burgundy transforms into a dramatic center of attention. The metallic gold foil adds an organic, raw mineral texture that sparkles under evening lighting. Unlike flat glitter, gold foil reflects light unevenly, giving an artful, handcrafted feel to every single nail.

Moreover, rich burgundy shades pair exceptionally well with cozy winter knits, cashmere coats, and velvet dresses. The contrast between warm wool textures and high-gloss wine-colored acrylics creates captivating visual interest. Technicians can adjust the darkness of the red base to match cool or warm skin undertones flawlessly. Whether you choose a deep oxblood tone or a brighter cherry burgundy, gold accents elevate the final outcome. It is a timeless winter trend that brings warmth and sophisticated glamour to cold seasons.
Steps to Craft Gold Foil Burgundy Sets
Step 1: Base Sculpting and Color Application
Prep the natural surface and apply your chosen extension tips carefully. Build the structural apex using rich burgundy powder or dark base gel. Pinch the sides gently while curing to maintain a narrow silhouette. Ensure the flat tip remains straight and perfectly perpendicular to fingers. Buff the surface lightly to create a smooth canvas for foil placement.
Step 2: Foil Placement and Pressing Technique
Apply a thin layer of specialized foil transfer gel over nails. Cure under an LED lamp according to manufacturer instructions completely. Tear small, organic pieces of gold leaf foil using delicate tweezers. Press the foil onto chosen accent nails, focusing near cuticles or edges. Use a silicone tool to smooth down foil edges completely flat.
Step 3: Encapsulation and Final Polishing Finish
Cover the gold foil accents with a layer of clear acrylic. This step locks the metallic pieces beneath a smooth surface permanently. File side walls to maintain crisp, straight coffin lines throughout. Wipe away dust using a lint-free alcohol pad thoroughly. Apply a high-gloss topcoat layer and cure under lamp lights.
Long-Lasting Care Protocols for Dark Sets
Keep nails away from harsh household chemicals that cause premature lifting. Store acetone products away, as they dissolve cured surfaces over time. Use a soft nail brush to clean underneath extended tips daily. Apply sun protection over hands to prevent dark colors from fading. Avoid picking at foil edges if tiny spots wear down slightly. Visit a certified technician quickly if any lifting occurs near cuticles.
Dark pigments require careful protection against prolonged sun exposure to avoid subtle color shifting. Applying top coats equipped with UV inhibitors maintains the deep wine intensity. Additionally, taking care during routine tasks prevents micro-scratches on dark glossy surfaces. Always dry underneath free edges completely after swimming or taking hot showers.
3. Milky White with Encapsulated Dried Flowers
Encapsulated floral details elevate translucent acrylic aesthetics
Milky white bases offer a soft, dreamy foundation for intricate nail art. Encapsulating tiny dried flowers within clear layers adds delicate natural beauty. The result resembles preserved botanical art under clear polished glass panels. The structural strength of acrylic allows thick embellishments to rest securely inside. The semi-translucent backdrop makes pastel petals pop with subtle contrast. It brings a romantic, spring-inspired feel to long coffin extensions. This design appeals to nature lovers and fans of delicate handiwork.
Each nail becomes a unique piece of art with varied floral arrangements. It remains popular for outdoor weddings, garden parties, and spring travel. The art of floral encapsulation requires patience, precise placement, and delicate handling. Real dried botanical pieces must be flattened carefully to prevent air bubbles during clear capping steps. The soft milky backdrop creates a sense of visual depth, making flowers appear as if floating inside ice. This multi-layered dimension makes observers look closer to appreciate fine craftsmanship.
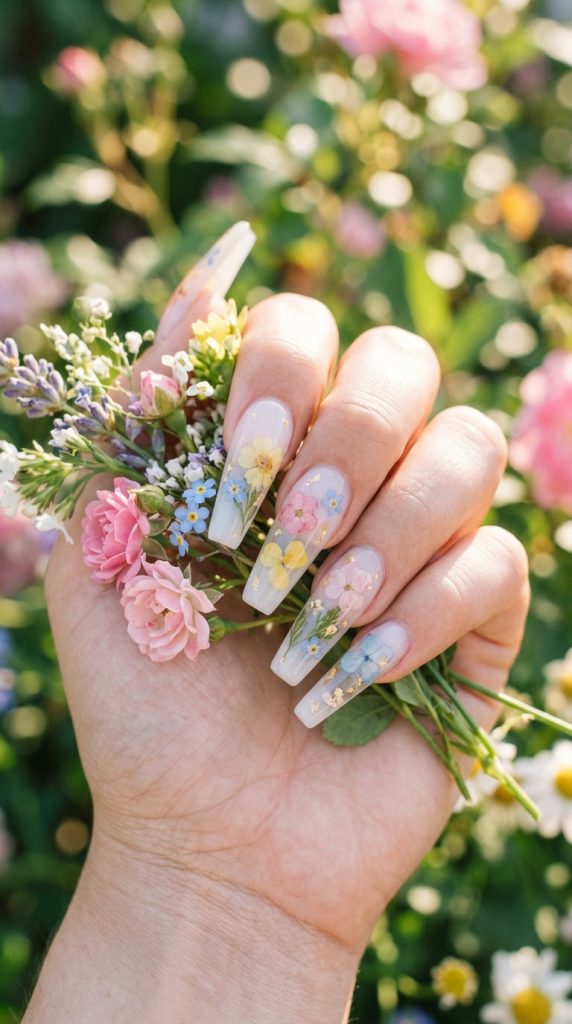
Furthermore, milky white bases offer a softer alternative to stark chalk-white colors. They blend gently against natural cuticles, creating a clean aesthetic that flatters all skin tones. You can mix different flower species, combining tiny baby’s breath blossoms with vibrant miniature buttercups. Adding tiny gold leaf flecks between petals adds subtle warmth to cool pastel flower arrangements. It is a artistic style that brings nature directly to modern beauty routines.
Creative Ways to Embed Floral Elements
Way 1: The Full Cover Botanical Canvas
Prepare real pressed flowers by cutting them into tiny usable sizes. Apply a thin layer of milky white base to build color. Place floral pieces onto the sticky layer using precision tweezers carefully. Press petals down flat so no edges stick up outward. Cap the entire design with clear building powder to protect flowers.
Way 2: The Delicate French Tip Cluster
Sculpt a clean, milky white tip following traditional coffin guidelines. Leave the nail bed area nude or clear for natural contrast. Arrange tiny flower buds along the smile line of the tip. Secure them with clear gel before applying a protective capping layer. Shape and file the free edge to keep sides razor-sharp.
Way 3: Floating Floral Gradient Accent
Apply translucent milky powder thicker near cuticles, fading toward the tip. Place small leaf pieces and petals scattered along the clear tip. Add tiny specks of gold foil between flowers for extra dimension. Encapsulate everything under clear material and buff until perfectly smooth.
Preservation Steps for Delicate Art Sets
Avoid prolonged exposure to hot water, which can soften enhancement layers. Apply UV-blocking top coats to prevent white shades from turning yellow. Moisturize cuticles with Vitamin E oil to maintain healthy nail beds. Refrain from tapping nails loudly on hard desks or counters repeatedly. Keep a nail file handy to smooth minor edge nicks immediately. Schedule professional maintenance to refresh clear top layers every few weeks.
Translucent milky powders can absorb pigments from dark dyes or spices like turmeric if unprotected. Wearing gloves while cooking or handling colored liquids protects delicate milky backgrounds. If clear caps lose shine over time, applying a fresh gel topcoat restores crystal-clear clarity. Treat real botanical encapsulations with care to ensure inner artwork stays vibrant.
4. Matte Black with Glossy Geometric Lines
Contrast textures redefine modern minimalist acrylic creations
Matte black provides an edgy, dramatic canvas for modern geometric patterns. Adding glossy black lines creates a subtle, tactile contrast that feels luxurious. The interplay of matte and shine catches light unexpectedly without loud colors. Using acrylic extensions ensures the flat top and sides stay sharp. This shape enhances the architectural feel of clean geometric line work. It offers a chic, gothic aesthetic suited for bold fashion enthusiasts. This trend suits monochrome wardrobes, urban street style, and evening events.
It proves that dark colors can feel versatile, refined, and trendy. It is low-profile yet demands attention from anyone who sees it up close. Texture play represents one of the most exciting trends in contemporary nail design. By removing bright colors, focus shifts entirely to light reflection, clean geometry, and surface finishes. The velvety texture of matte black absorbs light, while high-gloss gel lines reflect it like liquid obsidian. This creates dynamic movement across nails as your hands shift under natural light.
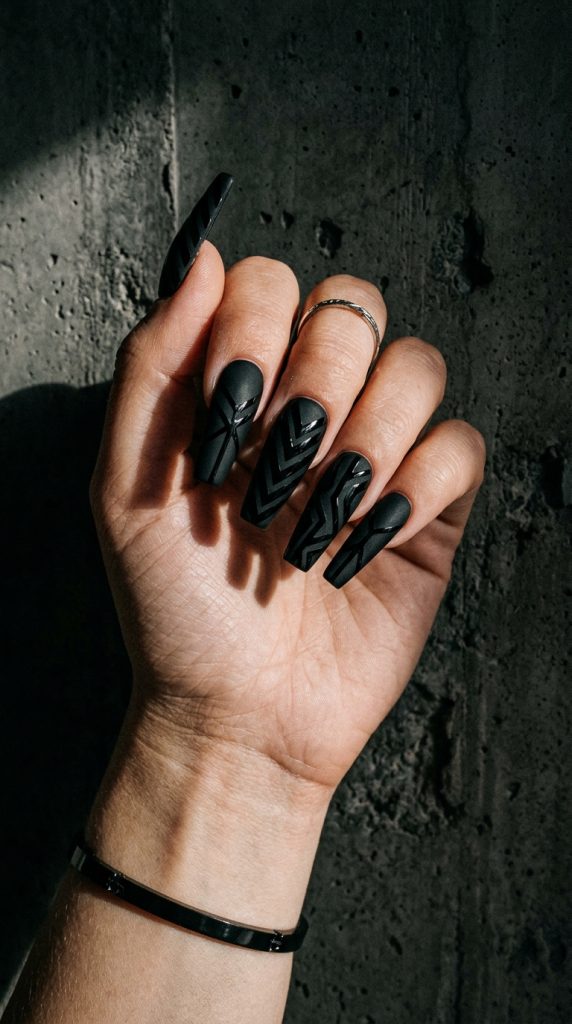
In addition, geometric line work accentuates the sharp, clean structure of coffin tips. Diagonal slash lines, minimalist grids, or converging triangles emphasize tapering side walls visually. It creates a sleek hand profile that pairs seamlessly with leather jackets, sharp blazers, and minimalist jewelry. This monochrome masterpiece offers sophistication without relying on glitter or rhinestones.
Step-by-Step Styling for Texture Contrast
Step 1: Structuring the Matte Black Base
Sculpt the extensions using dense black building powder for rich color. Ensure structural stress points are properly reinforced for everyday strength. File top surfaces flat and smooth out all bumps carefully. Apply a dedicated matte topcoat across all nails and cure fully. Wipe off any tacky residue to reveal a velvety matte finish.
Step 2: Drawing Precision Geometric Lines
Dip a thin detail brush into glossy non-wipe black liner gel. Paint sharp diagonal lines, chevron patterns, or minimalist grid shapes carefully. Keep lines thin and consistent across every finger for harmony. Cure the glossy gel art under your lamp immediately to prevent bleeding. Do not reapply matte topcoat over your newly drawn shiny lines.
Step 3: Adding Metallic Micro Accent Dots
Select one or two accent fingers for additional high-contrast details. Place tiny silver or chrome dots at line intersections using dotting tools. Cure the accent work securely under LED lights for maximum durability. Leave main background panels completely matte for high textural impact.
Protection Rules for Matte Enhancements
Avoid applying oily hand lotions directly onto matte surfaces without wiping. Clean matte finishes with rubbing alcohol to remove oils and restore flat texture. Wear gloves when working with hair dye, spices, or dark inks. Never use abrasive nail files across painted geometric design lines directly. Reapply matte topcoat between line art if the background grows shiny. Keep cuticles hydrated without getting heavy grease over matte areas.
Matte surfaces tend to absorb natural oils from skin contact throughout daily wear. A quick wipe with an alcohol-saturated pad instantly strips away oils and restores velvety finishes. When applying cuticle oils, use precision brush applicators to keep oil concentrated along skin borders. Avoid dragging oils across main matte nail faces to maintain contrast sharpness.
5. Nude Base with Chrome Swirl Details
Futuristic chrome accents transform classic nude acrylic shapes
Nude foundations remain a staple in nail fashion for good reason. Injecting metallic chrome swirls brings a futuristic, dynamic energy to neutral bases. The liquid metal effect contrasts beautifully against soft, skin-tone backgrounds. With strong acrylic extensions, long canvas space allows dramatic sweeping curves. The metallic accents wrap around edges, emphasizing the elongated shape visually. It feels modern, trendy, and effortlessly cool for any contemporary wardrobe. This style appeals to fashion-forward individuals wanting trendy yet wearable art.
Chrome reflects light dynamically, changing appearance as your hands move around. It works as well with streetwear denim as with formal dresses. Liquid chrome effects have revolutionized contemporary nail design over recent years. The ultra-reflective mirror finish elevates organic swoops and abstract wave patterns into modern statement pieces. When combined with warm nude bases, chrome accents pop without overwhelming hand aesthetics.
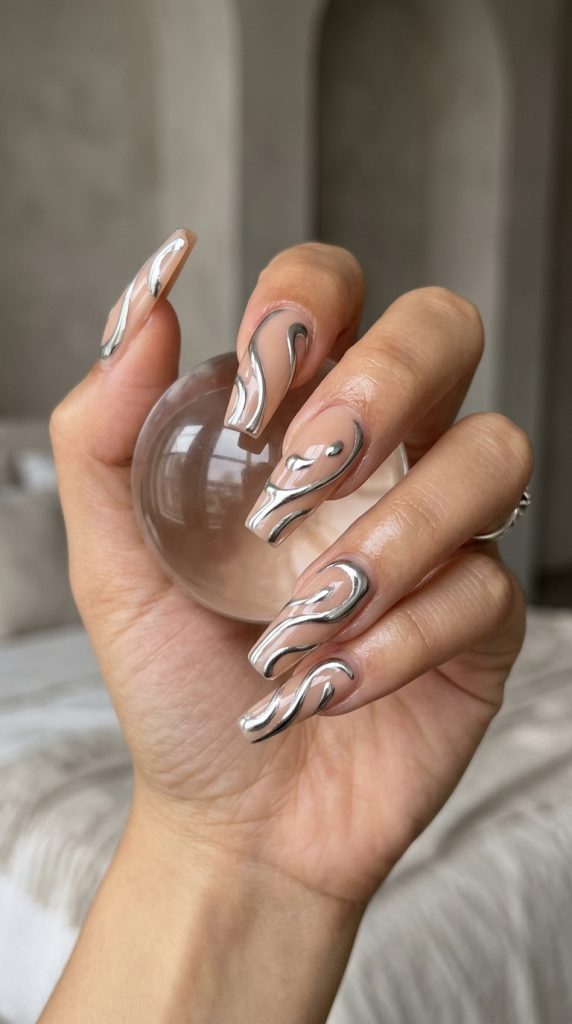
Furthermore, abstract swirls allow endless personalization across ten fingers. No two nails need to have identical lines, creating a playful artistic flow across your hands. Silver chrome provides cool, industrial contrast, while gold chrome offers warm luxury. Rose gold and iridescent liquid chrome options expand possibilities even further. It is an elevated aesthetic that feels trendy, high-fashion, and effortlessly chic.
Methods for Applying Chrome Line Art
Method 1: 3D Gel Chrome Swirl Technique
Sculpt a natural nude base and file it to crisp perfection. Apply a tack-free matte or glossy topcoat and cure completely. Paint raised 3D swirls using clear, thick builder gel lines. Cure the raised lines under lamp light until fully set. Rub metallic chrome powder over raised lines using a sponge applicator. Wipe away excess loose powder from surrounding nude areas carefully.
Method 2: Flat Foil Chrome Transfer Style
Apply your preferred nude extension shade and smooth out surfaces. Draw flowing abstract lines using specialized foil transfer adhesive gel. Cure the adhesive gel under your light source for recommended times. Press metallic chrome foil sheets firmly onto cured adhesive lines. Peel the sheet back quickly to reveal crisp chrome line patterns.
Method 3: Dual-Tone Chrome Wave Design
Paint swooping waves using silver chrome gel on one half of nails. Add a parallel wave using rose gold or bronze chrome powder alongside. Seal all metallic elements beneath a durable clear top coat layer. File coffin tips once more to ensure crisp edges remain clean.
Care Rules for Metallic Chrome Sets
Seal chrome art properly at free edges to prevent peeling away. Avoid picking or scratching at raised 3D metallic line details. Wear gloves when using cleaning products containing bleach or harsh solvents. Reapply topcoat if metallic shine begins to look dull over time. Keep hands clean using mild soap and tepid water during days. Consult your technician if chrome detailing starts lifting near tips prematurely.
Chrome powders require thorough top coat encapsulation along free edges to prevent rubbing off. When filing during touch-ups, exercise extreme care around chrome line boundaries. If you notice chrome shine dulling slightly, applying a non-yellowing gel topcoat restores mirror finishes instantly. Avoid aggressive physical rubbing against rough fabrics to preserve raised 3D line height.
6. Pastel Marble with Gold Quartz Veins
Soft pastel marble options elevate luxurious acrylic aesthetics
Pastel marble designs bring dreamy, cloud-like textures to long extensions. Swirling soft pink, lavender, and mint creates a soothing visual effect. Adding metallic gold veins transforms soft marble into realistic quartz stone. The strength of acrylic ensures delicate marble patterns stay protected beneath clear layers. The elongated shape provides room for flowing organic swirls to expand. It offers a soft, elegant look suitable for warm seasons. This style suits anyone who loves ethereal art and subtle color blends.
It looks like polished marble countertops or raw crystal gemstones. It adds soft color while maintaining a high-end, luxury aesthetic. Organic stone aesthetics bring natural luxury to long enhancement shapes. The soft blending of pastel shades mimics real geological formations, creating a calm visual appeal. Gold veins add contrast, catching light as your hands move through daily tasks.
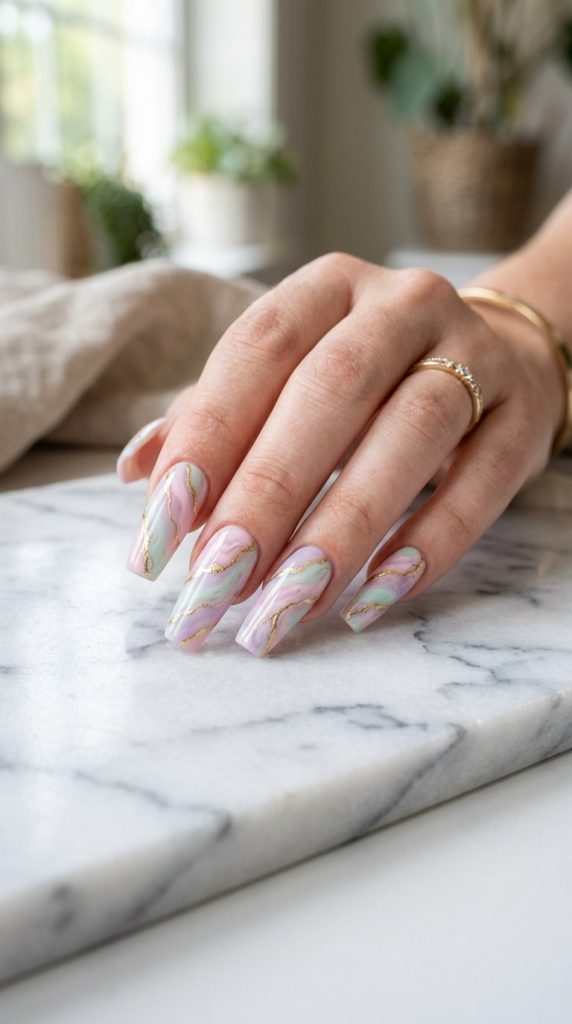
Moreover, pastel marble designs prove incredibly versatile across seasons. Soft pinks and lavenders bring romantic energy during spring, while mint and sky blue feel refreshing for summer. Encapsulating swirled colors beneath clear protective layers creates a smooth glass-like finish. It provides visual texture without bumpy outer surfaces that catch on clothing. It is an artistic option that flatters delicate jewelry and soft outfits.
Step-by-Step Marble Creation Steps
Step 1: Preparing the Pastel Color Base
Sculpt the base using soft white or pale nude extension powders. Apply a thin layer of wet blooming gel or clear base coat. Drop small dots of pastel pink, purple, and mint gel polish. Allow colors to spread naturally into wet base layers smoothly. This creates an ethereal organic swirl pattern effortlessly.
Step 2: Swirling Colors and Adding Depth
Drag a fine detail brush through dropped colors in curving motions. Create organic marble veins, keeping some areas light and open. Cure the swirled pastel layer under LED light to set patterns. Apply a clear gel layer to add depth before adding gold lines. This clear separation adds realistic multi-dimensional depth.
Step 3: Painting Gold Quartz Vein Lines
Dip a thin brush into gold metallic gel or liquid foil paint. Draw fine, jagged lines following the edges of swirled pastel colors. Branch smaller veins off main lines to mimic natural quartz stone. Cure the gold veins completely and seal with a glossy topcoat layer.
Maintenance Instructions for Pastel Sets
Keep pastel shades safe from direct sunlight to prevent color fading. Avoid handling newsprint or fresh magazines that can leave ink smudges. Wipe nails with alcohol pads if light colors pick up dirt. Apply cuticle oil every night to maintain healthy skin around extensions. Avoid using nails to scrub tough surfaces during daily cleaning tasks. Schedule fill appointments regularly to keep structural stress points balanced correctly.
Pastel shades can stain if exposed to strong synthetic dyes or dark denim washes. If light surface discoloration occurs, a gentle wipe with isopropyl alcohol removes dirt without damaging top coats. Keeping top coats sealed ensures gold vein paint stays shiny and bright. Regular hydration preserves natural nail bed flexibility beneath extension layers.
7. Royal Blue Rhinestone Encrusted Glamour
Bold jewel tones dominate high-drama acrylic manicures
Royal blue is a striking color that exudes confidence and regal beauty. Encrusting nails with shimmering crystals elevates jewel tones to dramatic heights. The deep blue backdrop makes clear and AB rhinestones sparkle intensely. Building extensions with strong acrylic provides the support heavy crystals need. The flat top offers a stable space for intricate stone placements. It makes a bold statement for red-carpet events, birthdays, or celebrations. This design targets lovers of maximum glamour and uninhibited shimmer.
The deep blue color flatters various skin tones while adding striking contrast. Your hands will command attention in every room you enter. Rich cobalt and royal blue shades command instant authority in fashion design. When applied to extended shapes, intense blue creates an eye-catching foundation. Clear glass rhinestones placed over deep blue backgrounds mimic sparkling stars against night skies.

Additionally, rhinestone placement options allow custom flexibility based on comfort and preferences. You can encrust one entire accent nail while keeping remaining fingers sleek and solid blue. Alternatively, applying crystal crowns along cuticle borders across all ten fingers adds balanced shimmer. High-quality crystal placement turned into an art form ensures long-lasting wear without losing stones.
Placement Methods for Heavy Rhinestones
Method 1: Full Statement Accent Nail Cover
Sculpt extensions using vivid royal blue powder or rich gel polish. Select one finger per hand to serve as full crystal statement nails. Apply thick rhinestone glue or builder gel across the entire nail surface. Place large central gems first using a wax picker tool carefully. Fill spaces around main gems with smaller filler crystals completely. Cure under lamp lights to lock all stones securely in place.
Method 2: Cuticle Crown Rhinestone Crest
Apply royal blue color across all nails for a uniform base. Place a row of small, graduated crystals curving along cuticle lines. Use clear resin gel to secure stones without dulling their facets. Cure thoroughly and apply topcoat around stone bases to seal securely. This frames cuticles with subtle sparkle while keeping main bodies sleek.
Method 3: Cascading Waterfall Gem Placement
Scatter rhinestones densely near cuticles, letting them spread toward tips. Use smaller crystals as you move down the nail body gradually. Seal stone edges with non-wipe topcoat using a fine detail brush. Ensure top coat does not cover gem facets, preserving bright sparkle.
Care Protocols for Gem-Encrusted Extensions
Avoid catching crystal edges on knitted sweaters or lace clothing items. Wear protective gloves when doing heavy household work to avoid knocking stones off. Do not pick at loose crystals; visit a salon for quick repairs instead. Clean around stones using a soft toothbrush and mild soap gently. Avoid harsh acetone liquids near crystal placements to prevent glue breakdown. Keep spare rhinestone glue handy for emergencies while traveling away.
Crystals require mindful physical habits to avoid snagging prongs or stone edges on textured fabrics. When getting dressed, put on delicate lace or knits before picking up items with crystal-adorned hands. If dust collects between small crystals, gentle scrubbing with soft toothbrushes restores maximum sparkle. Never apply thick top coat over rhinestone facets, as this rounds sharp cuts and dulls light reflection.
8. Iridescent Opal Shell Encapsulation
Ethereal opal textures bring seaside luxury to acrylic extensions
Opal designs mimic the luminous, color-shifting beauty of precious ocean shells. Crushed shell flakes and iridescent foils embedded in clear layers reflect light endlessly. Greens, pinks, and purples shimmer as your hands move. The depth achieved through acrylic encapsulation makes shell pieces appear three-dimensional. The smooth outer layer protects textured shell fragments from snagging clothing items. It delivers a serene, bohemian-luxury look perfect for summer getaways.
This style appeals to fans of sea glass, mermaid aesthetics, and iridescent textures. It feels whimsical yet sophisticated thanks to its polished high-gloss finish. It brings a slice of coastal beauty directly to your fingertips. Iridescent opal finishes offer captivating shimmer without relying on glitter. Embedded mother-of-pearl fragments reflect light across multiple spectrums, shifting color under varying light sources. Encapsulating raw materials within structural clear layers ensures outer surfaces stay perfectly smooth.

Furthermore, this seaside style pairs naturally with gold jewelry, linen summer outfits, and resort wear. The translucent nature of clear acrylic capping creates an illusion of floating elements beneath polished glass. You can customize density, choosing heavy shell coverage or sparse accents scattered across natural nude bases. It brings coastal relaxation and modern sophistication together seamlessly.
Steps to Encapsulate Crushed Shells
Step 1: Laying the Translucent Foundation
Prep natural nails and apply structural extensions cleanly. Lay down a thin layer of milky white or clear building powder. Keep the base thin to allow room for embedded shell fragments. Do not cure or set completely before placing decorative shell pieces carefully.
Step 2: Placing Crushed Shell Fragments
Pick up flat crushed shell pieces using wet acrylic brushes or tweezers. Place larger shell fragments near the center of nail bodies carefully. Fill smaller gaps with tiny iridescent foil flakes or fine glitter. Press all pieces flat against the base layer to avoid sharp edges.
Step 3: Capping with Clear Extension Material
Overlay the entire shell layout with clear building powder generously. Ensure all shell fragments are fully covered beneath clear material layers. File top surfaces smooth, paying attention to side walls and tips. Polish to a mirror shine using high-grit buffing blocks and topcoat.
Protection Rules for Encapsulated Designs
Inspect side walls to ensure no shell fragments protrude through clear layers. Apply topcoat weekly to maintain glass-like transparency over embedded shells. Keep nails moisturized with natural oils to prevent surrounding skin dryness. Avoid hitting tips against hard surfaces to protect encapsulated structural layers. Wash hands thoroughly after using sunscreens that can dull glossy finishes. Get professional refills on time to prevent lifting around clear cuticle areas.
Encapsulated shell art relies on crystal-clear top layers to display inner iridescent textures. Protecting outer clear coats from scratching ensures light penetrates through to embedded shells. If minor surface dullness develops over time, applying fresh clear gel topcoats restores ocean clarity. Always check edge seals during maintenance appointments to prevent moisture ingress.
9. Modern French V-Cut Line Art
Geometric V-shaped tips update traditional acrylic French manicures
V-cut French tips offer a sharp, modern alternative to curved smile lines. The dramatic angular tips converge at a central point, elongating fingers visually. It creates an edgy, sleek silhouette that suits contemporary fashion lovers. The clean lines of coffin shapes match the sharp angles of V-tips perfectly. You can play with contrasting colors, metallic outlines, or double lines easily. It provides a clean, tailored aesthetic appropriate for corporate or casual wear.
This trend targets lovers of architectural geometry and crisp graphic lines. It looks deliberate, modern, and polished without feeling overly complex. It brings fresh energy to classic neutral manicures effortlessly. Sharp graphic lines create structural harmony with tapered flat-topped extensions. The point of the V-shape draws eyes downward toward tips, reinforcing linear length. This geometry creates a slimming effect for hand profiles, creating clean visual lines.

Additionally, V-cut French designs open possibilities for creative color combinations. Classic white tips on nude bases deliver sharp modern professional looks. Swapping white for black, neon hues, or metallic chrome transforms sets into edgy statements. Adding thin accent lines parallel to main V-cuts creates double-walled architectural interest. It is an intellectual, clean style that speaks to precision design lovers.
Application Techniques for Sharp V-Tips
Method 1: Precision Hand-Painted Line Work
Sculpt a clean nude or pink extension base and file smooth. Dip a long striping brush into rich black or white gel polish. Paint one diagonal line from side wall to center tip precisely. Paint a matching line from the opposite side wall to meet it. Fill in the V-shape tip completely and cure under LED light.
Method 2: Vinyl Stencil Tape Application
Apply your nude base color and cure with a matte topcoat layer. Place crisp V-shaped vinyl stencils onto nails once dry. Paint contrast color over exposed tip areas inside vinyl stencil borders. Peel stencils away immediately while polish is wet for clean edges. Cure color tips and seal whole nails with glossy topcoat layers.
Method 3: Double-Layered Metallic Border Design
Paint your primary color V-cut tip following standard application steps cleanly. Draw a thin gold or silver metallic line along the inner V-edge. Cure metallic lines fully under lamp light sources before topcoat application. File flat tip edges carefully to keep overall shapes razor-sharp.
Maintenance Tips for Graphic Line Designs
Keep line work sharp by applying protective clear topcoats every week. Avoid filing edge tips yourself, which can remove painted V-shape corners. Use non-acetone removers if touching up surrounding skin area messy spots. Keep cuticles neat to ensure geometric lines stay visually centered. Wear gloves during heavy cleaning to preserve crisp color contrast edges. Visit your technician if tip edges chip to maintain sharp geometry.
Precision graphic line designs highlight any uneven filing or jagged edges. Maintaining crisp side walls through regular touch-ups ensures geometric balance. Avoid filing free edge corners aggressively between salon visits, as this can dull sharp V-points. Keeping cuticles pushed back and oiled keeps geometric lines properly framed at bases.
10. Velvet Cat-Eye Magnetic Shimmer
Dynamic magnetic polish effects add dimension to acrylic sets
Cat-eye magnetic polish creates a mesmerizing 3D velvet effect across long extensions. Tiny magnetic particles within the polish react to special magnets before curing. This creates shimmering lines of light that shift as your hands tilt. The expansive surface area of coffin extensions amplifies dynamic magnetic light waves. Deep emerald greens, space purples, and velvety bronzes look rich in this finish. It offers an interactive visual experience that feels luxurious and magical.
This design appeals to fans of cosmic visuals, gemstone textures, and moody shimmer. It turns simple manicures into captivating light shows under ambient room lighting. It represents modern nail chemistry at its most entertaining level. Magnetic light manipulation brings dynamic movement to static manicures. As light hits metallic particles aligned by magnets, glowing bands glide across nail faces like velvet fabric.
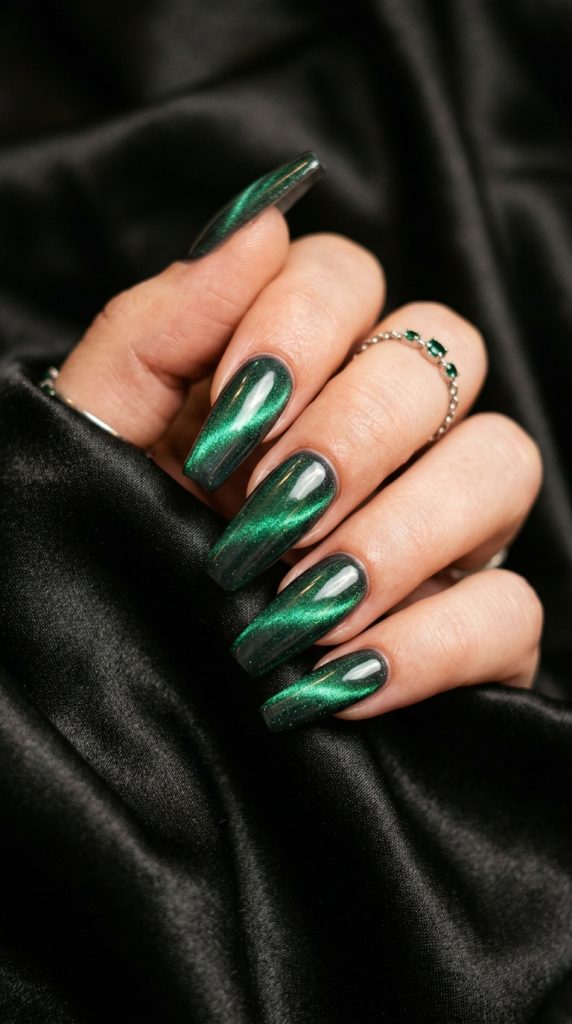
Furthermore, magnetic techniques allow wide artistic expression. Technicians can create single diagonal light bars, cross-hatched velvet effects, or floating orb patterns. Applying cat-eye polish over dark black base coats creates deep jewel-toned contrast. Placing magnetic polish over translucent jelly bases offers ethereal glass-like shimmer. It is a modern, technologically advanced style that captivates observers instantly.
Step-by-Step Magnetic Application
Step 1: Applying Dark Base Colors
Sculpt smooth extension foundations and file to crisp coffin shape perfection. Apply a coat of black gel polish to create depth under shimmer. Cure black base layer under LED lights according to manufacturer timing. Dark bases make magnetic metallic particles pop with intense contrast.
Step 2: Magnetic Particle Alignment Technique
Apply a generous layer of magnetic cat-eye gel polish over black. Hold a strong magnet tool a few millimeters above wet polish surfaces. Move the magnet to pull metallic particles into desired light bands. Hold magnet still for five to ten seconds until lines sharpen clearly. Cure under lamp immediately to lock metallic particle lines in place.
Step 3: Multi-Dimensional Layering and Sealing
Apply a second thin coat of cat-eye gel for added depth. Magnetize again, shifting light bands slightly for multi-dimensional 3D looks. Cure fully under LED lights to set shifting metallic shimmer lines. Apply a high-gloss topcoat layer to enhance depth and protect art.
Care Protocols for Velvet Shimmer Sets
Protect glossy topcoats from scratches to keep magnetic depth looking clear. Clean surfaces with soft microfiber cloths to clear away smudges and oils. Hydrate surrounding cuticles daily with nourishing almond oil treatments regularly. Avoid exposing extensions to strong industrial solvents that dull gel layers. Do not pick at free edges where gel polish bonds to extensions. Schedule timely salon touch-ups to maintain structural alignment as nails grow.
Dynamic velvet effects rely on smooth, scratch-free top layers to shine brightly. Micro-scratches scatter ambient light, reducing the sharp contrast of magnetic bands underneath. Applying fresh top coats every week preserves depth and mirror clarity. Taking care during daily manual tasks ensures smooth magnetic light reflection stays vibrant.
Complete Care & Maintenance Guide
Daily Care Protocols for Extensions
Maintaining long extension sets requires gentle daily care habits. Treat extensions as jewels, not functional tools for prying things open. Apply high-quality cuticle oil morning and night to keep natural beds flexible. Hydrated nails flex slightly under pressure, reducing breakage risks significantly over time. Keep hands clean by scrubbing beneath extended tips with soft brushes.
Dry hands thoroughly after washing to prevent moisture from settling under lifting edges. Use hand creams daily to preserve skin elasticity around nail beds. Small daily maintenance habits prevent costly salon repairs down the road. Furthermore, paying attention to how you use your hands prevents unnatural lever strain on natural beds. Use knuckles or pads of fingers when pushing elevator buttons or typing on keyboards.
When pulling objects from tight spaces, avoid placing direct pressure on extended free edges. Maintaining awareness of hand placement protects both extensions and underlying natural nail health. Cultivating mindful habits ensures your extensions remain beautiful and comfortable throughout their wear cycle.
Cleaning and Storage Rules
When cleaning around extension sets, avoid using sharp metal tools underneath. Metal scrapers can damage the hyponychium and break protective acrylic bonds beneath. Opt for soft bristles and gentle antibacterial soaps instead during daily hand washing. Protect extensions from household chores by wearing heavy rubber gloves always. Harsh detergents, bleach, and dish soaps strip natural moisture quickly.
If you wear press-on extensions, store them in padded boxes away from light. Proper handling keeps extensions looking fresh, strong, and beautiful for weeks. In addition, managing exposure to hot water during long baths or dishwashing prevents material softening. Water trapped under lifting edges creates environments where bacteria thrive.
Thorough drying after water exposure maintains clean hyponychium areas. If minor lifting occurs, visit your salon technician promptly for sanitary resealing. Never force lifted extensions off naturally, as this strips layers off natural nail beds. Gentle care practices ensure your natural nails stay strong and healthy underneath extensions.
Conclusion: Embrace Your Favorite Look
Nail art remains one of the most fun ways to express personal style. Coffin shapes offer the perfect canvas for creative textures and colors. Whether you prefer minimalist matte black or dramatic royal blue, options abound. Investing in quality application and daily maintenance ensures your set lasts. Don’t be afraid to mix trends or try bold dynamic finishes.
Your hands deserve to feel fabulous, polished, and beautifully styled every day. Take inspiration from these ten gorgeous designs for your next salon visit. Work with skilled technicians to bring your favorite aesthetic ideas to life. Enjoy the confidence that comes with sporting a head-turning, flawless manicure! Exploring different textures, lengths, and colors keeps your beauty routine fresh and inspiring.
Whether preparing for major life events or enjoying routine self-care days, great manicures elevate daily moods. Remember to prioritize underlying natural nail health through consistent hydration and professional maintenance. Flaunt your chosen set with confidence, knowing you are sporting structural elegance at its finest.
Leave a Reply