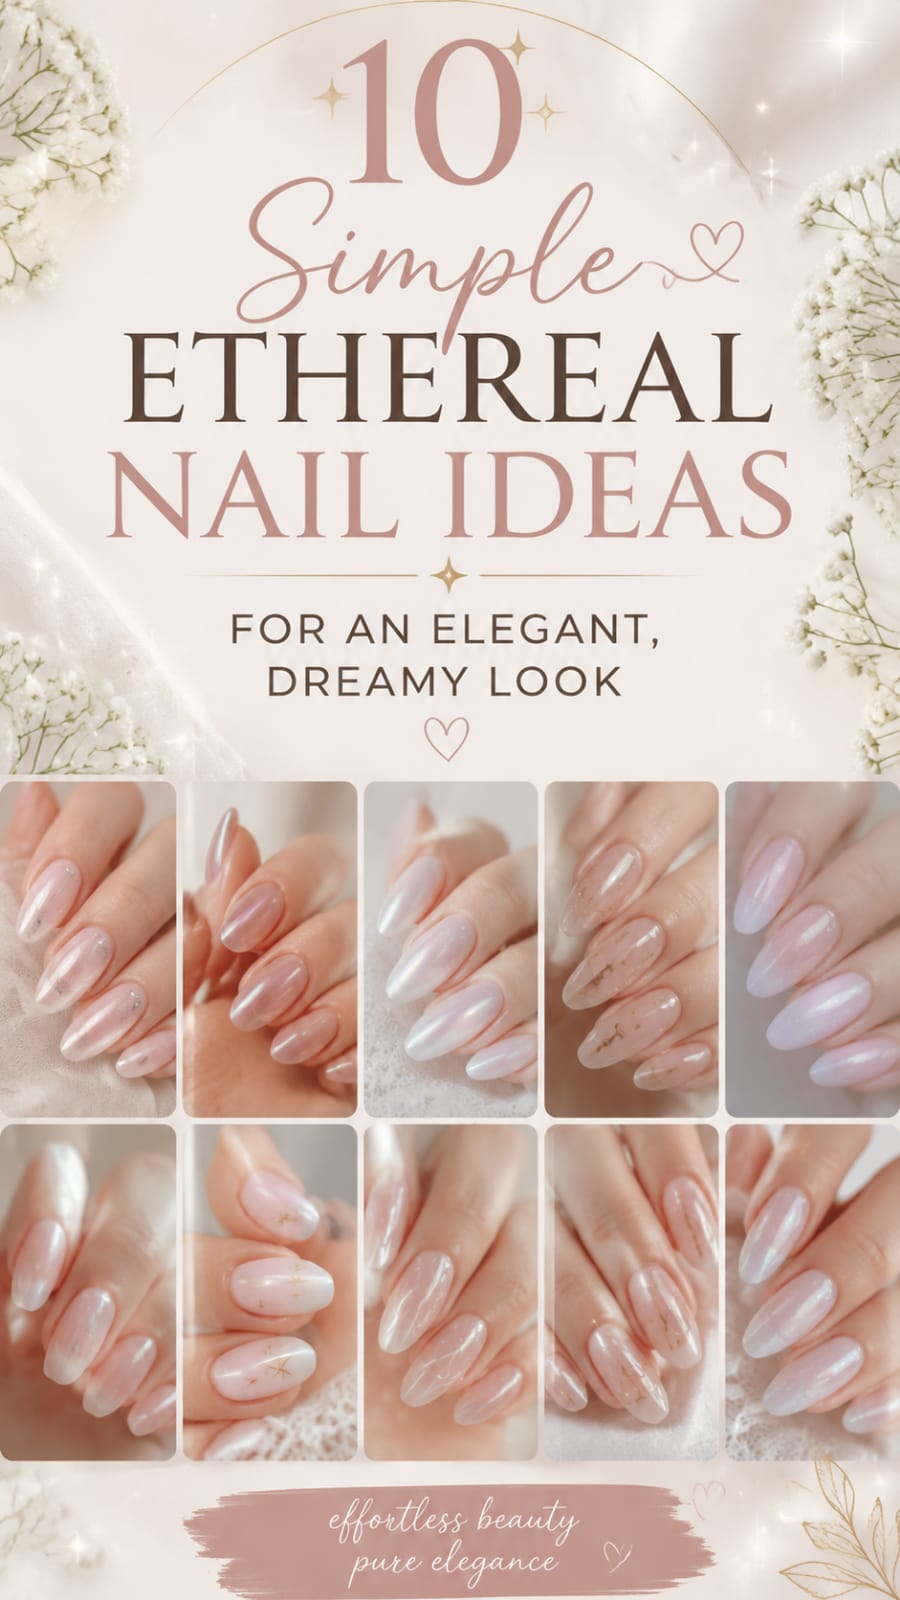
The world of modern manicures is currently undergoing a beautiful transformation of nail. Subtle shimmers, translucent textures, and cloudlike shades are sweeping across social platforms and salon menus everywhere. Beauty lovers across the globe are stepping away from loud neon shades and heavy graphic art. Instead, there is a deep appreciation for looks that celebrate grace, romantic softness, and timeless charm. A soft aesthetic brings an undeniable sense of peace and calm to your everyday busy routine.
Ethereal beauty centers entirely around feelings of weightlessness, soft light, and delicate details. These soft designs offer a refreshingly quiet visual escape from chaotic daily life. They elevate your everyday outfits without ever feeling visually overwhelming or cluttered. Simple, quiet elegance remains a timeless choice that outlasts fast-fashion cycles across all modern style movements.
Finding the ideal dreamlike manicure enhances your personal styling routine completely. Whether you prefer the glowing sheen of pearl finishes or floating cloud motifs, options abound. Every single design brings a small touch of magical charm right to your fingertips. Soft pastel shades and sheer bases flatter every skin tone and suit any social occasion effortlessly.
Exploring gentle aesthetic manicures brings incredible creative joy to your personal self-care routine. Whether you are attending upscale formal celebrations or relaxing at home, soft styles fit in beautifully. Let us explore ten simple, magical manicure ideas today, complete with detailed styling methods and long-lasting care techniques.
1. Pearl Gloss Soft Aura Designs
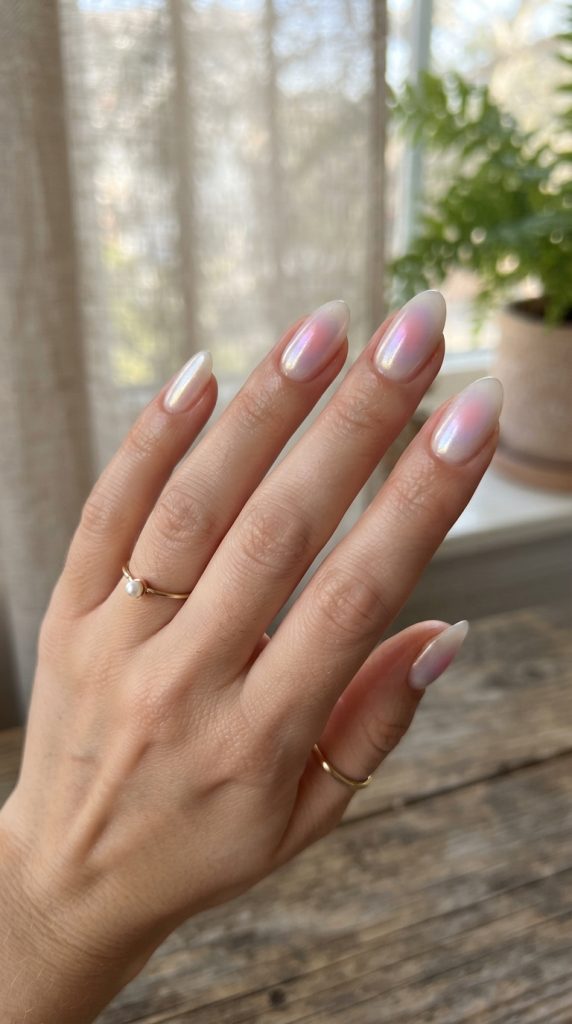
Pearl aura manicures bring a soft, radiant warmth to your fingertips with ease. This gentle style creates a glowing colored center that fades smoothly outward toward sheer edges. Soft pinks, delicate lavenders, and milky whites dominate this dreamy aesthetic trend. A subtle layer of fine pearl chrome powder adds a magical, iridescent finish over the color blend.
Why Pearl Finishes Elevate Dreamy Nail Designs
Glazed pearl finishes create a mesmerizing light reflection across your hands. Soft pearlescent pigments catch natural sunlight with incredible grace and multidimensional charm. This shimmering effect adds instant luxury to delicate pastel colors without feeling visually loud.
Aura gradients give hands a healthy, soft, and luminous appearance every day. The gentle color blend eliminates harsh lines to create a cloudlike visual effect across the nail plate. Choosing high-grade pearl pigments ensures your gentle manicure shines softly through weeks of daily wear.
Step 1: Creating a Soft Blended Aura Center
Achieving a seamless gradient center requires patience, light pressure, and soft sponge tools:
- Apply a sheer nude or translucent pink base coat across the entire surface smoothly.
- Sponge a tiny circle of soft pastel color directly onto the center point of the nail plate.
- Dab around the edges lightly using a dry wedge makeup sponge tool to soften color transitions.
- Cure the soft aura layer under your LED lamp for sixty seconds to set the gradient firmly.
Step 2: Applying Iridescent Chrome Powder for Radiance
Enhance your soft aura gradient with a shimmering layer of pearl pigment powder:
- Apply a smooth, even layer of non-wipe gel top coat over your blended colors.
- Cure the non-wipe top coat completely under your curing lamp light according to bottle directions.
- Rub glowing pearl chrome powder evenly across the whole surface using a soft applicator tool.
- Seal everything carefully with a durable glossy top coat layer to protect the chrome shine.
2. Sheer Milky White Cloud Magic
Milky white foundations offer a soft, romantic alternative to stark, opaque white polishes. This sheer look resembles fluffy summer clouds floating across clear, sunlit skies. Adding subtle hand-painted cloud accents elevates this simple aesthetic look into a true work of art.
The Charm of Translucent Milky Polish
Sheer white shades create a remarkably clean, elegant, and ethereal base coat foundation. Translucent formulas allow the natural warmth of your hands to glow through subtly beneath the polish. The resulting look appears effortless, polished, and completely dreamy every single day.
Hand-painted cloud motifs add whimsical charm without cluttering the surface of your nails. Soft white swirls create dynamic visual interest when swept across translucent milky base coats. This gentle look pairs beautifully with cozy winter knits, summer linen dresses, and formal evening gowns alike.

Method 1: Layering Sheer White Base Shades
Building perfect sheer depth requires thin, deliberate application techniques across all nails:
- Clean the natural surface thoroughly using isopropyl rubbing alcohol wipes to remove oils.
- Apply one ultra-thin coat of sheer milky white polish evenly from cuticle to tip.
- Let the first soft layer dry or cure completely before adding any additional product layers.
- Apply a second thin coat to build a perfectly balanced, translucent milky opacity.
Method 2: Painting Floating Cloud Motifs Easily
Adding delicate cloud art brings dreamy fairytale magic directly to your fingertips:
- Dip a small dotting tool into opaque white polish lightly to pick up product.
- Place three small, overlapping dots where you want your main cloud shape to sit.
- Connect the outer edges smoothly using a thin detail liner brush tool.
- Feather the bottom edge outward to create a soft, misty cloud effect that blends smoothly.
3. Celestial Gold Foil Star Accents
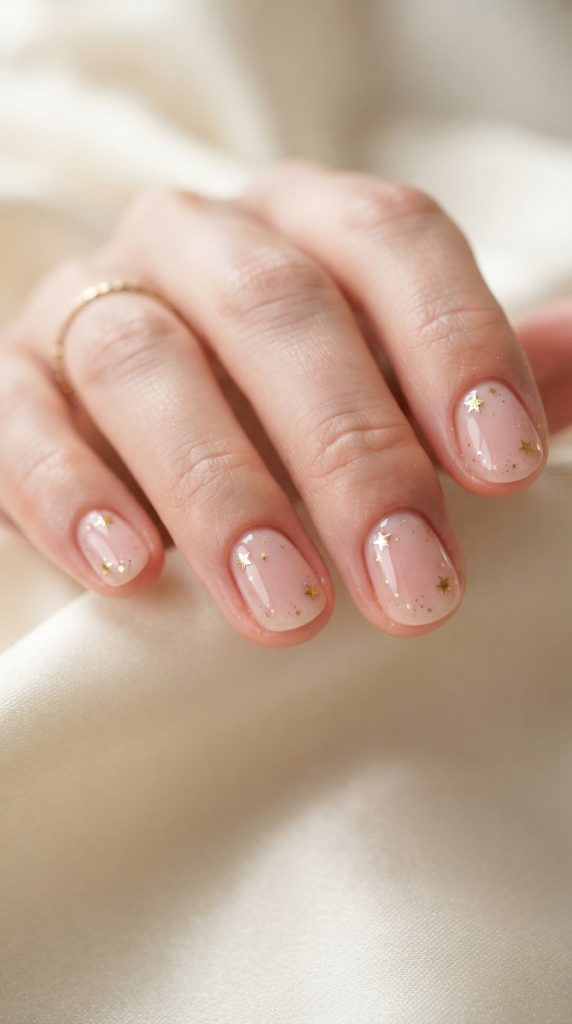
Celestial beauty trends bring starry night wonder directly to your daily beauty routine. Sheer blush foundations adorned with delicate gold foil stars create instant, starry elegance. This cosmic look balances soft romantic shades with tiny, sparkling metallic accents.
Combining Soft Pastel Shades with Metallic Celestial Accents
Pairing delicate pastels with reflective gold foil creates breathtaking visual depth on hands. The warm metallic contrast captures ambient light playfully whenever your hands move through the room. Tiny star shapes add whimsical charm without overwhelming simple aesthetic manicures.
Sheer blush pink offers the ultimate backdrop for golden cosmic design elements. The soft pink hue enhances natural hands while keeping the art understated and feminine. It provides sophisticated charm suitable for romantic date nights, corporate meetings, or formal dinners.
Way 1: Placing Delicate Gold Foil Stars Accurately
Placing metallic foil accents requires a gentle hand, steady control, and precise tools:
- Apply your favorite sheer blush pink base color smoothly and allow it to set.
- Paint a tiny drop of clear top coat onto exact star placement spots on the nail surface.
- Pick up individual gold foil star pieces using a dampened wooden stick or wax pencil tool.
- Press the star foil flat into the wet top coat drops gently to secure placement.
Way 2: Sealing Metallic Foils for Long Lasting Wear
Protect delicate gold accents from snagging on clothing or peeling off prematurely:
- Apply a generous layer of clear builder gel or thick protective top coat over everything.
- Ensure the top coat covers all raised metallic edges completely without leaving rough bumps.
- Cap the free edge carefully with polish to seal the front tip tightly against peeling.
- Allow the final clear protective coat to dry or cure fully under your lamp.
4. Iridescent Opal Shimmer Layers
Opal gemstones inspire some of the most captivating romantic manicures available today. This ethereal style mimics the mysterious inner fire found within natural opal stones. Flecks of green, pink, gold, and violet shimmer dance beneath translucent polish layers.
Capturing the Magical Radiance of Natural Opal
Natural opal effects bring a multidimensional glow to simple aesthetic manicures effortlessly. Flakes of iridescent foil embedded inside sheer gel create incredible organic visual depth. Every angle reveals a new color flash as ambient light shifts around your hands.
This mesmerizing look works beautifully across all nail shapes and finger lengths. Sheer opalescent shimmer keeps the overall aesthetic clean, soft, light, and delicate. It offers unique visual enchantment without needing heavy graphic nail art or dark colors.

Step 1: Laying Iridescent Flakes over Sheer Bases
Creating realistic opal depth starts with strategically scattered iridescent foil pieces:
- Apply a smooth layer of sheer milky or pale lavender polish as your base foundation.
- Press small, irregular pieces of iridescent foil flat onto the sticky polish layer.
- Space the shimmering foil pieces slightly apart to mimic realistic gemstone depth.
- Smooth down any raised foil corners gently using soft silicone precision tools.
Step 2: Encapsulating Shimmering Flakes with Clear Gel
Lock in shimmering dimensional flakes for a smooth, glasslike surface finish:
- Apply a generous coat of clear builder gel or thick leveling top coat over the entire nail.
- Float the clear product evenly over all embedded foil pieces to smooth out bumps.
- Check that the surface feels completely smooth without any rough texture points lingering.
- Cure or air dry the clear encapsulating layer completely until it feels rock solid.
5. Soft Rose Quartz Gemstone Polish
Rose quartz is known worldwide as the ultimate crystal of unconditional love and peace. Translating this delicate crystal texture onto manicures creates pure ethereal magic. Veins of soft white floating through translucent pink capture true gemstone beauty with ease.
The Gentle Healing Energy of Rose Quartz Aesthetics
Soft rose quartz manicures carry a peaceful, loving, and deeply romantic aesthetic vibe. Translucent pink polish mimics natural crystal formations with effortless grace and visual softness. The gentle pink hue adds healthy, natural radiance to every skin tone effortlessly.
Delicate white marbling adds organic complexity to an otherwise simple, understated look. No two quartz designs look identical, giving you a custom piece of art every time. This soft gemstone aesthetic remains a top choice for brides, dreamers, and romantic souls.
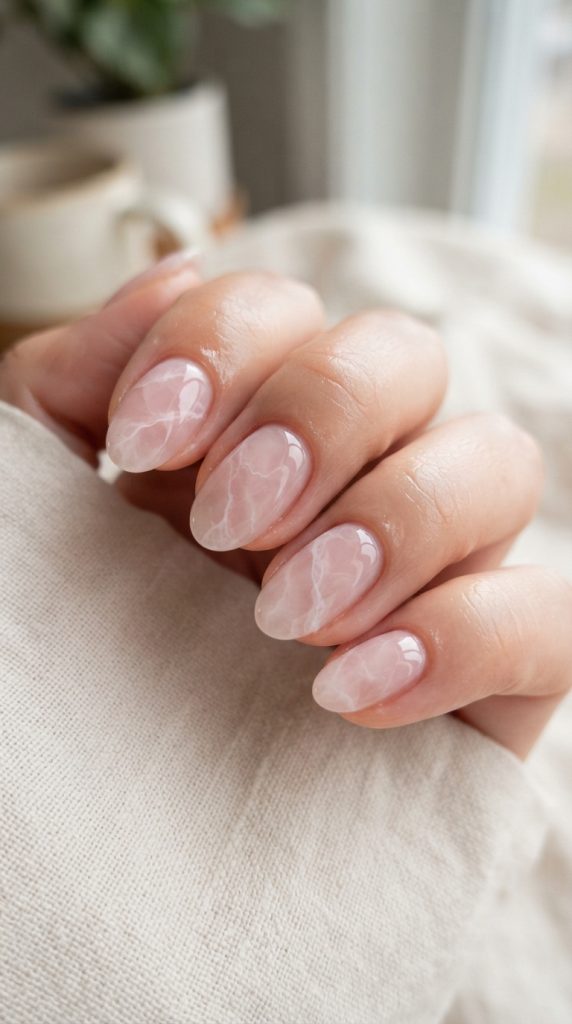
Method 1: Creating Translucent Pink Crystal Foundations
Building a realistic crystal base requires custom blending clear and pink polish formulas:
- Mix two drops of sheer pink polish with several drops of clear top coat on a palette.
- Apply the custom sheer pink mixture smoothly across all nails as your base.
- Apply a second sheer layer to build subtle, translucent depth across the nail plate.
- Let the sheer crystal foundation dry or cure completely solid before adding details.
Method 2: Drawing Soft White Marble Veins
Adding organic white veining brings natural crystal textures to life on your nails:
- Dip a fine detail liner brush into sheer white polish very lightly.
- Draw squiggly, unpredictable diagonal lines across the sheer pink base surface.
- Dab a brush dipped in rubbing alcohol over the lines to blur them softly outward.
- Seal the realistic quartz texture under a thick layer of high-gloss top coat.
6. Frosted Lavender Sugar Shimmer
Lavender represents grace, serenity, and soft romantic summer evenings spent outdoors. Combining pale lavender polish with fine sugar shimmer creates a magical texture contrast. This subtle style offers a unique tactile feel while maintaining quiet elegance everywhere.
Why Pastel Lavender Embodies Dreamy Ethereal Beauty
Pastel lavender offers a cool-toned, ethereal alternative to traditional blush pink shades. This peaceful botanical shade invokes images of blooming lavender fields under soft sunlight. Its delicate undertones brighten hands effortlessly while keeping designs subtle and highly sophisticated.
Micro sugar shimmer adds a soft frosted glow to quiet lavender base shades. The tiny sparkling particles catch ambient light like delicate winter frost on windowpanes. It brings whimsical tactile charm to your favorite simple aesthetic beauty routine.
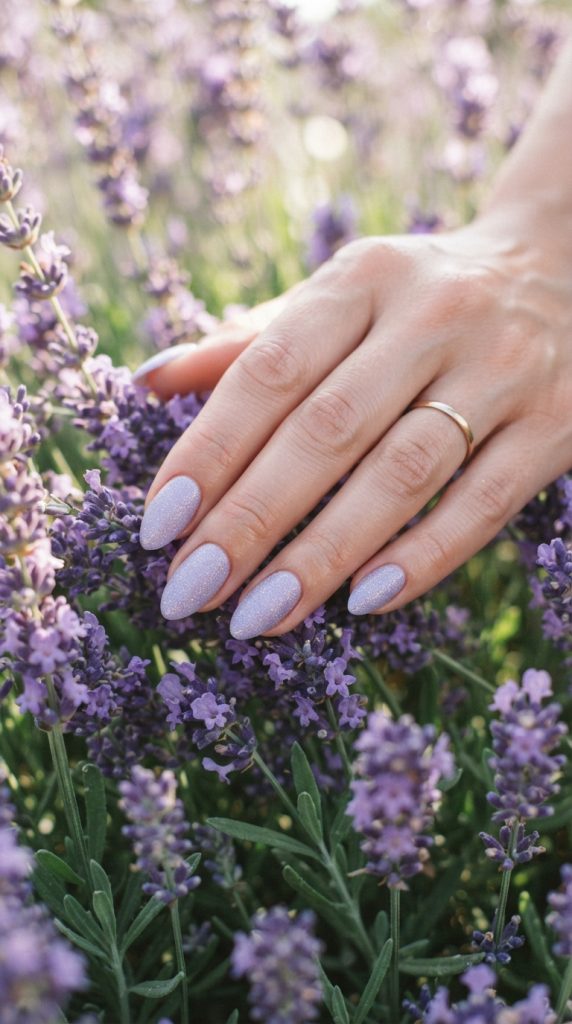
Way 1: Applying Pale Lavender Cream Polish Evenly
Achieving streak-free pastel coverage requires smooth, delicate polish application techniques:
- Apply a ridge-filling base coat to smooth out natural surface imperfections completely.
- Apply thin coats of pale lavender polish using minimal downward brush pressure.
- Allow each coat to level naturally across the nail before adding the next coat.
- Build full pastel opacity using two or three ultra-thin polish layers.
Way 2: Dusting Fine Sugar Shimmer Powder Successfully
Adding frosted sugar shimmer creates an enchanting, eye-catching texture effect effortlessly:
- Apply a fresh, generous coat of top coat over your opaque pastel lavender base.
- Sprinkle fine, iridescent sugar glitter powder heavily over the wet top coat.
- Tap your finger gently against a hard surface to shake off excess loose glitter particles.
- Cure or let the frosted sugar texture set completely firm under your lamp or air dry.
7. Floating Sheer French Tips with Pearls
The classic French manicure receives a modern dreamy update this season across beauty communities. Sheer, barely-there tips replace traditional thick, opaque white smile lines effortlessly. Tiny micro pearls placed near the cuticle base add timeless romantic vintage charm.
Modernizing Classic Manicures with Delicate Dreamy Touches
Redefining traditional lines brings fresh, airy modernity to classic manicure styling routines. Sheer white tips offer a softer, more natural transition across your hands. This subtle modification creates a longer, more elegant visual appearance for fingers overall.
Single micro pearl accents introduce luxurious three-dimensional beauty instantly to simple designs. Placing tiny pearls near the cuticle arch frames hands with regal, understated grace. It creates an unforgettable bridal or formal style that feels light and effortlessly dreamy.
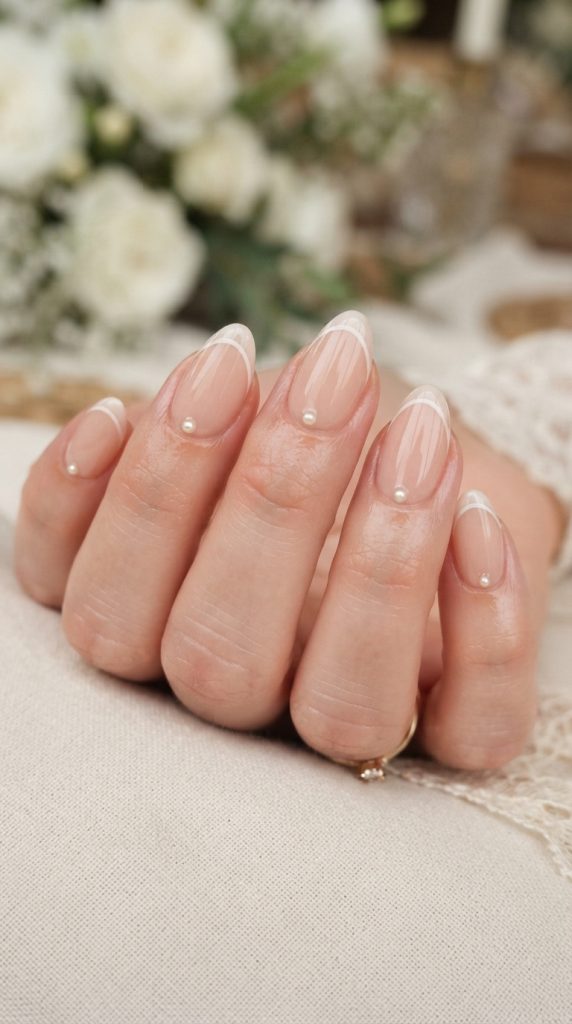
Step 1: Painting Sheer Micro French Smile Lines
Drawing delicate, ultra-thin French smile lines requires hand control and steady patience:
- Apply a sheer nude or translucent pink base coat smoothly across all nails.
- Dip a long striping liner brush into soft white polish very lightly.
- Trace an ultra-thin line along the very top free edge of each nail.
- Curve the line edges slightly inward along the sides to follow natural nail shapes.
Step 2: Securing Micro Pearls near Cuticle Arches
Attaching delicate micro pearl studs securely prevents accidental snagging or loss during daily wear:
- Place a small drop of clear nail jewelry glue or builder gel near the cuticle arch.
- Position a single micro pearl stud directly into the wet glue or gel drop.
- Adjust alignment carefully using a wax pencil or precision pickup tool.
- Cure or dry the adhesive completely to lock pearls down firmly against the nail plate.
8. Glazed Donut Chrome Sheer Glow
Glazed chrome finishes continue to dominate modern fashion and beauty trends around the world. Applying a micro-fine chrome powder over sheer nude polish creates instant magic. This subtle technique delivers an ethereal, mirror-like sheen that appears glowing under any light source.
The Phenomenon of High-Shine Glazed Aesthetics
Glazed chrome finishes offer a sleek, modern twist on simple aesthetic designs. The high-shine surface reflects surroundings like liquid glass whenever ambient light hits hands. It creates an ultra-clean, healthy aesthetic that looks high-end, polished, and fresh.
Sheer nude bases keep the high-shine reflective finish looking soft and refined. This versatile style combination transitions seamlessly from daytime office meetings to formal evening events. It remains the ultimate choice for lovers of quiet luxury manicures.
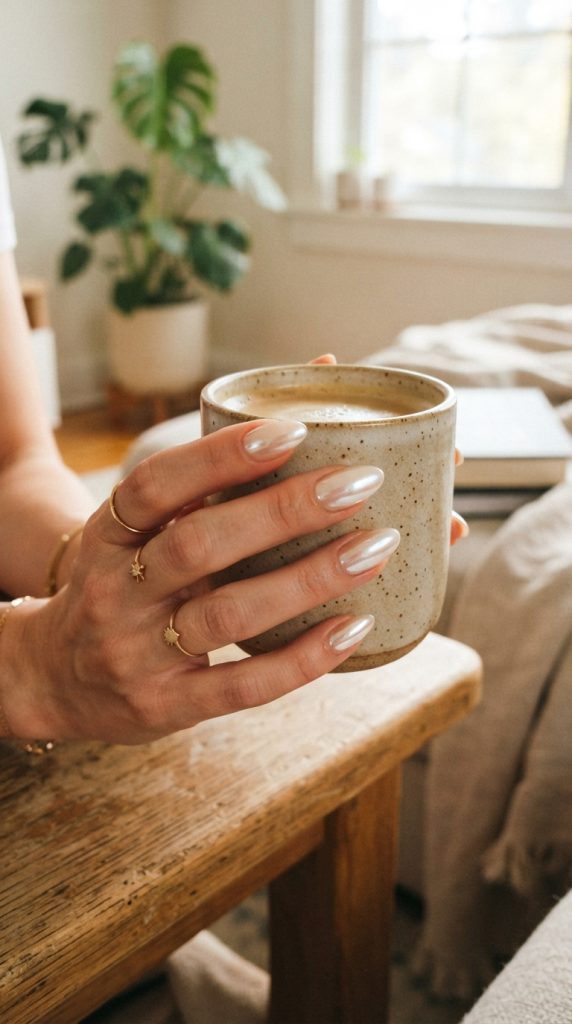
Method 1: Prepping Sheer Nude Base Coatings
Creating a perfectly smooth base layer is essential for achieving flawless chrome light reflections:
- Buff the natural surface gently using a fine buffer block to remove texture ridges.
- Apply a smooth, thin layer of sheer nude or soft peach polish evenly.
- Ensure base colors apply completely streak-free across all ten fingers.
- Cure or dry the foundation coat fully before moving to chrome application steps.
Method 2: Buffing Chrome Powder to Liquid Perfection
Transforming fine powder into a liquid glass finish requires proper buffing techniques:
- Apply a non-wipe gel top coat over your sheer nude base and cure for thirty seconds.
- Gently rub pearl white chrome powder onto the surface using a soft eyeshadow applicator.
- Buff in firm circular motions until a seamless, reflective sheen appears instantly across the plate.
- Wipe away excess loose powder around cuticles before applying the final clear top coat layer.
9. Wispy Watercolor Blossom Accents
Watercolor art brings soft, painterly beauty directly to gentle aesthetic manicures. Sheer floral petals created with blooming gel or diluted polish look thoroughly ethereal. Soft pinks, peaches, lavenders, and greens blend together like romantic garden paintings in spring.
The Romantic Appeal of Painterly Botanical Art
Watercolor floral art celebrates fluid movement, soft transparency, and creative artistic freedom. Blended petal edges mimic delicate wild flowers swaying in soft outdoor breezes. This organic artistic style feels deeply personal, expressive, and romantic overall.
Keeping floral accents on just one or two accent fingers maintains delicate simplicity. Sheer surrounding manicures keep the overall look balanced, fresh, and visually quiet. It brings artistic garden magic to hands without feeling overly busy or crowded.
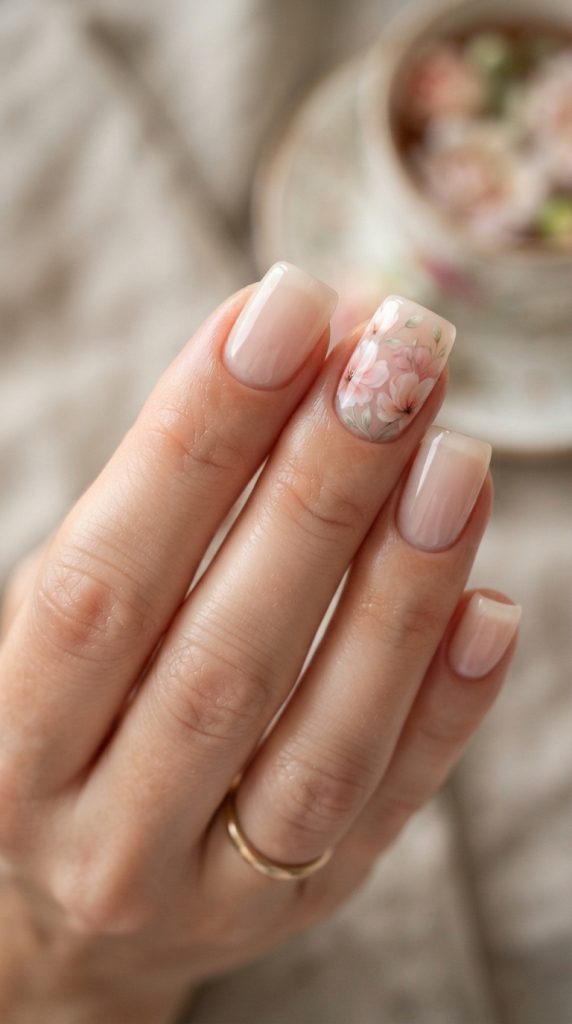
Way 1: Using Blooming Gel for Fluid Petal Blends
Creating effortless watercolor bleeds requires specialized clear blooming gel polish formulas:
- Apply a smooth layer of clear blooming gel over your base coat without curing it.
- Dot pastel pink or soft lavender polish onto the wet blooming gel using a detail brush.
- Watch the color bloom outward into soft, watercolor petal shapes naturally.
- Cure under your lamp immediately once petals reach your desired softness and size.
Way 2: Detailing Botanical Leaves with Fine Liners
Adding delicate leaf stems completes your watercolor botanical artwork nicely:
- Dip a fine liner brush into pale sage green polish lightly.
- Draw thin, curved stem lines connecting your soft watercolor floral petal blooms.
- Add tiny leaf shapes along stems using minimal downward brush pressure.
- Seal your watercolor garden design under a durable, high-gloss top coat layer.
10. Barely-There Champagne Sparkle Gradients
Champagne shimmer gradients offer a delicate, sparkling finish for dreamers everywhere. Microfine gold and silver glitters fade softly from cuticles or tips outward. This effortless look sparkles like delicate bubbles rising inside a celebration glass.
Why Champagne Tones Offer Universal Subtle Elegance
Champagne shades blend warm gold and cool silver tones completely harmoniously together. This balanced metallic shade flatters every skin tone with effortless grace and warmth. Champagne glitters sparkle brightly without looking harsh, heavy, or visually overwhelming anywhere.
Gradient placement leaves plenty of negative space for clean aesthetic beauty across the nail. Fading glitter softly toward the center preserves an airy, light feeling. It provides the perfect touch of quiet magic for everyday subtle elegance.
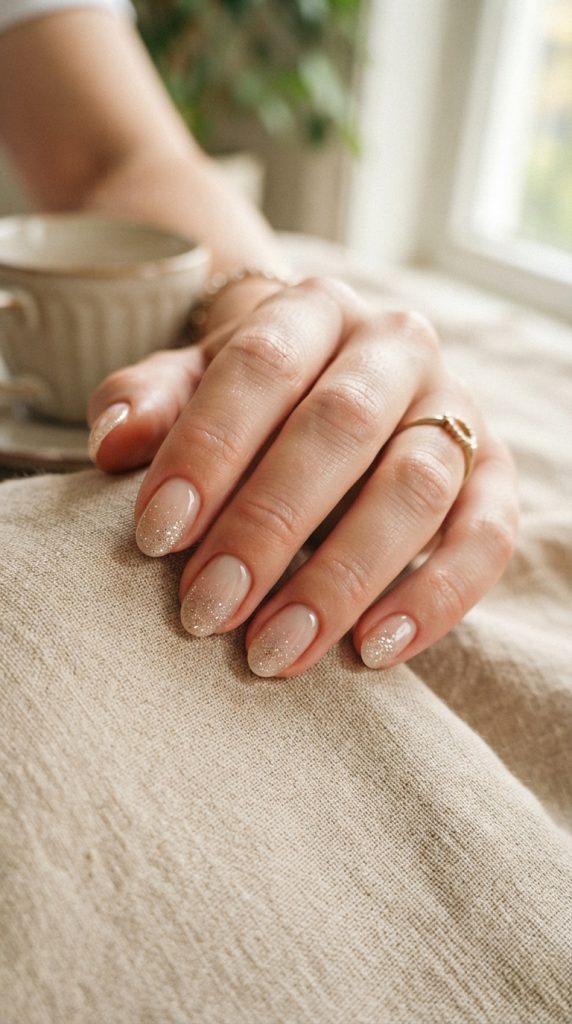
Step 1: Applying Translucent Nude Base Coatings
Preparing a clean nude canvas ensures champagne sparkles shine brightly:
- Apply a single coat of translucent nude, blush, or soft beige polish evenly.
- Smooth out any application streaks with soft, light brush strokes across the surface.
- Allow the sheer background color to dry or cure completely solid before adding glitter.
- Keep the base lightweight to preserve a natural, sheer appearance underneath.
Step 2: Sponge Gradients for Soft Glitter Transitions
Dabbing glitter with makeup sponges creates dense concentration with soft fading edges:
- Apply champagne glitter polish directly onto the corner edge of a clean makeup sponge.
- Dab the sponge gently near tips or cuticles to deposit concentrated glitter particles.
- Feather leftover glitter lightly toward center areas to create a smooth fade effect.
- Lock the sparkling gradient securely under a smooth, protective clear top coat layer.
Essential Considerations for Maintaining Ethereal Manicures
Preserving the delicate beauty of dreamy manicures requires daily, mindful care habits. Ethereal styles rely heavily on clean lines, healthy cuticles, and smooth, glossy surfaces. Protecting hands from harsh daily environmental elements keeps delicate art glowing significantly longer.
Hydration plays a critical role in maintaining long-lasting, gorgeous manicure results:
- Apply nourishing cuticle oil daily to keep skin around nails soft and flexible.
- Massage rich hand cream into palms and fingers every night before sleep.
- Avoid using nails as tools to open cans or peel off stubborn stickers.
- Keep nail edges smooth by filing gently in one direction with glass files.
Always wear protective rubber gloves when performing household chores, washing dishes, or handling cleaning supplies:
- Harsh household chemicals quickly dull high-gloss top coats and strip natural moisture.
- Hot water weakens polish bonds over time, leading to premature lifting or chipping.
- Physical abrasion from scrubbing pads can scratch delicate pearl chrome finishes easily.
- Taking a few seconds to protect your hands preserves your investment for weeks.
Ethereal manicure styles celebrate soft grace, romantic charm, and timeless quiet elegance. Embrace sheer pastels, shimmering chrome finishes, and delicate celestial accents with complete confidence. Your hands deserve quiet beauty that brings peace, joy, and creative inspiration to every single day.
Leave a Reply