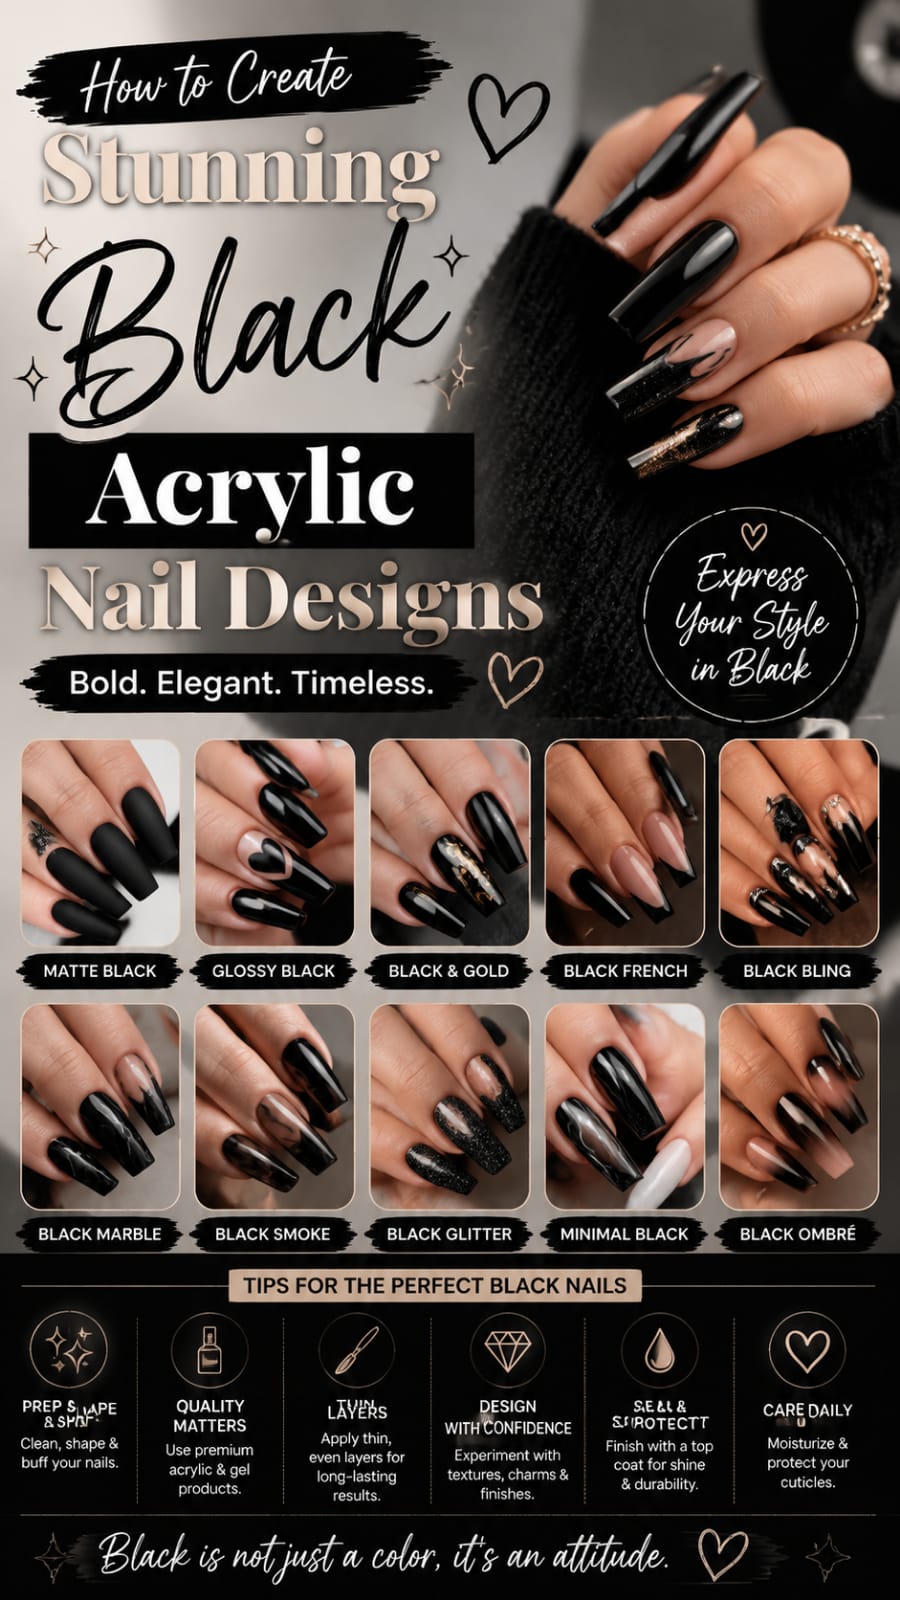
Modern nail care thrives on bold self-expression, artistic precision, and long-lasting elegance. A classic dark set represents one of the most versatile choices in contemporary beauty. Incorporating a black acrylic nail design into your personal style delivers an instant dose of drama, sophistication, and timeless glamour.
Whether you prefer sleek minimalist lines or intricate gem-encrusted masterpieces, dark acrylics provide a striking canvas. The deep, rich tone acts as a neutral backdrop that complements every skin tone, outfit, and season seamlessly. In this extensive guide, we will explore ten captivating approaches to elevating your dark manicure.
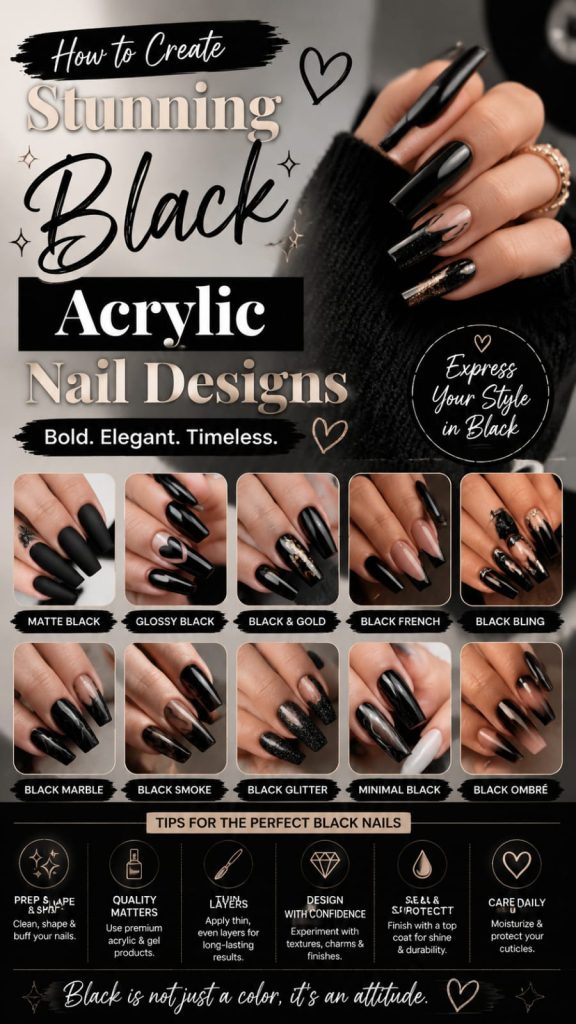
Each concept brings a unique aesthetic flair while utilizing professional application methods to ensure flawless durability. From metallic accents to soft velvet finishes, these artistic ideas will transform your routine into a creative journey. Get ready to discover step-by-step techniques that keep your sets looking freshly finished, structurally sound, and completely unforgettable.
1. Minimalist Glossy and Matte Contrast Black Acrylic Nail Formations
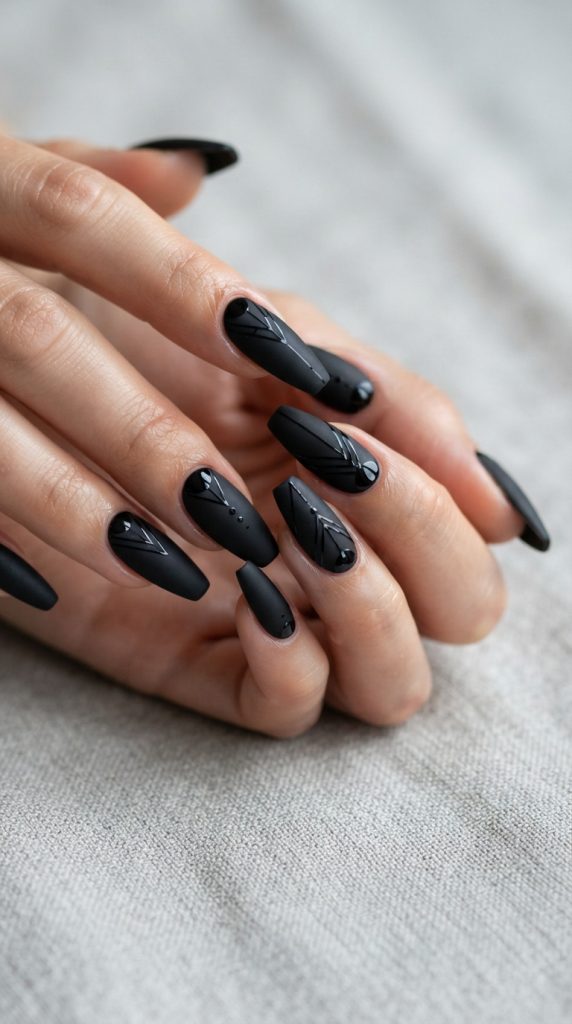
Contrast plays a pivotal role in modern nail art, offering visual depth without requiring complex color palettes. Combining high-shine topcoats with velvety smooth finishes creates an understated yet captivating aesthetic. This technique relies on texture variation to highlight subtle geometric patterns, fine line work, or abstract shapes.
To execute this look cleanly, begin by applying a rich dark base over your prepared extensions. Ensure the color application is completely even and free of streaking before curing or letting it set. Once your base is solid, apply a matte topcoat across the entire surface to create a smooth, velvety foundation.
After the matte layer finishes drying, use a fine detail brush to paint high-gloss designs directly over the velvety surface. You can draw simple vertical stripes, delicate half-moons, or intricate French tips using a shiny topcoat. The juxtaposition between glossy and matte surfaces brings your black acrylic nail art to life with refined sophistication.
- Step 1: Prep the natural nail plate thoroughly by removing shine and applying a bonding primer.
- Step 2: Form a smooth, structured extension using high-quality dark acrylic powder and liquid monomer.
- Step 3: File, buff, and shape the enhancement until the surface is completely level and smooth.
- Step 4: Apply a durable matte topcoat across all ten nails and allow it to cure completely under a lamp.
- Step 5: Use a detail liner brush dipped in shiny topcoat to paint delicate patterns over the matte base.
Experimenting with negative space also enhances this minimalist approach significantly. Leaving portions of the natural nail bed exposed beneath black acrylic nail accents creates an airy, modern balance. This contrasting technique remains a favorite for individuals seeking professional, office-appropriate glam.
Maintaining this style requires minimal effort, provided you protect the matte surface from heavy oils and lotions. Regular cleaning with isopropyl alcohol restores the velvety texture while keeping the glossy accents shining bright.
+-------------------------------------------------------+
|                TEXTURE CONTRAST MATRIX                |
+-------------------------------------------------------+
|  BASE COAT   |  OVERLAY FINISH  |    VISUAL EFFECT    |
+--------------+------------------+---------------------+
| Velvet Matte | High-Gloss Gel   | Subtle 3D Dimension |
| Deep Satin   | Chrome Powder    | Futuristic Metallic |
| High Gloss   | Micro-Sugar Dust | Tactile Rough Edge  |
+-------------------------------------------------------+
2. High-Shine Metallic Gold Leaf Accents on Black Acrylic Nail Shapes
Gold leaf provides an instant touch of luxury when paired with rich, dark background colors. The brilliant warm shimmer of metallic foil contrasts beautifully against deep, absorbing hues, creating an opulent atmosphere. This combination suits formal events, holiday gatherings, or everyday wear for those who adore continuous glamour.
Creating this dynamic design begins with sculpting a pristine dark base across your extensions. Before sealing the enhancement, press delicate pieces of gold foil onto selected areas using precision tweezers. You can cluster the gold leaf near the cuticle area or scatter it diagonally across the free edge.
To prevent the delicate foil from lifting, press it firmly into the tacky layer of your gel or acrylic base. Once the foil sits flush against the enhancement, encapsulate the entire design with a clear gel or acrylic layer. Encapsulation ensures the metallic flake stays protected from daily wear, snagging, or fading over time.

- Method A: Place large foil flakes near the cuticle to form an organic gilded base gradient.
- Method B: Shred the gold leaf into micro-particles to create a sparkling stardust effect across the tip.
- Method C: Strip thin foil ribbons along the center line for an elongated, sleek geometric silhouette.
When layering foil, avoid covering the entire nail surface, as moderation creates superior aesthetic balance. Leaving generous dark space visible allows the gold accents to pop with maximum visual brilliance.
Finalizing the set with an ultra-glossy topcoat seals the metallic elements under a glassy, protective shield. The resulting black acrylic nail look offers multidimensional depth that catches light beautifully from every angle.
Proper sealing prevents moisture from penetrating the foil layers, ensuring long-lasting wear without premature chipping or peeling.
  Base Enhancement
        │
        ▼
  Foil Placement ──► Press Flakes Firmly
        │
        ▼
  Clear Encapsulation
        │
        ▼
  High-Gloss Topcoat
3. Gothic Lace and Fishnet Patterns for Black Acrylic Nail Styling
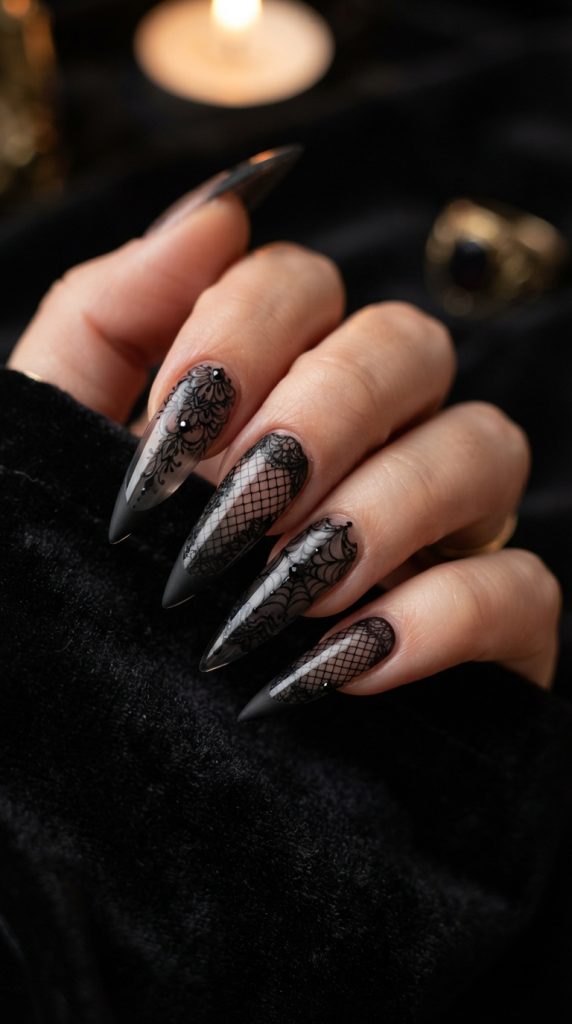
Lace patterns channel a romantic, gothic-inspired aesthetic that looks incredibly intricate and delicate on long extensions. Painting fine lace webs, mesh grids, or floral filigree requires a steady hand and highly pigmented art gels. The result is a dramatic, vintage-inspired set that exudes mysterious charm and artisanal craftsmanship.
Start by preparing a smooth, opaque foundation on your extensions using rich dark polymers. If you prefer a semi-translucent look, build a clear or sheer nude extension and layer a thin black acrylic nail overlay. This sheer “smoky glass” effect mimics actual sheer lace fabric perfectly.
Using an ultra-thin line brush, paint delicate crisscross lines across the nail to establish the fishnet grid foundation. Add micro-dots at the intersections of the lines to recreate the appearance of woven textile knots. You can frame the edges of the nail with scalloped lace borders to complete the delicate fabric illusion.
- Way 1: Paint full-coverage fishnet patterns over a translucent black acrylic nail base for subtle depth.
- Way 2: Design delicate lace scalloped edges exclusively along the French tip line for vintage elegance.
- Way 3: Combine floral filigree stamp patterns with hand-painted mesh grids on accent fingers.
Patience is essential when executing fine line work on dark extensions. Work in thin layers and cure or set your gel painting frequently to prevent fine lines from bleeding together.
Applying a velvet matte topcoat over hand-painted lace designs creates a realistic fabric texture that feels soft. Alternatively, a high-shine gel topcoat turns the intricate lace artwork into a glossy, modern stained-glass feature.
Regular maintenance includes keeping the detailed lines clean by gently scrubbing beneath and around the cuticles during hand washing.
+-------------------------------------------------------+
|                 LACE DESIGN VARIATIONS                |
+-------------------------------------------------------+
|   PATTERN TYPE   |  RECOMMENDED BASE  | TECHNIQUE     |
+------------------+-------------------+---------------+
| Gothic Fishnet   | Sheer Smokey Gel  | Micro-Grid    |
| Vintage Floral   | Opaque Dark Base  | Fine Filigree |
| Scalloped Edge   | Clear Nude Base   | Line Bordering|
+-------------------------------------------------------+
4. Celestial Starlight and Constellation Black Acrylic Nail Features
Night sky themes feel natural when paired with dark, expansive nail enhancements. Painting delicate stars, crescent moons, and glowing galaxy clouds onto a dark base turns your hands into mini cosmic displays. This dreamy aesthetic appeals to lovers of astrology, astronomy, and magical, whimsical beauty trends.
To build a deep space background, start with a rich, dark base coat on your extended enhancements. While the base layer is wet, dab tiny specks of deep purple, midnight blue, and metallic silver gel polish across the surface. Sponge these colors together gently to create hazy, shifting nebula clouds that fade seamlessly into the dark background.
Once your cosmic clouds are cured, use a fine detail brush and white gel paint to draw sharp four-point stars. Add tiny white dots of varying sizes across the nail to represent distant sparkling stars and planetary clusters. Incorporating a tiny constellation line chart on an accent finger personalizes the set even further.
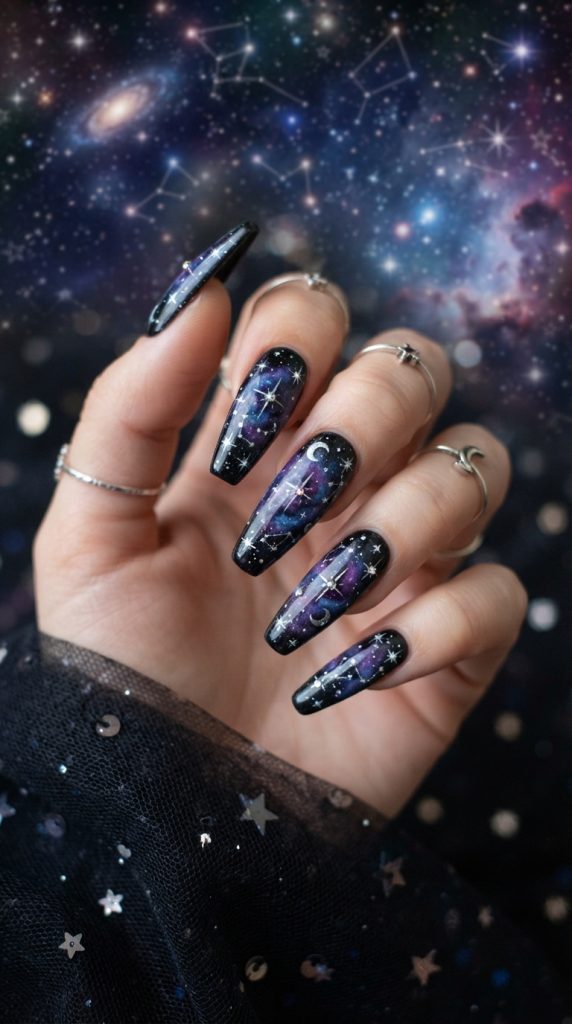
- Step 1: Apply an opaque dark base coat across all extensions and cure under a UV/LED lamp.
- Step 2: Sponge deep purple, blue, and shimmer gels randomly to construct a soft galaxy nebula effect.
- Step 3: Use white art gel to detail sharp four-point celestial stars and crescent moons precisely.
- Step 4: Scatter ultrafine silver glitter dust over the nebula areas to add brilliant cosmic depth.
- Step 5: Seal the intricate celestial artwork with a thick, protective high-gloss gel topcoat layer.
Adding tiny reflective micro-rhinestones to the centers of major stars gives your constellation design physical 3D brilliance. These stones catch room light dynamically, bringing your celestial black acrylic nail theme to life during movement.
Protecting your cosmic manicure requires applying a durable topcoat that completely encases all hand-painted white stars and gel nebulae.
  Dark Base Application
        │
        ▼
  Sponge Gel Nebula ──► Blend Purple & Blue
        │
        ▼
  Detail Stars & Moons
        │
        ▼
  Encapsulate & Seal
5. Edgy Chrome and Rhinestone Encrusted Black Acrylic Nail Concepts
For those who believe more is more, combining metallic chrome dust with brilliant crystal embellishments creates ultimate show-stopping drama. Dark bases enhance the reflective power of silver, liquid gold, or iridescent magic chrome powders significantly. Adding structured clusters of sparkling rhinestones transforms standard extensions into wearable, light-reflecting jewelry.
Begin by applying a tack-free topcoat over your dark base and curing it for the designated duration. While the surface is still warm from the lamp, burnish silver chrome powder across the nail using a silicone applicator. The dark background intensifies the chrome’s mirror effect, giving it a sleek, liquid-metal appearance.
After buffing away excess powder, apply a strong gel resin or sculpting gel to anchor your rhinestones securely. Place crystals of various sizes near the cuticle area, building a dense cluster that tapers off down the nail. Use pointed AB crystals, dark iridescent stones, and tiny metallic cavity beads to fill small empty spaces.
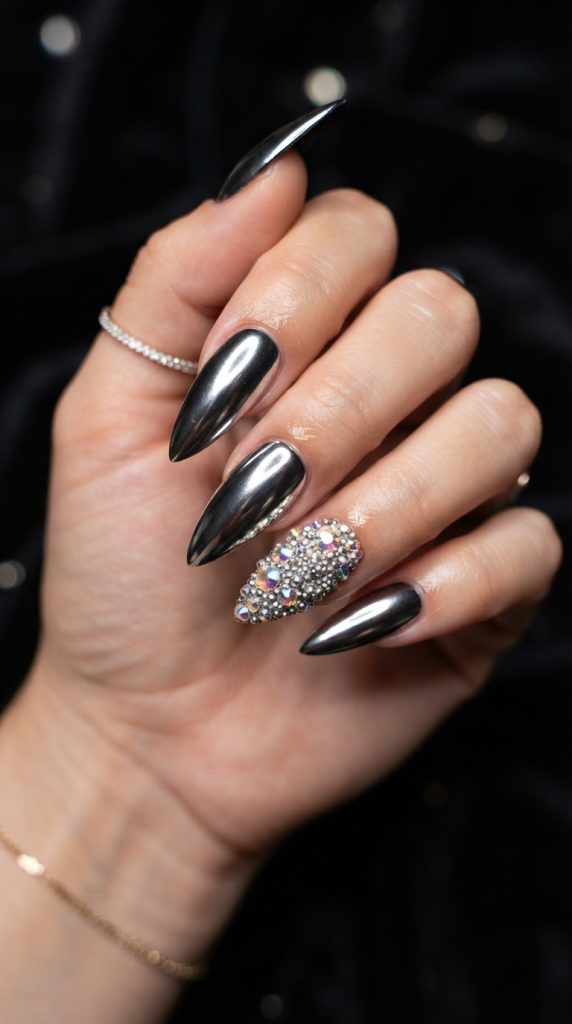
- Method A: Rub liquid silver chrome over all nails and accent the thumb with heavy crystal clusters.
- Method B: Create a dark-to-chrome gradient ombré effect starting from the free edge toward the cuticle.
- Method C: Outline the perimeter of a matte black acrylic nail with a frame of tiny silver rhinestones.
Proper stone placement is crucial for comfort and longevity. Keep crystals slightly away from the extreme side walls to prevent catching on clothing, hair, or daily items.
Seal around the bases of the rhinestones with a thin line brush dipped in topcoat, avoiding painting directly over the crystal facets. Painting over facets reduces their brilliant light refraction, dulling the stone’s natural sparkle.
This high-glamour black acrylic nail style demands careful wear, but its striking reflective power makes it worth every extra step.
+-------------------------------------------------------+
|               CHROME & CRYSTAL STYLING                |
+-------------------------------------------------------+
|   EFFECT TYPE   |  APPLICATION TOOL  | LONGEVITY TIP  |
+-----------------+--------------------+----------------+
| Mirror Chrome   | Silicone Applicator| Tack-Free Base |
| AB Rhinestones  | Wax Gem Picker     | Resin Anchor   |
| Micro-Beads     | Fine Detail Brush  | Edge Sealing   |
+-------------------------------------------------------+
6. Abstract Smoky Marble Black Acrylic Nail Artwork
Smoky marble designs replicate the fluid, organic beauty of swirling ink suspended in liquid or natural quartz stone veins. This abstract style offers an artistic, fluid look where no two nails look identical. The soft, drifting white and gray veins create a stunning contrast against a deep, dramatic base.
Achieving realistic marble smoke requires a wet-on-wet gel technique or specialized blooming gel formulas. Start with a solid dark foundation on your shaped extensions and allow it to dry or cure completely. Next, apply a thin, uncured layer of clear blooming gel across the entire surface of the nail.
Using a fine liner brush, drop thin, wavy lines of white gel polish onto the wet blooming gel layer. Watch as the blooming gel automatically spreads and dissolves the white lines into soft, feathery smoke trails across the nail. You can drag a clean brush through the floating color to direct the marble veins along natural curves.
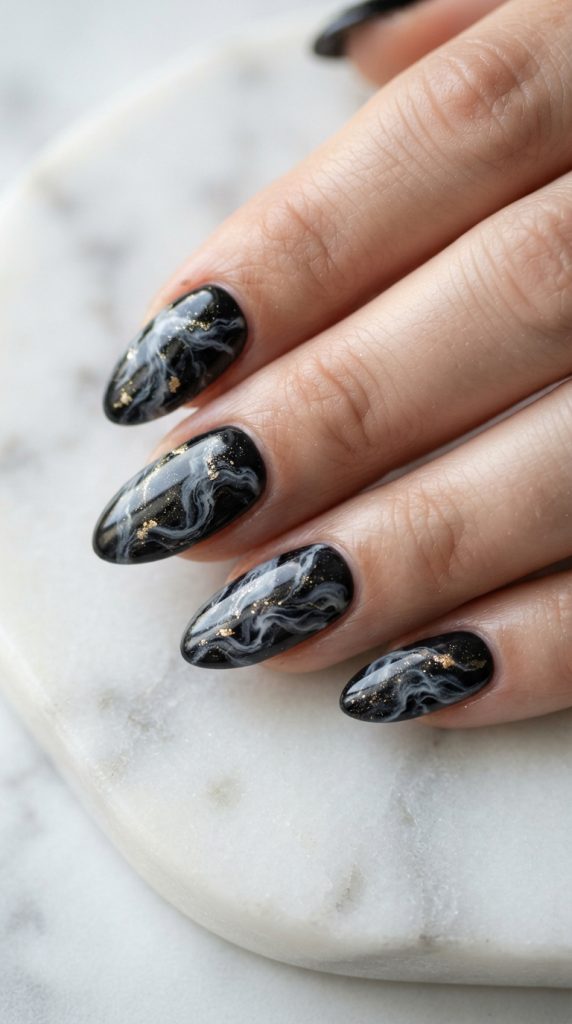
- Way 1: Create white smoke trails over an opaque black acrylic nail base for classic marble elegance.
- Way 2: Layer gold shimmer dust inside the smoky veins to mimic natural metallic quartz formations.
- Way 3: Mix sheer dark tints over white marble veins to build deep, dimensional 3D stone depth.
Once the blooming gel achieves your desired level of smoky diffusion, cure the nail immediately under your lamp to lock the motion. You can layer multiple sheer smoky coats on top of each other to build multi-dimensional stone depth.
Finishing the marble pattern with a crystal-clear gloss topcoat enhances the visual depth, making the smoke appear suspended deep within the nail.
This abstract black acrylic nail method works exceptionally well on almond, coffin, or square extension shapes, accentuating their elongated lines.
  Opaque Dark Base
        │
        ▼
  Apply Blooming Gel ──► Do Not Cure
        │
        ▼
  Detail White Veins
        │
        ▼
  Cure & Gloss Topcoat
7. Mysterious Dark French Tip Variations for Black Acrylic Nail Extension
The traditional French manicure receives an edgy makeover when classic white tips are replaced with deep, dramatic hues. A dark French tip offers a clean, sophisticated line that elongates the appearance of your finger beds. This modern twist balances classic elegance with contemporary streetwear aesthetics flawlessly.
To construct this sleek design, start with a sheer nude, blush pink, or completely clear acrylic extension base. A clean natural nail bed color provides the sharpest contrast against the dramatic dark smile line. Sculp or paint a crisp, deep curve along the free edge using dark acrylic powder or rich gel polish.
You can modify the traditional smile line by designing sharp V-shaped tips, diagonal cutoffs, or exaggerated deep curves. Adding a tiny metallic stripe along the border where the nude base meets the tip elevates the design instantly.
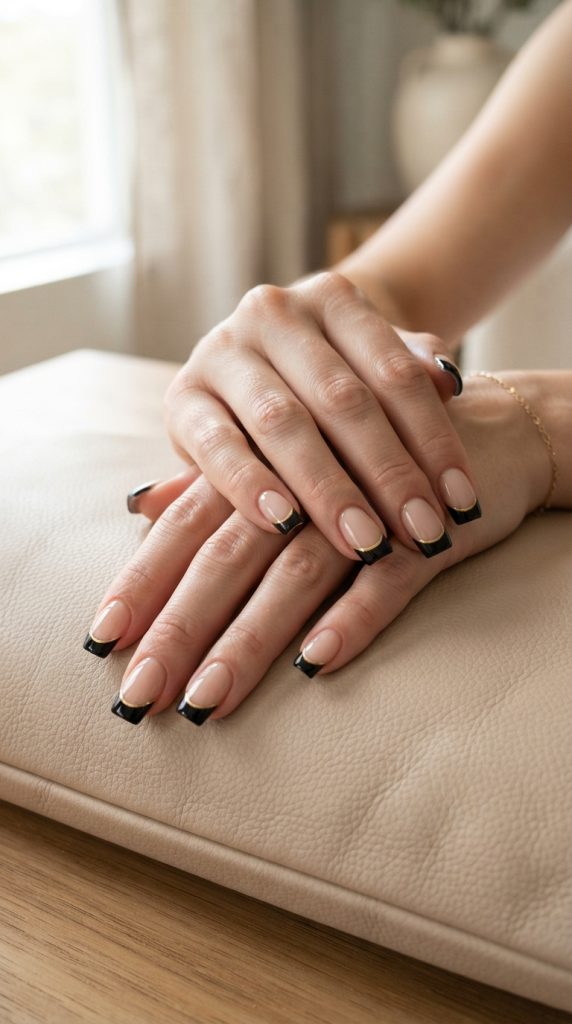
- Step 1: Extend the nail bed using a sheer nude acrylic powder that complements your skin tone.
- Step 2: File the smile line crisp and sharp if using structured powder, or paint it precisely with gel.
- Step 3: Fill the free edge completely with an opaque dark gel or black acrylic nail mixture.
- Step 4: Paint a thin gold or silver metallic boundary line along the smile line border for flair.
- Step 5: Cap the entire extension with a clear gel topcoat to create a smooth, seamless surface transition.
Mixing finishes adds another layer of intrigue to this sophisticated style. Try wearing a nude matte base paired with high-shine dark tips for an unexpected tactile contrast.
Dark French tips require high precision during application, as uneven smile lines are easily visible against light bases.
This versatile style pairs effortlessly with any wardrobe choice, making it ideal for daily office settings and evening events alike.
+-------------------------------------------------------+
|                 FRENCH TIP MODIFICATIONS              |
+-------------------------------------------------------+
|  VARIATION STYLE  |  SMILE LINE SHAPE  | RECOMMENDED ACCENT|
+-------------------+--------------------+-------------------+
| Classic Curved    | Deep Oval Arc      | Micro-Rhinestone  |
| Modern V-Shape    | Sharp Centered Point| Metallic Pinstripe|
| Diagonal Cutoff   | Single Angular Line| Matte/Gloss Blend |
+-------------------------------------------------------+
8. Tactile Velvet and Cat-Eye Magnetic Black Acrylic Nail Effects
Magnetic cat-eye polishes contain ultra-fine iron filings that react to specialized magnetic tools, creating velvety, shifting light bands. When applied over a dark base, magnetic pigments create mesmerizing 3D depth that appears to move beneath the surface. This tactile velvet appearance gives your manicure an alluring, mysterious glow that shifts as your hands move.
Begin by painting a dark base layer to absorb background light, ensuring the magnetic pigments pop with maximum brilliance. Once your base is set, apply a generous layer of dark magnetic cat-eye polish across the nail. Hold a strong magnet close to the wet polish surface for ten to fifteen seconds without touching it.
The magnetic pull pushes and pulls the metallic particles into concentrated velvet waves, crisp diagonal slashes, or glowing central halos. Experiment with different magnet shapes, such as round magnets or dual-ended wands, to achieve varied light distribution patterns.
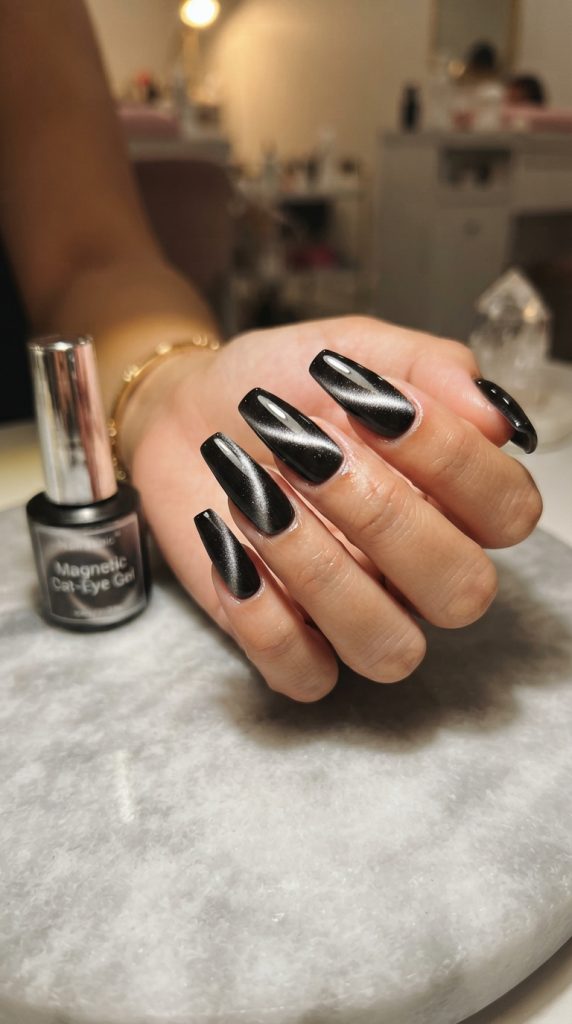
- Method A: Wave the magnet from the edges inward to gather the shimmer into a centralized, velvet sphere.
- Method B: Pull the magnetic particles diagonally across the free edge to create a sharp, cat-eye slash.
- Method C: Use a horseshoe magnet around the entire finger to create a smooth, surround-velvet effect.
Cure the nail immediately after holding the magnet to lock the shifted iron particles into place before they diffuse. Delaying curing allows the metallic lines to spread out, losing their crisp, velvety definition.
Layering a glass-like clear topcoat over the cured magnetic design enhances the illusion of deep 3D space within the nail.
This magnetic black acrylic nail effect remains popular because it provides continuous interactive visual appeal without requiring tedious hand-painted art.
  Dark Base Application
        │
        ▼
  Magnetic Gel Layer ──► Do Not Cure
        │
        ▼
  Apply Magnetic Field
        │
        ▼
  Flash Cure Immediately
9. Intricate 3D Floral and Snakeskin Black Acrylic Nail Reliefs
Three-dimensional nail art adds an extraordinary physical dimension that elevates a simple dark set into a wearable sculpture. Creating raised floral petals, textured snakeskin patterns, or ornate baroque scrollwork requires solid monomer control or thick sculpting gels. These raised tactile elements catch ambient light, casting dramatic micro-shadows across the dark surface beneath.
To sculpt 3D flowers, place small, dry beads of acrylic polymer directly onto your finished, buffed extension surface. Use the tip of an acrylic brush to press and shape the bead into a flattened petal shape before it sets completely. Layer multiple petals together in a circular pattern to build roses, orchids, or modern abstract blooms.
For a textured snakeskin pattern, apply a layer of thick gel paint and cure it partially under your lamp. Use a dotting tool or silicone pen to press realistic scale impressions into the surface before applying a final topcoat. Alternatively, lay a tiny mesh netting over wet gel, cure, and peel away the mesh to leave raised scale ridges behind.
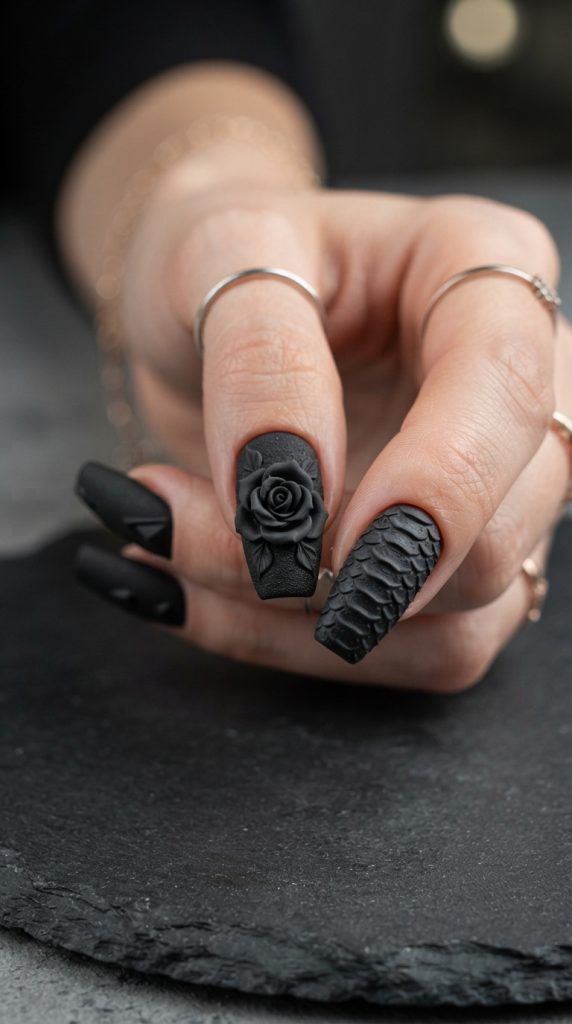
- Way 1: Sculpt dramatic 3D roses on the ring finger accent nail for romantic gothic flair.
- Way 2: Press realistic snakeskin scale textures into matte black acrylic nail surfaces across all fingers.
- Way 3: Create raised baroque frame swirls around tiny center crystals using thick clear builder gel.
When wearing high-relief 3D designs, ensure all sculpted edges are smooth and properly anchored to prevent snagging on fabrics. Buffing sharp corners slightly maintains the design’s structural integrity while protecting your delicate clothing items.
Applying a combination of matte topcoat over the base and glossy topcoat over the raised 3D elements emphasizes the physical depth.
This sculpted black acrylic nail aesthetic showcases high-level technical skill, making it a favorite for nail competitions and editorial photoshoots.
+-------------------------------------------------------+
|                 3D RELIEF TECHNIQUES                  |
+-------------------------------------------------------+
|   RELIEF TYPE   |   PRIMARY MATERIAL  | APPLICATION TOOL|
+-----------------+---------------------+-----------------+
| Sculpted Petals | Dry Acrylic Monomer | Pointed Brush   |
| Snakeskin Scale | Thick Gel Paint     | Mesh / Stamp    |
| Baroque Swirls  | 3D Builder Gel      | Fine Silicone   |
+-----------------+---------------------+-----------------+
10. Moody Ombré Gradient Transitions with Black Acrylic Nail Powders
Gradient ombré blends merge two contrasting shades together seamlessly, creating a smooth transition from light to dark. Fading a deep dark color into warm nude, rich red, or soft gray produces a sophisticated, smoldering effect. This design softens the overall intensity of a dark manicure while retaining its signature drama and depth.
Executing a flawless acrylic gradient requires working quickly with wet monomer beads of two different powder shades. Extend the tip of the nail bed with your chosen accent color, such as a soft cover nude or deep burgundy. Feather the back edge of the colored bead backward toward the middle of the nail bed to create a soft, thin blend line.
Next, place a wet bead of dark polymer at the free edge and brush it backward into the blended accent shade. Use light, sweeping brush strokes to melt the two wet shades together where they meet in the center. The goal is to eliminate any harsh separation line, creating a soft, smoky color transition down the enhancement length.

- Step 1: Prepare the natural nail plate and apply your preferred extension forms or tip extensions cleanly.
- Step 2: Apply a bead of nude or colored polymer near the cuticle, feathering it softly toward the mid-nail.
- Step 3: Place a wet bead of dark acrylic powder at the tip, blending it upward into the nude base shade.
- Step 4: Cap the entire gradient transition with a clear powder layer to protect the smooth blend during filing.
- Step 5: File, shape, buff, and apply a high-shine topcoat to reveal the seamless, smoky ombré blend.
If you find monomer acrylic gradients challenging, you can achieve a similar soft look using gel polish and a blending sponge. Sponge thin layers of dark gel onto the tip over a cured nude base, curing between each sponge layer.
Capping your gradient with a clear powder or gel layer ensures you won’t file through your smooth color transition during final shaping.
This moody black acrylic nail ombré transition offers a timelessly chic result that flatters every nail shape, from short square to long stiletto.
Essential Care and Maintenance for Dark Acrylic Sets
Keeping your dark enhancements looking flawless requires consistent home care, protective habits, and regular maintenance appointments. Dark colors highlight surface scratches, cuticle regrowth, and dust more visibly than pale pastel shades. Following a dedicated maintenance routine ensures your investment stays shiny, structural, and stunning for weeks after leaving the salon chair.
Hydration plays a pivotal role in maintaining the health of your natural nail bed and the surrounding cuticle skin. Apply a high-quality cuticle oil rich in jojoba oil, vitamin E, and sweet almond oil twice daily. Massaging oil into your cuticles prevents skin dryness and unsightly hangnails, keeping your dark manicure looking clean and freshly applied.
Wear protective rubber gloves whenever washing dishes, using household cleaning chemicals, or working outdoors in the garden. Harsh detergents and solvents degrade acrylic bonds over time, causing premature lifting, dullness, or yellowing of your topcoat. Protecting your hands preserves the brilliant high-gloss finish of your black acrylic nail art against daily chemical exposure.
- Daily Hydration: Massage cuticle oil into the nail folds twice daily to keep surrounding skin supple and healthy.
- Chemical Protection: Wear thick rubber gloves during house cleaning to shield topcoats from harsh degrading solvents.
- Avoid Friction: Refrain from using your extensions as tools to open cans or scrape stubborn surfaces.
- Regular Refills: Schedule fill-in appointments every two to three weeks to maintain proper structural balance and apex support.
- Gentle Cleansing: Clean under free edges using a soft nail brush and soap rather than sharp metal tools.
When filing minor edge snags at home, always use a high-grit soft buffer board rather than a coarse metal file. Coarse files can break the topcoat seal, allowing air and moisture to penetrate beneath the dark layer.
Never pick, force, or pry lifted acrylic off your natural nail bed yourself if lifting occurs near the cuticle. Prying damages natural keratin layers severely, leaving thin, weak nails underneath. Always consult a professional nail technician to safely remove or repair compromised dark enhancements.
+-------------------------------------------------------+
|              MAINTENANCE & TROUBLESHOOTING            |
+-------------------------------------------------------+
|    ISSUE ENCOUNTERED   |    PROBABLE CAUSE   |   CORRECTIVE ACTION  |
+------------------------+---------------------+----------------------+
| Dull Surface Shine     | Household Chemicals | Apply Fresh Topcoat  |
| Lifting Cuticle Edges  | Excess Skin Moisture| Schedule Fill-In     |
| Surface Scratching     | Heavy Friction Use  | Buff & Re-Seal Gel   |
+------------------------+---------------------+----------------------+
Mastering Color Pairing Dynamics with Dark Manicures
While monochrome sets look striking on their own, pairing dark tones with strategic accent colors opens up infinite artistic possibilities. Understanding color theory helps you select complementary shades that highlight your dark base rather than competing with it. Strategic color pairings enhance the structural architecture of your extensions while reflecting your personal aesthetic preferences.
Nude and blush pink tones provide the ultimate classic contrast when combined with dark enhancements in French or geometric designs. The softness of natural skin tones tempers the intensity of deep dark shades, creating an approachable, wearable everyday look. This combination remains a staple for modern minimalist fashion lovers worldwide.
Incorporating rich jewel tones like emerald green, deep ruby red, or sapphire blue creates a dramatic, regal atmosphere. These high-saturation shades blend seamlessly with dark bases, especially when used in smoky marble designs or cat-eye magnetic formulas. The subtle pop of hidden jewel tones adds a layer of sophisticated intrigue under shifting light.
- Pairing 1: Combine sheer nude bases with dark accents for clean, high-fashion minimalist contrast.
- Pairing 2: Layer deep emerald or ruby shimmer over dark bases for opulent, jewel-toned sophistication.
- Pairing 3: Use bright neon line work over matte dark backgrounds for high-impact cyberpunk energy.
For a modern, high-contrast look, pair bright neon yellow, lime green, or hot pink lines over a matte dark base. The intense brightness of neon shades creates an eye-catching electric effect against dark background surfaces.
Metallic silver, rose gold, and pure yellow gold remain the most popular accent choices for dark extensions. Metallic elements reflect light sharply, providing luxurious focal points that draw attention directly to your hands.
Experimenting with different color pairings ensures your favorite dark theme stays fresh, exciting, and visually engaging throughout the entire year.
  Dark Neutral Canvas
        │
        ├─► Nude & Blush ───────► Classic Minimalist
        │
        ├─► Emerald & Ruby ─────► Opulent Jewel Tone
        │
        ├─► Neon Lime & Pink ───► Cyberpunk Contrast
        │
        └─► Metallic Gold ──────► Timeless Luxury
Selecting the Right Nail Shape for Dark Extensions
The physical shape of your acrylic extensions impacts the final aesthetic impression of dark manicures significantly. Dark colors naturally draw visual attention, accentuating the outline, edge precision, and symmetry of your chosen nail shape. Selecting a silhouette that complements your hand anatomy enhances the overall elegance of your dark set.
Coffin and ballerina shapes remain immensely popular for dark themes due to their long, tapered sides and flat free edges. The sharp geometric lines of coffin extensions showcase dark colors with high-fashion, edgy precision. This shape offers ample surface area for intricate hand-painted artwork, chrome placement, or crystal encapsulation.
Almond and stiletto shapes create an elongated, fierce silhouette that accentuates the dramatic nature of dark acrylics. The soft curve of almond nails tempers the boldness of deep colors, offering a sophisticated, feminine feel. Long stiletto shapes, on the other hand, maximize drama, creating a striking dagger-like visual effect that commands attention.
- Coffin / Ballerina: Ideal for showcasing bold geometry, matte contrasts, and intricate hand-painted line artwork.
- Almond Shape: Softens intense dark colors, providing an elongated, elegant appearance that suits all finger lengths.
- Square Shape: Offers clean, sharp traditional lines that highlight glossy dark French tips and minimalist block colors.
- Stiletto Shape: Delivers maximum dramatic impact, perfect for gothic lace, chrome dust, and heavy 3D crystal clusters.
Classic square shapes provide a timeless, solid frame that suits short to medium-length dark extensions. The sharp right-angled corners emphasize crisp French smile lines and high-shine block colors with clean clarity.
When choosing your length, consider your daily work routine, typing habits, and lifestyle needs carefully. Shorter square or almond dark extensions offer low-maintenance durability without sacrificing an ounce of style.
Regardless of your chosen shape, maintaining balanced apex structure and crisp side walls is key to preventing breakage on long, dark acrylic enhancements.
+-------------------------------------------------------+
|               NAIL SHAPE & DESIGN MATCHING            |
+-------------------------------------------------------+
|   NAIL SHAPE   |   BEST DESIGN MATCH  | VISUAL EFFECT     |
+----------------+----------------------+-------------------+
| Coffin         | Matte/Gloss Contrast | Geometric Precision|
| Almond         | Smoky Quartz Marble  | Elongated Elegance|
| Stiletto       | Gothic Lace & 3D Art | Fierce High-Drama |
| Short Square   | High-Shine Metallic  | Neat Professional |
+----------------+----------------------+-------------------+
Troubleshooting Dark Acrylic Application Issues
Applying dark acrylic powders and rich gel polishes presents unique technical challenges that require precise nail technician skills. Highly pigmented dark formulas absorb light quickly, which can affect curing times, product consistency, and overall adhesion. Understanding how to navigate these challenges ensures a flawless, durable application every single time.
Incomplete gel curing is a common issue when working with intensely pigmented dark gel polishes. Because deep pigments block UV light from penetrating through the layer, thick applications can remain soft and uncured underneath. To avoid uncured gel pockets, apply dark polish in paper-thin layers, curing each layer fully before adding the next.
Color marbling or streaking can occur when monomer liquid and dark acrylic powder ratio is unbalanced. Working with a bead that is too wet causes dark pigments to separate, leaving unsightly pale streaks across the surface. Maintaining a medium-dry polymer bead consistency ensures smooth, dense, and even color distribution across the entire extension.
- Issue 1: Uncured Gel Pockets
- Cause: Applying dark gel polish too thick, blocking UV light penetration.
- Solution: Apply multiple paper-thin coats, curing each for 60 seconds under a powerful LED lamp.
- Issue 2: Pigment Marbling & Streaking
- Cause: Working with an overly wet liquid-to-powder monomer ratio during sculpting.
- Solution: Control monomer saturation, maintaining a consistent, medium-dry acrylic bead.
- Issue 3: Staining Natural Nails During Removal
- Cause: Soaking off dark extensions without a clear protective base layer underneath.
- Solution: Always apply a clear acrylic base layer before laying down dark colored polymers.
Staining of the natural nail bed during future soak-off removal is another frequent concern with dark enhancements. Dark pigments can penetrate the porous keratin plate if applied directly over the natural nail. Always lay down a thin layer of clear acrylic powder first to act as a protective barrier before applying colored polymers.
If surface filing exposes light patches on your dark set, your colored acrylic layer was likely applied too thin. Cap your colored acrylic layer with clear powder so your file shapes the clear shield, leaving the rich dark color underneath completely untouched.
Mastering these practical troubleshooting steps guarantees a flawless black acrylic nail application that maintains its structural integrity and intense color payoff throughout its entire wear cycle.
  Identify Application Issue
        │
        ├─► Uncured Gel ───────► Apply Paper-Thin Layers
        │
        ├─► Color Streaks ─────► Control Monomer Ratio
        │
        └─► Nail Staining ─────► Apply Clear Base Shield
Leave a Reply