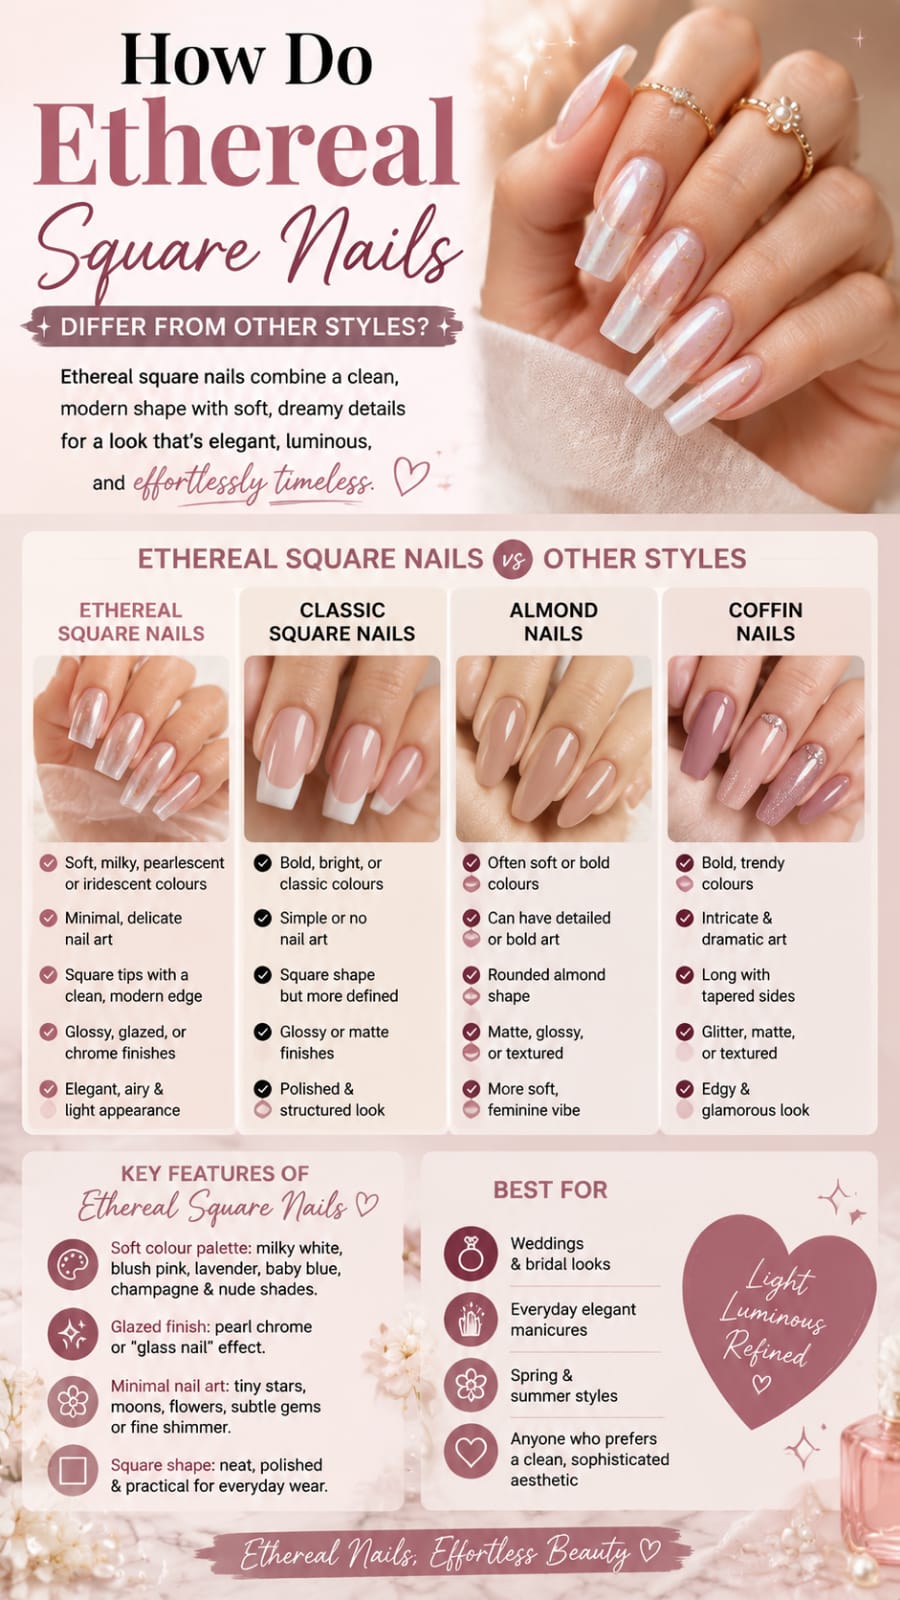
Nail fashion evolves every single season. New shapes and aesthetic trends capture our imagination continuously. Among all modern trends, ethereal square nails stand out instantly. They combine structured geometry with soft, dreamy, otherworldly designs.
This unique combination creates a striking visual contrast. Standard manicure styles often lean heavily toward one extreme. They are either strictly sharp and edgy or soft and rounded. Ethereal square nails blend both worlds into absolute harmony.
Understanding what makes this style special helps you upgrade your routine. You can elevate your personal aesthetic with ease and grace. Whether you prefer gel, acrylic, or natural manicures, this guide explains everything.
Below is the complete breakdown of how this enchanting trend differs from classic styles. Discover the secrets behind shaping, color palettes, texture, and everyday maintenance.
1. Understanding the Foundational Geometry of the Square Nail
The core foundation of this style rests entirely on precision geometry. Unlike oval or almond shapes, the square nail silhouette features sharp ninety-degree corners. It has a completely flat top edge running perpendicular to side walls. This clean structural outline gives your hands a crisp, modern appearance.
Achieving this crisp shape requires steady filing and careful symmetry checks. You must keep your nail file flat against the free edge. Filing at an angle creates unwanted slants and ruins the clean line. Straight side walls must run parallel to your finger’s natural axis.
This strong geometrical framework provides an incredible canvas for artistic expressions. Sharp outer lines contrast beautifully against soft, cloud-like interior designs. That juxtaposition is the exact magic defining this captivating trend.

Filing Techniques for the Classic Square Nail
Begin by shortening your length using a high-grit file. Hold the file completely perpendicular to your finger tip. Move the file in one continuous direction to prevent splitting.
Next, align your file along the lateral side walls. Keep the file parallel to your finger to maintain straight lines. Avoid curving into the corners, which weakens structural integrity.
Finish by gently smoothing the sharpest points of the corners. A single light stroke removes razor edges without losing true shape.
Balancing Edge Precision with Everyday Safety
Razor-sharp corners look crisp, but they catch on soft fabrics easily. Softening the micro-tips slightly prevents annoying snags in daily life.
Check your symmetry by viewing your hand from multiple angles. Turn your palm toward your face to inspect edge straightness.
Apply a strengthening base coat across the vulnerable top corners. Reinforced corners resist chipping and maintain structural balance longer.
Maintaining Lateral Wall Parallelism
Keeping sidewalls straight requires precise hand positioning during shaping sessions. Hold the finger firmly between your thumb and index finger.
Align your file flush against the natural lateral fold line. Never tilt the file top inward or bottom outward while moving.
Checking parallel lines under bright overhead light ensures maximum accuracy. Perfectly parallel sidewalls form the backbone of clean square aesthetics.
Preventing Surface Stress Fractures
Flat free edges handle frontal impacts differently than curved tips. Blunt forces send shockwaves straight back down the center stress area.
Reinforcing the middle area prevents sudden horizontal fractures across beds. Use flexible base coats that absorb daily physical impacts smoothly.
Never use nails as mechanical tools for opening tight objects. Proper physical care preserves structural integrity for several weeks.
2. Comparing Ethereal Designs on a Square Nail Versus Almond Shapes
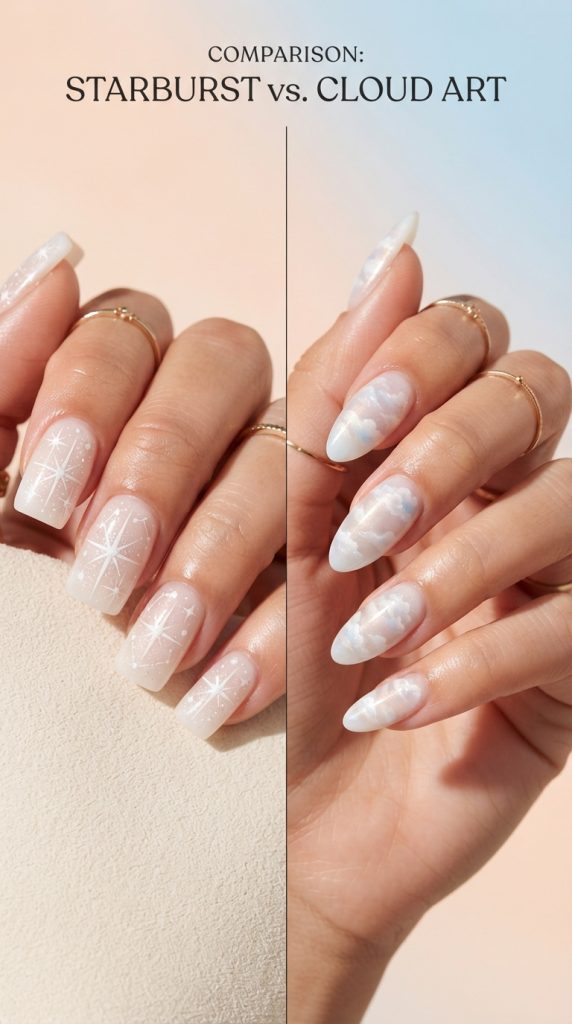
Almond shapes lean naturally into soft, organic, and flowing designs. Their tapered tips lead the eye toward a central focal point. In contrast, a square nail provides a broad, flat horizon. This wide canvas dramatically changes how light and art interact.
When applying ethereal art to tapered tips, designs shrink near the top. Cloud motifs and celestial swirls get compressed along narrow edges. The spacious surface of a flat top permits expansive artistic compositions.
Celestial stars, milky gradients, and iridescent shimmer breathe easily across flat tips. The wide free edge acts like a picture frame for dreamy art. This structural difference creates a far more immersive visual experience.
Visual Canvas Area Across Different Silhouettes
The broad tip of a flat edge offers maximum surface area. Art extends all the way to the sharp lateral corners.
Almond and stiletto shapes lose canvas surface near their pointed tips. Detailed painting requires microscopic precision on narrowed ends.
Square canvases allow balanced placement of complex iridescent foils and gems. You enjoy uncompressed artistic freedom from cuticle to tip.
Light Reflection Patterns on Flat Surfaces
Flat nail beds reflect ambient light in clean, uniform sheets. Iridescent chrome powders look intensely vibrant across flat horizontal planes.
Curved tips scatter light reflections diagonally along tapered side edges. This diffuses the glowing effect of ethereal aura gradients.
A flat plane holds glowing aura centers right in the middle. The smooth surface turns subtle color transitions into mesmerizing focal points.
Art Distribution and Compositional Freedom
Wide canvases accommodate multiple art elements without appearing cluttered or crowded. You can combine hand-painted stars, micro-pearls, and soft aura clouds effortlessly.
Tapered almond tips force artists to stack design elements vertically. Stacking elements vertically limits horizontal artistic composition and balance dramatically.
Square horizontal planes support side-by-side placement of delicate celestial charms. This open layout creates expansive, breathing compositions across every finger.
3. Comparing Ethereal Designs on a Square Nail Versus Coffin Styles
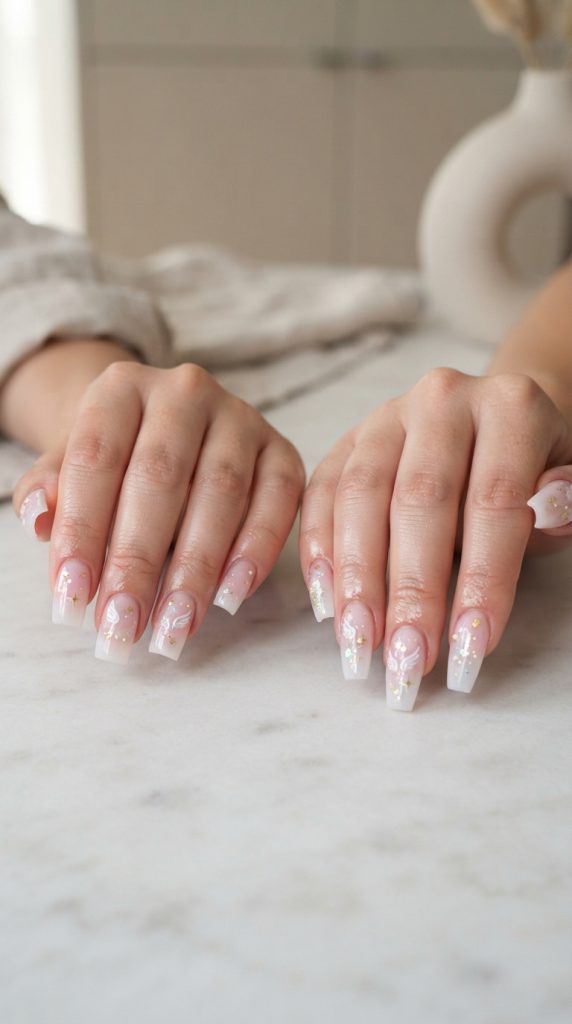
Coffin styles share sharp lateral walls with flat tips, but they taper inward. This inward taper creates a bold, fierce, and highly dramatic silhouette. Ethereal art on coffin shapes often looks dramatic, edgy, and high-fashion.
A true square nail maintains uniform width from stress area to tip. This consistent width softens the overall vibe of the manicure. It makes otherworldly, dreamy art feel delicate, romantic, and effortlessly soft.
Choosing between them comes down to your personal mood and lifestyle. If you want high-drama glamour, tapered coffin shapes work brilliantly. If you want dreamy, floating, angel-core aesthetics, uniform straight edges win every time.
Tapered Width Dynamics Versus Uniform Width
Coffin shapes narrow significantly as they reach the free edge. This tapering creates strong vertical tension in your hand posture.
Uniform straight walls preserve natural finger proportions from base to tip. The silhouette feels grounded, balanced, and structurally composed.
Soft cloud art looks calmer when bounded by parallel vertical lines. The lack of harsh tapering enhances the soft, floating mood.
Aesthetic Mood Differences in Edge Structures
Coffin silhouettes exude intense, edgy energy regardless of color choice. Even soft pinks look sharp and fierce on tapered flats.
Straight edges absorb soft pastel palettes with remarkable visual grace. The clean structure lets delicate art feel grounded rather than overly sweet.
Try pairing micro-pearl accents with straight horizontal edges for soft balance. The contrast creates a wearable, everyday ethereal aesthetic.
Impact Resistance Along Lateral Edges
Inwardly tapered coffin edges concentrate stress along narrowed free tips. Narrowed tips break easily under heavy diagonal pressure or twisting motions.
Uniform horizontal edges distribute impact pressure evenly across the whole width. Even pressure distribution minimizes sudden snaps during daily hand activities.
This inherent strength makes full-width shapes ideal for longer extensions. You enjoy dramatic length without worrying about constant corner breakage.
Here is Part 2 (Points 4 through 7) of your guide, expanding on texture, color dynamics, durability, and shape comparisons with short paragraphs (under 140 words) and simple sentence structures (under 20 words).
4. Comparing Ethereal Designs on a Square Nail Versus Oval Styles
Oval silhouettes are classic, traditional, and inherently rounded. They mimic the natural curve of your cuticle line seamlessly. Applying ethereal art to oval shapes results in a very gentle look. However, it often lacks modern architectural crispness.
The sharp corners of a square nail inject fresh, modern energy into soft art. Milky whites, sheer shimmers, and opalescent glazes gain modern flair. The straight free edge prevents soft pastel colors from looking dated or plain.
This contrast between soft interior art and sharp exterior lines defines ethereal style. Oval nails simply merge soft art into soft edges without visual friction. That subtle friction is what makes this trend command attention on Pinterest.
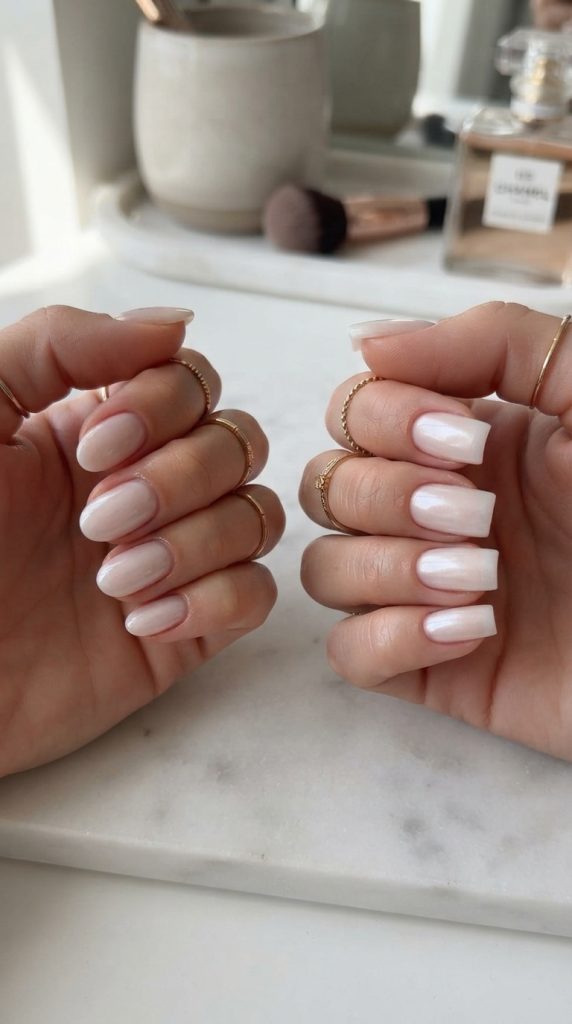
Architectural Contrast and Modern Edge Styling
Oval shapes lack distinct corner anchor points for graphic elements. Art smoothly flows around curved edges without clear structural stops.
Crisp right-angle corners serve as geometric frame anchors for sheer polishes. They define exactly where dreamy color gradients begin and end.
This clear border gives sheer opalescent polishes a sophisticated look. Your hands look polished, tailored, and purposefully designed.
Enhancing Sheer Palettes with Crisp Lines
Sheer milky polishes can sometimes look unfinished on rounded tips. Sharp straight edges clarify that the translucent look is completely intentional.
Layer sheer jelly polishes over straight horizontal tips for clean depth. The crisp edge highlights the liquid-like quality of translucent formulas.
Add fine gold line work along the flat free edge. Framing sheer colors with metallic straight lines creates an ethereal effect.
Visual Frame Definition Across Hand Postures
Rounded oval edges blend into the natural contours of your fingers. This seamless blend softens the overall appearance of short finger beds.
A flat horizontal top creates a definitive end to the nail bed. That clean boundary gives translucent art a neat, framed appearance.
The framed look helps soft, dreamy colors pop against skin tones. It provides structure that keeps pastel art looking sharp and intentional.
5. Color Palette Dynamics for the Modern Square Nail
Color choice dictates whether a manicure looks heavy or light. Ethereal styles completely abandon flat, heavy, or opaque solid colors. Instead, they rely on translucent jellies, sheer milky bases, and iridescent glazes.
On a broad square nail, sheer layered colors create breathtaking optical depth. Light travels through translucent layers and reflects off the nail bed. This creates an internal glow that appears to shift under different lighting.
Key shades include soft lavender, translucent rose, milky quartz, and sky blue. Adding pearl chrome toppers transforms these base shades into magical, shifting finishes. The flat top surface displays these color shifts without distortion.
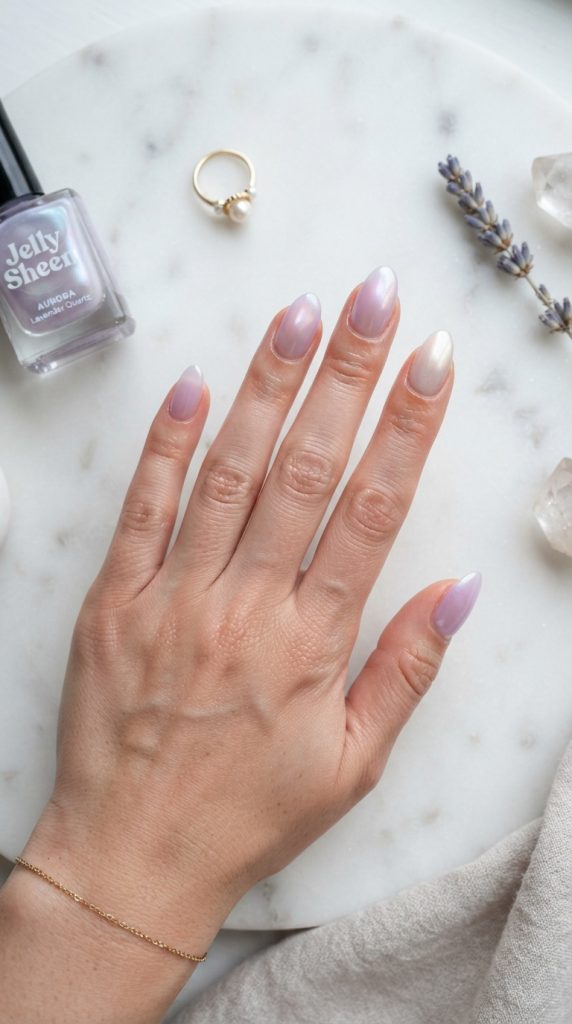
Layering Translucent Jelly Polishes
Start with a sheer, semi-transparent base shade across the surface. Apply thin coats to build color density slowly without thickness.
Add a second layer of slightly iridescent jelly polish over top. This creates an optical illusion of depth inside the nail layer.
Finish with a glossy, non-wipe top coat for maximum clarity. The sheer layers lock in ambient light for an ethereal glow.
Incorporating Pearl and Chrome Powders
Apply chrome powder over a cured non-wipe gel top coat. Use a silicone applicator tool to rub powder firmly across the flat top.
Focus extra powder along the sharp lateral corners for intense shine. The flat surface catches chrome reflections like a polished mirror.
Dust off excess powder gently with a soft fan brush. Seal with a durable top coat to prevent chrome edge peeling.
Selecting Soft Celestial Accent Colors
Pastel shades form the core foundation of dreamy color palettes. Pale lilac, sheer seafoam, and baby blue create calming visual effects.
Combine two pastel shades to make a soft aura center. Blend the colors gently outward using a soft sponge applicator.
Top the aura gradient with a dusting of micro-shimmer powder. The shimmer reflects ambient light with every slight hand movement.
6. Texture Integration and Accent Details on a Square Nail
Texture elevates simple nail art into a multi-dimensional masterwork. Ethereal styles mix smooth glass finishes with subtle, raised three-dimensional elements. The flat area of a square nail accommodates raised accents without looking crowded.
Popular texture accents include clear gel water droplets, subtle aura clouds, and micro-pearls. Delicate metallic starbursts and 3D wire swirls are also widely loved. These raised elements catch side lighting and cast soft shadows across the nail.
Because the tip is flat, 3D elements sit securely on the surface. They are far less likely to pop off compared to curved tips. This practical advantage makes textured art both gorgeous and durable.
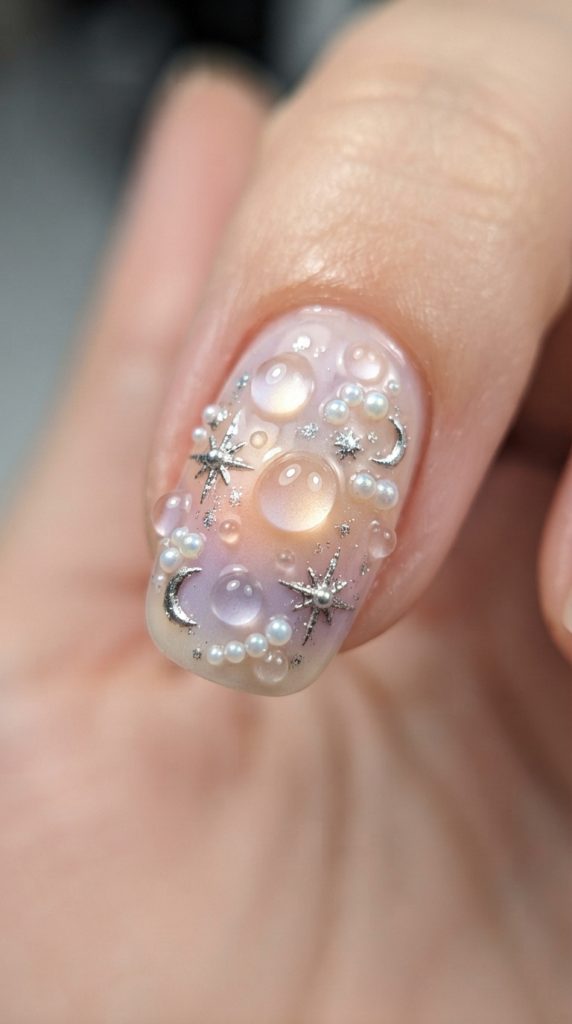
Applying 3D Gel Droplets and Swirls
Use a thick building gel or 3D gel to create water droplets. Place small beads onto cured top coat using a fine detail brush.
Flash cure immediately under a compact LED lamp to lock placement. This stops clear gel from spreading flat across the smooth surface.
Create dreamy, floating swirls by curving builder gel across mid-sections. The raised texture creates striking shadows over underlying milky polish.
Securing Micro-Pearls and Celestial Charms
Apply a small drop of charm glue onto desired placement spots. Nestling small pearls into flat surfaces ensures maximum adhesive contact area.
Curved tips leave gaps beneath flat-backed charms, causing early loss. Straight surfaces support flat charm backs flush against the nail plane.
Encapsulate charm edges with a fine brush dipped in top coat. This prevents snagging on clothing while preserving crisp outer lines.
Creating Opal and Iridescent Flake Textures
Embed thin iridescent foil flakes directly into uncured gel base. Press the flakes down flat using a silicone sculpting tool.
Cover the embedded flakes with a generous layer of builder gel. The builder gel creates a glassy, liquid-like depth over the foils.
Finish with a high-shine top coat after curing completely. The encapsulated flakes glow like natural opal stones from within.
7. Structural Durability Factors of the Square Nail
Nail shapes handle mechanical stress and daily impacts quite differently. The classic square nail distributes stress evenly across its flat free edge. This structural strength makes it a reliable choice for longer natural lengths.
However, the ninety-degree corners represent potential weak points if unreinforced. Corner snags can cause hairline fractures along side walls over time. Proper overlay techniques protect these corners while maintaining a slim, delicate look.
Ethereal aesthetics require thin, natural-looking application profiles. Using hard gel or builder gel in a bottle provides invisible strength. You achieve incredible durability without sacrificing the lightweight, ethereal appearance.
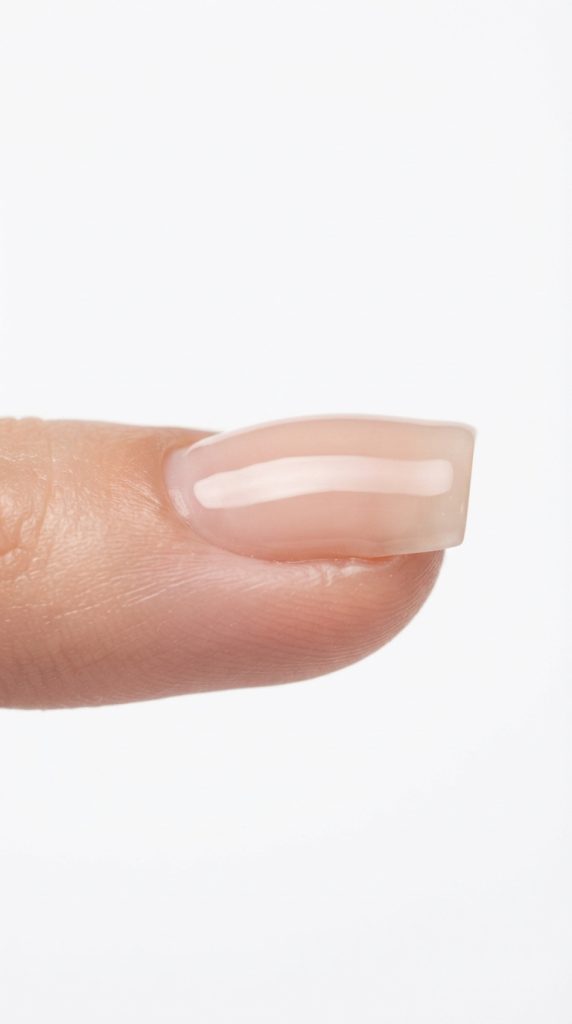
Reinforcing Vulnerable Corner Points
Apply a small bead of builder gel near outer free edges. Feather the gel smoothly toward the center to avoid thick, bulky tips.
Ensure builder gel caps the crisp side corners completely during application. Capped corners absorb everyday blunt impacts without cracking or splitting.
File under edges slightly after curing to remove excess product buildup. This maintains sharp outer geometry while keeping underlying strength high.
Apex Placement for Natural Slimness
Place the structural apex over the natural stress area centered low. Keep product thin near cuticle lines and along outer free edges.
A low, subtle apex supports long flat extensions without adding bulk. The finished silhouette remains delicate, airy, and visually weightless.
Check your side profile view to confirm smooth, gradual curves. A heavy apex ruins the sleek, clean lines of straight walls.
Preventing Gel Lamination and Corner Lifting
Dehydrate the surface thoroughly using an alcohol prep wipe first. Apply an acid-free primer to ensure maximum chemical adhesion.
Pay close attention to sealing the gel along side borders. Unsealed borders allow water entry, leading to sudden layer peeling.
Keep gel product slightly away from surrounding skin during application. Clean borders prevent lifting as your natural nails grow outward.
Here is Part 3 (Points 8 through 10, Summary Table, and Conclusion) of your guide, completing the full article in the exact same expanded style with short paragraphs (under 140 words), simple sentence structures (under 20 words), and clear technical explanations.
8. Maintenance Routines for a Crisp Square Nail
Maintaining sharp geometry requires consistent, gentle home care between appointments. As natural nails grow, free edges can lose their crisp square nail outline. Daily wear wears down sharp corners, rounding them into soft squovals.
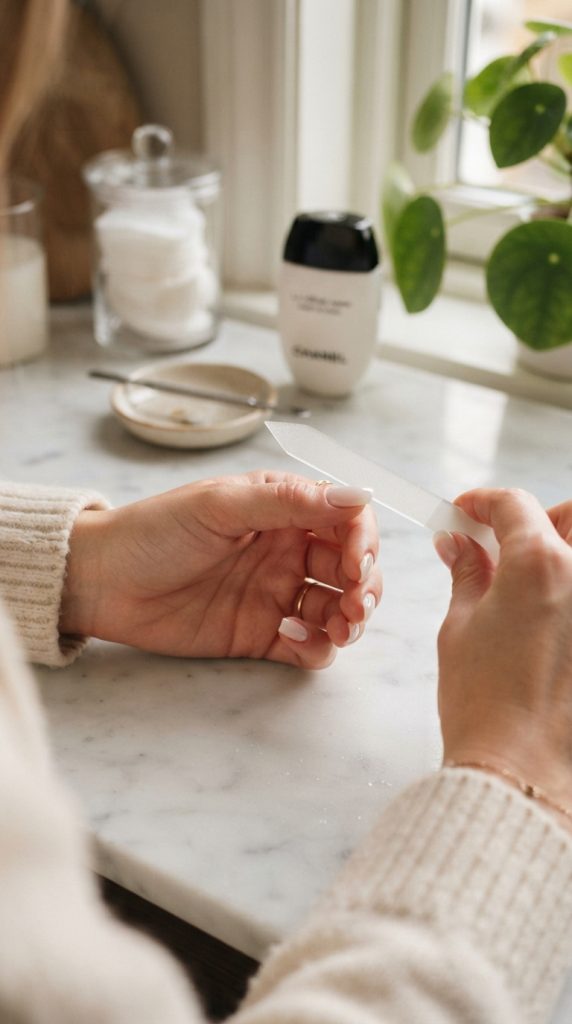
To preserve true ethereal aesthetics, perform light maintenance filing weekly. A fine-grit glass file sharpens edges without causing micro-shatters in gel layers. Ten seconds of careful filing keeps your geometry looking completely fresh.
Daily cuticle hydration is equally vital for maintaining this aesthetic. Healthy, hydrated cuticles frame sheer, ethereal polishes flawlessly. Dry, ragged skin distracts instantly from delicate milky art and pearlescent glazes.
Weekly Refinement with Glass Files
Select a high-quality etched glass file for home edge maintenance. Glass files seal natural keratin layers while shaping free edges.
Hold the file firmly at a ninety-degree angle against tips. File in gentle, single-direction passes to restore flat, straight lines.
Avoid aggressive back-and-forth sawing motions that cause heat friction. Light passes maintain crisp corners without disturbing cured gel overlays.
Nourishing Cuticles for Translucent Styles
Apply jojoba-based cuticle oil around nail beds twice daily. Jojoba oil penetrates skin deeply, keeping eponychium tissue soft and elastic.
Gently push back softened cuticles using a rubber-tipped pusher weekly. Clean cuticle lines enhance the floating effect of sheer polishes.
Massage excess oil into side walls to prevent dry hangnails. Well-hydrated skin complements the clean lines of flat manicures.
Protecting Free Edges During Daily Tasks
Wear protective rubber gloves while washing dishes or handling household cleaners. Harsh chemicals weaken gel top coats and dull shiny finishes quickly.
Avoid exposing cured gel to hot water for extended periods. Heat softens gel overlays, making sharp outer corners prone to bending.
Apply a fresh layer of top coat every seven days. A fresh top coat seals micro-scratches and restores original glass shine.
9. Hand Illusion Effects with a Square Nail Silhouette
Nail shape alters the visual proportions of your hands and fingers. Tapered shapes elongate short fingers by extending visual lines upward. A traditional square nail can visually widen short or wide finger beds.
However, ethereal styling tricks completely offset this widening effect. Using sheer, skin-matching base shades extends finger lines seamlessly through the tip. Combined with straight side walls, it creates a lengthening illusion.
Vertical nail art accents further enhance this hand-elongating effect. Subtle vertical aura lines, fine metallic stripes, and centered gems draw eyes up. You get crisp modern geometry without making fingers appear shorter.

Optical Lengthening with Sheer Nudes
Choose sheer nude bases that closely match your natural skin undertones. Seamless color transitions blend nail beds directly into fingertips.
Avoid stark, opaque whites that create harsh horizontal visual breaks. Soft translucent pinks elongate hands while preserving clean horizontal ends.
Extend sheer polish all the way down to cuticle borders. Uninterrupted color fields make short finger beds appear noticeably longer.
Using Vertical Art Elements for Balance
Paint thin, vertical shimmer lines down the center of each nail. Vertical art directs visual focus along the finger’s length.
Place celestial starbursts or tiny rhinestones along central vertical axes. Centralized placement balances the wide horizontal spread of flat tips.
Soft aura glow centers should stretch vertically rather than horizontally. Elongated aura centers add gentle height to flat surface beds.
Managing Visual Proportion Across Short Hand Types
If you have short, delicate hands, select medium nail lengths. Medium length creates necessary space for vertical art without overwhelming small beds.
Keep lateral side walls filed strictly parallel to finger joints. Widenings along side edges create bulky shapes that shorten hand posture.
Use subtle gradient transitions that fade toward transparent tips. Translucent ends trick the eye into seeing longer, slimmer fingertips.
10. How to Request an Ethereal Square Nail at the Salon
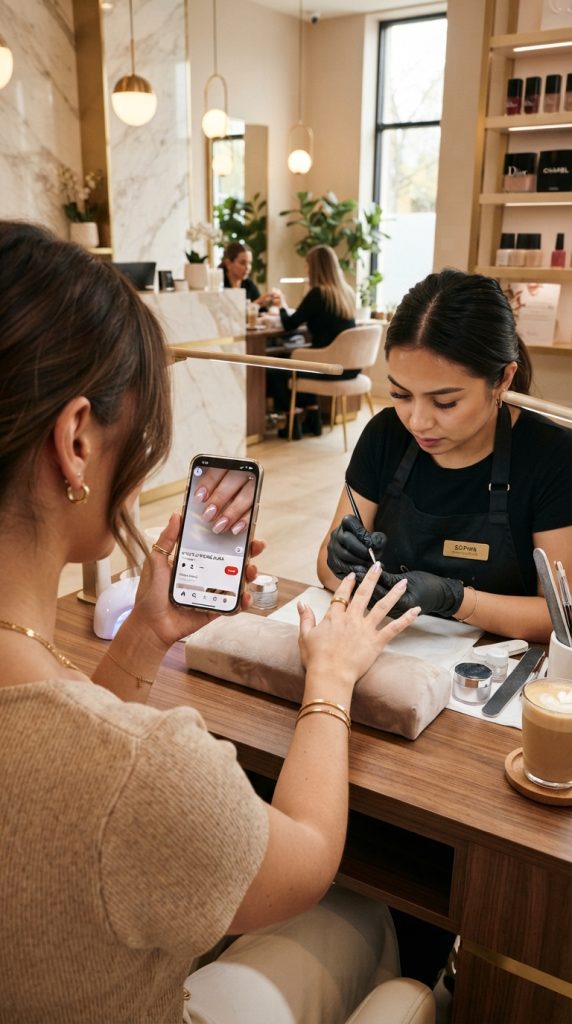
Communicating your exact vision to a nail technician prevents misunderstandings. Terms like ethereal or dreamy mean different things to different artists. Bringing reference photos and using precise technical vocabulary ensures perfect results.
Specify that you want a crisp, true square nail silhouette with softened micro-corners. Emphasize that you prefer thin, natural-looking builder gel application over thick overlays. This guarantees a delicate foundation for sheer art.
For art design, ask for sheer jelly bases, iridescent chrome toppers, or subtle aura effects. Mention specific accent details like micro-pearls or delicate 3D gel droplets. Clear communication yields gorgeous, salon-quality results every single time.
Technical Vocabulary for Your Appointment
Ask for straight parallel side walls and a flat, horizontal tip. Request micro-beveled corners to prevent fabric snagging in daily life.
Specify lightweight builder gel or hard gel overlay for strength. Ask your technician to keep edge profiles slim and free of bulk.
Request non-wipe top coat application before applying iridescent chrome powders. This ensures a mirror-like chrome finish across the flat surface.
Bringing Effective Visual Inspiration
Save three to four Pinterest photos showing your preferred aesthetic clearly. Select photos displaying similar hand tones and natural nail bed lengths.
Show one photo for exact shape, another for color depth. Point out specific art details you want included or excluded.
Discuss your daily lifestyle with your technician before styling begins. They will adjust length and builder thickness to match your routine.
Confirming Layering Techniques In Real-Time
Watch the base layer application before art painting begins. Confirm that the builder gel profile remains thin and natural from all angles.
Ask your artist to do a quick swatch test for sheer jelly shades. Swatching ensures the color tone aligns with your personal skin tone.
Check corner sharp points before final top coat curing occurs. Ask for minor corner softening if edges feel too sharp for comfort.
Summary of Key Differences
| Feature | Ethereal Square Style | Almond & Coffin Styles | Oval & Round Styles |
| Free Edge Shape | Completely flat, horizontal line | Tapered or narrowed point | Continuous smooth curve |
| Canvas Area | Broad, wide horizon for art | Compressed toward tip | Narrowed organic surface |
| Visual Vibe | Modern geometry meets soft art | High-drama, fierce, or classic | Traditional, subtle, delicate |
| Light Reflection | Uniform, mirror-like sheets | Angled diagonal light dispersion | Softly scattered light rays |
| Best Art Styles | 3D droplets, chrome aura, stars | Flowing lines, tapered gradients | Delicate florals, soft washes |
Conclusion
Ethereal square nails offer a breathtaking blend of modern geometry and romantic art. By pairing sharp, clean outlines with soft, otherworldly designs, this trend stands in a class of its own. It transforms manicures into wearable pieces of modern art.
Whether you prefer subtle milky glazes or intricate celestial detailing, this style adapts seamlessly. Embrace the balance of structure and dreaminess on your next salon visit. Your hands will display a captivating look that is stylish and timeless.
Leave a Reply