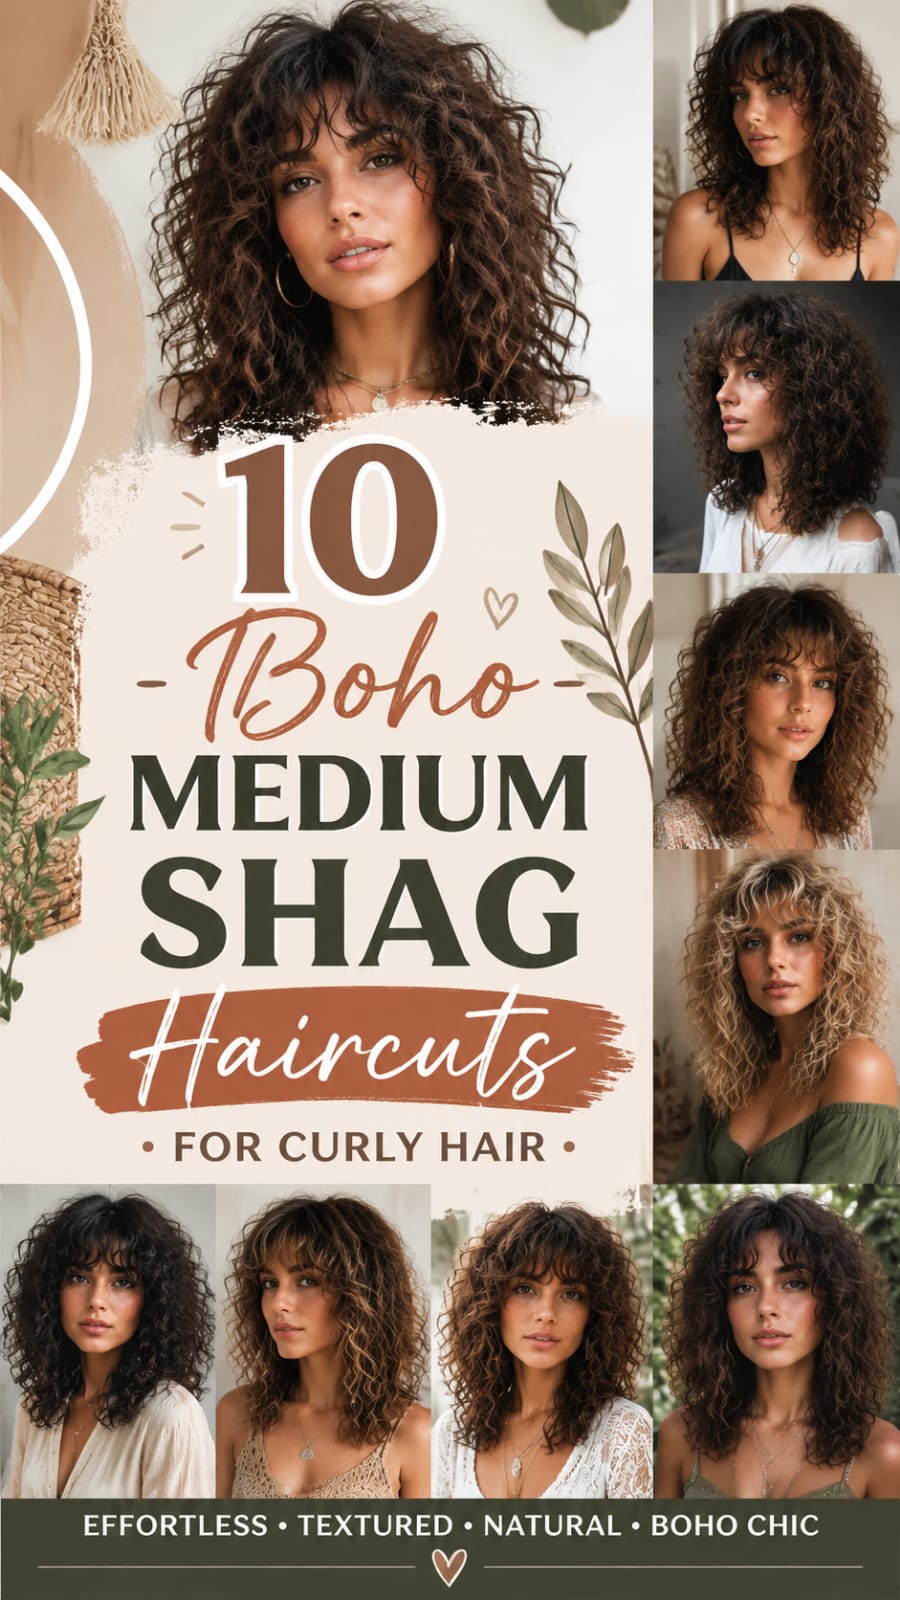
Curly haircuts possesses a natural, vibrant energy that truly shines when given the right structure. A textured shag style adds effortless movement, airy depth, and distinct personality to natural curls. The medium length offers fantastic versatility, making your hair easy to style, manage, and care for every single day.
Combining bohemian flair with a retro silhouette creates a breezy, timeless aesthetic. This silhouette relies on strategically placed layers to reduce unwanted bulk and enhance curl definition. You can customize the look to suit various curl patterns, ranging from soft waves to tight ringlets.

This comprehensive guide highlights ten top bohemian medium shag choices designed for textured locks. You will explore detailed methods, maintenance tips, and practical styling techniques for every single option. Strategic layering can completely transform your daily routine, boost volume, and elevate your personal style effortlessly.
1. The Classic Shaggy Layered Haircuts
This timeless style features heavy layering throughout the crown and mid-lengths. The classic shape removes excess weight while boosting natural movement for every curl type. It balances volume across the top and sides for a flattering profile.
+-------------------------------------------------------------+
|                      STYLING STEPS                          |
+-------------------------------------------------------------+
| 1. Apply curl cream to wet strands evenly.                  |
| 2. Scrunch gently from ends toward the roots.               |
| 3. Air-dry or use a diffuser on low heat.                   |
| 4. Shake out roots with your fingers for volume.           |
+-------------------------------------------------------------+

Strategic Cutting Techniques for Dynamic Volume
Creating dramatic volume starts with proper layer placement during your salon visit. Ask your stylist for vertical cuts to add soft texture to your locks. This precise technique keeps your ends light and airy without creating frizzy, blunt lines.
+-------------------------------------------------------------+
|                     VOLUME ENHANCEMENT                      |
+-------------------------------------------------------------+
| 1. Lift crown sections vertically while cutting.             |
| 2. Remove interior weight to allow natural lift.            |
| 3. Blend shorter layers smoothly into longer ends.          |
| 4. Dry-trim final shape to assess natural spring.           |
+-------------------------------------------------------------+
Essential Maintenance and Daily Care Routines
Keep these haircuts fresh by trimming split ends every six weeks regularly. Wash your hair with a hydrating shampoo to maintain natural moisture balance daily. Apply a lightweight leave-in conditioner to protect your ends from breaking.
+-------------------------------------------------------------+
|                     DAILY MOISTURE RETENTION                |
+-------------------------------------------------------------+
| 1. Apply leave-in treatment to wet ends daily.              |
| 2. Seal damp strands with lightweight seed oil.             |
| 3. Protect style overnight using a silk bonnet.              |
| 4. Refresh dry curls with mist spray mornings.               |
+-------------------------------------------------------------+
Comprehensive Step-by-Step Styling Protocol
Achieving a flawless look requires a systematic approach to application. Begin on soaking wet hair straight out of the shower. Distribute product using your palms in a downward gliding movement.
+-------------------------------------------------------------+
|                    APPLICATION PROTOCOL                     |
+-------------------------------------------------------------+
| 1. Divide wet hair into four manageable quadrants.          |
| 2. Apply styling cream section by section thoroughly.       |
| 3. Use a wide-tooth comb to ensure even distribution.       |
| 4. Scrunch upwards firmly toward the scalp line.            |
+-------------------------------------------------------------+
In-Depth Layering Methods for Volume Enhancement
Understanding how individual layers react to cutting is crucial. Hairdressers must analyze the curl pattern before making a single cut. Dry cutting techniques provide immediate feedback on spring-back height.
+-------------------------------------------------------------+
|                    DRY CUTTING WORKFLOW                     |
+-------------------------------------------------------------+
| 1. Assess natural curl fall in its unwashed state.          |
| 2. Cut individual curl loops at their natural bend.         |
| 3. Work slowly from lower perimeter to top crown.           |
| 4. Shake hair periodically to check weight distribution.    |
+-------------------------------------------------------------+
Advanced Hydration and Scalp Care Systems
Healthy curls start at the scalp level with proper cleansing. Avoid aggressive sulfates that strip away natural protective oils completely. Cleanse gently using co-washes or sulfate-free shampoos once weekly.
+-------------------------------------------------------------+
|                    SCALP CARE WASH ROUTINE                  |
+-------------------------------------------------------------+
| 1. Massage scalp with fingertips under warm water.          |
| 2. Work sulfate-free cleanser across root areas.             |
| 3. Rinse thoroughly to remove all product buildup.         |
| 4. Follow with rich conditioning treatment on ends.         |
+-------------------------------------------------------------+
2. Curly Shag Haircuts with Curtain Bangs
Curtain bangs frame your face beautifully while blending seamlessly into medium layers. This style creates a soft focus around your cheeks and eyes effortlessly. It adds retro charm without requiring intense daily styling effort or heat tools.
+-------------------------------------------------------------+
|                     CURTAIN BANG CARE                       |
+-------------------------------------------------------------+
| 1. Finger-coil front bang sections when damp.               |
| 2. Secure bangs away from the face while drying.            |
| 3. Diffuse on cool setting for soft shape.                  |
| 4. Separate coils with a light hair oil.                    |
+-------------------------------------------------------------+

Precise Methods for Shaping Front Layers
The front pieces should taper smoothly into your longer side layers. Your stylist should cut the fringe while your curls are completely dry. Dry cutting ensures these haircuts do not spring up surprisingly short when dried.
+-------------------------------------------------------------+
|                     FRONTLINE SHAPING STEPS                 |
+-------------------------------------------------------------+
| 1. Section off front triangular fringe area.                |
| 2. Angle shears downward toward cheekbones carefully.       |
| 3. Cut individual curl clumps at natural bends.            |
| 4. Verify symmetry while hair rests naturally.             |
+-------------------------------------------------------------+
Reliable Daily Styling Methods for Softness
Style your curtain bangs using your index finger to curl ends outward. Allow them to air-dry completely before touching or combing them again. Finish with a spritz of flexible hairspray for long-lasting daily hold.
+-------------------------------------------------------------+
|                     SETTING THE BANG PATTERN                |
+-------------------------------------------------------------+
| 1. Spritz front fringe with hydration mist daily.           |
| 2. Wrap curl groups around fingers outward.                 |
| 3. Clip bangs flat against temples temporarily.             |
| 4. Release clips once strands dry fully.                    |
+-------------------------------------------------------------+
Master Methods for Framing Face Features
Curtain bangs must accent your specific face shape flawlessly. Rounder shapes benefit from longer cheekbone-skimming fringe lengths. Angular faces look amazing with shorter, softer framing pieces.
+-------------------------------------------------------------+
|                   FACE FRAMING ADJUSTMENT                   |
+-------------------------------------------------------------+
| 1. Identify widest part of cheekbones precisely.            |
| 2. Align lowest bang point with cheekbone structure.        |
| 3. Taper upper sections toward center forehead line.         |
| 4. Soften edges with vertical snip techniques.              |
+-------------------------------------------------------------+
Detailed Drying Techniques for Soft Movement
Drying technique dictates the final shape and level of hold. Using a diffuser with low heat preserves natural curl alignment. Point air stream downward to smooth cuticles and prevent unwanted frizz.
+-------------------------------------------------------------+
|                    DIFFUSER AIRFLOW GUIDE                   |
+-------------------------------------------------------------+
| 1. Set dryer speed to low and heat to warm.                 |
| 2. Cup fringe sections inside diffuser bowl gently.         |
| 3. Hold stationary for thirty seconds per section.          |
| 4. Finish with cold shot air to lock in setting.            |
+-------------------------------------------------------------+
Specialized Night Preservation Techniques
Protecting your fringe overnight prevents morning restyling stress. Use pin curls or soft clips to hold shape flat. Silk bonnets keep friction low while you sleep comfortably.
+-------------------------------------------------------------+
|                    NIGHTTIME FRINGE CARE                    |
+-------------------------------------------------------------+
| 1. Sweep fringe to chosen sides using wide comb.            |
| 2. Secure ends loosely with flat creaseless clips.          |
| 3. Cover head with smooth silk turban wrap.                 |
| 4. Remove clips morning and fluff with fingertips.          |
+-------------------------------------------------------------+
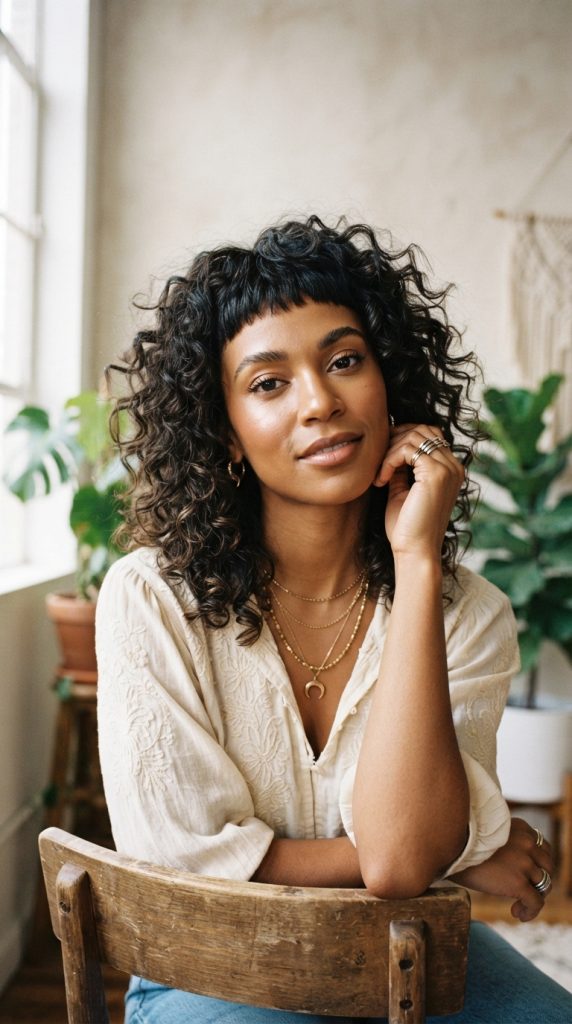
3. Textured Shag Haircuts with Micro Bangs
Micro bangs bring an edgy element to your bohemian aesthetic instantly. Tiny fringe pieces sit high on the forehead, drawing attention to brows. This combination offers a bold contrast against bouncy, textured medium layers.
+-------------------------------------------------------------+
|                     MICRO BANG METHODS                      |
+-------------------------------------------------------------+
| 1. Dampen fringe slightly every morning.                     |
| 2. Apply a dime-sized amount of styling gel.                |
| 3. Smooth fringe downward using a fine comb.                 |
| 4. Let fringe air-dry flat against the skin.                |
+-------------------------------------------------------------+
Achieving Precision Cut Lines on Short Fringe
Short bangs require precise trimming to complement various natural curly textures. Your stylist must evaluate your natural hair growth patterns very carefully. Strategic placement prevents these haircuts from shrinking up unexpectedly high on foreheads.
+-------------------------------------------------------------+
|                     SHORT FRINGE TRIM GUIDE                 |
+-------------------------------------------------------------+
| 1. Isolate high forehead section with clips.                |
| 2. Snip small sections at relaxed tension.                  |
| 3. Soften horizontal lines with point cuts.                 |
| 4. Check bounce height after drying thoroughly.             |
+-------------------------------------------------------------+
Essential Product Recommendations for Control
Use a light smoothing pomade to define short front fringe pieces. Avoid heavy butter products that can weigh down small hair sections quickly. A dry texture spray adds grip while maintaining airy volume across top.
+-------------------------------------------------------------+
|                     PRODUCT APPLICATION STEPS               |
+-------------------------------------------------------------+
| 1. Warm small pomade amount between palms thoroughly.       |
| 2. Tap product lightly onto micro fringe tips.             |
| 3. Spray texture mist through top crown layers.            |
| 4. Scrunch upward to lock in soft definition.               |
+-------------------------------------------------------------+
Tailored Cutting Protocols for Cowlicks
Cowlicks at the front hairline present unique styling challenges. Stylists must cut with growth patterns rather than forcing directions. Leaving slightly extra length compensates for stubborn hair cowlicks.
+-------------------------------------------------------------+
|                    COWLICK MANAGEMENT CUT                   |
+-------------------------------------------------------------+
| 1. Locate natural hairline growth swirls accurately.        |
| 2. Leave cowlick section slightly longer than rest.         |
| 3. Point-cut ends to blend uneven growth directions.        |
| 4. Check lay flat behavior without tension applied.          |
+-------------------------------------------------------------+
Detailed Daily Reset Routine for Fringe
Micro bangs require quick morning attention to reset daily shape. Mist lightly with water to reactivate styling products easily. Direct hair forward using your fingers until completely settled.
+-------------------------------------------------------------+
|                     MORNING RESET STEPS                     |
+-------------------------------------------------------------+
| 1. Dampen fringe area using fine mist spray bottle.         |
| 2. Apply drop of light gel across damp tips.                |
| 3. Comb downward using fine tooth plastic comb.             |
| 4. Press lightly against skin until fully dry.              |
+-------------------------------------------------------------+
Long-Term Perimeter Maintenance Guidelines
Keeping micro bangs sharp requires regular touch-ups every three weeks. Learn simple self-trimming techniques using professional cutting shears. Cut tiny amounts at a time while standing dry.
+-------------------------------------------------------------+
|                    TRIMMING AT HOME STEPS                   |
+-------------------------------------------------------------+
| 1. Ensure hair is completely dry and unstyled.              |
| 2. Hold shears vertically instead of horizontally.          |
| 3. Snip individual curl tips very conservatively.           |
| 4. Step back from mirror often to review balance.           |
+-------------------------------------------------------------+
4. The Feathered Crown Shag Haircuts
A feathered crown focuses layer density directly at the top area. This technique gives curly textures maximum lift without widening side shapes. It delivers a buoyant silhouette ideal for fine to medium strand weights.
+-------------------------------------------------------------+
|                      CROWN VOLUMIZING                       |
+-------------------------------------------------------------+
| 1. Apply volumizing mousse directly to damp roots.         |
| 2. Flip head upside down during diffusions.                 |
| 3. Use root clips on top layers while drying.               |
| 4. Fluff roots with a wide-tooth comb.                      |
+-------------------------------------------------------------+

Proven Cutting Strategies for Height and Lift
Internal layering is key to creating lift across your crown area. Stylists remove small sections beneath top layers to support height seamlessly. This invisible structural support keeps these haircuts looking full all day long.
+-------------------------------------------------------------+
|                     INTERNAL SUPPORT STEPS                  |
+-------------------------------------------------------------+
| 1. Lift crown sections straight up away head.               |
| 2. Notch interior base strands slightly shorter.           |
| 3. Overlay longer exterior ringlets smoothly top.            |
| 4. Shake out crown area to test volume.                    |
+-------------------------------------------------------------+
Effective Ways for Preserving Curl Elasticity
Avoid over-cleansing to keep curls springy, healthy, and full of life. Use a deep conditioning mask once every week without fail. Protein-rich products help reinforce curl structure, maintaining long-lasting natural bounce.
+-------------------------------------------------------------+
|                     ELASTICITY RECOVERY PLAN                |
+-------------------------------------------------------------+
| 1. Wash with gentle sulfate-free cleanser weekly.           |
| 2. Coat mid-lengths using rich protein mask.                 |
| 3. Leave treatment active for fifteen full minutes.         |
| 4. Rinse thoroughly with cool water to seal.                |
+-------------------------------------------------------------+
Strategic Clip Placement for Scalp Elevation
Using root clips provides elevation without heat damage risks. Insert metal double-prong clips directly at root bases while damp. Remove clips only after strands dry completely for maximum height.
+-------------------------------------------------------------+
|                    ROOT CLIPPING TECHNIQUE                  |
+-------------------------------------------------------------+
| 1. Lift individual crown ringlets perpendicular to head.    |
| 2. Slide open clip close to scalp base securely.            |
| 3. Repeat across entire top crown area systematically.      |
| 4. Allow full air-dry before removing clips gently.         |
+-------------------------------------------------------------+
Advanced Protein and Moisture Balance Routines
Maintaining elasticity requires balancing protein treatments with deep hydration. Too much protein causes brittle hair, while moisture excess causes limpness. Alternate treatments weekly to keep curls bouncy and resilient.
+-------------------------------------------------------------+
|                   BALANCE TREATMENT SCHEDULE                |
+-------------------------------------------------------------+
| Week 1: Apply protein-enriched rebuilding mask.            |
| Week 2: Follow with intense moisture therapy cream.         |
| Week 3: Use clarifying cleanser plus light conditioner.     |
| Week 4: Apply deep penetrating oil treatment.               |
+-------------------------------------------------------------+
Specialized Fluffing Techniques for Maximum Lift
Fluffing hair correctly increases volume without causing surface frizz. Insert an afro pick or wide comb at root bases. Lift upward one inch and release without pulling through ends.
+-------------------------------------------------------------+
|                     ROOT PICKING WORKFLOW                   |
+-------------------------------------------------------------+
| 1. Tilt head forward or sideways for root access.           |
| 2. Insert pick teeth directly into scalp area.              |
| 3. Lift teeth gently outward away from scalp.               |
| 4. Remove pick without snagging outer curl ends.            |
+-------------------------------------------------------------+
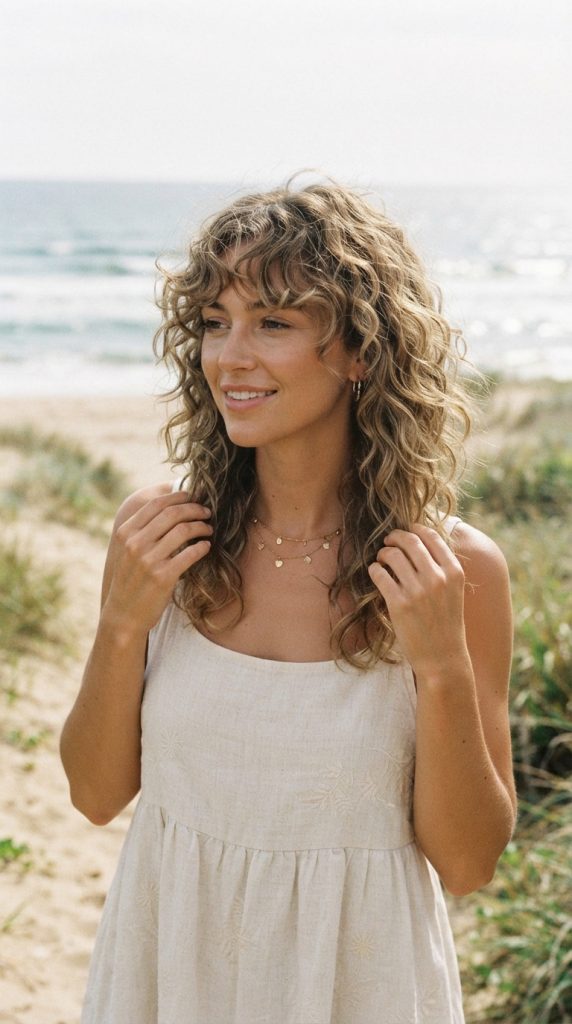
5. Deconstructed Wispy Shag Haircuts
Wispy layers create an airy, delicate appearance throughout your hair length. This variation relies on soft ends rather than thick blocky cuts. It offers an easygoing vibe that looks perfectly lived-in and natural.
+-------------------------------------------------------------+
|                     WISPY STYLING STEPS                     |
+-------------------------------------------------------------+
| 1. Mist dry strands with water spray bottle.                |
| 2. Apply sea salt spray from mid-lengths to ends.           |
| 3. Scrunch upwards to activate soft wave pattern.           |
| 4. Allow hair to air-dry without touching.                 |
+-------------------------------------------------------------+
Smart Tapering Methods for Airy Movement
Feathering the ends removes heavy weight without shortening your overall length. This method encourages loose ringlets to soft-curl completely naturally. It creates an effortless, wind-swept look perfect for low-maintenance daily routines.
+-------------------------------------------------------------+
|                     END-TAPER PROCESS STEPS                 |
+-------------------------------------------------------------+
| 1. Slide cut downward along lower perimeter ends.           |
| 2. Feather heavy ringlet tips using thin shears.            |
| 3. Soften blunt edges across back lower sections.           |
| 4. Shake strands dry to assess airy flow.                   |
+-------------------------------------------------------------+
Simple Ways to Protect Fine Curly Strands
Protect wispy ends from friction by sleeping on a silk pillowcase. Use light leave-in sprays instead of heavy butter creams daily. Nightly pineappling preserves your texture and prevents morning frizz and tangles.
+-------------------------------------------------------------+
|                     OVERNIGHT PROTECTION ROUTINE            |
+-------------------------------------------------------------+
| 1. Gather all hair high atop crown loosely.                |
| 2. Secure loosely with soft silk scrunchie ring.            |
| 3. Wrap perimeter hairline with smooth satin scarf.          |
| 4. Release hair mornings and shake out roots.              |
+-------------------------------------------------------------+
Lightweight Product Formulations for Fine Textures
Selecting light products prevents wispy layers from looking greasy. Water-based leave-in sprays provide moisture without adding heavy oil weight. Stylist foams build structure while keeping movement airy and free.
+-------------------------------------------------------------+
|                    PRODUCT SELECTION CHART                  |
+-------------------------------------------------------------+
| Form: Water sprays -> Ideal for daily hydration layer.     |
| Form: Styling foams -> Ideal for weightless definition.     |
| Form: Light oils   -> Ideal for sealing wispy ends.        |
| Form: Heavy creams -> Avoid on fine wispy layers.           |
+-------------------------------------------------------------+
Sea Salt and Texturizing Spray Application
Sea salt sprays create beachy friction that enhances wispy texture. Apply lightly from mid-shaft to ends on damp hair. Avoid applying directly to scalp to prevent drying out roots.
+-------------------------------------------------------------+
|                     SALT SPRAY APPLICATION                  |
+-------------------------------------------------------------+
| 1. Shake bottle thoroughly to mix active minerals.          |
| 2. Mist six inches away from damp mid-lengths.              |
| 3. Scrunch upwards firmly using micro-fiber towel.          |
| 4. Let air-dry naturally to allow salt activation.          |
+-------------------------------------------------------------+
Gentle Detangling Systems for Delicate Curls
Wispy ends tangle easily if combed aggressively when dry. Always detangle hair while coated in conditioner during washes. Use a flexible wet brush starting at ends working up.
+-------------------------------------------------------------+
|                    SAFE DETANGLING STEPS                    |
+-------------------------------------------------------------+
| 1. Coat hair generously with slippery conditioner.          |
| 2. Divide length into small two-inch sections.              |
| 3. Brush gently from bottom ends toward root base.          |
| 4. Rinse with cool water to lock in moisture.               |
+-------------------------------------------------------------+
6. Shaggy Bob Hybrid Haircuts
This medium-short variation blends bob structure with shag layers seamlessly. It sits right at shoulder level, offering crisp, springy movement. It provides a neat profile while keeping a relaxed, bohemian feel.
+-------------------------------------------------------------+
|                      BOB SHAG ROUTINE                       |
+-------------------------------------------------------------+
| 1. Apply curl foam to soaking wet hair.                     |
| 2. Micro-fiber towel dry by gentle squeezing.               |
| 3. Diffuse roots while tilting head sideways.               |
| 4. Finish with light shine serum on ends.                   |
+-------------------------------------------------------------+

Proper Structural Design for Lower Perimeters
The baseline maintains a clean, solid line near the collarbone area. Internal layers prevent the bottom from expanding into a broad shape. This crucial balance produces chic, wearable haircuts for any occasion.
+-------------------------------------------------------------+
|                     BASE SHAPING STEPS                      |
+-------------------------------------------------------------+
| 1. Establish blunt perimeter baseline near collarbone.     |
| 2. Carve soft internal layers through mid-lengths.          |
| 3. Soften thick corner sections around lower back.          |
| 4. Diffuse completely to review final perimeter shape.      |
+-------------------------------------------------------------+
Simple Refreshing Methods for Second-Day Curls
Refresh your short layers on day two using a misting bottle. Scrunch in a small amount of curl foam to redefine ringlets. Air-dry quickly for instant volume rejuvenation without washing everything again.
+-------------------------------------------------------------+
|                     DAY-TWO REFRESH STEPS                   |
+-------------------------------------------------------------+
| 1. Lightly spray dry ringlets with pure water.              |
| 2. Smooth foam over surface without disrupting curls.        |
| 3. Scrunch ends upward gently toward scalp line.             |
| 4. Diffuse on low speed for two minutes.                    |
+-------------------------------------------------------------+
Eliminating Unwanted Triangle Shape Traps
Curly bobs often turn into triangles if left uncut inside. Stylists must carve out weight through lower middle layers carefully. Removing hidden mass allows top layers to fall over roundly.
+-------------------------------------------------------------+
|                    TRIANGLE REMOVAL CUT                     |
+-------------------------------------------------------------+
| 1. Identify dense triangular bulges along sides.            |
| 2. Lift interior side sections at forty-five degrees.       |
| 3. Channel-cut small channels through interior bulk.        |
| 4. Drop outer layers down to verify rounded shape.           |
+-------------------------------------------------------------+
Microfiber Towel Drying and Micro-Plotting
Drying with terry cloth towels roughens cuticles, causing extreme frizz. Microfiber materials gently absorb excess water without disturbing natural patterns. Micro-plot by cupping hair upward toward scalp carefully.
+-------------------------------------------------------------+
|                    MICRO-PLOTTING STEPS                     |
+-------------------------------------------------------------+
| 1. Open microfiber towel flat across both palms.            |
| 2. Cup ends of hair into towel gently.                      |
| 3. Squeeze upward toward scalp in pulsing motions.          |
| 4. Move across all head sections until water stops dripping.|
+-------------------------------------------------------------+
Angle Adjustments for Collarbone Grazing Lines
Collarbone lengths require exact front-to-back angle balancing techniques. Angling slightly longer toward front creates sleek modern framing. Angling longer in back creates traditional retro shag profiles.
+-------------------------------------------------------------+
|                   PERIMETER ANGLE GUIDE                     |
+-------------------------------------------------------------+
| Forward Angle: Longer in front -> Modern sleek profile.     |
| Backward Angle: Longer in back  -> Retro shag silhouette.   |
| Level Cut: Uniform length       -> Classic bob structure.   |
| Pick shape based on neck length and cheekbone height.       |
+-------------------------------------------------------------+
7. Heavy Fringe Modern Haircuts
A dense, full-coverage fringe highlights your facial features with bold impact. This style blends a thick front section into choppy layers effortlessly. It creates a cozy frame suitable for long or oval shapes.
+-------------------------------------------------------------+
|                     HEAVY FRINGE ROUTINE                    |
+-------------------------------------------------------------+
| 1. Comb damp fringe forward with wide-tooth comb.           |
| 2. Apply light hold gel to keep curls aligned.               |
| 3. Let fringe dry naturally without disturbing.             |
| 4. Gently scrunch crunch using lightweight oil.             |
| 5. Fluff bangs lightly with fingertips for full shape.      |
+-------------------------------------------------------------+

Balancing Mass and Weight Inside the Cut
Heavy fringe sections require careful weight management inside the cut interior. Your stylist must thin out interior mass while keeping outer edges thick. This balances structural shape with soft, natural curly movement seamlessly.
+-------------------------------------------------------------+
|                     INTERIOR WEIGHT REDUCTION               |
+-------------------------------------------------------------+
| 1. Separate top fringe from underlying front layers.        |
| 2. Notch interior strands underneath top layer carefully.   |
| 3. Smooth outer fringe over thinned interior space.          |
| 4. Evaluate front density while hair sits naturally.         |
| 5. Refine overall outline with dry point-cuts.              |
+-------------------------------------------------------------+
Practical Long-Term Maintenance Tips for Fringe
Schedule fringe trims every four weeks to keep sightlines clear always. Wash your front bangs more frequently than the rest of hair. A quick sink wash keeps your front layers clean and bouncy.
+-------------------------------------------------------------+
|                     QUICK BANG-WASH METHOD                  |
+-------------------------------------------------------------+
| 1. Clip back long side and rear strands tightly.            |
| 2. Wash front fringe over sink using gentle cleanser.       |
| 3. Apply lightweight conditioner to bang ends only.         |
| 4. Towel blot gently and air-dry bang section.              |
| 5. Apply a tiny drop of serum to prevent flyaways.          |
+-------------------------------------------------------------+
Managing Dense Front Hairlines Efficiently
Thick hairlines can cause bangs to push forward too aggressively. Stylists can adjust sectioning shape from triangular to crescent shapes. Crescent sectioning softens forward push and integrates bangs smoothly.
+-------------------------------------------------------------+
|                    CRESCENT SECTIONING GUIDE                |
+-------------------------------------------------------------+
| 1. Trace curved parting from temple to temple.              |
| 2. Keep depth of section within one inch of hairline.       |
| 3. Comb section forward to verify soft density.             |
| 4. Cut dry at relaxed eye-level length.                     |
| 5. Blend outer points smoothly into side layers.            |
+-------------------------------------------------------------+
Controlling Humidity and Sweat Effects
Front bangs absorb sweat quickly during warmer summer months. Apply dry shampoo to root bases before leaving home. Dry shampoo absorbs oil instantly, preserving fresh volume throughout days.
+-------------------------------------------------------------+
|                    HUMIDITY DEFENSE STEPS                   |
+-------------------------------------------------------------+
| 1. Spray dry shampoo onto underside of fringe roots.        |
| 2. Massage product gently with fingertips to blend.         |
| 3. Lightly mist outer surface with anti-humidity spray.     |
| 4. Avoid touching fringe throughout hot afternoons.         |
| 5. Reapply dry shampoo mid-day if oil appears.              |
+-------------------------------------------------------------+
Customizing Fringe Density for Face Widths
Fringe width affects how wide your face appears visually. Narrow fringe widths elongate rounder facial features effectively. Wider fringe widths balance narrower or longer facial profiles.
+-------------------------------------------------------------+
|                    WIDTH SELECTION GUIDE                    |
+-------------------------------------------------------------+
| Narrow Width: Ends at outer iris -> Elongates wide faces.   |
| Medium Width: Ends at cheekbone -> Balances oval shapes.    |
| Wide Width:   Ends past temples  -> Softens long faces.     |
| Always cut conservatively before expanding width further.   |
| Re-evaluate balance after hair dries fully.                 |
+-------------------------------------------------------------+
8. Asymmetrical Boho Haircuts
Uneven lengths add dramatic artistic interest to a layered silhouette. One side hangs slightly longer than the other, creating eye-catching angles. It turns natural curls into a dynamic, sculptural style statement.
+-------------------------------------------------------------+
|                   ASYMMETRICAL STYLING                      |
+-------------------------------------------------------------+
| 1. Part hair deeply on one side when wet.                  |
| 2. Apply styling cream evenly through all sections.          |
| 3. Twist longer side around fingers for definition.         |
| 4. Air-dry completely to lock in unique shape.             |
| 5. Gently shake out roots to enhance diagonal flow.        |
+-------------------------------------------------------------+

Precision Angle Cutting for Asymmetrical Balance
Stylists work with your natural drop line to craft uneven lengths. Cutting dry allows natural spring-back rate to dictate actual final lengths. This guarantees balanced, intentional asymmetry when these haircuts dry naturally.
+-------------------------------------------------------------+
|                     ANGULAR CUTTING PROCESS                 |
+-------------------------------------------------------------+
| 1. Establish side part along natural crown break.           |
| 2. Cut shorter side layers to jawline height.               |
| 3. Extend longer opposite side past collarbone level.      |
| 4. Soften transition points through rear crown space.       |
| 5. Dry-check balance from straight-on front angle.          |
+-------------------------------------------------------------+
Product Layering Techniques for Strong Hold
Layer a soft styling gel over a hydrating leave-in cream. Focus gel placement on the longer side to define shape clearly. Use a lightweight hair oil to break any stiff gel cast.
+-------------------------------------------------------------+
|                     GEL APPLICATION STEPS                   |
+-------------------------------------------------------------+
| 1. Distribute leave-in cream evenly across wet hair.        |
| 2. Smooth gel over longer asymmetrical side strands.       |
| 3. Diffuse hair completely until hard cast forms.           |
| 4. Scrunch out cast with two oil drops.                     |
| 5. Fluff longer side for added dramatic height.             |
+-------------------------------------------------------------+
Choosing the Ideal Side Part Location
Side part placement determines how dramatic your asymmetry looks. Deep side parts above temple arches create high contrast profiles. Subtle side parts one inch off-center offer softer variations.
+-------------------------------------------------------------+
|                   SIDE PART PLACEMENT GUIDE                 |
+-------------------------------------------------------------+
| Deep Part:   Above temple arch -> Maximum drama and lift.   |
| Medium Part: Mid-eyebrow line   -> Balanced everyday look.  |
| Subtle Part: One inch off-center -> Gentle soft asymmetry.  |
| Align part with your favorite facial feature side.          |
| Experiment on wet hair before committing to cut lines.      |
+-------------------------------------------------------------+
Weight Distribution Across the Rear Crown
Asymmetrical cuts must blend cleanly around the back head area. Stylists cut diagonal section lines running across rear crown spaces. Smooth diagonal lines prevent awkward steps from forming in back.
+-------------------------------------------------------------+
|                    REAR BLENDING WORKFLOW                   |
+-------------------------------------------------------------+
| 1. Section rear hair along diagonal parting line.           |
| 2. Connect short side to long side with angled shears.      |
| 3. Point-cut interior ends to remove harsh stair-steps.     |
| 4. Diffuse rear hair completely to review smooth slope.     |
| 5. Refine lower neck hairline for clean edge alignment.     |
+-------------------------------------------------------------+
Styling Accessories for Asymmetrical Accents
Decorative clips elevate asymmetrical silhouettes for formal events. Pin back the shorter side using metallic decorative Bobby pins. Leaving the long side free creates striking red-carpet contrast.
+-------------------------------------------------------------+
|                   ACCESSORY STYLING STEPS                   |
+-------------------------------------------------------------+
| 1. Smooth shorter side hair toward back ear base.           |
| 2. Slide decorative clip horizontally above ear line.       |
| 3. Apply firm hold spray to keep short side smooth.         |
| 4. Fluff longer opposite side Curls for maximum volume.    |
| 5. Let free side Curls frame collarbone area dramatically.  |
+-------------------------------------------------------------+
9. Bottleneck Bangs with Shag Haircuts
Bottleneck bangs narrow near eyes and widen near your cheekbones. Combined with soft, layered strands, this style creates incredible fluid movement. It gives curls a soft, seamless transition from top to bottom.
+-------------------------------------------------------------+
|                   BOTTLENECK STYLING                        |
+-------------------------------------------------------------+
| 1. Part bangs down the middle while damp.                   |
| 2. Angle side pieces outward using styling cream.           |
| 3. Diffuse bangs gently on low airflow setting.            |
| 4. Set shape with a light flexible hairspray.               |
| 5. Separate center gap lightly using index fingers.         |
+-------------------------------------------------------------+

Methods for Softening Layer Transitions Smoothly
Tapering techniques create soft, textured ends that curl effortlessly every time. This prevents harsh lines between short bangs and longer hair lengths. The outcome is fluid, bohemian movement full of modern elegance.
+-------------------------------------------------------------+
|                     FLUID LAYER BLENDING                    |
+-------------------------------------------------------------+
| 1. Connect center bang pieces softly to cheekbones.         |
| 2. Angle side fringe layers into mid-length strands.        |
| 3. Soften all joining lines with point-cutting tips.        |
| 4. Check smooth flow while ringlets dry naturally.          |
| 5. Re-trim dry stray Curls that disrupt slope line.         |
+-------------------------------------------------------------+
Protective Care Ways for Keeping Ends Healthy
Keep razor-cut ends hydrated with daily leave-in moisture sprays. Avoid using high-heat styling tools to maintain healthy strand elasticity. Use deep treatment masks bi-weekly to prevent split ends completely.
+-------------------------------------------------------------+
|                     DAILY ENDS PROTECTION                   |
+-------------------------------------------------------------+
| 1. Spritz moisture spray onto dry ends mid-day.             |
| 2. Seal tips using small drops of argan oil.               |
| 3. Avoid brush usage on delicate dry ends completely.       |
| 4. Apply deep mask once every two weeks.                    |
| 5. Sleep on silk pillowcase to prevent friction split ends.|
+-------------------------------------------------------------+
Answering Face Shape Compatibility Questions
Bottleneck bangs suit almost every face shape due to curved outlines. Narrow center openings draw eyes inward toward center face areas. Widening lower arches frame cheekbones beautifully across all cheek shapes.
+-------------------------------------------------------------+
|                  FACE SHAPE ADAPTATION CHART                |
+-------------------------------------------------------------+
| Heart Face:  Widen lower arch to balance narrow chin.       |
| Square Face: Curve outer edges to soften strong jawlines.  |
| Oval Face:   Keep classic proportions for balanced frame.   |
| Round Face:  Elongate center narrow slot slightly longer.  |
| Custom-fit opening width to match cheekbone width.         |
+-------------------------------------------------------------+
Finger Coiling Techniques for Center Partings
Finger coiling establishes clean separation along center part lines. Dampen central bang section completely before applying styling cream. Wrap small curl groups around fingers twisting away from center.
+-------------------------------------------------------------+
|                    FINGER COILING ROUTINE                   |
+-------------------------------------------------------------+
| 1. Establish clean center part using tail comb tip.         |
| 2. Coat left bang section with small cream drop.            |
| 3. Twist left section around index finger counter-clockwise.|
| 4. Repeat process on right section twisting clockwise.      |
| 5. Allow coils to air-dry before shaking open softly.       |
+-------------------------------------------------------------+
Restoring Bounce to Stretched Frontier Curls
Front bangs lose spring quickly from frequent touching throughout day. Refresh spring by spraying water mixed with leave-in conditioner. Scrunch upward toward scalp line and hold briefly until dry.
+-------------------------------------------------------------+
|                    BOUNCE RECOVERY PROTOCOL                 |
+-------------------------------------------------------------+
| 1. Mix three parts water with one part conditioner in spray.|
| 2. Mist stretched front bang coils lightly.                 |
| 3. Cup coils in palm and press upward gently.               |
| 4. Hold position for fifteen seconds to re-form shape.      |
| 5. Let air dry completely without further touching.         |
+-------------------------------------------------------------+
10. The Wolf Cut Inspired Haircuts
The wolf cut combines severe crown layers with longer, wispy lengths. This edgy hybrid offers extreme volume on top and tapered ends. It transforms natural curly textures into a bold, rock-and-roll statement.
+-------------------------------------------------------------+
|                     WOLF SHAG ROUTINE                       |
+-------------------------------------------------------------+
| 1. Apply strong hold curl mousse to wet hair.              |
| 2. Flip head over and diffuse roots for height.             |
| 3. Scrunch ends upwards with texturizing spray.             |
| 4. Shake out crown layers for maximum drama.               |
| 5. Piece out ends using lightweight pomade wax.             |
+-------------------------------------------------------------+

Creating Extreme Contrast Across Layer Heights
Stylists cut short layers across top while keeping length below. This creates high contrast between voluminous crown strands and lighter ends. It works remarkably well on thick, tight ringlet hair textures.
+-------------------------------------------------------------+
|                     HIGH-CONTRAST LAYERING                  |
+-------------------------------------------------------------+
| 1. Create short choppy layers across top crown.             |
| 2. Keep lower back perimeter lengths long wispy.            |
| 3. Blend middle section aggressively for dramatic drop.     |
| 4. Shake out layers to verify distinct heights.             |
| 5. Detail outer perimeter using slice cutting methods.      |
+-------------------------------------------------------------+
Actionable Styling Ways for Maximum Crown Volume
Boost volume at the crown using a lightweight texturizing powder. Puff powder directly into roots and massage with your fingertips. This keeps these haircuts looking dramatic and full all day long.
+-------------------------------------------------------------+
|                     ROOT LIFT APPLICATION                   |
+-------------------------------------------------------------+
| 1. Part top crown layers into small sub-sections.           |
| 2. Dust texturizing powder lightly onto root bases.         |
| 3. Massage scalp with fingertips to activate grip.          |
| 4. Tousle top layers for instant dramatic lift.             |
| 5. Spray light aerosol hairspray to lock height.           |
+-------------------------------------------------------------+
Diffusing Upside Down for Extreme Crown Height
Diffusing upside down utilizes gravity to pull roots off scalps. Flip head forward completely while hair is ninety percent damp. Place diffuser bowl directly against scalp and push upward gently.
+-------------------------------------------------------------+
|                    UPSIDE DOWN DIFFUSING                    |
+-------------------------------------------------------------+
| 1. Bend forward at waist allowing hair to hang free.        |
| 2. Apply heat protectant spray across root bases.           |
| 3. Press diffuser against scalp holding thirty seconds.     |
| 4. Move systematically across crown and nape areas.         |
| 5. Flip head back upright and shake out roots.              |
+-------------------------------------------------------------+
Defining Piecey Tapered Ends in Lower Back
Lower back lengths must look intentionally piecey rather than thin. Rub small wax pomade amount between index finger and thumb. Pinch individual lower curl ends together to form defined points.
+-------------------------------------------------------------+
|                    PIECE-OUT ENDS ROUTINE                   |
+-------------------------------------------------------------+
| 1. Warm dime-sized pomade amount between finger pads.       |
| 2. Identify lower wispy strands along neck area.            |
| 3. Pinch strand ends pulling downward gently to set.        |
| 4. Repeat across all lower perimeter Curls.                 |
| 5. Mist lightly with shine spray for glossy finish.         |
+-------------------------------------------------------------+
Long-Term Retention and Shape Up Schedules
Wolf shag cuts require professional shape-ups every five weeks. Short crown layers grow out faster visually than longer lower ends. Regular maintenance prevents top volume from flattening out over time.
+-------------------------------------------------------------+
|                    SHAPE UP MAINTENANCE                     |
+-------------------------------------------------------------+
| Week 1 to 3: Enjoy peak shape and maximum volume.           |
| Week 4: Use root powder to maintain crown height.           |
| Week 5: Visit stylist to re-shorten crown layers.           |
| Keep lower perimeter length untouched during trim.           |
| Refresh interior texture channels for airy bounce.          |
+-------------------------------------------------------------+
Comprehensive Styling Comparison & Maintenance Matrix
| Haircut Style | Crown Volume Level | Maintenance Cycle | Ideal Curl Density | Primary Styling Product | Daily Reset Time |
|---|---|---|---|---|---|
| Classic Shaggy Layered | Moderate | 6 Weeks | Medium to Thick | Hydrating Curl Cream | 5 Minutes |
| Curly Shag + Curtain Bangs | Medium | 4 to 5 Weeks | Loose to Medium | Flexible Hairspray | 7 Minutes |
| Textured Shag + Micro Bangs | High Surface | 3 Weeks | Tight Ringlets | Smoothing Pomade | 10 Minutes |
| Feathered Crown Shag | High Lift | 5 Weeks | Fine to Medium | Volumizing Mousse | 8 Minutes |
| Deconstructed Wispy Shag | Light Soft | 6 to 8 Weeks | Fine Density | Sea Salt Spray | 3 Minutes |
| Shaggy Bob Hybrid | Balanced Compact | 5 Weeks | Medium Density | Curl Defining Foam | 5 Minutes |
| Heavy Fringe Modern Shag | Dense Frontal | 4 Weeks | Medium to High | Light Hold Gel | 8 Minutes |
| Asymmetrical Boho Shag | Angular Side | 5 Weeks | All Density Types | Strong Hold Gel | 7 Minutes |
| Bottleneck Bangs + Shag | Soft Framed | 4 to 5 Weeks | Soft Wavy Curls | Leave-In Moisture Spray | 6 Minutes |
| Wolf Cut Inspired Shag | Extreme Height | 4 to 5 Weeks | Thick Dense Curls | Texturizing Powder | 10 Minutes |
Leave a Reply