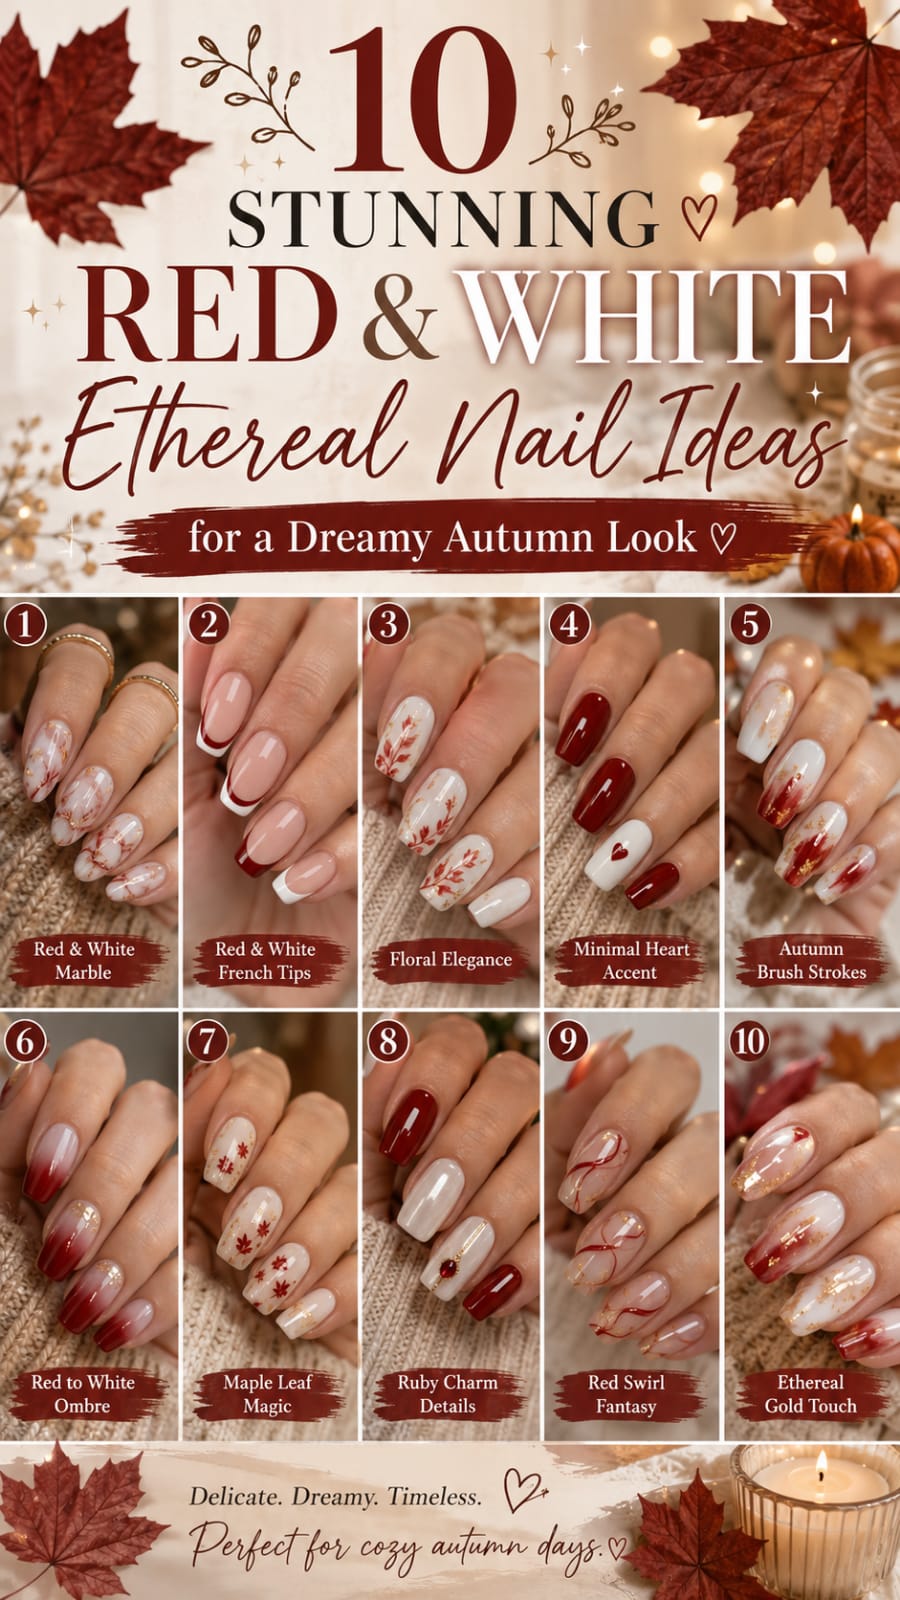
Autumn provides the perfect backdrop for exploring creative, sophisticated beauty trends. When the crisp weather arrives, transitioning your seasonal style becomes a top priority. A curated red & white nail look brings instant warmth, contrast, and elegance to your daily aesthetic.
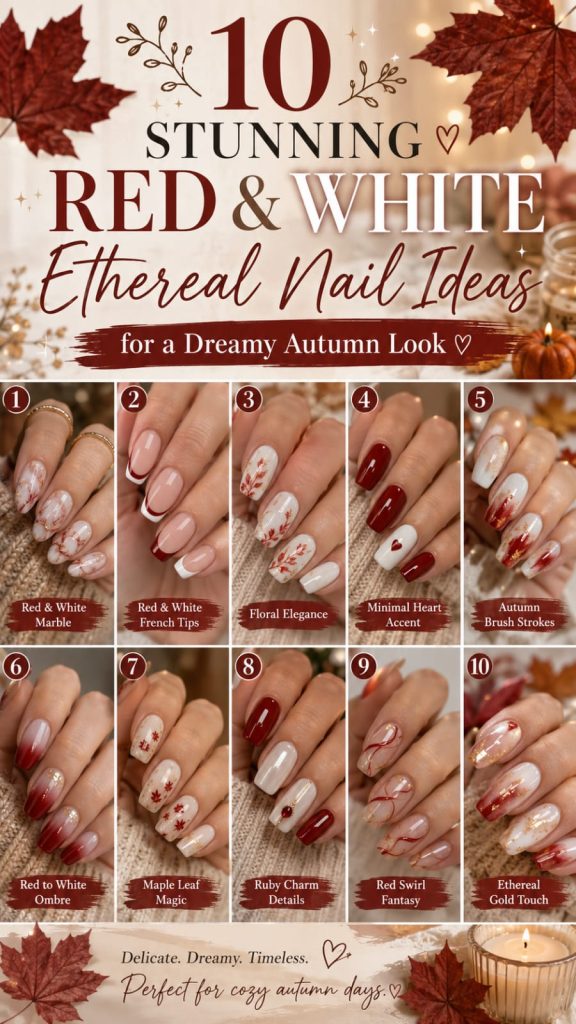
Crimson and alabaster palettes capture both cozy seasonal energy and timeless beauty. From delicate swirls to velvet textures, these contrasting shades create depth and visual excitement. Incorporating fresh ideas into your manicure routine will elevate your everyday fall ensembles effortlessly.
Textured knits, pumpkin lattes, and golden afternoon leaves pair beautifully with dynamic manicures. Red delivers romantic drama, while soft white softens the overall visual impact. Together, they create a dreamy harmony that fits any seasonal gathering or formal event.
Whether you prefer minimalist micro-details or bold layered designs, options are limitless. Exploring diverse manicures allows you to express your seasonal creativity with confidence. Let these ten dreamy concepts inspire your upcoming autumn beauty appointments.
1. Spiced Cranberry and Milky Quartz Swirls
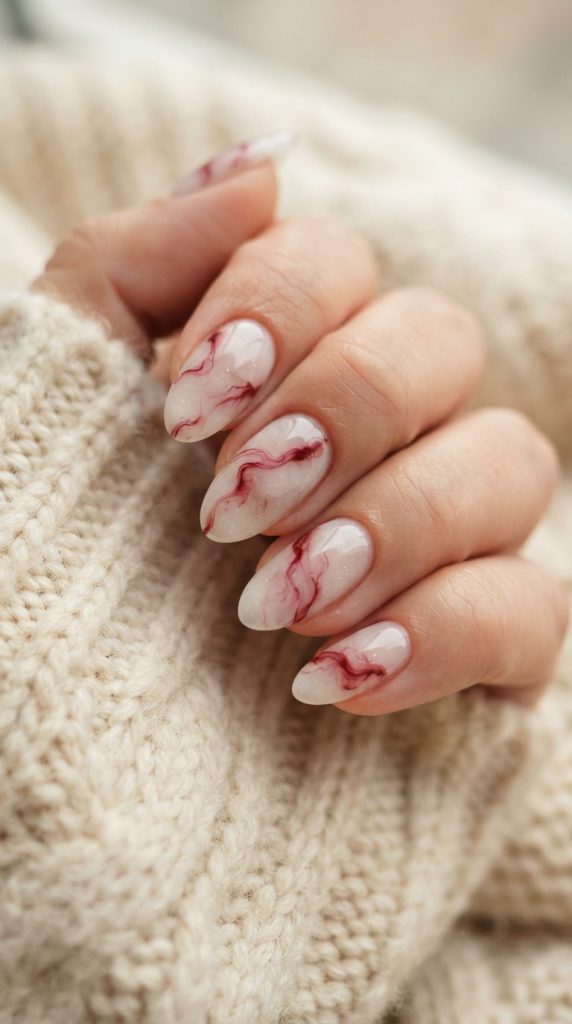
This style blends deep cranberry jelly with soft, semi-translucent milky quartz swirls. It evokes the feeling of tart autumn berries resting in fresh morning cream.
+-----------------------------------------------------------+
|          Cranberry Quartz Style Breakdown                 |
+-------------------+---------------------------------------+
| Base Finish       | Sheer Milky White Jelly Lacquer       |
| Accent Detail     | Swirled Spiced Cranberry Gel Pigment  |
| Ideal Length      | Medium Almond or Soft Oval Silhouette |
| Complementary Look| Cashmere Cardigans, Pearl Rings       |
+-------------------+---------------------------------------+
Aesthetic Inspiration for Red & White Nail Concepts
The design draws inspiration from natural gemstone marbling and seasonal spiced berry compote. The sheer white base keeps the appearance weightless, modern, and delightfully ethereal.
Deep cranberry ribbons float across the nail plate to create organic movement. Because each swirl is freehand, no two nails look completely identical.
This fluid variation ensures a bespoke finish that catches soft autumn daylight. It delivers high-end elegance that feels understated yet undeniably eye-catching.
Warm berry tones flatter cool and golden skin undertones alike. The milky backdrop softens the dramatic crimson, making it universally wearable.
Essential Tools and Lacquer Choices
To achieve this marble finish, choose a sheer milky white builder gel. Pair it with a rich, highly pigmented cranberry jelly lacquer.
You also need an ultra-thin striper brush for delicate fluid art. A clear blooming gel helps disperse the berry lines smoothly without harsh borders.
Keep a bottle of high-gloss, non-wipe topcoat ready to finish. Quality lint-free wipes and isopropyl alcohol ensure seamless cleanups between steps.
Investing in pure pigments guarantees your marbling stays vibrant without muddy blending.
Step-by-Step Application and Shaping Steps
- Prep the natural nails by gently pushing cuticles back.
- File the free edges into an elegant, slender almond shape.
- Apply a thin layer of dehydrator and adhesive gel base.
- Paint two coats of sheer milky white, curing between each.
- Apply a wet layer of clear blooming gel without curing.
- Drop cranberry pigment into the blooming gel using a brush.
- Swirl the berry lines gently to create natural stone veins.
- Cure under an LED lamp for sixty full seconds.
- Seal the entire design with a glossy protective topcoat.
Styling Combinations and Longevity Preservation Ways
Pair these marble nails with cream cable-knit sweaters and gold stacked bands. The semi-translucent base ensures natural nail growth remains inconspicuous over several weeks.
Apply nourishing cuticle oil morning and evening to maintain maximum shine. Avoid using your nails as tools to prevent lifting along the side walls.
Reapply a thin layer of clear topcoat every five days. This quick step refreshes the high-gloss shine and seals outer edges.
2. Frosted Vanilla and Velvet Crimson French
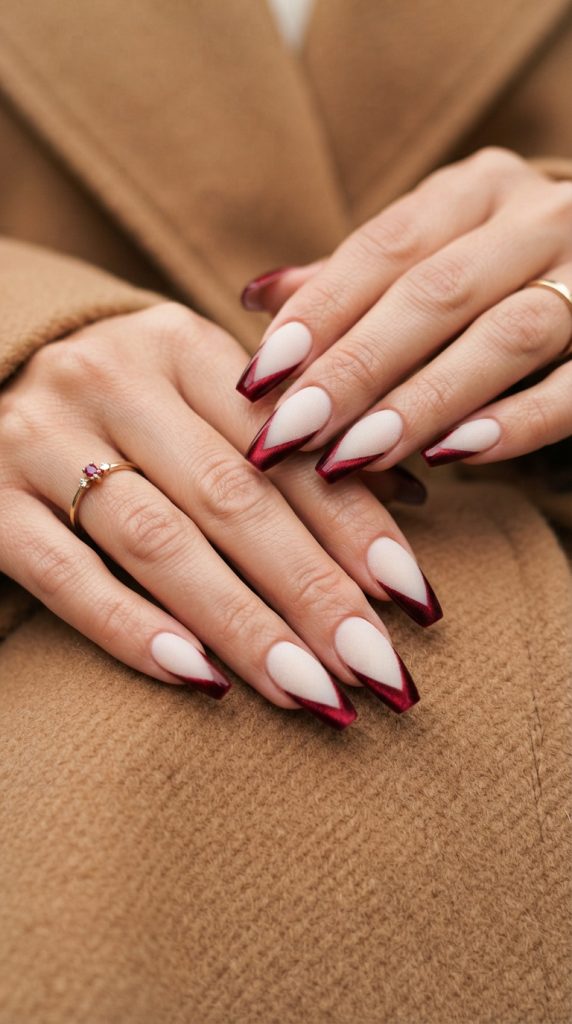
This modern take on the French manicure replaces traditional white with frosted vanilla. A deep velvet crimson smile line adds rich, touchable texture across the tips.
+-----------------------------------------------------------+
|           Frosted Velvet French Breakdown                 |
+-------------------+---------------------------------------+
| Base Finish       | Matte Frosted Vanilla Cream Base      |
| Accent Detail     | Magnetic Velvet Crimson Tip Lines     |
| Ideal Length      | Long Coffin or Structured Square      |
| Complementary Look| Camel Wool Overcoats, Suede Boots     |
+-------------------+---------------------------------------+
Aesthetic Appeal and Visual Harmony
This concept pairs a matte neutral base with shimmering magnetic velvet tips. The frosty vanilla foundation creates a clean, calm background for dramatic contrast.
The velvet crimson smile line catches ambient light with every hand gesture. It mimics the plush, cozy texture of heavy autumn evening fabrics.
By keeping the French smile line crisp, your fingers appear elongated instantly. The combination feels festive, sophisticated, and perfect for early holiday celebrations.
It represents the ultimate balance between modern minimalism and glamorous seasonal flair.
Essential Materials for Magnetic Gel Finishes
Acquire a matte finish gel topcoat and a frosted vanilla base. You need a premium red magnetic cat-eye gel for the tips.
A strong neodymium wand magnet is essential to direct the velvet particles. A fine French detail brush allows you to draw razor-sharp smile lines.
Keep pure acetone nearby in a glass dappen dish for corrections. Clean brushes allow you to sculpt perfect, symmetrical French curves effortlessly.
High-density magnetic particles provide the deepest 3D shimmer across the tips.
Step-by-Step Application and Shaping Steps
- Shape nails into a crisp, modern square or long coffin.
- Apply an acid-free primer and a durable rubber base.
- Paint two smooth layers of frosted vanilla cream polish.
- Apply a matte topcoat and cure to create the base.
- Dip a detail brush into red magnetic cat-eye polish.
- Paint a deep French smile line along the free edge.
- Hover the magnet beneath the tip to pull shimmer upward.
- Cure immediately under the LED lamp to lock the particles.
- Cap the velvet tip with glossy topcoat for contrast.
Styling Combinations and Longevity Preservation Ways
This textured French manicure complements tailored camel blazers and dark denim effortlessly. The contrast between matte and gloss adds an editorial, high-fashion touch.
Protect the magnetic tips by avoiding harsh abrasive household cleaners. Always wear rubber gloves when washing dishes or cleaning kitchen surfaces.
Massage vitamin E oil into your cuticles daily to prevent hangnails. Keeping the skin supple highlights the crisp lines of the manicure.
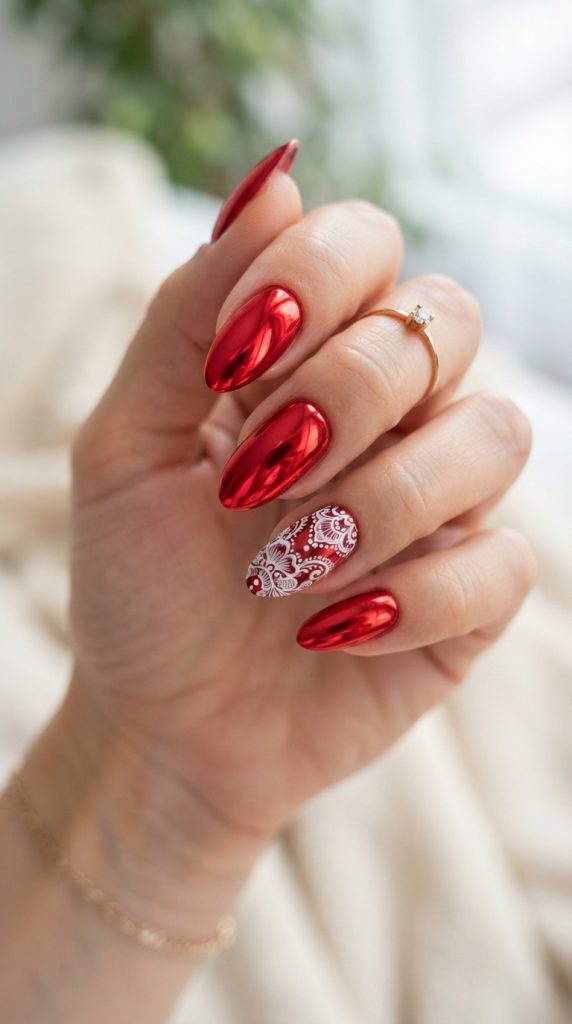
3. Candy Apple Chrome with Pearl Lace Accents
Combining high-shine candy apple chrome with hand-painted white lace creates an ethereal look. It captures the balance between bold seasonal energy and delicate vintage romance.
+-----------------------------------------------------------+
|            Candy Apple Chrome Breakdown                   |
+-------------------+---------------------------------------+
| Base Finish       | Mirror Candy Apple Red Chrome Powder  |
| Accent Detail     | Hand-Painted Ultra-Fine White Lace    |
| Ideal Length      | Medium Almond or Tapered Squoval      |
| Complementary Look| Vintage Lace Blouses, Gold Hoops      |
+-------------------+---------------------------------------+
Aesthetic Inspiration and Style Blueprint
The high-shine candy apple chrome mimics polished autumn apples and glossy candy. Its reflective surface creates an energetic, mirror-like foundation across your nails.
Delicate chalk-white lace patterns painted over top soften the bold red chrome. The contrast feels like vintage lace resting over luxurious red satin ribbons.
This look is perfect for festive dinner parties and autumn celebrations. It reflects light dynamically, making it a standout feature in any room.
The intricate lace work showcases incredible artistic craftsmanship and refined personal taste.
Essential Red & White Nail Preparation Methods
Start with a high-pigment crimson gel and mirror red chrome powder. A no-wipe gel topcoat is vital for rubbing the chrome powder smoothly.
Select an opaque white art gel that has zero dispersion layer. This ensures that your delicate lace lines do not bleed or spread.
You need an ultra-fine detail brush with seven-millimeter synthetic bristles. A silicone buffing tool guarantees a smooth, streak-free chrome powder application.
Prepping the nail plate thoroughly prevents premature chipping along the free edge.
Step-by-Step Application and Shaping Steps
- File and buff the natural nail surface into a smooth almond.
- Apply a bonding base coat and cure for thirty seconds.
- Paint two coats of deep red gel, curing between layers.
- Apply a non-wipe topcoat and cure for thirty seconds.
- Buff the red chrome powder evenly across the nail plate.
- Dust away all loose pigment particles using a fluffy brush.
- Dip your detail brush into opaque white painting gel.
- Paint delicate floral lace meshes across chosen accent nails.
- Cure the lace artwork for sixty seconds to set completely.
- Seal the entire design with a scratch-resistant glossy topcoat.
Styling Combinations and Longevity Preservation Ways
Wear this romantic design alongside ivory knit sweaters and delicate gold jewelry. The high-shine chrome reflects candlelight beautifully during intimate autumn dinners.
To maintain the chrome finish, ensure the free edge is capped securely. Exposed chrome powder can wear away quickly with daily keyboard typing.
Hydrate your hands with rich shea butter lotion after every hand wash. Well-moisturized hands keep the chrome looking vibrant and fresh for weeks.
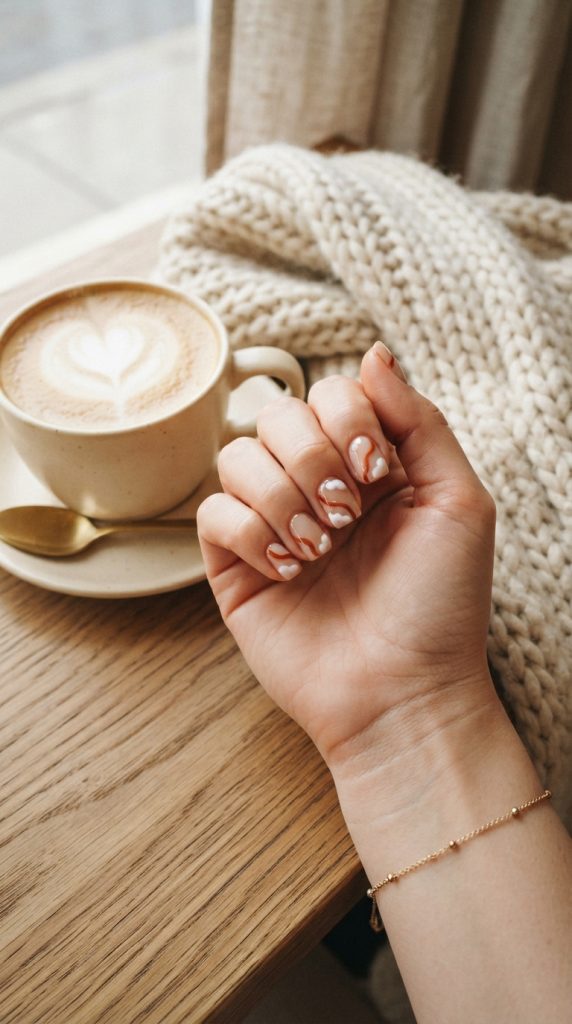
4. Cinnamon Glaze and Marshmallow Cloud Negative Space
Negative space manicures remain an artistic favorite for modern beauty lovers everywhere. This design pairs warm cinnamon red arcs with fluffy marshmallow white accents.
+-----------------------------------------------------------+
|          Cinnamon Cloud Negative Space Breakdown          |
+-------------------+---------------------------------------+
| Base Finish       | Clear Bare-Nail Sheer Gloss Base      |
| Accent Detail     | Cinnamon Arcs and Marshmallow Clouds  |
| Ideal Length      | Short Natural Square or Oval Nails    |
| Complementary Look| Chunky Knits, Canvas Tote Bags        |
+-------------------+---------------------------------------+
Aesthetic Appeal and Visual Harmony
This minimalist style celebrates the natural beauty of the bare nail bed. Cinnamon red geometric arcs sweep across the perimeter, creating structured visual interest.
Soft marshmallow white clouds float over the negative space to balance shapes. The transparent background creates an airy, weightless aesthetic that feels fresh.
Because the cuticle zone remains clear, regrowth appears completely seamless over time. This makes it an exceptionally low-maintenance option for busy seasonal schedules.
The warm cinnamon shade adds seasonal comfort without overwhelming shorter nail shapes.
Essential Tools and Lacquer Choices
You need a sheer nude base coat that enhances your natural nail. Choose a warm cinnamon red gel and an opaque marshmallow white.
A striping tape tool helps create sharp, clean borders for geometric sections. A small dotting tool allows you to paint fluffy cloud curves easily.
Prepare a flat cleanup brush dipped in alcohol to sharpen edges. A ridge-filling base ensures your bare nail looks smooth and uniform.
Quality high-viscosity gels ensure your negative space art stays sharply defined.
Step-by-Step Application and Shaping Steps
- Clean the nail bed with alcohol to remove natural oils.
- Apply a nourishing, tinted sheer nude base coat smoothly.
- Cure the base layer for thirty seconds under your lamp.
- Place striping tape diagonally across the side of the nail.
- Paint the outer section with warm cinnamon red lacquer.
- Remove the tape carefully before curing to ensure crisp lines.
- Cure the red section for sixty seconds under the lamp.
- Use a dotting tool to create white cloud puffs nearby.
- Connect the dots with a detail brush to form clouds.
- Seal the nail with a long-lasting, plump gel topcoat.
Styling Combinations and Longevity Preservation Ways
This playful geometric set pairs effortlessly with casual denim and flannel shirts. It adds an artistic, modern touch to everyday cozy autumn outfits.
Because natural growth is invisible, you can wear this set longer. Simply reapply a thin coat of clear gloss after two weeks.
Keep cuticles tidy by using a gentle exfoliating cuticle remover weekly. Clean borders ensure your negative space design remains sharp and polished.
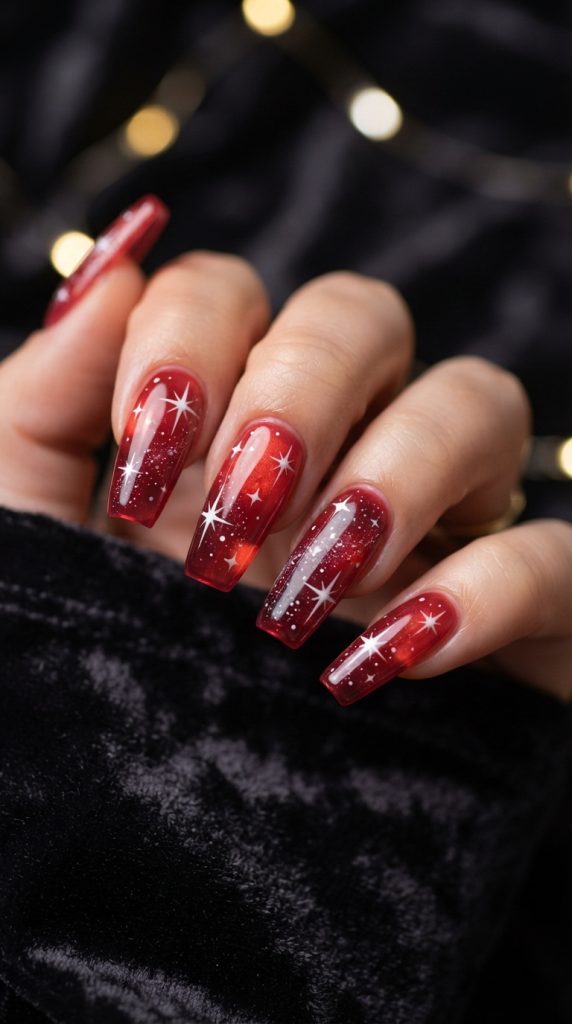
5. Pomegranate Glaze with Frosted Snowflake Stars
As autumn transitions into early winter, celestial motifs bring magical seasonal charm. This manicure features a glowing pomegranate jelly base paired with hand-painted stars.
+-----------------------------------------------------------+
|           Pomegranate Glaze Star Breakdown                |
+-------------------+---------------------------------------+
| Base Finish       | Translucent Pomegranate Jelly Glaze   |
| Accent Detail     | Crisp White Starlight & Micro Sparkles|
| Ideal Length      | Medium Almond or Long Ballerina Nails |
| Complementary Look| Velvet Dresses, Sparkling Drop Earrings|
+-------------------+---------------------------------------+
Aesthetic Inspiration and Style Blueprint
The juicy pomegranate glaze captures the rich warmth of late autumn fruits. Its glass-like transparency allows light to pass directly through the nail.
Crisp white four-point starbursts twinkle across the glowing berry backdrop effortlessly. Tiny micro-dots mimic distant galaxies, adding an ethereal, fairytale dimension to hands.
The contrast between deep red jelly and bright white stars is mesmerizing. It works wonderfully for autumn date nights, evening galas, and holiday parties.
This enchanting design brings a touch of celestial wonder to your fingertips.
Red & White Nail Blending and Gradient Methods
Begin with a sheer pomegranate red jelly polish with buildable coverage. Gather an ultra-pigmented white spider gel or white painting paste.
A fine silicone dotting tool allows you to create sharp star points. A high-gloss builder gel provides the dimensional glass depth you need.
Keep a dual-ended nail art brush nearby for delicate constellation line work. Isopropyl alcohol wipes ensure no sticky dispersion layers remain before detail work.
Using high-viscosity white gel prevents star points from sagging or blurring.
Step-by-Step Application and Shaping Steps
- Prepare the nail plates and apply a flexible bonding base.
- Paint one thin coat of pomegranate jelly and cure fully.
- Apply a second jelly coat to deepen the rich red color.
- Add a drop of clear builder gel to create volume.
- Cure under the LED lamp for sixty full seconds.
- Dip a fine detail brush into white painting gel.
- Paint a thin vertical line, followed by a horizontal cross.
- Pull delicate diagonal rays outward from the star center.
- Add tiny white galaxy dots around the main starbursts.
- Seal with a high-shine topcoat and cure for sixty seconds.
Styling Combinations and Longevity Preservation Ways
Pair these celestial nails with dark velvet dresses and sparkling silver accessories. The deep jelly tone provides an alluring, moody elegance for evening wear.
To protect the fine star art, apply two thin layers of topcoat. Double-capping the edges prevents the white paint from wearing away prematurely.
Massage organic argan oil into your nail beds before going to sleep. Regular hydration prevents the gel enhancements from becoming brittle over time.
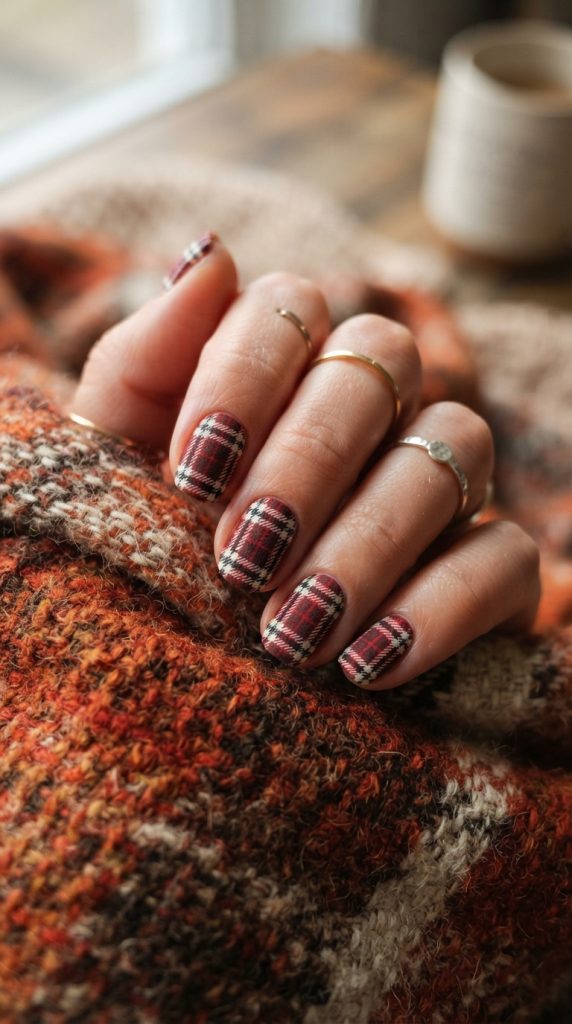
6. Scarlet Plaid Tartan with Cream Wool Texture
Nothing says autumn quite like classic tartan plaid patterns wrapped around nails. This design combines rich scarlet red with cozy cream lines and matte finishes.
+-----------------------------------------------------------+
|             Scarlet Plaid Tartan Breakdown                |
+-------------------+---------------------------------------+
| Base Finish       | Deep Scarlet Red and Cream White Base |
| Accent Detail     | Multi-Layered Autumn Tartan Plaid Art |
| Ideal Length      | Short to Medium Square or Squoval     |
| Complementary Look| Wool Trench Coats, Leather Loafers    |
+-------------------+---------------------------------------+
Aesthetic Appeal and Visual Harmony
Tartan plaid brings rustic heritage fashion directly to your seasonal beauty routine. The bold scarlet backdrop provides a warm, energetic foundation for crisp lines.
Cream and soft white stripes intersect to mimic woven wool blanket textures. A velvety matte finish softens the colors, making them look touchably cozy.
This manicure brings a cozy cabin vibe to your everyday autumn lifestyle. It pairs seamlessly with rustic outdoor settings, harvest festivals, and holiday travels.
The structured geometric lines add order and sophistication to natural nail shapes.
Essential Tools and Lacquer Choices
Collect an opaque scarlet red polish, a rich cream, and black gel. A long striper brush with twelve-millimeter bristles creates straight lines effortlessly.
A matte topcoat gives the finished design its signature wool fabric texture. Acrylic dip powder sprinkled over wet lines adds realistic 3D sweater texture.
Keep a precision cleanup brush ready to correct any wavy line paths. Having steady hand support makes drawing intersecting tartan lines much easier.
High-pigment art gels ensure that thin lines remain completely opaque over red.
Step-by-Step Application and Shaping Steps
- Shape nails into neat, clean squoval or short square silhouettes.
- Apply an adhesive base coat and cure under your lamp.
- Paint two smooth coats of scarlet red on chosen nails.
- Paint accent nails with an opaque cream white base polish.
- Dip your long striper brush into creamy white painting gel.
- Draw two parallel vertical lines down the red accent nail.
- Paint intersecting horizontal lines across the vertical stripes smoothly.
- Add ultra-thin black accent lines between the cream grid squares.
- Dust clear acrylic powder over the wet lines for texture.
- Cure completely, then seal with a soft-touch matte topcoat.
Styling Combinations and Longevity Preservation Ways
This cozy tartan manicure looks exceptional alongside wool trench coats and leather loafers. It complements rustic plaid scarves, dark denim jackets, and leather accessories.
Matte finishes can pick up daily oils, so clean them with alcohol wipes. Gently wiping the surface restores the velvety, soft-touch matte look instantly.
Apply a nourishing cuticle cream daily to keep your nail margins smooth. Proper care prevents lifting around the sidewalls during cold weather snaps.
7. Deep Crimson Ombre with Sugar White Sweater Knits
Combining gradient color transitions with raised 3D sweater knit patterns creates magic. This design transitions from deep crimson to soft white, topped with cable-knit art.
+-----------------------------------------------------------+
|          Crimson Sweater Ombre Breakdown                  |
+-------------------+---------------------------------------+
| Base Finish       | Seamless Deep Crimson to White Ombre  |
| Accent Detail     | Raised 3D Cable-Knit Texture Accents  |
| Ideal Length      | Medium Almond or Stiletto Shape       |
| Complementary Look| Oversized Sweaters, Wool Beanies      |
+-------------------+---------------------------------------+
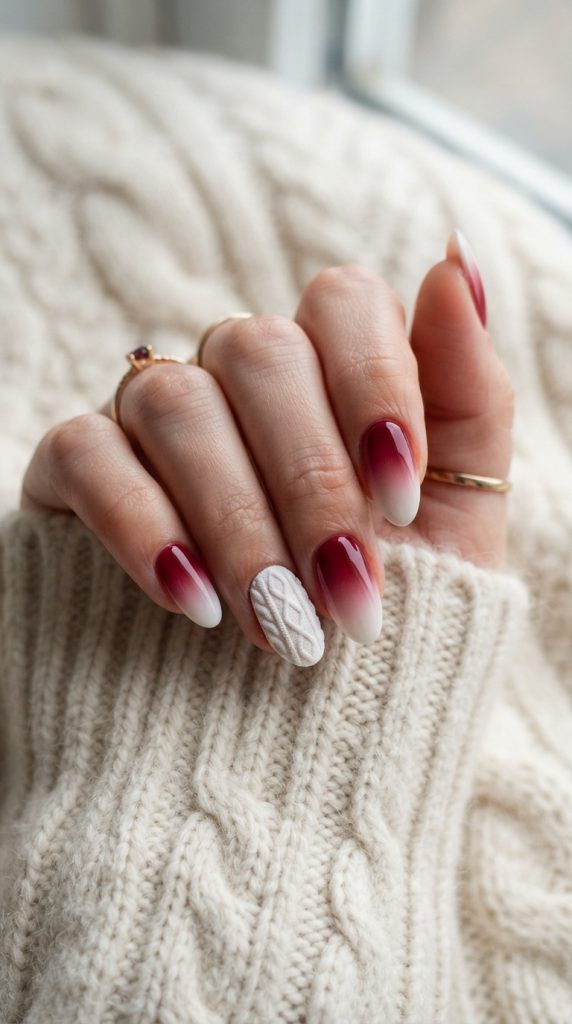
Aesthetic Inspiration and Style Blueprint
This design channels the ultimate cozy feeling of wrapping up in wool. The seamless ombre gradient softens the bold transition between crimson and white.
Raised 3D cable-knit patterns embossed over accent nails mimic favorite autumn sweaters. The tactile surface invites touch, making your manicure feel warm and interactive.
The white tips brighten the overall set, making hands look graceful. It is a stunning, festive choice for Thanksgiving dinners and cozy weekends.
This textured style showcases advanced nail art techniques with effortless, cozy charm.
Refining Your Red & White Nail Line Art Steps
You will need deep crimson gel, pure white gel, and clear acrylic. A dense ombre blending sponge helps achieve smooth, streak-free color gradients.
A 3D sculpting gel or thick builder paste creates raised cable knits. A fine liner brush allows you to draw intricate braided sweater stitches.
Keep a manicure duster brush ready to sweep away excess acrylic grains. A dependable matte topcoat locks in that authentic wool fabric appearance.
Using highly viscous gels ensures your 3D sweater braids hold their shape.
Step-by-Step Application and Shaping Steps
- Prep the nail surface and apply a strengthening base coat.
- Paint the lower half crimson and the upper half white.
- Dab the seam gently with an ombre sponge to blend.
- Cure the first gradient layer and repeat for full opacity.
- Apply a matte topcoat over the ombre and cure fully.
- Dip a fine liner brush into thick white sculpting gel.
- Paint vertical braided cable-knit stitches down the nail center.
- Add small flanking dots and diagonal dashes on the sides.
- Sprinkle clear acrylic powder generously over the wet 3D gel.
- Cure under the lamp for ninety seconds to set hardness.
- Dust away excess powder using a soft, fluffy brush.
Styling Combinations and Longevity Preservation Ways
Match this sweater manicure with oversized knit cardigans and warm wool beanies. The tactile 3D ridges add cozy, dimensional charm to your seasonal wardrobe.
Clean between the raised 3D knit ridges using a soft manicure brush. This prevents makeup, lotions, or dust from settling into the texture.
Keep natural nails supported by maintaining an optimal apex balance during application. Strong architecture prevents breakage on medium to long nail lengths.
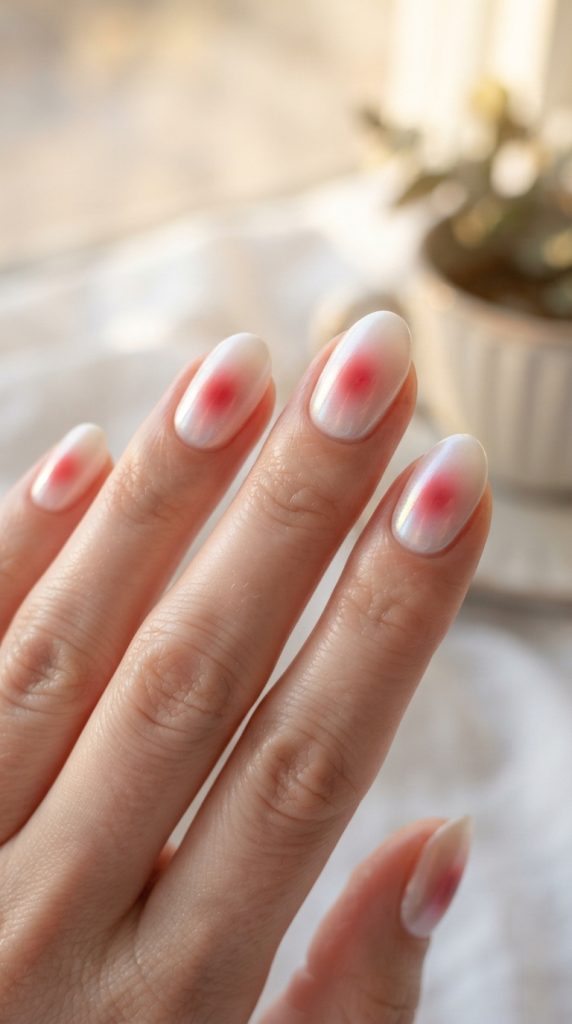
8. Ruby Aura with Frosted Pearl Halo
Aura nails continue to dominate modern beauty feeds with their glowing gradients. This concept features a bright ruby red core surrounded by a frosted pearl halo.
+-----------------------------------------------------------+
|             Ruby Pearl Aura Breakdown                     |
+-------------------+---------------------------------------+
| Base Finish       | Soft Frosted Pearl White Base Lacquer |
| Accent Detail     | Airbrushed Radiant Ruby Red Aura Core |
| Ideal Length      | Medium Almond or Natural Oval Nails   |
| Complementary Look| Silk Blouses, Delicate Gold Pendants  |
+-------------------+---------------------------------------+
Aesthetic Appeal and Visual Harmony
The aura design creates an ethereal, glowing orb in the nail center. Surrounding a vibrant ruby core with frosted pearl white produces breathtaking radiance.
It looks as though light is radiating directly from within your fingertips. The soft gradient edges keep the bold red from appearing harsh or severe.
This futuristic yet romantic style pairs beautifully with modern minimalist fashion. It brings a dreamy, mystical vibe to your everyday autumn beauty routine.
The radiant glow flatters every skin tone by enhancing natural hand warmth.
Styling Options for Red & White Nail Sets
You need a pearlescent white base polish and a vibrant ruby red. A handheld nail airbrush machine or dense cosmetic sponge creates the aura.
Liquid latex protects the skin surrounding your cuticles during airbrushing sessions. A high-gloss topcoat blends the fine pigment particles together seamlessly.
Keep pure acetone handy for cleaning the airbrush nozzle between uses. A fine-grit buffer prepares the pearl base for smooth pigment adhesion.
Using specialized airbrush gel inks ensures ultra-fine, seamless gradient transitions.
Step-by-Step Application and Shaping Steps
- File nails into a symmetrical almond or soft oval shape.
- Apply a bonding base coat and cure for thirty seconds.
- Paint two smooth coats of frosted pearl white polish.
- Cure the pearl base completely under your LED lamp.
- Apply liquid latex around the cuticles to protect skin.
- Spray ruby red ink in a tight circle in the center.
- Build pigment intensity gradually with light, controlled bursts.
- Peel away the protective latex barrier from the skin carefully.
- Clean any stray overspray using an acetone-dipped brush.
- Seal with an ultra-glossy topcoat and cure for sixty seconds.
Styling Combinations and Longevity Preservation Ways
Wear this glowing aura manicure alongside silk blouses and delicate gold pendants. The radiant center adds an ethereal pop of color to neutral outfits.
Maintain the glossy finish by applying a fresh coat of topcoat weekly. This prevents surface scratches from dulling the radiant center gradient glow.
Hydrate your hands with lightweight jojoba oil throughout the busy day. Well-moisturized skin enhances the luminous appearance of your pearlescent base.
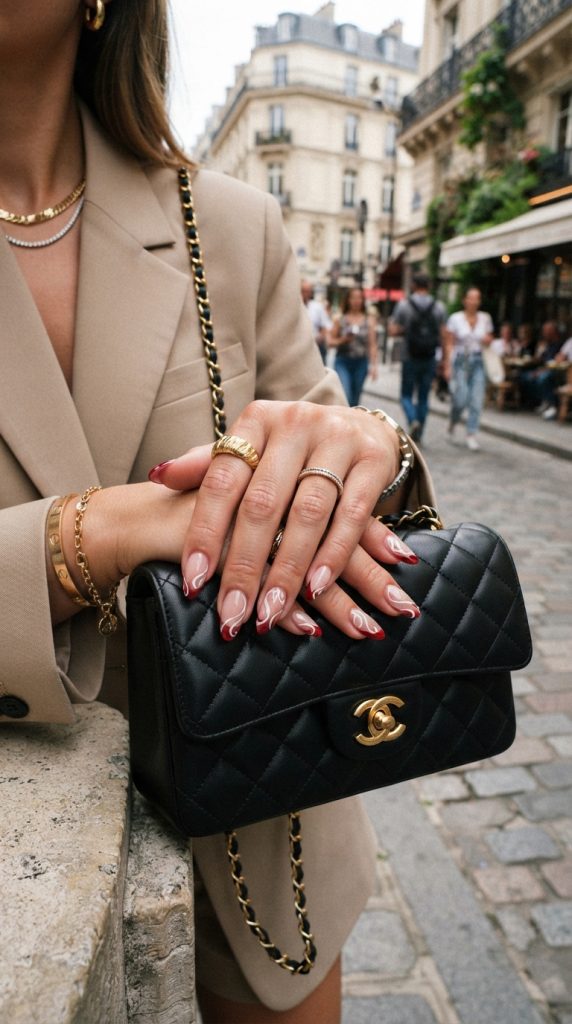
9. Cherry Glaze French with Alabaster Swirl Tendrils
This elegant design updates the French manicure with flowing, abstract line work. It features deep cherry red smile lines accented by floating alabaster swirl tendrils.
+-----------------------------------------------------------+
|          Cherry Swirl French Breakdown                    |
+-------------------+---------------------------------------+
| Base Finish       | Sheer Translucent Nude Pink Base      |
| Accent Detail     | Deep Cherry French with White Swirls  |
| Ideal Length      | Long Almond or Tapered Coffin Nails   |
| Complementary Look| Tailored Blazers, Leather Handbags    |
+-------------------+---------------------------------------+
Aesthetic Inspiration and Style Blueprint
Abstract swirl art brings fluid, modern energy to classic French tip silhouettes. The rich cherry red tip grounds the design with deep autumn elegance.
Delicate alabaster white tendrils twist organically over the smile line and nail bed. The sheer pink base allows your natural nail half-moons to shine through.
This combination feels artistic, lively, and tailored for contemporary fashion lovers. It elongates the fingers while offering an expressive, sculptural finish.
The dynamic curves catch the eye, making your manicure feel fluid and light.
Essential Tools and Lacquer Choices
Prepare a sheer nude-pink base, deep cherry gel, and opaque white liner. A long, flexible striper brush is essential for painting smooth, fluid swirls.
A flat angled French brush makes carving clean smile lines effortless. Keep lint-free wipes and alcohol ready for quick brush cleanings during application.
A strengthening builder base provides structural support for longer nail shapes. High-shine topcoat unifies the raised line art into a smooth surface.
Quality liner gels prevent lines from shrinking or pooling before curing.
Step-by-Step Application and Shaping Steps
- Prep the cuticle area and apply an adhesive base coat.
- Paint two sheer coats of nude-pink base, curing between.
- Use an angled brush to paint deep cherry French tips.
- Clean the smile lines to ensure sharp, symmetrical arches.
- Cure the cherry tips under the lamp for sixty seconds.
- Dip a long striper brush into opaque white liner gel.
- Paint fluid, sweeping swirls that curve across the smile line.
- Add a delicate branch swirl extending downward toward the cuticle.
- Cure the white swirl art for sixty seconds completely.
- Apply a generous layer of high-gloss topcoat to finish.
Styling Combinations and Longevity Preservation Ways
Pair this sculptural French set with tailored blazers and structured leather handbags. It brings a polished, artistic statement to your corporate and weekend looks.
Protect long nail extensions by typing with your finger pads instead. This reduces mechanical stress on the tips and prevents premature lifting.
Apply nourishing cuticle balm every evening to maintain soft skin margins. Keeping cuticles healthy frames the abstract line work beautifully for weeks.
10. Terracotta Red with Frosted Botanical Silhouettes
Terracotta brings an earthy, sun-baked warmth to autumn manicures of all lengths. This look combines warm terracotta red with delicate white botanical leaf silhouettes.
+-----------------------------------------------------------+
|          Terracotta Botanical Breakdown                   |
+-------------------+---------------------------------------+
| Base Finish       | Creamy Earthy Terracotta Red Base     |
| Accent Detail     | Hand-Painted White Botanical Leaves   |
| Ideal Length      | Short Natural Nails or Squoval Shape  |
| Complementary Look| Linen Shirts, Earthy Wool Sweaters    |
+-------------------+---------------------------------------+
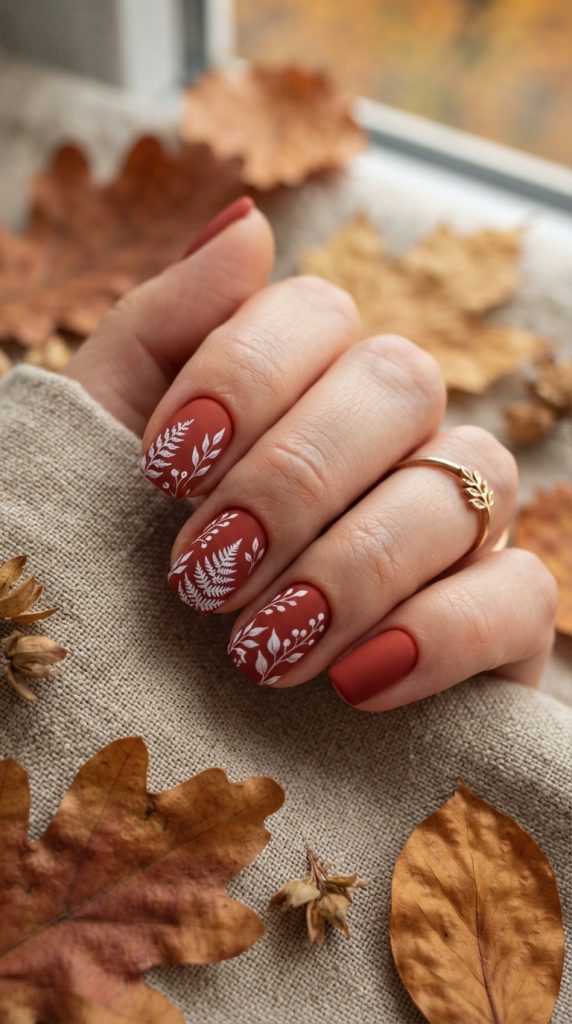
Aesthetic Appeal and Visual Harmony
Terracotta captures the grounding essence of clay pots and fallen autumn leaves. Its warm red-brown undertones feel natural, calming, and deeply seasonal.
Crisp white botanical silhouettes painted over top create an organic, artistic mood. Delicate ferns and eucalyptus leaves appear as if pressed directly onto nails.
The earthy palette looks stunning on short, natural nail shapes for daily wear. It is a fantastic option for nature lovers seeking unique seasonal concepts.
The contrast between warm earth and crisp white feels fresh and grounded.
Longevity Tips for Red & White Nail Extensions
Gather a creamy terracotta polish and an ultra-pigmented white painting gel. You will need a fine detailer brush with sharp five-millimeter bristles.
A matte or satin topcoat gives the botanical art an authentic pressed-leaf look. Keep a palette ring nearby to dispense small drops of gel paint.
A gentle buffing block smooths the terracotta base before intricate detail work. Proper prep ensures your botanical leaf veins remain sharp and precise.
Quality pigments prevent delicate leaf stems from fading under topcoat application.
Step-by-Step Application and Shaping Steps
- Shape nails into a tidy, natural squoval or short oval.
- Apply a bonding base coat and cure for thirty seconds.
- Paint two thin, even coats of creamy terracotta red polish.
- Cure the base coats under the LED lamp for sixty seconds.
- Dispense a pea-sized amount of white gel paint onto your palette.
- Dip your detail brush in paint, rolling it into a point.
- Paint a central curved stem cascading diagonally across the nail.
- Add small, teardrop-shaped leaf pairs along both sides of the stem.
- Add tiny white accent dots along the perimeter for balance.
- Cure the artwork for sixty seconds under your LED lamp.
- Seal with a velvety matte topcoat for a modern finish.
Styling Combinations and Longevity Preservation Ways
This botanical design pairs beautifully with linen shirts, olive jackets, and wool knits. It complements earthy wardrobe palettes including taupe, mustard, and forest green.
To keep matte finishes clean, wipe them periodically with isopropyl alcohol. This removes surface dirt without degrading the velvety matte finish beneath.
Massage vitamin-rich sweet almond oil into your cuticles twice daily. Proper daily care preserves your natural nail health and keeps art pristine.
Seasonal Care Guide for Every Red & White Nail Set
Achieving a dreamy autumn manicure is only the first step in your journey. Maintaining healthy nails and long-lasting shine requires dedicated, consistent daily care.
+-----------------------------------------------------------+
|             Daily Seasonal Nail Care Checklist            |
+-------------------+---------------------------------------+
| Morning Routine   | Apply Jojoba Cuticle Oil to Beds      |
| Afternoon Care    | Reapply Rich Shea Butter Hand Lotion  |
| Evening Routine   | Massage Cuticle Balm Before Sleep     |
| Weekly Refresh    | Reapply Clear Protective Topcoat      |
+-------------------+---------------------------------------+
Protecting Nails from Cold Weather Brittleness
Cold autumn winds and indoor heaters can strip moisture from nail plates quickly. When nails lose hydration, they become brittle, prone to cracking, and prone to peeling.
Make applying pure organic jojoba oil a daily habit across your routine. Jojoba oil molecules penetrate the nail plate deeply to restore natural flexibility.
Wear warm gloves when spending extended periods outdoors in cool temperatures. Protecting your hands from cold air preserves both skin and gel enhancements.
Well-hydrated nails withstand daily impacts without chipping or breaking unexpectedly.
Mindful Habits for Long-Lasting Manicures
Always wear protective rubber gloves when washing dishes or handling household chemicals. Harsh cleaning agents and water exposure weaken nail adhesives and gel bonds.
Treat your nails as delicate jewels rather than everyday utility tools. Avoid using your fingertips to pry open cans, scrape labels, or press buttons.
Use the pads of your fingers or handy tools to complete tasks. These small habit adjustments extend the lifespan of your manicures significantly.
Matching Shapes and Lengths to Your Lifestyle
Selecting the right nail shape enhances the beauty of your autumn colors. Different shapes highlight specific design elements and flatter your hands uniquely.
+-----------------------------------------------------------+
|             Nail Shape Selection Matrix                   |
+-------------------+---------------------------------------+
| Almond Silhouette | Elongates fingers, ideal for swirls   |
| Oval Shape        | Classic, natural, great for cat-eye   |
| Short Square      | Low maintenance, perfect for tartan   |
| Squoval Contour   | Versatile, balances modern and soft   |
+-------------------+---------------------------------------+
Elongating Almond and Oval Silhouettes
Almond and oval shapes create an elegant, slender line along your fingers. They provide generous surface area for intricate swirls, gradients, and celestial art.
The smooth, tapered edges reduce the risk of snagging on knit sweaters. These shapes work exceptionally well with medium to long natural nails or extensions.
They complement the dreamy, romantic aesthetic of autumn color combinations beautifully. Almond silhouettes remain a favorite choice for sophisticated, high-fashion seasonal styling.
Durable Square and Squoval Contours
Short square and squoval shapes offer exceptional durability for active, busy lifestyles. They provide a clean, modern canvas that suits geometric tartan and negative space.
Short lengths are far less prone to accidental breakage during daily chores. They require minimal daily maintenance while looking neat, chic, and intentionally styled.
This practical style looks exceptionally polished when paired with rich red shades. Choosing the right shape ensures your manicure feels comfortable all season long.
Embracing these dreamy seasonal styles brings warmth, creativity, and elegance to your routine. From sheer cranberry glazes to cozy sweater knits, contrasting palettes offer endless inspiration. Treat your hands to a stunning seasonal refresh and celebrate autumn with confidence.
Leave a Reply